The main purpose of fog lights is clear to everyone - to illuminate the road in dense fog. Since they are located lower than conventional headlights, they make it possible to illuminate the road at a lower level. However, they can be useful not only in foggy conditions, but also in any poor visibility.
Fog lights for Kalina can be installed without the help of professionals, since the process is quite simple, and by following simple recommendations, you are guaranteed to achieve an excellent result. In this review, we will consider both the features of installation work and the criteria for choosing high-quality PTFs and the basic rules for setting the light so that it is as effective as possible and does not blind oncoming drivers.
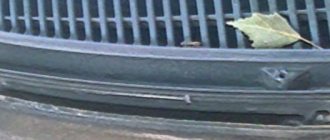
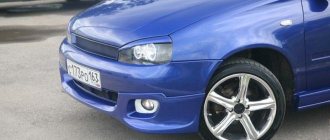
This example has PTFs already installed at the factory.
And if you have to at least periodically travel outside the city limits, then with their help you can identify your vehicle to other cars participating in traffic. The car gains visibility because the fog lights have a wide spectrum of light distribution. These principles will allow you to better understand how to independently connect fog lights to Kalina.
Which headlights to choose
Factory technology provides for the installation of headlights in a luxury configuration. Indeed, today such products are produced by many manufacturers, large and small.
The following types of products can be found in the retail chain:
- Products under the Bosch brand are always sold as a set (2 pieces) and are distinguished by fairly durable glass and good quality luminous flux. We can say that this is the most reliable option, but its price is noticeably higher than all other analogues.
- Production PTFs are in many ways similar to those described above, but in fact their quality is noticeably inferior to the first option. The only advantage is lower cost.
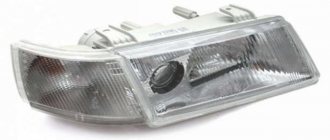
- Kirzhach fog lights on Kalina have lens-shaped convex glass, which allows you to concentrate the light flux and direct it exactly where it is required. Quite a good and reliable solution.
- Products under the ProSport brand and other similar brands are produced by Chinese factories. It is difficult to judge their reliability and quality, since one option can be excellent, while the second one will fail in a very short time.
Bosch products play leading roles here too
Advice: it is better to opt for products that are made in Ryazan and Kirzhach. They still have a longer service life compared to their Chinese counterparts and are not as expensive as their Western counterparts.
The question of which fog lights are better for Kalina raises a number of disputes, so the decision is yours. As practice shows, the most popular options are Bosch and Kirzhach.
Important! All of the above options are excellent for installation, and you do not have to make any alterations to the design.
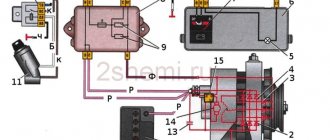
Electrical diagram for connecting fog lights on Lada Kalina
If you want to install fog lights with your own hands, you will need a wiring diagram for fog lights on Kalina.
Removing the connection of the fog lights themselves (clickable):
General color scheme of electrical equipment (clickable 2000x1340) for Lada Kalina:
Connecting PTF to car wiring
Connection diagram of PTF to electrics on Lada Kalina
Initially, the wires must be connected to the headlights themselves. The “mass” is also screwed to the car body. “Plus” is connected to the battery according to the diagram. The wires are pulled through the engine compartment to the passenger compartment.
We pull the wiring into the salon
This must be done along the left wing, where the standard fastenings for the wires are located. Before doing this, you need to remove the fender liner to make work easier.
We will infiltrate here
Features of installation and configuration: detailed instructions
As noted above, you can install Lada Kalina fog lights with your own hands; this does not require special equipment and devices, everything is very simple.
We will delight car enthusiasts with the fact that there is no need to cut or drill the bumper. Simply remove the protective caps and the covers are designed to fit into the cutouts on the bumper.
What to have on hand
To carry out the work, we will arm ourselves with the following items:
- keys 8 and 10;
- flat and Phillips screwdrivers;
- a 6-sided key that regulates the spread of light;
- electrical tape, wire cutters, pliers (possibly a soldering iron);
- ties for fastening the wiring and a piece of strong steel wire;
- actually, headlights;
- The most important thing you will need for repairs is a kit for connecting fog lights to Kalina.
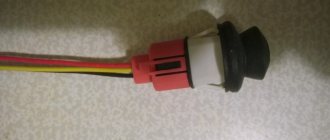
Button, relay and wires with connectors
Although the included end caps are usually black, you can paint them to match the body color however you wish. Philips bulbs that are quite good in their characteristics .
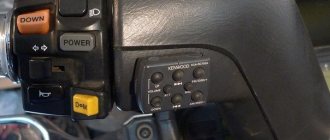
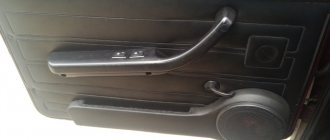
The kit, which includes a button for turning on Kalina's fog lights, as well as wires, connectors and connectors, and a turn-on relay will need to be purchased separately. However, if your car has an air conditioner, then the space for the button is automatically occupied.
Tip: In this case, purchase a rectangular button separately and install it in the corresponding hole next to the cigarette lighter.
Parts for installation in the front bumper
Sequence of work
Standard fog lights are equipped with an H11 type cartridge. Therefore, the entire installation will involve dismantling the front bumper, after which it will be necessary to pull the wiring in the car from the headlights into the interior. Install the headlight switch button and connect the power.
The first stage, as in a number of other electrical works, our actions begin by disconnecting the power from the battery (minus terminal).
Next, we proceed to installation and in general the installation instructions look like this:
- First, the bumper fastenings are unscrewed; all fastening points can be found in the instruction manual; the screws are located both along the grille and under the arches. To free the structure, the side parts are slightly removed from under the arches .
To remove the bumper fasteners, remove the latches securing the grille (green arrows)
- Next, using a flat screwdriver, the plugs are removed from the structure, after which you can attach the headlights themselves, which are most often framed according to the size of the hole. Fastening will not cause any difficulties, this is done using three self-tapping screws, the main thing is to do everything carefully so that the structure stands level and is fixed as firmly and reliably as possible.
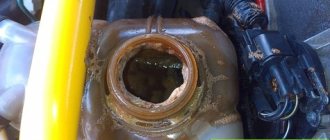
- The next step is laying the wiring harness that comes with the kit. This is done from the interior: first, the carpet is removed, and in the area of the clutch pedal you can find a large bundle of wiring and a plug. The plug is pressed to clear the hole, after which the harness is tied to a piece of wire and pulled under the hood, the photo shows where the plug is located.
- Using plastic clamps, the wires are attached to the main bundle, after which the harness is pulled along the left side and along the front bumper so that the connection points are located near the location of the PTF. It is important that the wires are secured and not dangling.
Assembling the headlight completely
We continue our PTF installation algorithm:
- We maintain the required length for the foglights and begin to screw the negative terminals to the bolts. For this purpose, you can use any bolts located on metal parts of the body, except for the engine crankcase mounting bolts, since through them there is no normal contact between the protection and the car body;
- It will be more convenient to run the wire to the right headlight under the radiator grille;
Important! Don’t rush to screw the bumper on; if something is done wrong, you won’t have to disassemble the structure again.
Connecting wires
- if it is necessary to lengthen the wires, twist them, or better yet, solder this place and insulate it;
- the power that the fog lights consume requires connection through a relay, which is controlled by a button (see photo);
- it is best to install the relay under the panel, and do not forget to securely fix the structure;
- take power from the pink wire that leads to the fuse box (relay K7). It is designed to turn on the high beams, and voltage appears only when the ignition is on;
The relay controls the operation of the entire system
- use a 15 Amp fuse;
- To connect the PTF, pins 30 and 87 are used; all connections must be equipped with terminals to ensure the best contact.
- contacts from the relay are connected via wires with a cross-section of at least 0.75 mm to the wires of the fog lights and to the relay;
- After making all the connections, we need to check how we assembled our kit and whether there is power in the circuit. To do this, connect the ground of the car and check how the headlights shine when turned on by the button;
Bumper with headlight installed
- All that remains is to reassemble the bumper in reverse order, making sure that the wires do not get pinched anywhere. The price and degree of complexity of such repairs will be within the power of any Kalina owner. In order to adjust the headlight beam, there is access to the adjustment screw from below.
Sequence of work
So, below are detailed instructions, using which you can easily equip your pet with fog lights:
- as in a number of other electrical works, our actions begin by disconnecting the power from the battery (minus terminal);
- Now you can start dismantling the bumper. We need to unscrew the screws and remove the black plastic grilles. It may be necessary to remove the license plate;
We begin work on installing the PTF
- the grilles and bumper are attached with screws and self-tapping screws - you can feel them with your hands, even without a hole. When you remove the bumper, you will see that the mounting points are indicated by arrows. This will allow such work to be completed much faster in the future;
- the wheel arches additionally hold the bumper with 3 self-tapping screws - do not forget to unscrew them as well;
- Now you can carefully begin to remove the sides of the bumper from under the arches, using rocking movements, and remove it entirely. Bend the plugs using a flat-head screwdriver;
- The fog lights themselves are attached to three screws each;
- now we need to extend the wiring into the cabin (as the video in this article shows). Many people recommend removing the driver's wheel and arch protection at this point;
- where the clutch pedal is located, we will find the place where the wires are collected in a bundle and push the seal outward;
- Now you can stretch the wiring using rigid steel wire. The idea is to tighten the wiring from the interior into the space under the hood. You can immediately provide wiring for connecting LED parking lights, alarms, remote hood opening and everything else that has not yet been installed;
New Lada: Kalina drives jerkily, jerks when moving slowly (solved) - 2 answers
PTF assembly
- Our new wire blocks will go along with the factory ones, after which they can be tied together with plastic ties like clamps. If there is a need, a wiring diagram for fog lights on Kalina can help with this;
How to adjust the light
Lensed products shine especially brightly, and once set up you will appreciate their effectiveness
For best performance in low visibility conditions, you need to adjust the light, this is quite simple:
- Before you adjust the fog lights on Kalina, you need to find an area with a flat surface and a wall or a solid fence in front of it. It is in this place that all necessary work will be carried out.
- First of all, check the tire pressure, it must be the same for the car to stand level. After this, measure the distance from the ground to the center of the PTF and draw a horizontal line on the wall at the same height. GOST standards stipulate that the driver’s seat must carry a weight weighing 75 kg; any person with approximately this weight can be seated.
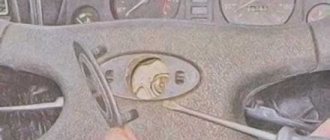
- The work is carried out in the dark, the car is located at a distance of 5 meters from the wall, after which the fog lights are turned on. The adjustment itself is made using a screw, the location of which is shown in the photo. That is, for adjustment you only need a thin Phillips screwdriver.
The main advantage of this type of work is simplicity
- First, one headlight is covered with thick cardboard or other opaque material, after which the light flow is adjusted with a screwdriver so that its center is located on the line or slightly below it. The same thing is repeated with the second PTF, after which the adjustment can be considered complete.
To give additional reliability to the glass and protect it from falling stones, we recommend ordering the production of stickers for the headlights; they will protect the surface from scratches and cracks.
The video will clearly show the entire process from start to finish and will help you understand some important nuances even better. Every car enthusiast can do the job if you have purchased quality products.