Choosing a clutch - articles and brands
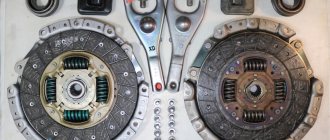
VIS clutch kit for VAZ 2110-12: basket, disc, release bearing.
The driven disk must have part number 2110-1601130. This kit is produced by the VAZInterService (VIS) plant, the external distinctive features are a diaphragm with 12 blades, one-piece smooth friction linings of the driven disk, the disk itself has 6 damper springs. The quality of the original kit is so-so. The high level of imbalance of the driven disk exceeds the permissible limit by almost twice. In addition, the VIS kit is quite heavy compared to its competitors.
This was also reflected in the preferences of the public - only 6-8% of users buy this kit for 2.8 - 3 thousand rubles.
Analogs
This is the most common choice of tens!
In addition to the Togliatti VIS plant, on the shelves you can find a lot of clutch kits from a variety of manufacturers, both domestic and foreign. Among the latter, a huge share is Chinese counterfeit. In principle, the list of the most popular manufacturers looks something like this:
- German clutch LuK (Lamellen und Kupplungsbau), driven disc 320 030810, basket 2 D24 120 0252 10.
- Their fellow countrymen, Sachs.
- Also the Germans FINWHALE and QML.
- Turkish companies Starco, Mapa, Kraft (article 2110 W3200C B2240).
- VALEO, France, article number 21102 - 21103 - 21108 - 2111 - 2112 826622.
- HOLA, Holland.
- MecArm and PILENGA from Italy.
- South Korean company FORTECH.
Domestic factories from Naberezhnye Chelny and Tyumen, as well as the local Nachalo brand, are also quite widely represented, but the quality of their clutches is difficult to compare with German, say, kits. And now a few words about how to choose a high-quality clutch on a VAZ-2110 without resorting to laboratory tests.
Clutch selection
The manufacturer installed carburetor (2103 with a volume of 1.5 l) and injection (2106 with a volume of 1.6 l) engines on different VAZ 2107 models. Despite the external similarity, the clutch of these models has certain differences. The diameter of the basket pressure plate in both cases is 200 mm. But for the basket for 2103 the width of the pressure plate is 29 mm, and for 2106 it is 35 mm. Accordingly, the diameter of the driven disk for 2103 is 140 mm, and for 2106 - 130 mm.
Some car owners install a VAZ 2121 clutch on their VAZ 2107, which is noticeably stiffer and more reliable than the original one.
Clutches for the VAZ 2107 are produced by both domestic and foreign manufacturers
All VAZ models with rear wheel drive are suitable for clutch kits from classic cars of famous brands.
Table: clutch manufacturers for VAZ 2107
| A country | Manufacturer's brand | Advantages and disadvantages of clutch | Weight, kg | Price, rub |
| Germany | SACHS | Reinforced, so a little tough. Reviews are excellent | 4,982 | 2600 |
| France | VALEO | Great reviews, very popular | 4,322 | 2710 |
| Russia, Tolyatti | VAZInterService | Installed on the assembly line, good reviews | 4,200 | 1940 |
| Germany | LUK | There are dampers on the pressure and driven disks. Reviews are good | 5,503 | 2180 |
| Netherlands | HOLA | Noisy, short-lived, many negative reviews | 4,810 | 2060 |
| Germany | KRAFT | Soft, reliable. Reviews are good (many fakes) | 4, 684 | 1740 |
| Russia | TRIAL | Excessively hard. Reviews 50/50 | 4,790 | 1670 |
| Belarus | FENOX | Difficult, bad reviews | 6, 376 | 1910 |
| Türkiye | MAPA | Medium hardness, reviews 60/40 | 5,370 | 1640 |
| China | AUTOTECHNIK | Difficult, reviews are not very good | 7,196 | 2060 |
Operating principle and components
The clutch is single-plate, with a central pressure spring. Drive – cable. The housing is attached to the flywheel and pressure plate. There is also a driven disk.
For dozens, the “native” clutch system is VIS, and although many reviews criticize it, there are also many who believe that there is no better VIS (VAZINTERSERVICE) for VAZ.
The main components are:
- casing;
- Pressure and driven disks;
- Carter with bottom cover. It also has support planes with which the crankcase is attached to the frame;
- Release bearing for disengaging the clutch;
- Flywheel;
- Power plug;
- The cable lead that goes directly to the clutch pedal (far left).
This, in brief, is the clutch device of the VAZ 2110.
Clutch VAZ-2110
Clutch VAZ-2110.
Despite the fact that the ten clutch is primitive, like a cart wheel, it must meet many parameters in order to flawlessly perform its functions - high-quality transmission and complete interruption of the transmission of torque from the engine to the gearbox.
In addition (and few people know this), two types of clutches have been developed for the VAZ-2110:
- for cars with a carburetor or injection engine and a torque of 116 Nm (2110 and 2111);
- for 1.6-liter engines with a torque of 128.3 Nm (VAZ 2112).
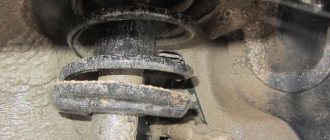
You can distinguish a VAZ-2112 clutch by the hole in the slot of the petals and the damper springs.
Parameters and requirements
In addition, you should not discount the weight of the basket assembly, the weight of the driven disk and such an important factor (which our left foot will immediately feel) as the squeezing force.
And another standard is moving the pressure plate. This parameter should be 7.9-8.1 mm. The thickness of the driven disk is also important, not only in the free state, but also under load. The manufacturer must measure it under a load of 3.4 thousand N. As you can see, not everything is so simple with such a simple kit. Now let's listen to the reviews and reports of the expert laboratory.
Dismantling
Most often you need to remove the gearbox, especially if you need a replacement rather than just an adjustment. It is not necessary to drain the oil from the box.
You also need:
- Disconnect the battery;
- Remove the air filter;
- Disconnect the wiring harness;
- Raise the car, then loosen the clutch drive nut (on the right) and unscrew it completely on the left;
- Remove the suspension arm, ball joint;
- Remove the lower engine protection;
- Disconnect the transmission linkage;
- Remove the clutch housing and inspect it carefully. The main defects that the crankcase may have are cracks, wear of the threads or paws with which it is attached. New threads can be cut, cracks can be welded, thus returning the crankcase to working condition;
- After jacking up the engine, remove the gearbox, gaining full access to the clutch elements.
It is also possible to replace the clutch without completely removing the gearbox:
After repairs, you may notice that the clutch is too tight. But this is easy to fix without disassembling the entire system - from the interior side, by adjusting the pedal travel.
Signs of clutch wear
| Sign | Cause and remedy |
| Incomplete engagement of the clutch (slips) | Replacing discs, cleaning clutches |
| Incomplete shutdown (leading) | Prevention of the clutch mechanism |
| Periodic jerks | Clutch cable wear, clutch replacement |
| Vibration, beating when shifting to higher gears | The flywheel is bent, the gripper teeth are worn out. Replacing the flywheel and related consumables |
| Noise, creaking, grinding noise when activated | Damper spring wear, replacement with a new one, drive lubrication |
| Pedal free play is increased, exceeding 2 -3 mm | Tensioning the cable, replacing with a new one |
| You can hear the smell of burnt friction linings | Dismantling the clutch block, replacing worn elements |
| Increased fuel consumption | Flywheel worn, teeth damaged |
| Reduced acceleration dynamics | Replacing clutches |
Basic clutch elements
Now let's look at what main elements are included in the design:
- VAZ-2112 clutch drive disc (usually called the “basket”). It is installed on the flywheel and secured with bolts.
- Driven disk. It stands inside the “basket” and is connected to the gearbox input shaft using a splined connection.
- The release bearing is an element that allows you to act on the petals of the basket. With its help, the slave disk is disconnected from the master disk.
- Clutch cable - allows you to transmit force from the pedal to the release bearing.
- The clutch pedal, which the driver operates with the force of his foot.
These are all the basic elements that are present in the design of a car clutch. It is worth noting that the “two-piece” uses a cable drive system, which is much cheaper than a hydraulic one. But it is much worse in terms of convenience - the pedal is tight, this is especially noticeable on older cars. And if you want the clutch on your car to be as soft as possible, change the cable in a timely manner, do not wait until it breaks.
Clutch on VAZ-2112
This is what the VAZ-2112 clutch diagram looks like in disassembly.
The clutch on any car, including the VAZ-2112, plays a very important role. So, without his participation it would simply be impossible to transmit torque from the engine to the gearbox.
Due to the fact that this element bears a large load, it can absolutely be called a consumable material, because its main elements require immediate replacement if they are severely worn.
Video about replacing the clutch on a VAZ 2110-2112 family
It is impossible to influence the condition of the clutch in any way, and it is also impossible to control its condition visually, so its malfunctions will only appear when one of the elements begins to fail.
Tool for replacement work
To make the work easier, you need to prepare all the tools in advance.
- Inspection hole or lift.
- Jack.
- Wheel chocks.
- Set of socket wrenches.
- Mount or extension tube.
Step-by-step work order
Replacing the clutch without removing the gearbox
Before proceeding directly to replacing the clutch, you need to remove the gearbox. How to do this quickly and efficiently is written in this article.
When the clutch is dismantled, we continue work:
- Using a spanner, unscrew the bolts securing the clutch housing.
Clutch basket assembly
We remove the dismantled bolts to the side.
Preparatory stage before replacing the clutch on the Lada Grant
Necessary tools, materials:
- set of car keys, sockets, ratchet;
- extension;
- calipers;
- additional lighting;
- screwdrivers with a set of bits;
- mounting blade;
- pliers;
- hammer;
- metal brush;
- hydraulic (mechanical) jack;
- cylinder and torque wrench;
- graphite-based lubricant “CV joint-4”;
- container for draining waste;
- 6 liters of gear oil;
- clutch assembly;
- wooden spacers;
- rags.
Symptoms of a node malfunction
Before replacing the clutch on a VAZ-2112, you need to figure out whether it needs to be done at all.
Among the signs of malfunctions are the following:
- When you press the gas pedal, you can hear the engine picking up speed, but the car does not go faster. This indicates that the clutch is slipping, there is practically no connection between the driven and driving discs.
- Extraneous sounds are heard when the car moves - this may indicate the destruction of some system components. As a rule, at the same time as these sounds, the system also fails.
- A hum is heard when you lightly press the pedal - a clear sign of a faulty release bearing.
- The pedal falls through - most likely the VAZ-2112 clutch cable has broken. This is the most harmless thing that can happen.
- If the cable is intact, but the pedal falls and the clutch does not release, then the release bearing has collapsed. Unfortunately, this also happens sometimes.
Knowing all the signs of breakdowns, you can begin repairs. Replacing the clutch on a VAZ-2112 with your own hands is not difficult. You just need to know the order of the work.
Basic faults
It should be noted right away that the driven disk and release bearing are consumables, the long service of which should not be counted on. The integrity of the flywheel is much more important; its price is much higher and replacement is more difficult.
The main clutch malfunctions on a VAZ:
- Difficulty changing gears;
- Clutch slips;
- Jerks during operation;
- Vibration during operation;
- Creaking and other extraneous sounds during operation;
- The clutch doesn't work.
Difficult gear shifting means that the clutch does not disengage completely, that is, the driven disc continues to turn when the pedal is pressed. There may be several reasons for this situation:
- There is a problem with the driven disk: it began to jam on the splines of the input shaft, or the fixing rivets began to come out of their seats and cling to the flywheel and pressure plate, or the damping springs failed;
- Problem with the release bearing: it is too far from the clutch basket, as a result it does not press it with enough force;
- Hydraulic problem: low fluid or air lock.
Once the cause has been found, you can solve the problem: replace the driven disk, troubleshoot the input shaft, install the release bearing at the required distance from the clutch basket, add hydraulic fluid and bleed the system.
Clutch slipping is the asynchronous movement of the flywheel and driven disk when the clutch is fully engaged (when the pedal is not pressed). Causes:
- Oil has got onto the working surface of the driven disk;
- The problem is with the release bearing: it fits against the clutch basket and presses on the spring;
- The clutch drive requires adjustment;
- The bypass channel in the master cylinder is clogged;
- The clutch pedal does not move back.
Depending on the problem, the solution will be appropriate: checking and replacing oil seals from which oil may leak, adjusting the clutch, repairing and cleaning the master cylinder.
Jerking and vibration when the clutch operates is a rather unpleasant sign. Possible causes of jerking when moving:
- The disc is jammed on the gearbox shaft splines. In this case, it cannot move freely along them, which means there will be no “soft docking” with the flywheel;
- Problem with the basket and drive disk. With prolonged use, the springs wear out and the drive disk becomes deformed;
- The driven disk is worn;
- The drive requires adjustment.
With such a problem, diagnostics is needed. In the best case, everything can be done by replacing the driven disk; in the worst case, the entire clutch will have to be changed.
If, when engaging or disengaging the clutch, you hear grinding, rattling, knocking and other sounds that should not be there, this may be a manifestation of the following problems:
- The bearings are jammed - pressure or drive shaft. This may be due to wear and tear over time or lack of lubrication. In this case, the sound appears when the clutch is engaged;
- There is a problem with the driven disk - the springs or splines connecting to the gearbox shaft are worn out. Knocking and rattling noises appear when you press the pedal;
- The clutch fork return spring does not work.
After diagnosis, broken parts must be replaced with new ones. If the problem is in the spline connection of the driven disk, it is necessary to check the condition of the gearbox shaft.
And finally, if you release the pedal and the clutch does not engage, the reason must be sought in the hydraulics:
- Airlock;
- Insufficient hydraulic fluid;
- The clutch cylinder seals are worn out.
The easiest way is to add fluid to the reservoir and bleed the clutch system. If the problem is not solved, it is necessary to dismantle the master and slave cylinders and replace the repair kits.
Clutch installation and assembly
Replacing the clutch on a VAZ-2112 is carried out according to the following algorithm:
- Unscrew all the bolts that secure the basket to the flywheel. If you plan to install it again, then you need to unscrew the bolts evenly, crosswise. The main thing is not to damage the basket.
- Remove the basket and disk, install new elements in their place.
- Tighten all the bolts (be sure to use new ones, since the old ones are threaded) and install the guide sleeve.
- Tighten the bolts evenly, crosswise.
- Remove the old release bearing and install a new one.
- Reassemble everything in reverse order.
This is a short tutorial, but the hardest part is lifting and lowering the box, as it is quite heavy.
Sequence of actions when removing and replacing the Lada Granta clutch with cable drive
- After removing the manual transmission (the process is described above), we mark the location of the basket and flywheel with marks. In the event that we do not plan to replace the basket or pressure plate. The decision is made by the repairman based on the diagnostic results.
Removed manual transmission
- Unscrew the bolts and remove the basket with the pressure driven disk.
Cart with disc
Note to the driver!!! We loosen the tightening of the bolts evenly, according to the diagonal principle, one turn of the key.
- Remove the discs from the clutch basket.
Removing a disc from the bin
- We carry out troubleshooting of parts, adjacent mechanisms and elements.
What to pay attention to when troubleshooting:
- cracks, breaks in parts;
- depressions of more than 0.2 mm;
- check for cracks on the diaphragm spring;
- We inspect the support rings; there should be no signs of wear, visible or obvious defects on them;
We replace worn elements with new ones as necessary.
Do-it-yourself clutch installation on a Lada Granta
- Using a mandrel, we install the driven disk, basket, and centering pins.
- We fix the basket to the flywheel with three bolts. We tighten the bolts evenly according to the diagonal principle with a force of 37 N.m. We use a torque wrench.
- We remove the frame and install the manual transmission.
- We fix the clutch drive on the manual transmission.
- We adjust the distance from the plastic bushing to the drive fork. It should be equal to 27 mm. We adjust the key value to “10”.
We measure 10 mm
Where is the cable clutch mechanism of the Lada Granta?
In cars of the Lada Granta family, the clutch is installed under the flywheel housing at the junction of the engine and the manual transmission housing. To carry out maintenance work, it is necessary to completely/partially dismantle the transmission.
Troubleshooting and Correction
Let's talk about how to detect malfunctions based on special signs, as well as correct them.
1. If the clutch is leading, the following may be to blame:
- Insufficient pedal travel, possibly too tight. Adjusting the drive will help;
- Deformations in the driven disk. If straightening is not possible, then the disk must be replaced;
- The driven disk hub periodically jams. You can try washing and then lubricating the splines on the input shaft. If they or the shaft are worn out, replacement is needed;
- Rivets are loose or friction linings are broken. In this case, it is best to change the casing along with the spring and disk;
- The pressure plate is warped or warped. Replacing the linings will help, but before that, check for any deviations in the end runout of this disk;
- Something is wrong with the cable. The cable needs to be tightened or replaced, depending on wear.
2. It slips, that is, it does not turn on. Possible reasons:
- The friction linings of the driven disc are burnt or worn. “Cure” by replacement;
- The surfaces of the flywheel and both disks are oily. These signs also indirectly indicate that it is time to change the engine and gearbox seals. You also need to check if there is any oil leakage through the bolts securing the flywheel. In this case, it is better to place them on sealant. And rinse the oily parts (white spirit is usually used);
- The drive jams. Check and replace what is damaged.
3. It works, but in jerks. This clutch operation can be caused by:
- Oil getting on surfaces, as mentioned above;
- Jamming in the drive. Trace the “chain”, troubleshoot;
- Deformations or damage in the pressure disk, requiring replacement of the casing along with the disk.
4. It makes a lot of noise when it turns on. Most likely, these are signs that the springs in the damper have broken. Replace the entire driven disk assembly.
5. It makes a lot of noise when it turns off. The first suspect is the release bearing. It can wear out, become damaged, and lose oil. Therefore, naturally, it is better to replace such a bearing.
6. During prolonged operation, the clutch may suddenly disengage. The reason most often is that the release bearing is stuck. It is located on the gearbox guide sleeve. A worn bearing must be replaced with a new one.
There are also other problems. For example, the clutch is very tight, or it disappears when overtaking. With such a problem, you can still slowly drive to the garage, but if the clutch is completely lost, you can’t go, you need to call a tow truck.
Let's look at how to properly dismantle it, repair it, and then reassemble it.
Clutch faults VAZ 2107
The main signs of a faulty VAZ 2107 clutch are:
- it is difficult to change gears;
- the driven disk slips;
- vibration appears;
- The pressure bearing whistles;
- the clutch is hard to disengage;
- The pedal does not return from the lower position.
Destruction of the pressure plate and basket casing can lead to very serious consequences
Almost any malfunction is accompanied by extraneous sounds - noise, knocking, whistling, etc.
Find out why a car can jerk when starting from a stop: https://bumper.guru/klassicheskie-modeli-vaz/hodovaya-chast/pri-troganii-s-mesta-mashina-dergaetsya.html
Gears won't shift
If the gears are difficult to shift, an experienced driver will immediately tell that the clutch is moving. In other words, the clutch does not disengage completely. As a result, when starting from a stop, it is difficult to engage first gear, and when the pedal is pressed, the car moves slowly. The reasons for this situation may be:
- Increased distance between the thrust bearing support surface and the heel of the basket. It must be set within 4–5 mm, changing the length of the working cylinder rod.
- The spring sectors of the driven disk are warped. The disk needs to be replaced with a new one.
- The thickness of the driven disk has increased due to the stretching of the rivets securing the friction linings. The disk needs to be replaced with a new one.
- Jamming of the driven disk on the splines of the gearbox drive shaft. Both parts are defective and, if necessary, replaced with new ones.
- Lack of brake fluid in the master cylinder reservoir or accumulation of air bubbles in the hydraulic drive system. The working fluid is added to the required level, and the clutch hydraulics are pumped.
The clutch is slipping
The clutch may start to slip for the following reasons:
- there is no gap between the pressure bearing and the fifth basket;
- the clutch drive is not adjusted;
- oil got on the rubbing surfaces;
Oil getting on the driven disc can cause the clutch to slip and operate jerkily. - the bypass channel in the main cylinder body is clogged;
- The clutch pedal does not return to its original position.
Such malfunctions are eliminated by adjusting the drive, replacing oil seals, cleaning the channel with wire, and identifying and correcting the causes of pedal sticking.
Clutch is jerky
If the clutch starts to jerk, it may be caused by the following:
- the driven disk is jammed on the splines of the gearbox drive shaft;
- oily areas have formed on the friction linings;
- the clutch hydraulic drive is not adjusted;
- the steel disk of the basket is warped, some friction springs have lost their elasticity;
- The driven disk is faulty.
In such situations, a complete clutch replacement is most often required.
Noise when engaging clutch
The appearance of grinding and rattling noises when releasing the clutch pedal may be due to the following:
- the pressure bearing is jammed due to lack of lubrication;
- The gearbox drive shaft bearing is jammed in the flywheel.
In both cases, the problem is solved by replacing the bearing.
Noise when disengaging the clutch
When you press the clutch pedal, you hear a knocking, clanging, rattling sound, and you can feel vibration on the gear lever. The reasons may be the following:
- the damper part of the driven disk (springs, sockets) is faulty;
If the driven disk has worn splines, broken or loose damper springs, it must be replaced - The splined connection of the driven disk and the gearbox drive shaft is badly worn;
- the return spring of the clutch fork has become detached, lost its elasticity or broken.
In all cases, worn elements should be replaced with new ones.
The pedal returns but the clutch does not work
Sometimes it happens that the clutch does not work, but the pedal returns to its original position. This may be due to the following situations:
- air entering the hydraulic drive system;
- wear of the sealing rings of the main and working cylinders;
- lack of working fluid in the tank.
In these cases, you should bleed the hydraulic drive, replace the rubber rings with new ones and add working fluid to the reservoir.
Find out when you need to change tires to summer ones: https://bumper.guru/klassicheskie-modeli-vaz/poleznoe/kogda-menyat-rezinu-na-letnyuyu-2019.html
Tight grip
The softness of the clutch is determined by the force of pressure on the heel of the basket to retract the pressure plate. The magnitude of the force depends on the elasticity of the damper springs. Baskets from many manufacturers, including foreign ones, are suitable for the VAZ 2107 clutch. A tight pedal signals to the driver that the basket's life is coming to an end.
The pedal disengages the clutch at the beginning/end of its stroke
When you press the pedal, the clutch may disengage at the very beginning or, conversely, at the very end. In such situations, adjustment of the free and working travel of the pedal will be required. The free stroke is regulated by changing the length of the pedal limit screw, and the working stroke is regulated by changing the length of the working cylinder rod. In addition, increased free play may be a consequence of wear on the driven disk linings.
Video: main clutch problems and their solution
Replacing the clutch of a VAZ 2110
You should think about replacement in the following cases:
- After pressing the clutch pedal, a noticeable vibration appeared.
- The clutch “leads” - engine power drops for no reason.
- Incomplete launch. Motorists call this malfunction “clutch slipping.”
- Extraneous sounds in the form of jerks and clicks when starting.
- Unauthorized disengagement of the clutch.
If you find one of these defects, then you need to carry out repairs. If replacing parts (for example, a fork) can be done with your own hands, then finding the faulty part is quite difficult. The best solution would be a trip to a car service center for diagnostics. The service is inexpensive - about 300 rubles. But after checking, you will know what parts you need to buy. Replacement and repair are carried out using an inspection hole or a lift, and the second option is more practical. So, we have new parts, an inspection hole with a jack or a lift, an amplifier pipe (can be replaced with a regular mount) and a set of open-end and socket wrenches. We can begin.
The replacement takes place as follows:
We need to lift the front part of the VAZ 2110 and securely fix it on stands. When working with a pit, you need to install special stops for the rear pair of wheels. Removing the air filter to gain access to the gearbox. Next, we pull out the negative terminal from the battery - this is done to protect against short circuits and burning out all the car’s wiring. Next to the battery we find the air filter housing. We dismantle it so that there is access to the gearbox mountings to the engine.
Attention: the fastening bolts must be loosened, not completely twisted. Remove the wheel caps from the front wheels and then unscrew the nuts. The nuts on one wheel need to be removed, and on the other they only need to be loosened, since the wheels are removed sequentially. After making sure that the stands support the car, remove the front wheel - it is recommended to start with the left one
Removing the front wheels to access the vehicle's clutch. Next you need to remove the anti-roll bar protection. On older VAZ 2110 models it may not be available. Now unscrew the bolt that secures the stabilizer. The next step will be to shift the checkpoint. Now the fastening bolts under the hood can be unscrewed. It is also necessary to ensure free movement for the gearbox: remove the left mudguard, move the left strut behind the wheel drive, and release the left support from the fastenings. Now we need to remove two connectors from the gearbox. Next, pay attention to the plate, which is located to the right of the gearbox. It is a mount for jet thrust. Before dismantling, you need to mark the location for attaching the lever. This will make reassembly easier. All that remains is to unscrew the fastenings to the engine - 3 bolts and 1 nut. Removing the pillow. After this step you will have access to the clutch. The next step is to dismantle the rear cushion, which connects the engine and gearbox. Before removing the gearbox, you need to jack up the engine or use supports. Now the box can be moved to a distance for full access to the clutch. We unscrew the basket and remove the release bearing. Next, we change the necessary parts. Experts recommend performing a complete repair, that is, replacing the release bearing along with the clutch. Replacement of clutch basket parts.
Many motorists ask the question: “How much does it cost to change the clutch at a car service?” The answer is about 2 thousand rubles, while a set of a high-quality unit will cost you about the same amount.
Clutch VAZ 2107
The vehicle's handling largely depends on the serviceability of the VAZ 2107 clutch mechanism. How often this mechanism will have to be repaired is influenced by the quality of the roads and the driver’s experience. For beginners, as a rule, the clutch fails quite quickly, and repairing and replacing the unit is quite labor-intensive.
Purpose of the clutch
The main task of the clutch is to transmit torque from the engine to the drive wheels of the car.
The clutch serves to transmit torque from the engine to the main gear and protect the transmission from dynamic loads
Initially, it was intended for short-term separation of the engine and the main gear during smooth starting and gear shifting. The VAZ 2107 clutch has the following characteristic properties:
- has the smallest permissible moment of inertia of the driven disk;
- removes heat from rubbing surfaces;
- protects the transmission from dynamic overloads;
- does not require a lot of pressure on the pedal when controlling the clutch;
- It is compact, maintainable, quiet, easy to maintain and maintain.
The design and principle of operation of the VAZ 2107 clutch
Clutch VAZ 2107:
- mechanical (driven by mechanical forces);
- frictional and dry (torque is transmitted due to dry friction);
- single-disk (one slave disk is used);
- closed type (the clutch is constantly on).
When you press the pedal, the force is transmitted hydraulically to the pressure bearing, which releases the driven disc.
Cohesion can be roughly represented in the form of four components:
- driving or active part (crankshaft flywheel 6, basket with casing 8 and steel pressure disk 7);
- driven or passive part (slave or passive disk 1);
- inclusion elements (springs 3);
- shutdown elements (levers 9, fork 10 and pressure bearing 4).
The basket casing 8 is bolted to the flywheel, connected by damper plates 2 to the pressure disk 7. This creates conditions for transmitting constant torque from the flywheel through the casing to the pressure disk, and also ensures that the latter moves along the axis when the clutch is turned on and off. The driving part rotates constantly when the engine is running. The passive disk moves freely along the splines of the input shaft 12 of the gearbox. The hub is connected to the driven disk through damper springs 3 and due to this has the possibility of a certain elastic rotation. This connection dampens torsional vibrations that occur in the transmission due to engine operation at different speeds and corresponding dynamic loads.
When the pedal 5 is depressed, the passive disk 1, with the help of springs 3, is clamped between the flywheel 6 and the pressure disk 7. The clutch is engaged and rotates together with the crankshaft as a single unit. The rotational force is transmitted from the active to the passive part due to the friction that occurs on the surface of the friction linings of the driven disc, flywheel and pressure plate.
When pedal 5 is pressed, the hydraulic fork moves the clutch with the pressure bearing towards the crankshaft. Levers 9 are pressed inward and pull pressure plate 7 away from driven disk 1. Springs 3 are compressed. The active rotating part is disconnected from the passive one, no torque is transmitted, and the clutch is disengaged.
When the clutch is engaged, the driven disc slips relative to the smooth surfaces of the flywheel and pressure plate, so the torque increases gradually. This allows the car to move away smoothly and protects transmission components during overloads.
Clutch hydraulic drive device
The transmission of torque from the engine to the drive wheels is carried out using a hydraulic drive.
The clutch hydraulic drive transmits force from the pedal to the clutch fork.
The hydraulic drive plays an important role when starting the vehicle and changing gears. It includes:
- pedal;
- master and slave cylinders;
- pipeline and hose;
- pusher;
- clutch engagement and release fork.
The hydraulic drive allows you to smoothly engage and disengage the clutch without exerting much effort when pressing the pedal.
Clutch master cylinder
The clutch master cylinder (MCC) increases the pressure of the working fluid when you press the pedal. Due to this pressure, the clutch fork rod moves.
The clutch master cylinder converts the force from pressing the pedal into working fluid pressure, which moves the clutch on/off fork rod
The pusher piston 3 and the master cylinder piston 5 are located in the main cylinder body. The use of an additional pusher piston reduces the radial force on the main cylinder piston when the pedal is pressed. In this case, the sealing ring 4 is pressed against the walls of the cylinder mirror and improves the sealing of the pistons. To ensure tightness inside the cylinder, there is an o-ring 12 located in the groove of the piston 5.
For additional sealing of the piston, an axial hole is drilled in its guide part 9, connected to the ring groove by 12 radial channels. As the pressure in the working space of the GCS increases, it reaches the inner part of the ring 12 and expands it. Due to this, the tightness of the master cylinder piston increases. At the same time, ring 12 acts as a bypass valve, through which the working part of the cylinder is connected to the reservoir with the working fluid. When the pistons reach their extreme position at the plug 11, the sealing ring 12 opens the compensation hole.
Through this hole, when the clutch is engaged (when the RCS piston creates excess back pressure), part of the fluid passes into the reservoir. The pistons are returned to their original position by a spring 10, which at one end presses on the plug 11, and with the other on the guide 9 of the piston 5. All internal parts of the GCS are fixed with a retaining ring 2. On the mounting side, a protective cover is put on the GCS, protecting the working part of the cylinder from dirt. .
Most often, the o-rings on the master cylinder wear out. They can always be replaced from the repair kit. In case of more serious malfunctions, the GCS changes entirely.
If the compensation hole becomes clogged, excess pressure will be created inside the drive system, which will not allow the clutch to fully engage. She will slip.
Clutch slave cylinder
The clutch slave cylinder (CLC) is attached with two bolts to the gearbox housing in the area of the clutch housing. This arrangement of the RCS leads to the fact that dirt, water, and stones often get on it from the road. As a result, the protective cap is destroyed and wear of the O-rings is accelerated.
The slave cylinder is secured with two bolts to the gearbox
When you press the pedal, pressure is created in the clutch hydraulic drive, which is transmitted to piston 6. The piston, moving inside the cylinder, moves the pusher 12, which, in turn, turns the clutch engagement and release fork on a ball joint.
It is very important to observe the dimensions of the internal mirror of the main and working cylinders. When factory assembled, they are equal to each other - 19.05+0.025–0.015 mm. Therefore, the sealing rings on the pistons of both cylinders are completely interchangeable. If you need to make the clutch pedal softer, you need to buy a foreign analogue of the working cylinder with a smaller diameter of the working cavity. If the diameter is larger, then the pressure on it will be less. Therefore, in order to overcome the elastic force of the basket friction springs, greater force must be applied. Therefore the pedal will be tighter.
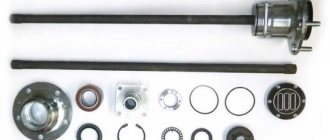
Composition of the VAZ 2107 clutch kit
The VAZ 2107 clutch kit consists of:
- baskets;
- driven disk;
- pressure bearing.
According to VAZ regulations, these elements are not repaired, but are immediately replaced with new ones.
Read how to bleed the clutch on a VAZ 2106: https://bumper.guru/klassicheskie-modeli-vaz/stseplenie/kak-prokachat-stseplenie-na-vaz-2106.html
Basket
The basket has the most complex device in the clutch kit. It consists of many parts that require correct and precise assembly. The basket is assembled only in factory conditions and is not repaired even in specialized car repair shops. If wear or serious defects are detected, the basket is replaced with a new one. Main cart malfunctions:
- loss of elasticity due to sagging springs;
- mechanical damage and fracture of damper plates;
- the appearance of wear marks on the surface of the pressure plate;
- kinks and cracks in the basket casing;
- other.
Usually the entire clutch is replaced, so the replacement kit includes a driven disc, pressure plate and pressure bearing
The service life of the clutch is determined by the life of the basket, driven disk or pressure bearing. Therefore, to avoid the cost of repeated repairs, the coupling is always replaced as a set.
Driven disk
The driven disk is designed to transmit torque from the engine flywheel to the transmission input shaft and can briefly disconnect the gearbox from the engine. The technology for manufacturing such disks is quite complex and requires the use of special equipment. Therefore, it is impossible to repair the disk yourself. It is replaced with a new one when:
- wear of friction linings;
- wear of the internal splines of the hub;
- detecting defects in damper springs;
- loosening the sockets under the springs.
Pressure bearing
The pressure bearing is designed to retract the pressure plate from the driven one and is activated when the clutch pedal is pressed. Its malfunctions are usually accompanied by whistling, knocking and other sounds. When the rollers jam, the supporting working surface or the seat in the cup wears out, the pressure bearing assembly is replaced.
Choosing which clutch is better to install on a VAZ 2110 car and why?
Any mechanic will tell you that with a properly tuned manual transmission, the components wear out almost evenly; this, so to speak, is an addition to the above. Most car repair shops that provide at least some kind of warranty refuse to replace the clutch piece by piece for fear of returns. Among the variety of kits, the editors of “Behind the Wheel” chose five manufacturers:
What indicators were compared?
To make it easier for our motorists to decide which clutch is best to install on their VAZ 2110, the publication’s specialists compared the following parameters:
Compliance of the mass of the part with the requirements of technical documentation - the weight indicator of the unit has a significant impact on torsional vibrations, as well as inertial transmission loads. All presented samples meet the standards, with the heaviest being Pilenga, and the lightest being KraftTech. We can conclude that if the kits are interchangeable, there will be no significant changes.
- Clutch safety factor - characterizes the ability of the internal combustion engine to transmit torque, taking into account the wear of the linings. Pilenga and KraftTech formally comply with modern VAZ standards (2.1), but for cars of the tenth series any set from the five presented is suitable. Only the first two models are suitable for Lada 2112 engines.
- Pressure plate imbalance level - acceptable values are in the range of 0.10-0.25 Ncm. Tests showed a complete discrepancy between these numbers of the VIS set. Valeo has a deviation of 20-25 percent, the rest fully meets the requirements.
- The level of imbalance of the driven disk - the indicator for all models turned out to be within the normal range, only in the Pilenga it is on the verge of what is permitted. The same kit did not meet the standards for squeezing force.
- The distance from the edge of the petals to the friction plane is an indicator characterizing the entire assembly. Exceeding the norm significantly reduces the service life of the car part. Here again, Pilenga’s indicators are unimportant.
It's time to choose
This time, the specialists of the Za Rulem editorial board were unable to find an ideal answer to the question of which clutch is best to install on the VAZ 2110 sedan. Perhaps the best performance in the top five was demonstrated by KraftTech and Luk, although the latter kit has insufficient torque. Valeo occupied the rightful middle - the balancing failed a little. The final list, where quality indicators are arranged in descending order, looks like this:
- KraftTech – there is no marking on the factory release bearing, but the thrust bearing is designated as X2200C; driven disk – Y 3200A B0206. Main features: four damper springs, there are 18 petals on the diaphragm spring. The box bears the designation: 2110 W3200C B2240.
- Luk – the kit does not include a release bearing, its marking is: SKF 500 063820; the pressure plate is branded 2 D24 120 0252 10, and the driven disk is branded 320 030810. The latter has marks for precise orientation during installation. The driven disk has six springs, the basket has 18 petals. The side is last marked.
- Valeo - marking is applied only to the bearing: Valeo SNR BB 126 18S50. The kit includes a mandrel for precise installation. The spring element of the pressure plate consists of 18 petals. There is a mark on the package - 21102-21103-21108-2111-2112 826622.
- VIS - there are no marked parts, the only special sign is the approval mark - AYA70. The pressure plate spring has 12 lobes, the driven disk has 4 large and 3 small damper springs. On the box: 2110-1601180.
- Pilenga - there are no markings or designations on the parts, but on the packaging it is noted: CK-P-4005 2110. The driven disk is equipped with 4 small and 4 large damper springs. The pressure plate spring includes 18 lobes.
What is clutch?
Before you go to a car service center in Moscow or another city, try to figure out how to properly replace the clutch on a two-wheeler. As you can see, there is nothing complicated in the work procedure. You can complete all repairs yourself in a few hours.
The clutch is a mechanism that allows you to disconnect the engine crankshaft and the primary gearbox. As a result, the engine can work, the gearbox lever can be in a gear position, and the car will stand still.
A clutch is needed in order to change gears while the car is moving. If it were not there, then changing gears would be problematic - the lever is very difficult to move from one position to another. And all because the engine crankshaft and the wheels of the car are rigidly connected. And it is the clutch that allows for a kind of disconnection of the power units.
When repairing a car in a car service center in Moscow or any other city, you need to carefully ensure that the technicians complete all the work to the highest possible quality.
How to choose the right one
Competent selection in 2021 begins with studying manufacturers' offers. Knowing several factors will help determine which clutch is best installed on a VAZ.
- Precise car modification. The configuration of the clutch kit and its physical parameters depend on the type of car.
- Estimated price range. Depending on the desired cost, the user can navigate by company. The final price tag is considered an important factor - you shouldn’t count on the cheapest model.
- Method of operating the machine. With moderate driving under normal conditions, even simple modifications to the disc and drives will last quite a long time. If the car is used in racing mode or under critical overloads with frequent switching (this also includes training cars), you should buy high-quality products with a large margin of safety.
By taking into account all the parameters, the motorist can correctly select the required clutch model and install it on his car.
Clutch disc cost
How much does it cost to replace a clutch disc (hereinafter referred to as DS)? This question was probably asked by every car owner who encountered a breakdown of this element. We will try to give you the most current figures, those that are found on the market.
Today, on the Ukrainian car market it is quite possible to purchase a domestically produced DS for 2107 for an average of 210 hryvnia. If you're lucky, you'll find it cheaper. But, depending on the stores, this price can vary and reach 250 hryvnia.
In Russian car stores this element costs about 500 rubles. This cost is average, so you can find DS both cheaper than this price and more expensive (mostly up to 700 rubles).
Dismantling the gearbox
The most important thing is to remove the gearbox. Therefore, it is best to carry out all work on an inspection hole or overpass - it’s really more convenient. Procedure:
- Remove the left wheel, unscrew the nuts from the ball joint and the tie rod end. You will need to move the box to the side; the drive on the left should come out without any problems.
- Loosen the nut securing the rocker and remove it from the gearbox shaft.
- Remove the starter, having first disconnected the battery and all wires from it.
- Unscrew the fastenings of the pillows holding the box. It is recommended to place a jack or reliable support under the gearbox housing before doing this.
- Disconnect the speedometer cable, disconnect the wires from the reverse sensor, as well as the ground bus.
- Unscrew the three bolts and nut that secure the gearbox housing to the engine block.
- Carefully move the box to the side; the right drive must be removed.
A little about how to properly remove the box:
- Firstly, you cannot remove both drives at once - replace one with a tube that will hold the differential.
- Secondly, it is imperative to drain the oil from the gearbox crankcase. By the way, why not replace it?
We make a replacement
If you decide to change the element yourself, but do not have enough knowledge and experience to do this, then it does not matter. Many motorists use the instructions on our website when carrying out certain repair work for the first time - and most of them are satisfied with the results. Even if you have never changed this element, just follow the instructions and you will succeed. But if you are not confident in your abilities and open the hood of the car only to add washer fluid to the expansion tank, then it is better to entrust this matter to specialists.
New DS for VAZ 2107
When do you need to change the DS? This may be needed in several cases:
- you notice that the clutch pedal does not engage or disengage completely;
- the coupling system does not work correctly: there is significant jerking when changing gears;
- When you press the pedal you hear new noises.
The process of replacing the DS involves dismantling the gearbox. However, we have a simpler option. We will look at the process of changing the clutch component without removing the transmission.
Sorry, there are no surveys available at this time.
What will you need?
Prepare everything you may need during the repair process, namely:
- set of wrenches;
- prybar or crowbar;
- jack;
- rags;
- some gasoline;
- mandrel for centering the disk.
We will need rags and gasoline to lubricate the DS, and a mandrel to center it. It is not expensive and is sold in any car store. When replacing the DS, this point is very important, since the new element necessarily requires alignment. Having collected everything you need, you can start working.
A set of wrenches for carrying out repair work on changing the DS of a VAZ 2107 A pry bar that will be needed during the repair process A jack for carrying out the work A little rag for lubricating the DS A little gasoline for lubricating the DS: this amount is quite enough A special mandrel for centering the DS: sold in any car store
Replacement instructions
If you decide to replace the DS yourself, then you will need the help of another person. You need to drive onto a hole or overpass, otherwise the repair will not be possible.
- Before you begin replacing the driveshaft, you need to disconnect the driveshaft. To do this, remove the brake drums and pads from the wheels. Take a 12mm wrench and unscrew the axle shaft mounts and then pull them out.
- Before unscrewing the fastening screws, the positions of the cardan flange and gearbox must be noted. This is done so that subsequent assembly will maintain their original position in order to prevent imbalance. So, unscrew the bolts and disconnect the driveshaft.
- Now you need to disconnect the wire contacts from the sensor that turns on the reversing headlights when reversing.
- There is a clutch mechanism casing on the cylinder head - they need to be unscrewed with a wrench, and the casing must be removed. In addition, you need to remove the cross member of the car's underbody.
- Now take a 13mm socket wrench and use it to unscrew the two bolts that hold the gearbox cushion. Take off this pillow.
- Next, take a crowbar or pry bar and move the gearbox power unit to the side opposite the engine. Here you will need the help of another person, since the unit must be moved very carefully, this can cause some difficulties. Do this until the shift lever is near the rear edge of the hole in the bottom of the vehicle.
- As a result, it should turn out that the transmission unit of your VAZ 2107 car will be located on the receiving tube. Here you will need a jack that will act as a support. It must be placed under the gearbox so that it does not slip and sag on the wires, thereby protecting the unit from damage.
- Next, you need to remove the clutch basket from the flywheel of the VAZ engine. To do this, you need to take a crowbar or pry bar and use it to fix the flywheel in place. When this is done, using a “13” wrench, unscrew the basket fastening bolts one by one.
- Having done this, carefully move the basket to the side with a crowbar and remove the DS that needs to be replaced. Remember which side the element is installed in order to place it the way you need it.
- At this point, the dismantling of the DS can be considered complete. Take the new disk and install it in place of the old one. Before installing the element, you need to wipe it with a clean rag, which must first be soaked in gasoline. All subsequent assembly must be carried out in reverse order. If necessary, replace other system elements.
1. Using a socket wrench, unscrew the nuts securing the casing 2. Take a pry bar and carefully move the gearbox away from the engine 3. Take a wrench at “13” and unscrew the nuts securing the mechanism basket 4. Dismantle the old DS, do not forget to pay attention to Which side is it installed 6. Center the new DS: the mandrel should freely enter and exit the hole 5. Place the new DS and insert a special centering mandrel into the hole
Important: do not forget to center the disk when it is already installed. To do this, use a special mandrel. If the DS is installed correctly on the mechanism, the mandrel will move freely into and out of the bearing when the basket mounting bolts are tightened. Don’t forget to also coat the gearbox input shaft splines with a thin layer of lubricant. Don't forget to also adjust the pedal free play.
Clutch on VAZ-2112
This is what the VAZ-2112 clutch diagram looks like in disassembly.
The clutch on any car, including the VAZ-2112, plays a very important role. So, without his participation it would simply be impossible to transmit torque from the engine to the gearbox.
The following two tabs change content below.
About the expert:
Fan-auto
All my life I have been surrounded by cars! First, in the village, already in the first grade, I was rushing around on a tractor through the fields, then there was JAVA, then a penny. Now I am a third-year student at the Polytechnic Faculty of Automotive Engineering. I work part-time as a car mechanic and help repair cars for all my friends.
Due to the fact that this element bears a large load, it can absolutely be called a consumable material, because its main elements require immediate replacement if they are severely worn.
Video about replacing the clutch on a VAZ 2110-2112 family
It is impossible to influence the condition of the clutch in any way, and it is also impossible to control its condition visually, so its malfunctions will only appear when one of the elements begins to fail.
Tool for replacement work
To make the work easier, you need to prepare all the tools in advance.
- Inspection hole or lift.
- Jack.
- Wheel chocks.
- Set of socket wrenches.
- Mount or extension tube.