How to disassemble a VAZ 2110 headlight
The design of dozens of headlights can vary greatly depending on the manufacturer (see types of headlights). Disassembly of the headlight will be shown on the two most popular models: Kirzhach (Avtosvet Plant) and Bosch.
Headlights VAZ 2110 Kirzhach
To remove the headlight glass, carefully insert a flat screwdriver into the corner of the glass, and then insert a utility knife into the resulting gap and cut off the sealant step by step, helping with the screwdriver. If the sealant does not yield, then it needs to be heated using a hairdryer; this is described in more detail in the video:
After the headlight glass is removed, remove the headlight reflector by unscrewing three bolts: To remove the board with the reflector and module from the headlight, remove the pressure spring through the hole in the hydraulic corrector. Then we tighten the adjustment as much as possible and slip in the screwdriver handle, after which we begin to unscrew first one adjustment screw, then the other. We remove the board from the headlight.
Headlights VAZ 2110 Bosch
Replacing Bosch headlight glass is easier because... Instead of sealant, a rubber seal is used. We remove the headlight glass, having first unfastened the latches. To remove the headlight reflector, we had to completely unscrew the adjusting screws and pull out the cap inside the reflector (covering the low beam lamp), prying it off with a screwdriver from the other side. When reassembling the headlight, the glass is installed using a sealant or sealant (you can use soft, construction). By the way, do you know how to tune the headlights of a VAZ 2110?
Tuning and repair of VAZ 2110
The information presented in this article will concern the disassembly of the VAZ 2110 headlight. Why do you need to disassemble the headlight? In my case, I did this in order to insert the diode strip inside the headlight. This will also be useful for those whose headlights sweat. The reasons may be different.
I will not describe how to remove a headlight from a VAZ 2110 in this article, since you can find detailed information about this HERE.
Well, let's get down to the process itself. In order to disassemble the VAZ 2110 headlight, you need to be patient. Since the parsing process is simple, but it can take a while.
First, let's look at how to disassemble the headlight of a VAZ 2110 (Kirzhach)
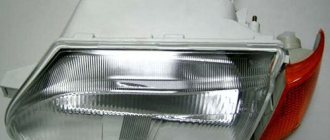
So, the first thing you need to do is remove the glass from the headlight. I consider this stage the longest and most dangerous
Dangerous because if you are not careful you can break the glass.
A) Insert a screwdriver or knife into the edge of the headlight, between the glass and the plastic block.
B) This will create a small gap through which you can insert a utility knife and begin cutting the sealant.
C) be careful, do not rush, do not insert the screwdriver too deeply, otherwise the headlight glass will simply crack.
D) We go through the entire perimeter of the headlight with a knife. If the sealant does not yield, you can warm up the headlight with a hairdryer.
disassembling headlights Kirzhach VAZ 2110
Disassembling headlights Kirzhach VAZ 2110
Video tutorial on disassembling headlights of the tenth family (Kirzhach) The video is a complete example.
headlight repair vaz 2110 boch
Repair of headlights VAZ 2110 boch
D) When the sealant has been slightly trimmed around the entire perimeter of the headlight, you can carefully push the screwdriver deeper into the headlight or insert a thicker screwdriver.
E) And again we go through the entire contour with a knife. (I played with the first headlight for 2 hours, with the second one less, either I gained experience, or there was less sealant. The second one succumbed to me in half an hour).
G) When the glass has completely come off, remove it from the headlight. Be careful, as the glass caught on the chrome plastic inside the headlight. And then it is fastened behind the headlight with three bolts. Therefore, if this happens to you, pry it with a stationery knife so that it comes unstuck from the glass.
We've sorted out the glass, let's move on.
2. Remove the chrome insert. To do this, unscrew 3 bolts from behind the headlight.
3. If you need to remove the headlight module and reflector, then remove the spring through the hole for the hydraulic corrector.
4. Now tighten the adjustment screws as much as possible, insert the screwdriver handle and unscrew the adjustment screws.
5. Now you can remove the board from the plastic headlight housing.
That's all, now let's look at the analysis of the VAZ 2110 (Bosh) headlight. Everything is much simpler with her.
- The glass on a Bosch headlight is very easy to remove, since it is not sealed with sealant. Unfasten the headlight latches.
3. To remove the reflector, you need to unscrew the adjustment screws and pull out the cap that covers the low beam bulb; to do this, pry it off with a screwdriver from the other side.
How to remove glass?
Removal will be necessary if, for example, it is necessary to replace broken glass on a VAZ 2110 or it has become cloudy, covered with microcracks, etc.
If you are dealing with Bosch, then you need to release the latches, then easily remove the glass. When installing a new one, it’s worth inspecting the rubber; replacing it won’t hurt either. Some also use sealant, although there is no particular need for this, unless, of course, you are dealing with genuine products and not Chinese fakes.
You'll have to tinker with Kirzhach a little longer. Here, in order to remove the glass, you must first carefully insert a flat-head screwdriver into the corner of the glass, forming a gap. Then connect a thin stationery knife to the process.
So, with the help of a knife and a screwdriver, you may be able to detach the glass. If the sealant “sticks”, you need to warm it up with a hairdryer and immediately continue removing the sealant while it is warm.
When installing new glass, the headlight block can be placed on a softer, construction sealant. In addition, by removing the glass, you can disassemble the reflector from the outside of the car if it also needs replacement.
The headlight unit can be dismantled for repair, replacement with a new one, or for tuning or modification. In this article we will talk about the removal and disassembly of a VAZ headlight of the tenth family, depending on its manufacturer (Bosch or Kirzhach).
Modernization
With a little modification, you can significantly improve the Kirzhach headlights with your own hands and make their glow brighter.
First, the headlight must be removed, then disassembled in the following sequence:
- To remove glass from Kirzhach, use a hairdryer - you need to heat the sealant, then use a sharp knife to separate the glass;
- Remove the reflective pad;
- The modernization will only affect the low beam units, so unscrew them;
- And then you have a choice: with Kirzhach you can either move the lens towards the reflector by 10 millimeters, or grind off the modular ring, making it shorter. This will help improve the luminous flux of the Kirzhach headlights, raise it and make it wider.
Design features
The design of the hydraulic corrector includes the following components:
- The master cylinder, which is mounted on the dashboard;
- Actuator cylinders, which are mounted on the headlights and turn them;
- Connecting pipelines of the hydraulic corrector, fixed with clamps;
- A working fluid that is characterized by increased frost resistance.
A hydraulic corrector works like this: a normal, working corrector maintains the pressure required for operation. If the driver needs to direct the headlights downwards, then the pressure in the system decreases. In this case, the rod turns the optics down using a piston. If the liquid leaks, the corrector pistons are fixed in one position, and adjusting the direction of the headlights becomes impossible.
VAZ 2110 headlight hydraulic corrector diagram
Eliminating headlight shake
Some owners of the domestic VAZ 2110 noticed that the light trembles when driving. This problem appears more often in Kirzhach headlights, but in this part from Bosch this phenomenon occurs quite rarely. Reason: rattling of the reflector itself.
To eliminate light jitter you need to check:
- Is the reflector in place in the latch?
- Is the adjusting bolt rod in place?
- Does the hydraulic corrector rod rest against the seat;
- Is the thread slack (we swap the high and low beam lamps)
- Is the tube in the hydraulic corrector frayed?
Among the most successful ways to troubleshoot the problem:
- Replacing the hydraulic corrector with an electric corrector.
- Increasing the length of the hydraulic corrector rod, which will help tension the spring.
This popular method allows you to get rid of the twitching of the light by placing a cap on the hydraulic corrector rod.
Use as a cap:
- plastic dowel 8mm long,
- brake fitting cap,
- another plastic cap.
The operating procedure is simple:
We take out the hydrocorrector from the illuminator. We tightly place the cap on its stem
It is important that it does not jump inside. We insert the hydraulic corrector into the seat
We insert the hydraulic corrector into the seat.
Replacing headlight glass on a VAZ-2114
Removed headlight during disassembly.
Replacing a headlight glass on a car means a complete process of disassembling the housing. So, let’s consider the sequence of actions aimed at carrying out repair work to replace glass:
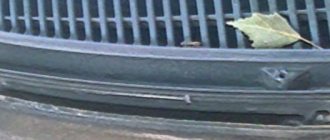
- The first thing you need to do is remove the upper radiator grille.
- Remove the hydraulic corrector and disconnect the power supply terminals.
- Unscrew the headlight mounts. Two at the top, one at the side and one at the bottom.
- We remove the headlight from its seat.
- We dismantle the light bulbs and other elements that are located at the back of the case.
- Using a knife or screwdriver with a thin blade, we pry it between the glass and the body, and then cut the rubber seal and glue around the entire perimeter.
- We take out the glass.
- We degrease the new glass and glue a sealant onto it.
- Apply glue to the body and press the glass tightly.
- The rest of the assembly process is carried out in reverse order.
You can remove the glue without a knife. There are special products that dissolve frozen liquid. The variety of manufacturers today is quite large, so the motorist will have plenty to choose from.
Glass selection
Essential glass replacement kit.
Glass for VAZ headlights can be sold original or analogues. So, the analogue costs 20-30% less, but it is not a fact that the kit will come with a rubber seal. This element is mandatory, since it is it that prevents moisture from getting inside the headlamp.
Reasons for replacement
The most common reason for replacing headlight glass is a pebble on the highway.
The glass on a car headlight can change for several reasons. So, sooner or later the car enthusiast will have to deal with this process. Of course, one of the options is a trip to a car service center, where they will definitely tell you to completely change the product, but many people don’t want to do this. So, let's look at the main reasons for replacing headlight glass:
- Over time, glass tends to fade. At the same time, I can’t help polishing the top layer, so I have to replace the glass.
- Broken headlight. It is often cheaper to change the glass than to replace the entire headlight unit, so many car owners are inclined towards this option.
One of the cheapest replacement options is to buy a disassembled headlight, since in most cases the housing becomes unusable, but the glass surface remains intact.
How is the replacement carried out?
Replacing headlights on a VAZ 2110
As a rule, car headlights can serve for a long time without needing repair. But if there is an urgent need, you can replace the headlight without much difficulty. This is easy to do yourself, given that when performing repairs in the cold season, it is better to carry out it in a warm room so as not to harm the plastic decorative trim. In addition, many car enthusiasts, chasing beauty and wanting to make their car more attractive and unique, remove and replace headlights for tuning purposes. Properly selected accessories can fundamentally change the appearance of dozens. Tuning is carried out in various ways, the most popular of which is tinting the headlights. Headlights can not only be tinted, but also painted in a variety of colors, and the standard headlights can be replaced with others.
Replacing the headlight
Replacing headlights in a VAZ 2110
Replacing a VAZ 2110 headlight will require the following tools and materials:
Replacement of headlights is carried out with extreme care so as not to damage the fragile plastic. To dismantle it, you will need to remove the radiator trim.
Note. The most difficult operation in the process of removing a headlight is to remove the decorative trim, also called the “eyelash”. This element complicates access to the lower nut securing the headlight.
First, the negative terminal is disconnected from the battery for safety. After this, the 2 electrical connectors of the headlight are disconnected.
Note. If there is a fender liner, unscrew it from the bumper side. As a rule, it is fixed with two or three self-tapping screws.
Using a “10” wrench, unscrew the two bolts securing the upper part of the headlamp. Then two bolts are removed that secure the decorative radiator grille.
Replacing headlights on a VAZ 2110
- You need to lift it and insert your fingers into the gap between the grille and the bumper. Two latches are released on both sides. The decorative grille is removed.
- One bolt is unscrewed that secures the headlight unit from below. Unscrew or loosen the two bolts of the upper bumper mounting and pull it back a little.
- Using a screwdriver or your fingers, carefully pull the edge of the decorative trim away from the headlight. This is a very difficult task during the dismantling process.
- For more convenient work and to avoid damage to body parts or scratches, you should remove the front bumper and continue working without it.
Note. This is necessary so that you can reach the lower nut that secures the headlight. It must be remembered that plastic becomes brittle in the cold, so it is better to carry out this work in a warm room.
Replacing headlights from VAZ 2110
After this, in the opened gap you can see a plastic latch-tab, with the help of which the edge of the lining is fixed to the edge of the wing
Care must be taken to remove it from engagement with the wing; this does not require much effort.
Note. It is necessary to press the latch of the hydraulic corrector cylinder, turn it 90 degrees until it stops and remove it from the socket without detaching it from the hoses. All actions are performed with your fingers.
Then the three headlight fixing bolts are unscrewed and the headlight unit is moved back. The headlight trim is moved back, then towards the center of the car by almost 4 centimeters, so that its hook is released from engagement with the wing, and is pulled out.
Note. Before removal, it must be lubricated with silicone grease along the fixation arc to the bumper.
- Using a socket head at “10”, the nut of the headlight unit is unscrewed, with which it is fixed to the bracket, and removed.
- The hydraulic corrector clamp is pryed off with a screwdriver, turned and pulled out of the headlight housing.
- Reassembly is carried out in reverse order without using brute force. When installing the decorative trim in place, its lower edge is advanced with a screwdriver. The entire procedure for dismantling and installing the headlight unit takes only about 20 minutes.
Types of lighting devices
Depending on the year of manufacture, the VAZ 2110 can be equipped with either Kirzhach or Bosch headlights. Both of them are a block that includes high and low beam headlights, side lights, and direction indicators.
No matter how much difference there is, there are some nuances:
- In Kirzhach, the glass is sealed, so both removing it and replacing it with a new one is more difficult. In addition, the low beam glass has a lens that makes the light output more focused, although limited; Left headlight block Kirzhach
- Bosch glass is secured with latches. They are sealed with rubber gaskets. Their low beam boundary is more blurred, since there is no lens in the glass. Right headlight block Bosch
It’s difficult to say unequivocally which headlight unit is better. But disassembling Boshevskys is definitely easier. In any case, it doesn't hurt to know how to do it in both cases.
To remove the headlight unit, you need to open the hood:
- De-energize the VAZ 2110 (this must always be done during repairs, especially anything related to electricity) by disconnecting the negative terminal from the battery;
- Remove the lining from the radiator;
- Disconnect the block with wires from the headlight;
- Press the latch of the hydraulic corrector cylinder and, turning it 90° to the right, remove it from the socket. There is no need to disconnect the hoses;
- Unscrew the three bolts securing the headlight unit, then move it back;
- After which, move the device to the side, towards the center of the car, until it disengages with the wing hook;
- Loosen the upper bumper bolts;
- Press the pad from below until its flange disengages from the buffer, then remove the pad;
- Unscrew the nut securing the headlight from below;
- By pulling the headlight unit towards you and disconnecting the block from the turn signal, you can remove it.
Tuning rear elements
Now there are taillights for the VAZ 2110 to suit every taste and budget, including ready-made LED panels. The cost of a tuning set of rear lights is from 3,000 rubles. Round-shaped lights are especially popular, some use a ProSport taillight unit, or even better, a Hella. However, installing them so that they look beautiful will not be easy, because the standard places for the rear optics will have to be redone for a long time and carefully.
It is much easier to install a diode strip into the standard signals yourself. To do this, the standard taillight is opened using a soldering iron, and the standard VAZ 2110 brake light insert is removed from it.
A new one is cut out from a pre-prepared sheet of plexiglass. It is necessary to mark in advance the locations of the diodes and drill holes for the wiring. The inner surface of the insert is matted. Next, the part is painted chrome on the same side.
Disassembling the headlight and removing the glass
Once the headlight is removed from the car, you can begin the disassembly process. It is worth understanding that over the entire production period of the car, the appearance and body of the headlight have changed, so disassembly will be different, but the processes are still similar.
The VAZ-2110 was equipped with headlights manufactured by Kirzhach and Bosch.
Let's consider the dismantling process separately.
Kirzhach
There is nothing difficult in disassembling the Kirzhach headlight. The glass itself is glued to the sealant. Therefore, to remove it you will need a stationery knife. Let's look at the operation itself step by step:
- Take a utility knife and very carefully cut the old sealant.
Using a utility knife, cut the sealant to remove the headlight glass.
- Now you can dismantle the glass. When installing new glass, it is necessary to change the seal and use sealant for gluing.
Old and new headlight glass with sealant.
- We take out the headlight bulbs by turning them counterclockwise.
- To remove the light diffuser, you just need to unscrew a few screws inside the headlight and the parts will fall out on their own.
- Assembly is carried out in reverse order.
Bosch
Disassembling a Bosch headlight is slightly different from Kirzhach, namely in the presence of latches of the headlight glass to the body.
All other operations are carried out the same way. As in the case of the Kirzhach headlight, it is necessary to use sealant during assembly, despite the presence of latches.
Using a screwdriver, disconnect the glass from the body.
What should you know about car optics?
A modern car has a large number of lighting fixtures.
All of them are combined into a single lighting system that performs the following functions:
- illuminates the road and side of the road;
- signals the driver's intentions;
- informs about the dimensions of the car;
- illuminates the interior, engine compartment, luggage compartment, etc.
All devices are divided into external and internal lighting. The external ones include front headlights, turn signals, dimensions, license plate lights, fog lights on the VAZ 2112. The headlights on the VAZ 2112 are a block that contains several lighting devices: low and high beam lamps, DRLs.
Turning and side lights are signaling lights. The former warn about the driver’s intentions to perform a particular maneuver, the latter inform about the vehicle’s dimensions. They are built into the front headlight and rear lights. A special feature of signaling devices is that they shine yellow and synchronously.
Requirements for installing daytime running lights on cars have appeared recently. They have an intense light, their function is to improve the visibility of the car when driving in the daytime. In their absence, this function is performed by low beam or PTF. Fog lights on the VAZ 2112 are designed for driving during bad weather when visibility is poor. They are installed in pairs at the front. The back may be missing.
The rear lights of the VAZ 2112, like the headlights, are block headlights. These include the exterior light, turn lights and side lights.
The rear optics include a brake light, a luggage compartment light and a license plate light.
Interior lighting consists of: interior lights, engine compartment lights, door lights, trunk lights, glove compartment lights, and dashboard lights.
Features of choice
Automotive optics is constantly evolving and at this stage the following types can be named:
- halogen;
- xenon;
- LED;
- laser
Halogen lamps resemble conventional incandescent lamps in their design: a glass bulb contains electrodes with a tungsten filament. Due to the high heating temperature, halogen lamps quickly fail as the tungsten filament burns out. The main advantage of these lamps is their low cost.
Xenon lamps shine much brighter than halogen lamps. At the same time, they do not have a filament, so they are not afraid of shocks and vibrations. Xenon is durable and economical. The disadvantage is that both bulbs have to be changed, since during operation the brightness decreases, so the light of the lamps will be different. In addition, xenon optics require the installation of an ignition unit.
LED optics have bright light, economical energy consumption, long service life, and do not heat up. Another advantage is the ability to install LEDs of different colors. The disadvantage is low efficiency. For high-quality lighting you need a large number of LEDs (video author - Pro Sport).
Laser optics uses laser LEDs, which are characterized by high power and small size; their light is very bright. The disadvantage of laser lighting elements is the complexity of control.
When choosing optics, you should be guided by the following factors:
When choosing lamps, you need to take into account the parameters (base type, markings, etc.) that are indicated in the instruction manual. You cannot install xenon on a VAZ 2112 in halogen optics
When installing xenon, it is necessary to change the optics to the appropriate lens
You should pay attention to the manufacturer and buy lighting fixtures from well-known companies. The seller should request a certificate stating that the product can be used in European countries
Selection of lighting fixtures VAZ 2110 – 2112
Drivers, first of all, always need a good low beam. Kirzhach headlights are equipped with a lens for low beam and, accordingly, a reflector for high beam. Bosch uses reflectors in both cases. Unlike a reflector, the lens has a much clearer light line; in addition, Kirzhach lighting devices can be legally “equipped” with xenon, which is not provided for Bosch.
However, if we compare the results of the review of experts and the opinions of car owners, it is worth noting that they are somewhat different. “Bosch” headlights have weak flare from the side in the low beam, but besides this, they are the ones that cause preference. In addition, they have a large surface for low beam due to the reflector. This has the best effect on the quality of automobile road lighting in cloudy weather.
In order for lighting to be as productive as possible at night, choosing high-quality optics is not enough. The headlights should be adjusted correctly, and the glass should be clean (the glass should be secured with a sealant, but on Bosch they are held on by sealants. This makes the process of replacing glass easier). However, the best option would be to use bright halogen lamps for car lighting.
“Alternative light” on the VAZ-2110
Tuning enthusiasts enthusiastically accepted the appearance of “alternative optics” for 2110-2112. Mass purchases of headlights with “angel eyes” have begun. But beauty, as we have heard, requires sacrifice.
And a lot was sacrificed:
- Quality of light - the low-beam beam shines in a spot, blinds oncoming drivers, the illumination of the road surface is unsatisfactory.
- Electrical safety - thin wires with plastic connectors melt during prolonged use.
- Maintainability - in this headlamp you cannot change the glass or turn signal separately - you will have to buy everything assembled.
- Economic attractiveness - products are offered mainly in pairs; finding one piece is a great success.
- Problems with technical inspection - the design does not provide for a position corrector.
- Difficulty in adjusting - there are 3 screws for each lamp, difficult to access with a key.
- Plastic, unlike standard glass, is more easily scratched by stones.
We cannot recommend such crafts for installation on cars used on public roads.
What lamps do drivers use in the VAZ 2110
The optics in each car are configured for different light elements. A reflector or lens is responsible for the formation. The following types of lamps are available as a source:
- classic halogen;
- xenon;
- LED
Standard lamps for VAZ 2110 headlights are halogen. Optics differ depending on the year of manufacture and can be with a reflector or lens. A xenon or LED part will not be able to form the correct light shelf due to the inappropriate size of the bulb in the standard “tens” headlight.
There is a special marking on the optics body that indicates the type of reflector and the type of lamps used. If a part not specified by the manufacturer is installed, questions may arise from traffic police officers.
Xenon
Young people often install gas-discharge lamps in the front optics of their VAZ. Most often, models with a lens responsible for light are subject to this. The alteration requires the installation of additional components in the form of:
- ignition unit for each lamp;
- additional fuses;
- reinforced relay.
It is also necessary to make a slot in the headlight housing for routing the power wires.
A headlight with such modernization has increased luminous flux and beam brightness. The disadvantages include the non-compliance of the cut-off line and the jackdaw with the requirements of GOST and the constant blinding of oncoming drivers in the dark and daylight hours.
Xenon is often installed in the PTF of VAZ 2110 and VAZ 2112, which also grossly violates traffic rules.
Halogen
VAZ 2110 headlights are designed taking into account the use of halogen. You can achieve optimal lighting using parts from well-known manufacturers:
- Osram;
- Philips;
- Koito;
- MTF.
With the Night Breaker series from Osram, you can not only significantly expand the luminous flux and increase the beam strength, but also achieve a white tint that looks like xenon with a temperature of 4300 K.
Lamps with improved characteristics do not require additional modifications to the headlight and are mounted in a standard place. The power consumption is 55 W, which is fully consistent with the standard low beam bulbs used from the factory.
LED
Chinese manufacturers offer LED lamps for the VAZ 2110. Such parts cost quite a lot and are often equipped with additional control units, a cooling system and controllers.
Domestic optics Kirzhach is equipped with a lens, but even it cannot cope with diodes to form the required daw and horizontal stripe. The fact is that in expensive cars with LED optics, premium lenses with a special shutter and a modified collecting element are used.
To achieve high-quality light using xenon or LEDs, you need to replace standard headlights with products from a tuning studio or install expensive lenses and control units yourself.
How to upgrade them
- The good news is that we won't need any more conductive tape, new or old. In any case, AvtoVAZ itself abandoned this “karmically” unsuccessful detail in the design of the rear lights of the VAZ 2114 or VAZ 2115 models.
- The bad news is that your car with such tape in the headlamp unit may present an unexpected and unpleasant surprise at the most inopportune time.
But there is a way out - to modernize with your own hands, and in fact to simplify the design of the rear lights.
Penny purchases
As you know, the best improvement is the one that:
- costs less than the original. And the proposed method will allow you to keep it within 250 rubles;
- simplifies the design. That’s how it will be, because it’s not for nothing that this method is used everywhere.
So, go to the nearest auto store and purchase:
- a set of single sockets for direction indicators;
- double sockets for brake lights and parking lights;
- male-female copper connectors;
- high-quality wire 2-3 meters.
Independent steps
Having removed the rear lights from the car, we begin to modernize them. To do this, you will need instructions that will show you how to remove the lighting fixture.
Don't forget that modern cars are full of plastic parts that can easily be broken due to carelessness.
Note! You will need a wiring diagram for the VAZ 2112 injector, and the good news is that it is posted at the beginning of the article.
Locksmith stage
We arm ourselves with cutting tools and begin the alteration:
- in the plastic panel of the headlight housing we mark places for cartridges;
- then we cut holes for them;
- We fix them with self-tapping screws.
Electric stage
An equally important process for connecting electrical components is as follows:
- We cut off a piece of wire and use it to make a common “ground”. To do this, we connect the “-” terminal of all cartridges in series, having previously secured the male-female connector to the wire;
- Cut the wire again and connect it to the “+” turn terminal;
- Using the next piece of wire we connect the “+” terminal of the side and brake lights in series;
- Referring to the diagram, we connect the connector block with the free ends of the wiring.
Tip: be sure to test the assembled circuit to identify a short circuit.
Replacing headlight wiring on a VAZ 2110
- Registration
- Entrance
- To the beginning of the forum
- Forum Rules
- Old design
- FAQ
- Search
- Users
The light bulbs are the most ordinary Lighthouse.
In Kirzhach everything is arranged differently.
Nsk
The updated BOSCH terminal has a + ordinary female connector. And the minus is supplied through the lamp holder body.
1 minus tendril broke off on my old headlights. The plus and minus went there at terminal 1. And the headlight kept going out!
So I advise you to just buy new optics. (Car: VAZ 21102 2004) My car is also 04 years old. The headlights were already tired, the glass looked like it had been sandblasted and the reflector was already faded... When I installed new headlights. It seemed as if xenon had been stuck there! 1500 rub. thing. Not that much money for normal light.
When I installed new headlights.
55 W lamps. The trick is very clever. It won't be possible to re-embrace the mothers. If I'm wrong, can someone explain exactly how to do this? In Kirzhach everything is arranged differently.
Principle of operation
The principle of operation is this: you turn the key in the lock, and current flows to the excitation wire. The magnetic field that the armature creates penetrates the stator windings, at the terminals of which voltage appears. When the armature reaches a sufficiently high rotation speed, which is provided by the pulley and belt drive, the so-called self-excitation mode occurs.
The rectifier unit converts alternating current into direct current. The voltage regulator starts working when the crankshaft speed changes (accordingly, the armature rotates faster or slower) and regulates the time for which the field wire is turned on. Sometimes a generator malfunction may occur due to a blown fuse in the circuit.
The problem with new headlights
It happens that after installing new headlights, purchased for a lot of money from a reliable, excellent manufacturer, the quality of the glow leaves much to be desired.
Inexperienced drivers attribute everything to a defect or the purchase of a fake disguised as a trusted company. But in reality everything is completely different.
Headlights shine efficiently and efficiently not only depending on the manufacturer. Settings that someone doesn’t know about or simply forgets play a big role.
Headlights that have just been removed from the factory packaging and installed in place of the old optics do not have the adjustment required specifically for your car. You can do it yourself, but this will require a perfectly flat area, a similar wall and the skills of a draftsman. In practice, this is quite difficult to implement, so the optimal solution is to entrust the adjustment to specialists from a service station.
Alas, the VAZ 2110 is not a modern, advanced car in which the headlights are automatically adjusted electronically. Here everything has to be done manually.
Loading …
Tinting and replacing factory lamps
You can replace the factory headlights on a VAZ 2110 in the garage; the operation takes 20 minutes and does not require any special tools.
Replacing standard lamps is carried out in the following steps:
- Remove the negative terminal from the battery.
- Remove the plug located near the wing.
- Unfasten the spring clip that holds the lamp.
- Disconnect the fastener and remove the lamp.
- Install the new light element in reverse order.
On a VAZ 2110, tuning often involves tinting the headlight housing. Film, painting, and tinting varnishes are used. Tinting of lighting equipment is carried out by tuning studios; the question of whether the procedure is legal or illegal remains open.
According to the rules for operating lighting devices on cars in the Russian Federation, shading of individual parts of the lens can only be carried out by the manufacturer. Set luminous flux color:
- for low and high beams – white, selective yellow;
- all turn lamps are orange;
- rear lights – red.
When tinting the headlight unit, it is not allowed to radically change the color of the lampshade. There is no separate regulatory act that regulates the degree of tinting. There is an official document GOST R 51709–2001 - “Safety requirements for technical. condition of the vehicle and methods of verification.” In 2009, the document removed the ban on installing any type of tinting, film, or additional optical elements on the lens, but did not provide additional clarification as to what type of tuning is allowed to be used for commercial optics. Motorists modernize headlights, adhering to general recommendations - do not change the main lighting parameters of headlights and additional lights.
Installing bi-xenon lenses
Installing bi-xenon headlights is one way to improve road lighting. With their help, visibility in low and high beams in the dark is improved, without blinding oncoming drivers. The difficulty of reinstalling the headlight unit from standard halogen to bi-xenon lies in the different operating principle of xenon lamps.
It is necessary to install ignition units, adapters, and change the headlight design. DIY algorithm for replacing bi-xenon lenses in VAZ 2110 headlights:
- Disconnect the wires from the battery.
- Disassemble the headlight.
- Remove the reflector and old lens.
- Make an adapter from a rigid metal plate, which will be adjusted to the place where the bolts are attached to the module.
- Screw the lamp into the module, connect it to the ignition blocks and screw the block to the frame.
- To connect the ignition unit, follow the instructions that come with the lamp.
- Reassemble and replace the unit in reverse order.
- Reconnect the battery terminals.
- Check functionality and make adjustments.
Installing xenon is not difficult, the main thing is to do it correctly. Installation of bi-xenon on any generation of VAZ is technically possible, but requires permission and legalization from the traffic police with a mark in the technical passport.
Replacement procedure
For inexperienced drivers, replacing the corrector often causes difficulties, as evidenced by numerous discussions on VAZ owner forums. And yet, changing the hydraulic corrector is not so difficult. This is done in this order:
- Fastenings. First you need to disconnect all the clamps securing the hydraulic corrector tubes to the body;
- Cabin management. Remove the corrector switch handle located on the panel in the passenger compartment. To do this, just pull it towards you;
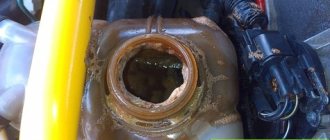
- Space for renovation. In the VAZ 2110, repairing the headlight hydraulic corrector is difficult precisely because of the inconvenient location of the hole through which the corrector tubes are threaded. At this stage, the whole process “slows down” for many. To get to the hole, you need to somehow remove the antifreeze reservoir. You just need to clear the “approach” from above so that you can work;
- We take out the cylinder. Further repairs take place from the interior. On the panel you need to sharply pull the switch towards you (pull it off), it will come off. Then unscrew the cylinder using the “22” socket. Open the cover with the fuses located there and, pulling, pull out the cylinder so that it hangs on the hoses;
- We take out the hydraulic corrector. The hydraulic corrector has a latch for the actuator cylinder; you need to press it. Then turn clockwise until it stops (90°) and remove it from the socket. Do the same steps with the other headlight;
- Push it inside the cabin and remove the hydraulic corrector;
- The new corrector is installed in the reverse order;
- Control. Check how the new hydraulic corrector works. Be sure to test whether the new device changes the angle of the headlights. If the repair is successful, then the luminous flux will be optimal and obedient to your adjustments.