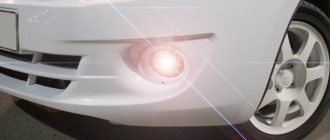
Fog lights are installed on a car to improve visibility in bad weather conditions.
Lada Vesta is equipped with PTF only in luxury configuration. All others have plastic plugs at the bottom of the buffer.
Installing PTF on Lada Vesta is not a cheap service. Self-installation will save some money, but requires care and experience on the part of the repairman. Incorrect installation of wiring and electrical circuits can lead to negative consequences and a short circuit.
The main steps when installing fog lights on a Lada Vesta
- Placing the machine on an inspection pit, roadside overpass, hydraulic lifting mechanism.
- Removing the terminal from the battery, since the work involves voltage, contacts, and relays.
- Unscrewing the top, middle, bottom row of fasteners and screws.
- Removing the sidewalls of the buffer from the grooves, removing the front part.
- Removal of plastic inserts, installation of fasteners for PTF.
- Laying the wiring from the left PTF to the fuse block.
- Installation of a mechanical button in the cabin, to the left of the steering column.
- Laying the cable from the button to the fuse box.
- Connection of limit switches according to the provided diagram.
- Install the buffer in the reverse order.
How to adjust PTF on Vesta
A new car usually doesn't need any adjustments, but over time something goes wrong and the light hits the road unevenly. To correct this situation, the designers have provided the ability to adjust the PTF light level using an adjusting screw, accessible through a hole in the bumper. You can do this yourself by following the procedure:
- Place the car with the light on opposite the wall at a distance of about 5 meters.
- Place an assistant in the front seat or place a load weighing 70 kg.
- You need to make markings on the wall or place a screen to adjust the light.
- Cover one of the fogs with a sheet of cardboard to properly adjust the second one.
- Turn the adjusting screw through the hole in the bumper and align the upper limit of the light with the horizontal marking line.
- The same operation with the second fog.
https://youtube.com/watch?v=OTYIG9Q4xUU%3F
If the adjustment is unsuccessful, you need to check the correct installation of the bumper, the housing of the fog lights and the light bulbs themselves and, if necessary, replace them.
Preparing seats and attaching headlights
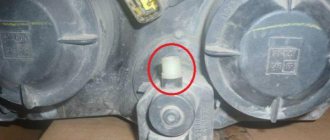
With the exception of the luxury version, plastic plugs are installed in place of the PTF. Using a special 76 mm bit, we drill holes.
This stage can be avoided if you purchase ready-made factory-made plastic inserts with cutouts in advance. The brackets are installed using three self-tapping screws.
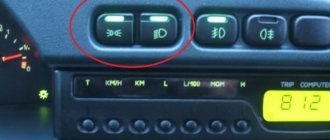
Buy a mechanical button for the car interior in any shape you like. The standard installation location is to the left of the steering column, closer to the trunk lid opening button.
How to activate the turn signal function on Vesta
Options for tuning the interior of the Lada Vesta: recommendations from upgrade specialists
If you wish, you can activate the cornering light function, which many of Vesta’s competitors in the price segment do not have, for example, Solaris. The backlight function can be done on non-native 55-watt lenses using the Ddt4all software and the ELM327 adapter:
- through the OBD2 connector, located next to the hood release handle, you need to connect to the EMM unit;
- in the Ddt4all program, change the value of Nbx_Cornering_CF in the WRITE field from 0 to 1;
- turn on Expert mode and click Send.
Such tuning is done for show and is akin to choosing chrome in the trim or “angel eyes” in place of standard lamps.
About the standard set of fog lights
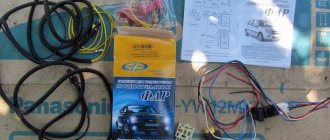
If you decide to convert the Lada Vesta with your own hands without visiting a service station, then additionally buy:
| Name / catalog article | Price, rub.) |
| PTF 261500097 | From 3000 (kt) |
| —/— FCR220029 | —/— |
| Blocks with wires for PTF 8450006983 | From 13000 |
| Left bracket 8450006277 | From 260 |
| Bracket right 8450006276 | —/— |
| Steering column switches 8450006924 | From 6500 |
| Electronics unit 231A08052R | From 3300 |
| Wiring 8450030715 | From 20000 |
*price indicated as of 02/02/2019.
The total cost, excluding payment for services at a service station, is 45–50 thousand rubles. Installation of fog lights in a workshop - from 60,000 rubles.
One of the problems that the master faces during the installation of the basic version of the Lada Vesta is the new electrical equipment circuit. It is different from Lada Granta, Kalina, Priora.
Standard control of fog lights is implemented via the steering wheel paddle. The activation signal does not go directly to the fog lights, but to the EMM control module. After which the unit redirects the signal via the CAN bus. Installing headlights according to the described scheme is complex, costly, and not always understandable for an inexperienced driver. An alternative and simpler option is to install fog lights using a separate circuit using a relay.
Lada Vesta Pluto › Logbook › Part 2. Installation of Wesem PTF in Vesta “Comfort”
Hello everyone, the link to the first stage is here! Be sure to check it out!
Well, I’ll continue my story about fog lights in Vesta Comfort. I’ll try to describe everything in order.
1) First of all, I removed the 5-button module from the car and brought it home. It is very easy to dismantle, even without special plastic keys for disassembling the interior. An old Gazprom plastic card helped me with this. I examined and unscrewed everything that could be unscrewed.
Next, I lifted each of the buttons and disconnected them from the body.
There are 2 more screws under them. We unscrew them and disconnect the latches. This is what the button block looks like disassembled.
We take the board from Igor and insert it into the case. The scarf is made of very high quality, everything fits like original. We install new pushers and insert the springs from the kit. We assemble in reverse order. Don’t forget to sharpen the stops on the desired button with a file that prevent pressing.
2) Install the PTF into the brackets. By the way, this is a different story. When I was preparing for installation, I read on the Internet that self-tapping screws with a press washer would be great for this task, but as it turned out, the diameter of the holes turned out to be larger than the diameter of the self-tapping screw. Arriving at the auto shop, they offered me a single self-tapping screw that fit perfectly (photo of the self-tapping screw in the first part).
3) Electrical diagram. I reviewed a bunch of options, reviews, descriptions, relay characteristics and concluded that I will not use a 4-pin relay, since the RZPTF can handle a load of up to 20A. By the way, I installed a 20 A fuse (I forgot to mark it on the diagram).
4) Preparation of the wiring began with taking dimensions. Since there are 3 control wires going into the interior of the car (a button, a button indication and an enabling wire), I took them with a reserve (3 meters each, and the remaining meter was useful for connecting to the TsBKE). The wire cross-section is 0.75 mm, it could be smaller, but I couldn’t find it here. I measured the wires for connecting the PTF (1.5 mm) locally. By the way, the screws with the ground are located next to the fog lights.
Well, in general, having measured out all the wiring and laid it out on the floor, I took up the corrugation, electrical tape, modelin and began making wiring harnesses.
Well, then a soldering iron, rosin solder and tips. Unfortunately there are no photos of the harnesses, as I went to try them on and installed them haha.
I decided to run the wiring harness under the top bar of the radiator frame (under the hood latch). The wiring went perfectly and discreetly. By the way, the mass screws are nearby, and there are plenty of possibilities to secure it. I secured the tourniquet with black ties.
The control wire harness was routed from the engine compartment into the passenger compartment through the seal in the engine shield (through a puncture). I removed the enabling wire from this harness and connected it to the size wire on the car. I brought the remaining wires to the block with buttons and connected them through the pins from the kit that Igor sent.
Wiring diagram
Preparatory stage:
- set of automotive tools, screwdrivers;
- rags, plastic spatula;
- fog lights, wiring kit, limit switches, 4-pin relay, insulation;
- elastic clamps – ties for electrical wiring;
- 16 A fuse for replacement in the fuse box;
- plastic corrugation of at least 5.0 meters.
Sequence of actions for connecting Lada Vesta fog lights:
- We install the car within the perimeter of the repair area, provide safety measures, and secure the rear row of wheels with wheel chocks.
- We gradually unscrew the top, middle, bottom row of screws.
- We remove the side clamps from the grooves.
- We remove the front bumper assembly and fix it on a workbench for ease of work.
- Using a crown (diameter 76 mm), we drill the left and right holes for the PTF. If you purchased ready-made brackets, then install them and secure them with three self-tapping screws.
- We lay the wiring under the plastic buffer amplifier and clamp it with clamps. Screw the buffer into place.
- We lay the cable to the fuse block.
- We install a mechanical button in the interior. The location is determined at personal discretion. We bring the limit switches to the fuse and relay block.
- We take the load power from a 12 V battery. We connect the control “plus” from the side lights or the cigarette lighter. We install the relay in the cabin under the dashboard above the pedal complex.
- As an alternative option, a steering column switch from Renault Duster with a fixed engagement is installed (article 8201167981).
With this scheme, the fog lights are activated when the headlights and low beam are turned on.
There is a third activation method: using a pulse relay, using the steering column switch, which are equipped with the Standard and Comfort versions. Installation work is carried out exclusively in the cabin, outside the engine compartment.
How to choose the right headlights and materials for them?
The highest quality indicator is the original set of headlights produced by the Valeo brand (code: FCR220029). These devices cost 3 thousand rubles. for a couple.
If this price scares off the buyer, then you can choose products from Dlaa, and they are almost half the price. If you want to install xenon versions of PTF, you should study in detail the experience of the owners and material on this issue.
Important! You should not be inclined to buy cheap options, since their quality is far from ideal, and cases of melting are not so rare.
The next important elements of the kit are the mounting brackets. For two products you will have to pay about 700 rubles.
Now let's look at the other products included in the kit:
- button to turn the headlights on or off;
- relay;
- cables with a plastic corrugated sheath and connectors for switching;
- fuse (current – 16 A).
For the indicated set, sellers will “ask” about 600 rubles.
You should also additionally purchase a lining for the PTF. For 2 pcs. the owner will have to part with 800 rubles.
In general, purchasing a PTF set will require a budget of at least 5 thousand rubles. All of these products are available in the warehouses of most online stores, which makes the purchase a quick process.
Review of Manufacturer Prices
| Name / catalog article | Price, rub.) |
| FranceCarFCR220029 | From 1500 |
| Autostol63261500097R | From 2300 |
| Valeo 47401 | From 4300 |
| Valeo 02539 | From 3300 |
| Bracket for fog lamp 657845163 | From 250 |
| Facings - frames | From 1000 |
| DLAA | From 1300 |
| Tune-auto (body) | From 890 |
| Wesem | From 2000 |
| LED bulbs in fog lights | —/— |
| Valeo | From 4000 |
| Lens | From 5000 |
| Rear fog lamp Lada Vesta 2191-3757010-20, size 223 * 12 mm | From 650 |
*prices are as of 02/02/2019.
Recommendations for selection
When purchasing, check the catalog numbers with the actual data specified in the instruction manual. Get advice from service center specialists regarding the compatibility of the PTF with your car model.
Check the presence of the barcode, date, batch number, and integrity of the packaging. Ask managers to provide you with quality certificates for products.
Conclusion
Installing fog lights on a Lada Vesta with your own hands is not difficult. Difficulties most often arise when connecting the electrical component rather than installation.
Before connecting the limit switches, be sure to disconnect the terminals from the battery to prevent a short circuit in case of incorrect connection.
Reviews are positive and negative
| № | Positive |
| 1. | Gennady , 32 years old, St. Petersburg: I bought the basic version of Vesta, I installed the PTF myself with a friend. There is nothing difficult about it, we did it in half an hour in total. |
| 2. | Kirill , 29 years old, Moscow: I traveled for two years without fog lights, it was very difficult in bad weather. I installed it at a service station, it was expensive, but the cost is worth it. |
| 3. | Vasily , 41 years old, Volgograd: bought the car second-hand, the previous owner installed a PTF. They illuminate well, cover the roadside, and visibility is good. |
| 4. | Dmitry , 45 years old, Samara: after a year of using Vesta, I realized that it wouldn’t work without additional lighting. I installed it myself and finished it in 20 minutes. |
| 5. | Alexander , 42 years old, Saratov: I bought Vesta in its basic configuration a year and a half ago. The car is good, but installing additional accessories is expensive. In particular, the fog lights cost me more than 45,000 rubles. |
| 6. | Ivan , 39 years old, Uralsk: my positive review of the PTF Autostol63261500097R, which I bought at a local store. Good price-quality ratio, warranty from the manufacturer. |
| 7. | Vyacheslav , 50 years old, Krasnodar: I don’t use the car very often, but I realized that I can’t do without additional headlights. Autumn time, often foggy, visibility is limited. I bought FranceCarFCR220029, my recommendations. |
| 8. | Alexey , 32 years old, Sevastopol: I bought a Lada Vesta in the basic version and decided to install fog lights. As it turned out, there was nothing complicated, there was more uncertainty. |
| Negative | |
| 9. | Vladimir , 32 years old, Moscow: I bought a car in a luxury configuration with PTF. I am dissatisfied with the quality of lighting, I plan to install Valeo 47401. In thick fog, visibility is still limited, despite the low landing. |
| 10. | Sergey , 33 years old, Samara: I drove for six months on factory fog lights, the quality is not very good. If possible, I will replace it with foreign analogues. |
| 11. | Kirill , 38 years old, St. Petersburg: garage mates recommended installing Autostol63261500097R instead of factory headlights. The cost of Autostol is one and a half thousand more expensive than the factory analogue, but the quality is obvious. |
| 12. | Valentin , 42 years old, Rostov-on-Don: I drove Vesta for six months, the car is good. There are not enough fog lights, weather conditions have worsened, visibility has decreased. I have selected several options: Valeo 47401, Autostol63 261500097R, I will choose and consult with specialists. |
| Video - Installing fog lights | Video - Installation without intervention in the ECU |
What kind of lamps are installed on Vesta from the factory?
Halogen light sources have not yet sung their swan song. At least on VAZ cars, and on all imported public sector cars as well. With proper adjustment, good care and careful selection of lamps, standard headlights without any modifications can shine quite informatively and no worse than foreign cars
It is important that the engineers took care not only of the visually pleasing modern architecture of the head optics, but also of the possibilities for its configuration and maintenance. For example, in order to replace the low beam, high beam, clearance or daytime running lights lamps, you do not need to completely dismantle the headlight, as was the case with the tenth family or Kalina
Lamps of the following base standards and power ratings were installed on Vesta from the factory:
- low beam lamp with H7 base 55 W;
- for high beams, lamps with an H1 socket of the same power are used;
- side lights and daylight - W21/5W;
- PY21W lamps with an orange bulb are used for the direction indicator.
As for the brands of lamps, Osram Bilux, a Mayak lamp or General Electric, as well as Phillips could be installed from the Vesta factory as a source of low or high beam.
