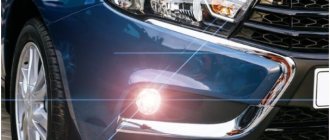
Each VAZ vehicle, including the Lada Granta Liftback, is equipped with a passive protection device - a standard immobilizer. This is a digital chip that transmits radio frequency signals to the electronic control unit when the door is activated by turning the key in the ignition core.
Car alarm function - passive protection
If the frequencies do not match or the mechanism does not work correctly, the car cannot be opened or the engine started.
There are frequent cases of system hacking and theft of technical equipment. In order to increase the level of safety, many motorists install active means of protection - multifunctional alarms.
The range of secret police vehicles is wide, but not all are compatible with the Lada Granta Liftback due to design features and technical characteristics. In order to provide methodological assistance, we will consider the algorithm for self-installation of an anti-theft system using the example of a Lada Granta Liftback car.
The best alarm systems for Lada Granta Liftback
Selection of car alarms for Grant
Technical characteristics by which “anti-theft” are classified:
- Manufacturer: Magnum, Pandect, Pandora, Scher-Khan, Sheriff, StarLine, iCode;
- Type of communication: one- and two-way;
- Autostart;
- Signal coding;
- CAN – module;
- GSM – module;
- Turbo timer;
- Sensors
| Name | Characteristics |
| StarLine Twage A91 | Car alarm (hereinafter referred to as “AS”) is a two-way type, with a pre-installed auto-start function, a built-in GPS module. Favorable price/quality ratio. |
| Scher-Khan Magicar 5 | The speaker is a two-way type, with a preset timer for starting the engine, locking the doors while driving. As well as a number of other options, including: “Panic” and “Call Driver”. |
| StarLine A93 | Two-way speakers, pre-installed GSM module. Signal reception range 300 meters. Additional option “Call driver”. |
| StarLine A94 | Two-way speaker with a pre-installed option to block the car at a distance. What will help in case of theft. |
| StarLine A93 CAN+LIN | Function of remote autostart of the motor at a distance, control of double-glazed windows. Range of action 800 meters, multi-level shock sensor. |
| DAVINCI PHI-350 Dialog | Budget class anti-theft with pre-installed feedback. Minimum set of functions, silent arming mode. |
| StarLine Twage A61 | Possibility of remote engine blocking. Range up to 1500 meters. |
| Scher-Khan Magicar 4 | Programmable start of the power unit, door locking, temperature sensor. |
| Pandora Deluxe 1870 | Signal reception range up to 1800 meters, built-in alarm clock, multi-level protection sensor. |
A93 2can-lin – lada granta lux 2021. conflict with standard ... / starline a93, starline a63 / starline
Good afternoon.
Recently installed the A93 2CAN-LIN GPS-GSM system.
Car – Lada Granta LUX 2020
The purchase and installation was carried out at the only branded installation center in Volgograd.
After installation, a problem emerged - when disarmed, the system does not open the doors. At the same time, the standard system is activated (the car horn and the immobilizer indicator on the panel turn on). Alarming the standard system and opening doors is possible only with the standard key (fob).
Wherein:
* if autorun was performed, no “side effects” are observed
New Lada: Step-by-step replacement of the Grant alternator belt with your own hands
* when arming, the interior light does not turn off.
* When arming, only the windows of the front doors are raised. or rear ones, but provided that the front ones were also lowered. If only the rear windows were lowered, they will not close.
* when arming, the doors close in a “strange mode” - the doors close. The engine turns off, the doors open and close again.
PS (exactly the same Granta of the same year and in the same configuration is considered as a standard. With a similar Starline system. Installed there a year ago. All of the above functions work fine - there is no conflict with the standard system, all windows close independently, the interior lights turn off , the doors are locked in one step and not in 3)
The installers updated the CAN firmware to the latest available at that time - nothing has changed.
It was assumed that the instrument cluster firmware was incorrect, but as it turned out, the firmware was the same (2190 v43)
At the moment, installers shrug their shoulders with the words “this is AvtoVAZ”….
But as far as I know, “it is AvtoVAZ” that has certified Starline and sells it in branded showrooms in branded packaging. Those. this argument is not very convincing.
Tell me what can be done?
Review of Manufacturer Prices
| Name / article | Cost, rub.) |
| Convoy XS-3/65263 | From 1100 |
| Sigma SM-50 65873 | —/— |
| Sigma SM-55 65875 | —/— |
| CYCLON X7 LC 216877 | —/— |
| CYCLON X5 LC 172924 | —/— |
| DaVINCI PHI-100 168541 | From 1500 |
| DaVINCI PHI-130 208766 | —/— |
| Convoy XS-4 178593 | —/— |
| RS C-800 179291 | —/— |
| Convoy XS-6 10469 | —/— |
| RS C-815 179292 | —/— |
| Convoy XS-7 68605 | From 1650 |
| Convoy XS-6 22847 | —/— |
| SPY SA1/LT150+LT302 43670 | —/— |
| Sigma SM-300 PRO 57602 | —/— |
| SHERIFF APS-2400 20237 | From 1800 |
| SHERIFF APS-2600 1210 | —/— |
| EX C169 178833 | —/— |
| Sigma SM-700 208628 | —/— |
| DaVINCI PHI-370 209797 | From 2000 |
| ALLIGATOR A-LIGHT 236831 | —/— |
| Viper 3100 154251 | —/— |
| Eaglemaster E4 LCD 170182 | —/— |
*prices are current as of October 14, 2018.
How to activate immo?
Activating the immobilizer is a procedure that many of our compatriots encounter. An activated immobilizer will be able to fully perform the functions assigned to it.
How to properly activate a node:
- First you need to close all the doors, then turn on the ignition, but to do this, use a red training key. Wait at least six seconds; if the immo is not activated, the corresponding indicator should appear on the device.
- Remove the learning key.
- Then, within five seconds you need to turn on the ignition with your working key. Having done this, you can hear the immo making beeps, there should be five of them in total. If there is no sound, there may be several reasons - either you did not meet the time limits, or the working key is configured to work with another device, or the node is not working.
- Next, turn off the ignition and remove the key.
- Then you need to quickly turn on the training key again while the car is blinking (you have no more than six seconds). Five beeps should sound again - 3 and 2.
- Now turn off the ignition, but do not remove the key. Another beep should sound. When this happens, within 6 seconds, turn on the ignition for 3 seconds, no more, then turn it off, and the key can be left in the lock.
- After these steps, three more signals should sound, but the key does not need to be removed. Wait at least ten seconds before removing the key. If for some reason the system was not activated, the procedure must be repeated.
New Lada: Comparison of Renault Symbol 1.4 and Lada Granta (2011-2018) 1.6 (106 hp)
Alarm connection points on Lada Granta Liftback
| Chain | Color | Polarity | Location |
| 12V | Pink | + | Egnition lock |
| IGN_1 | Blue | + | —/— |
| Start | Red | + | —/— |
| 12V | Pink | + | Ignition relay |
| 12V | Blue | + | —/— |
| Turn signals | Blue/black | + | Threshold |
| Gasoline pump | Grey | + | —/— |
| End cap | Red Green | — | |
| Handbrake | Brown/blue | — | |
| End cap | Red Green | — | Dashboard |
| Handbrake | Brown/blue | — | |
| Trunk | White black | — | |
| Tachometer | Brown/red |
How to connect the alarm yourself?
Now, armed with knowledge, you can connect the alarm itself. It’s worth noting right away that in Grant the manufacturer installed a stock limit switch only on the driver’s door. For the other three doors you will have to buy limit switches separately. We immediately buy connectors for them. You will also need to purchase about 11 m of medium-thick wire and an Alfa 12V siren (bell).
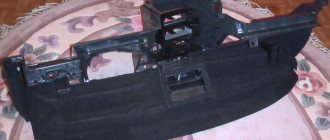
We install the siren and limit switch in the engine compartment. Through the plug, which is located near the engine, we pass the wire coming from the bell and limit switch into the passenger compartment. The main block of the protective system is located behind the Lada instruments. To do this, remove the steering casing and the dashboard trim. We must place a service button on the bottom strip of the fuse panel, and the shock sensor is also installed there. It is best to install the transmitter/antenna above the rear view mirror. On the left pillar, as is customary among car enthusiasts, there is an LED indicator. The next important step is to connect the main unit to the ignition switch. The rest of the work concerns the automatic opening of doors in the car.
We extend the wiring to all doors of your vehicle. Now we connect the electric drive to the central locking. Granta has an electric drive, but the manufacturer chose not to connect it, so you will have to do it yourself. We look at the connection points of the Lada Grant, assemble the connector and connect the wiring. We pull the wires into the cabin through the corrugated door tube. We connect all connectors. At the same time, you need to connect the wires in the remaining doors.
Now you can start testing the new security system.
Reviews
| № | Positive |
| 1. | Victor: after purchasing the car, I immediately ordered the installation of an anti-theft device. The service recommended StarLine A93. Budget option, basic set of functions. It works properly, no complaints. |
| 2. | Kirill: I installed the alarm myself for the first time, everything worked out, it works. The process is not difficult, I advise you to try it. |
| 3. | Vladimir: I bought a security guard at a car store, the manager advised me to buy a budget assembly from StarLine A93. I've been using it for six months and it works well. |
| 4. | Vyacheslav: after buying the car I used the standard immobilizer. Two months ago I installed the StarLine A93 signaling system. The quality is good, the price is affordable, my recommendations. |
| 5. | Sergey: I installed a Pandora Deluxe 1870 security system on the car. Despite the budget price, the quality is quite decent. |
| Negative | |
| 1. | Kirill: I don’t recommend installing various types of budget alarms. Duration of operation is six months to a year, after which replacement and repair. It is better to choose more expensive models from American manufacturers. |
| 2. | Ivan: negative review about Pandora Deluxe. I installed it six months ago at a service center, but yesterday it broke down. I couldn’t get into the car, so I called a team of specialists. |
| 3. | Alexander: I don’t recommend anti-theft from StarLine. Budget model, service life only one year. I won’t install it again, I’ll buy it more expensive. |
Connecting the signaling to the central locking system
Now we get to the most interesting part. The contacts of the signaling relay must be connected to the gap in the brown wire (see diagram in Chapter 1). Moreover, this will be required regardless of the configuration. Oddly enough, we won’t need power cables at all. And the task now looks like this: you need a two-wire signal cable connected to the break in the brown cord.
Preparing for connection, completion
The moral here is:
- If you were able to remove the central lock control unit, connect the cable to the break in the wire connected to pin “7” of the control unit;
- If you have removed the door trim, then pull the cable out of it (from the point where the brown cord breaks).
It is clear that the second side of the cable must reach the relay connector of your alarm.
Option for the “Lux” package
So, this means that there is a button on the armrest in the cabin that allows you to lock the locks. From one of the contacts of the button, to which a “plus” is applied when pressed, you need to stretch the cord to the signaling unit. Nothing else is required, and you can connect the alarm according to the following scheme:
Scheme for the “Lux” configuration
According to reviews, this option is suitable if we are talking specifically about the “luxury” configuration. By the way, the resistor can be connected to the gap in the wire designated “blue” (the common contacts are then connected with a jumper).
It must be remembered that when working with any electrical equipment, you must first remove the negative terminal from the battery.
Each cord that is re-laid must not touch metal surfaces. Otherwise, in places of contact, the wire is protected with a tube that can withstand temperatures of 250 degrees. This is how you can protect yourself from unforeseen consequences.
Option for the “Norma” configuration
Let's say there is no button in the cabin that allows you to perform emergency closing. Then you need to connect the signaling to the central locking system according to the following scheme:
Scheme for the “Norma” configuration
As you can see, unlike the first option, there are no resistors here, and positive voltage is not used at all. But in the luxury configuration the effect that is characteristic of this scheme will not be observed:
- We perform closing from the key fob - all locks are locked;
- We try to open the locks with the key fob - only the driver's lock unlocks.
If you are satisfied with this property, try to implement the scheme in practice. And other options, more advanced, look much more complicated.
Read what is said about installation safety in the previous chapter. Do not neglect the advice about disconnecting the negative terminal. We work only with signal circuits, so nothing will fail even if connected incorrectly. However, be careful not to confuse the locking and unlocking relays, which are located in the alarm unit. This unit is usually equipped with a 6-pin connector (for details, see the signaling manufacturer's instructions).