07/15/2021 37,567 VAZ Priora
Author: Ivan Baranov
Like any modern car, the Lada Priora is equipped with dozens of various sensors, the functioning of which determines the condition of the main vehicle systems. Diagnostics of the machine for errors allows you to detect all sensor faults in order to eliminate breakdowns. Now you will learn how Priora error codes are deciphered and how to independently diagnose the on-board computer (hereinafter referred to as BC).
[Hide]
How to check errors on Prior yourself
It’s terribly useful to do both the first and the second, and the third is basically “oil”! This is how you can cure any patient - disconnect the oxygen, go for a smoke, you come.
and he smokes too!
These are messages about factory testing of BOSCH 7.9.7+ Euro3 KSUD, as far as I understand. Try this: 1. Starting position: ignition off, battery on. 2. While holding down the daily mileage reset button, turn on the ignition. All positions of familiarity areas (segments) should light up on the LCD, which indicates the start of self-testing. 3. Press any of the on-board computer control buttons. The LCD should display the program version (Ver 1.0 and higher). 4. Press any of the control buttons again. The following error codes (if any) should be displayed on the positions of the first and second lines of the LCD:
2 – increased voltage of the on-board network; 3 – fuel level sensor error (if a break in the sensor circuit is detected within 20s); 4 – coolant temperature sensor error (if an open circuit of the sensor is detected within 20 s); 5 – error of the external temperature sensor (if there are no sensor readings within 20 s, the indication on the LCD is “-C”); 6 – engine overheating (the criterion for triggering the acoustic alarm is met); 7 – emergency oil pressure (the criterion for triggering the acoustic alarm is met); 8 – defect in the brake system (the criterion for triggering the acoustic alarm is met); 9 – the battery is discharged (the criterion for triggering the acoustic alarm is met); E – error detection in the data packet stored in the EEPROM.
5. If necessary, you can reset error information. To do this, press and hold down the daily mileage reset button for 3 seconds. 6. Press any of the control buttons again. All positions of the familiar areas (segments) should light up on the LCD - the system has returned to the state of point 2. 7. If you do not press any control buttons for about 15-30 seconds, the panel goes into operating condition.
Where did you see the zero? I’m curious. You had or have the following errors: 3 – fuel level sensor error (if an open circuit of the sensor is detected within 20 s); 4 – coolant temperature sensor error (if an open circuit of the sensor is detected within 20 s);
5 – error of the external temperature sensor (if there are no sensor readings within 20s, the indication on the LCD is “-C”
; Resetting does not cure. Before resetting, we always read what happened. If there are repetitions of the same mistakes, you need to figure it out. Anyone who thinks that by resetting he is curing something is simply an idiot.
To check instrument panel error codes, you need to enable test mode. To do this, you need to press the daily mileage reset button and, without releasing it, turn on the ignition. All familiar positions should light up on the liquid crystal display (LCD), and the arrows of the tachometer, speedometer, coolant temperature indicator and fuel level indicator should move from minimum to maximum values and back. The serviceability of the LCD and the above sensors is visually checked.
Press any key to switch functions of the on-board computer (BC). The program version is displayed on the LCD.
Press the BC function switch button again. The LCD should display (if present) the following error codes:
2 – increase the voltage of the on-board network,
3 – fuel level sensor error*,
4 – coolant temperature sensor error*,
5 – error of the external temperature sensor (if there is no sensor reading within 20 seconds, indication on the LCD is “-C”),
6 – engine overheating**,
7 – emergency oil pressure**,
8 – brake system defect**,
9 – battery is discharged**,
E – detection of an error in a data packet stored in EEPROM.
*- if an open circuit of the sensor is detected within 20 seconds
**- the criterion for triggering the acoustic alarm is met
If necessary, you can reset error information. To do this, press and hold down the daily mileage reset button for 3 seconds.
The next time you press any of the BC control buttons, all familiar positions should light up on the LCD - the system has returned to its initial state.
If you do not press any control buttons for approximately 30 seconds, the instrument panel enters the operating state.
The electronic control unit and on-board computer in modern car models help the driver quickly find a fault. But to understand electronics, a motorist must be able to decipher codes. In the material you will find a table with all the errors, as well as explanations of the most common codes: 1602, p0504, p0422, p1558. You will also learn how diagnostics are performed.
Battery disconnect method
Disconnecting the battery is an old way to reset the check engine light. Here are three steps to clear the check using this method: Step 1: Disconnect the cables from the battery. At this point, you should use a wrench to unscrew the positive and negative cables.
Step 2: Discharge the remaining electricity. The next thing you should do is press and hold the car horn for about 30 seconds. This action will help drain the car battery.
Step 3: Wait and reconnect the battery. After disconnecting the battery cables and draining the remaining electricity, all you have to do is wait about 15 minutes and then plug the battery back in. Error codes will be cleared. (Note: This method may not work on some vehicles.) If after this procedure the “check” lights up again, this may mean that the problem is still much more serious.
Diagnostics
Priora diagnostics can be carried out at any service station. This allows you to identify problems with the engine, namely the culprit of the problem. It will help save money, time and effort to find the cause yourself or at random.
Such engine scanning at a service station is carried out with an expensive and advanced scanner, which is quite expensive. Checking the Priora ECU for errors in a specialized service will cost from 1000 rubles and more.
What's the result?
Ease of use and accessibility allow adapters for the diagnostic connector to significantly simplify the procedure for checking a car, reading and decoding ECU errors. It is also worth noting that the error can be quickly reset without having to disconnect the battery terminals, erase a critical error, etc.
Finally, we would like to add that among the commercially available adapters, there are devices that may not read errors recorded in the ABS unit and Airbag airbag modules. In other words, information on these items may not be available. For this reason, before purchasing an adapter, it is necessary to separately clarify the possibility of reading errors from the memory of the above and other ECM modules by one or another device.
Lada Priora Station Wagon *
* › Logbook › Useful information on how to view errors on the on-board computer
Error codes that can be accessed through the standard BC:
Starting position: ignition off, battery on. While holding down the daily mileage reset button, turn on the ignition. All positions of familiarity areas (segments) should light up on the LCD, which indicates the start of self-testing. Press any of the on-board computer control buttons. The LCD should display the program version (Ver 1.0 and higher). Press any of the control buttons again. The following error codes (if any) should be displayed on the positions of the first and second lines of the LCD:
2 — increased voltage of the on-board network; 3 — fuel level sensor error (if a break in the sensor circuit is detected within 20 s); 4 — coolant temperature sensor error (if an open circuit of the sensor is detected within 20 s); 5 — error of the external temperature sensor (if there are no sensor readings within 20 s, the indication on the LCD is “-C”); 6 — engine overheating (the criterion for triggering the acoustic alarm is met); 7 — emergency oil pressure (the criterion for triggering the acoustic alarm is met); 8 — defect in the brake system (the criterion for triggering the acoustic alarm is met); 9 — the battery is discharged (the criterion for triggering the acoustic alarm is met); E - error detection in the data packet stored in the EEPROM.
If necessary, you can reset error information. To do this, press and hold down the daily mileage reset button for 3 seconds. Press any of the control buttons again. All familiarity positions (segments) should light up on the LCD - the system has returned to the state of point 2. If you do not press any control buttons for about 15-30 seconds, the panel goes into working condition.
Note:
* – an error is registered if within 20 seconds. a sensor break is detected; ** – an error is registered if within 20 seconds. The actual sensor data is not recognized (indication on the LCD is “— °C”); *** – accompanied by an acoustic signaling device. 1. Acoustic alarms. All acoustic indicators are displayed only when the ignition is turned on and if certain criteria are met. If several criteria are active in parallel, the alarms should be displayed in the sequence of their arrival one after another with a pause of 1.5 to 2.5 seconds. 2. Engine overheating. Criteria: coolant temperature display ≥ 115°C. Alarm: constant sound for 5 seconds. Termination: The coolant temperature gauge drops to ≤ 110°C. Repetition: The coolant temperature gauge drops to ≤ 110°C, then rises again to ≥ 115°C. 3. Emergency oil pressure. Criteria: engine speed ≥1000 rpm; The “oil pressure” input is active for 10 seconds. Alarm: constant sound for 5 seconds. Termination: Oil pressure input not active or speed ≤ 900 rpm. Repetition: Oil pressure input active, speed dropped to ≤ 900 rpm and then increased again within 10 sec. ≥ 1000 rpm. 4. Brake defect (front brake pad wear indicator). Criterion: the “brake defect” input is active for 10 seconds. Alarm: 0.5 sec on/0.5 sec off 5 repetitions. Abort: Brake defect input is not active. Repetition: “Brake defect” input active for 10 sec. 5. Low batteries. Criteria: speed ≥ 1000 rpm, “battery” input active for 60 seconds. Alarm: 0.5 sec on/0.5 sec off. 5 reps. Termination: Battery input not active or speed ≤ 900 rpm. Repetition: The battery input is active and the speed has dropped to ≤ 900 rpm and then increased again within ≥ 60 sec to ≥ 1000 rpm. 6. Seat belts are not fastened when the ignition is turned on. Criteria: Ignition on, seat belts not (yet) fastened. Alarm: 0.5 sec on/0.25 sec off/0.25 sec on/0.25 sec off, 5 repetitions. 7. Fuel reserve. Criterion: the fuel reserve indicator is turned on. Alarm: 0.25 sec on/0.25 sec off, 2 repeats
6.2.2 Self-diagnosis system and fault codes
6.2.2. Self-diagnosis system and fault codes
Hand-held scanners are the most convenient and versatile devices for checking engine control systems on later models.
OBD-I systems (pre-1995 models)
The electronic control unit has a built-in self-diagnosis system (On Board Diagnosis (OBD) system), which serves to troubleshoot the system and turns on the engine warning light on the instrument panel if a malfunction is detected. The fault code is stored in the memory of the electronic control unit and is available for reading.
Reading fault codes for OBD-I systems
To read the fault codes stored in the memory of the electronic control unit, connect the STI and GND terminals of the diagnostic connection connector.
Connect a voltmeter to the STO terminal and vehicle ground. Turn on the ignition and count the number of times the gauge needle deflects or the check engine light blinks. For example, code 34 will be displayed as 3 long flashes of the light, pause, 4 short flashes.
Clearing OBD-I DTCs
To clear fault codes, disconnect the negative battery cable and depress the brake pedal for more than 5 seconds.
OBD-I DTCs (1993-1995 models, except 1994 and 1995 models with 4-cylinder engine and automatic transmission)
OBD-I Trouble Codes (1994 and 1995 Models with 4-Cylinder Engine and Automatic Transmission)
OBD-II systems (models since 1996)
Diagnostic connector for connecting the OBD-II system
The connector is located under the instrument panel on the driver's side.
Models since 1996 have a second-generation OBD-II self-diagnosis system. Access to the electronic control unit of this system can only be obtained using a special scanner, which must be connected to the 16-pin diagnostic connection connector located under the instrument panel. If a malfunction is detected, the electronic control unit turns on the warning light on the instrument panel and stores the malfunction code in memory.
Reading OBD-II System Trouble Codes
To read OBD-II system fault codes, use a special scanner, which must be connected to the diagnostic connector. If you don’t have a scanner, you need to contact a specialist.
Clearing OBD-II DTCs
To clear OBD-II system fault codes, you must use a special scanner.
Error 0422
The efficiency of the Priora 16 neutralizer has fallen below the normal level - this is what error p0422 reports to the owner of the Lada Priora 16 valves. As practice shows, codes 0422 pop up quite rarely. If code 0422 appears on the on-board computer screen, then you need to perform the following steps:
- We examine the catalytic collector. Its body and filling must be in good condition;
- If damage is found, the catalytic collector should be replaced with a serviceable one;
- If the catalytic converter is not the cause of the message, then the remaining actions to eliminate p0422 must be entrusted to specialists from the service center.
To get rid of 0422 you will need to reflash the cathode collector. If you have the equipment to set the settings, you can do the work yourself.
How to fix the problem
To resolve the error, do the following:
- Check the sensor for functionality. If it breaks, you simply need to replace it.
- Make sure there is no plaque on the contact. If it is there, you need to clean it.
- Check the operation of the on-board circuit and make sure that it has contact.
- A random error can only be corrected by flashing the on-board computer, but to do this you need to go to the nearest service station.
So, you can solve this problem yourself, however, as practice shows, this does not always work out. It is worth noting that this code often appears in winter, if the car has been standing outside for a long time and not in the garage. It is noteworthy that it does not matter which engine is installed - 16 valves or 8 valves.
Do-it-yourself diagnostics
Various breakdowns of sensors and other devices can cause increased gasoline consumption, incorrect engine operation, and increased wear of car system components. Despite the presence of errors, the VAZ Priora will drive until the driver has to make expensive repairs because of them.
VAZ Priora car
So that the motorist does not suddenly have to face the need for repairs, a special controller is installed on the VAZ Priora, with the help of which the driver can diagnose breakdowns. This can be done either using special additional equipment or an on-board computer installed in the car.
In fact, to carry out diagnostics, the car owner will only need to press a few buttons and count combinations of faults.
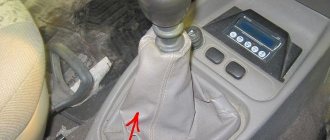
For example, you do not have a special tester, so we will look at diagnosing the vehicle for errors using the on-board computer. The BC is built into the dashboard and can be used to read combinations of faults. To do this, you need to activate the auto test mode.
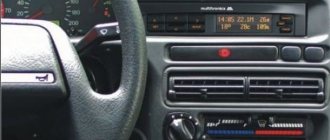
The arrows on the dashboard move to maximum values when performing self-diagnosis of the vehicle
- First, turn off the ignition. After this, hold down the daily mileage reset button and turn on the ignition. Please note: the button must be held down.
- There is an LCD indicator on the vehicle's dashboard, keep an eye on it. When you turn on the ignition, all icons will begin to light up, and all arrows (speedometer, tachometer, antifreeze temperature sensor, gasoline level status) will begin to move to the maximum values and back. That is, if all the arrows behave as described here, this means that the sensors and indicators are functioning correctly.
- Now you need to find the button for switching BC functions - it is located on the right steering column switch. By clicking on it, the software version (1.0 and higher) will be displayed on the screen.
- Click on this button again. Combinations of faults will begin to appear on the screen. If necessary, you can reset error data here. To do this, press and hold the daily mileage reset button for about three seconds.
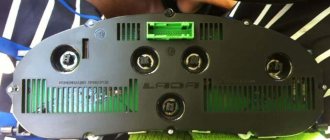
The appearance of a fault combination on the LCD screen during self-diagnosis
Allow the check engine light to go off on its own.
Wait until the “check” goes out on its own. The simplest method because you don't have to do anything. The computer system in most vehicles will automatically recheck for problems that may activate the error light. If it is a minor problem, it will automatically correct itself and the check will go off. However, if the check light is still on after three days, you need to apply the methods mentioned above to reset it.
If this continues to happen despite the following reset procedures, you should take your vehicle to your nearest auto repair shop and have it diagnosed by a professional mechanic. Professional diagnostics use more sophisticated tools and can identify precise problems.
REMEMBER: You can always contact our car service center, where your car will be happy to receive professional technical assistance. You can also make an appointment with us for a scheduled technical inspection! Please familiarize yourself with our car repair and diagnostic services.
Content
Tachometer, speedometer, on-board computer indicators, light bulbs - all this is represented by the Priora instrument panel. The “tidy” is designed to display the current state of various Lada Priora systems. An experienced motorist will immediately notice that one of the components requires repair; a certain icon will inform him about this. If you are a novice driver, then it will be useful for you to study the Lada Priora dashboard. This material provides a detailed description of each element of the tidy.
An example of diagnostics using the ELM327 scanner
Below is an example of diagnosing a car with a scanner from AliExpress on version 1.5 using an Android phone and the OpenDiag application on a Lada Priora.
All manipulations with scanning the ECU must be carried out with the engine running or with the ignition on.
We connect the scanner to the OBD-2 connector and wait until the indicators blink.
Next, go to Settings/Bluetooth on your phone. There we find OBD II and pair it with it. When pairing, the device will ask for a password code - 1234 , this code is the same for all scanners.
The next step is to go to the OpenDiag application. Click on the menu button, select the connection type and check the Bluetooth ELM box.
Next, click on the button in the upper right corner and select our device, in this case OBD II. After this the connection will occur.
The connection process is complete, then you can speed up the application itself and familiarize yourself with its functions.
The process of diagnosing a Lada Priora car using an on-board computer
First of all, you need to know how to reset the parameters using the button to reset all daily mileage indicators. It is located on the instrument panel. You must press this button and, while continuing to hold it, you must simultaneously turn on the ignition using the key. Using these steps, you will be able to see all the error codes that have occurred and are available. Before displaying a list of error codes, the vehicle's autonomous self-diagnosis is enabled.
At this time, at the beginning of the diagnostic process, all arrows on sensors and instruments should show a jump from the minimum to the maximum indicator, at the same time at this moment all the necessary indicators and errors for checking the car should be shown on the liquid crystal display.
If at this moment any arrow does not show the correct movement or any position on the display does not appear, then you need to check the sensors and systems of the car for errors. Also, do not forget to check the display itself for faults, because A situation is possible when the car is working correctly, but errors are shown on the display solely due to the separation of any contacts.
Now, in the same mode of self-checking the car, you need to double-click any button that is responsible for switching the operating mode of the on-board computer. After these steps, certain numbers should appear on the on-board computer’s LCD screen. These are the Lada Priora error codes.
Error code
Decoding
What to do if the Lada Priora check engine light is on
There is an interesting icon on the Priora instrument panel. Upon closer examination, it is clear that this is the silhouette of a car engine. Every experienced driver, looking at him, will casually say, “Ahhh, Check.” But at the same time he will not be able to clearly explain what kind of “Chek” this is, and what it serves and why it caught fire.
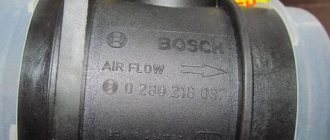
You can hear many interesting versions. The most common one is that if it lights up, this is a signal of a breakdown of the mass air flow sensor (mass air flow sensor). Well, and a dozen more equally exotic versions. So what is this alarm? And in what cases does it light up? And most importantly, what to do in this case?
PRINCIPLE OF OPERATION OF CARS WITH ECM (ELECTRONIC ENGINE CONTROL SYSTEM)
Cars with conventional carburetor engines have been replaced by cars in which fuel enters the cylinders through a system of nozzles (injectors). And sparking occurs not in the distributor (distributor), but in a special ignition module. This rather complex system is controlled by a special intelligent unit. You could say it's a computer. It is he who sends signals to trigger all actuators. Therefore, the entire ECM system can be divided into three parts.
- Computer (ECU).
- Actuators (injectors, spark generators, etc.).
- Sensors (Air, oxygen, throttle opening, crankshaft position, etc.)
PURPOSE OF THE CHECK ENGER WARNING LAMP ON PRIOR
What does the “Check” indicator light have to do with this system? The most direct. The fact is that this lamp is directly connected to the ECU (electronic control unit). This warning light comes on when the ignition is turned on. This gives a signal that the main unit is ready for operation. After starting the engine, after 2-3 seconds, the lamp goes out. This means that the motor and all devices are operating normally. And you can safely continue moving.
IF THE LIGHT IS ON
But when the warning light does not go out while the engine is running, or lights up while driving, this means that one of the computer-controlled components is not working correctly, or has generally failed. Literally, “Check Anger” means check the engine.
It is a mistaken opinion that the “Check” lights up when one sensor breaks down. You need to know that this signal can appear for a very large number of reasons! In general, if you read it correctly, from English, this signal, “Check Angier,” means “Check Engine.”
HOW TO DIAGNOSIS THE ECM
Of course, the most correct action if the “Check” signal lights up on the instrument panel is to go to a service center for diagnostics. There, through a special adapter, a desktop computer or laptop equipped with a licensed program will be connected to the Priora ECU. And they will be able to “talk” to the Priora ECU.
However, at the moment, small mobile devices have appeared in the car accessories market. Of course, they are not able to conduct a full-scale diagnosis of the Priora. But they are quite capable of reading error codes from the ECU memory. Then you just need to decipher the codes correctly. This is the case if the diagnostics provides them in digital format. In this case, you can turn to the Internet.
THE MOST COMMON REASONS WHEN THE CHECK ENGER LIGHT COMES ON ON A PRIOR
But the Priora has the most common breakdowns. To begin with, it is worth listing the main sensors included in the Priora ECM.
- Mass air flow sensor (MAF).
- Throttle position.
- Camshaft positions.
- Crankshaft.
- Knock sensor.
- Oxygen sensor (2 pcs.).
- Speed.
- Rough road sensor.
And also the actuators can make the “Check” light up.
- Idle air control (IAC).
- Fuel injectors (4 pcs.).
- Ignition modules (4 pcs.).
- Canister valve.
- Electric fuel pump.
All these components are activated through the computer, and therefore, if their operation fails, the “Check” light immediately lights up.
MOST COMMON ECU ERRORS THAT CALL THE “CHECK LIGHT”
In the first place, of course, there will be malfunctions of the oxygen sensor. These devices are installed in the exhaust manifold (sensor No. 1) and after the fuel afterburner (catalyst), No. 2. They read the percentage of CO content in the exhaust gases. Due to soot from burnt fuel, they most often deteriorate. The car begins to lose power, the “Check” light comes on. After all, the computer receives a signal that there is too much fuel.
Alas, it is only possible to accurately determine the reason why the signal may have come on using software diagnostics.
On the second place, the mass air flow sensor deservedly stands. A thin thread made of a special alloy changes resistance depending on the amount of air passing through the nozzle. The malfunction is characterized by severe engine malfunction. The revolutions “float”, the power drops, and, of course, the “Check” light comes on. And also checking only with diagnostics through the program.
And the camshaft sensor closes the top three. Its malfunction is characterized by an increase in startup time. Sometimes there may be slight jerks when accelerating. Again, there is no way to determine a breakdown without a program.
PRIORA ACTUATORS
Here in the first place is the IAC, a device that regulates the supply of additional air bypassing the throttle valve. It works by means of a micromotor that extends and retracts the shutter mechanism. If there is a malfunction, the engine will not start at idle. Or, conversely, it increases the speed to 1500-2000. "Check" lights up
Then the ignition modules. When it fails, the motor “troubles” and the speed “floats”. Power is lost. And as a result, the “Check Anger” icon lights up.
Faulty injectors give similar symptoms. It is interesting that all breakdowns of actuators, with certain skills, can be diagnosed without a computer. At least they will make the “Check” signal light up. This is done by either replacing it with a known-good unit, as with IAC, or by replacing it in places, as with ignition modules or injectors. And only the adsorber valve requires connecting equipment.
So what can we say. There is only one conclusion. If the “Check” indicator light on the instrument panel lights up, you need to do computer diagnostics in any case. This is the surest way out.