Substitute devices
The main reason for battery failure is its discharge.
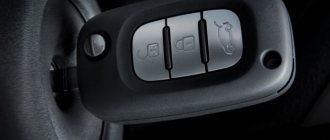
When the Lada Vesta battery runs out, the owner will face another problem - he will not be able to open the door, since it is opened with a key remotely.
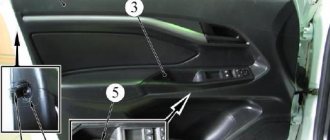
For such a case, a keyhole is provided in the driver's door handle body, hidden by a special plug. Once inside the Lada Vesta, you can open the hood and gain access to the faulty unit.
The rear view camera for the new Lada can be produced by other manufacturers, the main thing is to choose the most suitable device. When choosing, the following points are taken into account:
- The recommended viewing radius should be at least 170 degrees. Otherwise, there is a possibility that the display will not show objects that could cause a collision. A similar parameter is indicated by the manufacturer in the operating instructions.
- Minimum light level to obtain a high-quality image. Reversing at night occurs when the environment is insufficiently illuminated, and a flashlight does not help much to solve the problem. Only high-quality models provide good picture quality in the dark.
- The most important parameter is the resolution of the video camera. It determines how high quality the resulting image will be. Due to the small size of the device, it is almost impossible to provide high resolution.
- Availability of backlight. It can significantly improve the quality of the resulting image when shooting at night or in fog. However, such a device cannot be installed correctly in all cases.
- The temperature amplitude determines whether it is possible to use the camera in certain conditions. The recommended range is -40 to 70 degrees Celsius.
- Degree of resistance to moisture or dust. When making the case, plastic is often used, which does not react to environmental influences. A high degree of protection eliminates the possibility of oxide and corrosion, which can cause the device to fail.
There are a large number of different Chinese models on sale, most of them have attractive properties. It is worth considering that a low-quality rear view camera for a car will not last for a long period.
Malfunctions and repairs
The Lada Vesta rear view device is not characterized by high protection from environmental influences. SV Cross also has a similar drawback. In some cases, the original camera may fail after washing. Among the features of this case, we note the following points:
- As a result of poor waterproofing, water can get inside the structure, and this will lead to the appearance of oxide.
- To solve the problem with the formation of oxide, you will have to disassemble the entire system and dry the contacts, and then clean the surface of the resulting oxide.
Some problems cause the image to appear black or white. It is displayed if the multimedia device program crashes. If all contacts and devices do not have obvious defects, then the algorithm of actions is as follows:
- To reboot the multimedia system, press the reset button.
- RDS mode is selected in the device settings. It allows you to use hidden settings.
- Among the information that appears, you need to highlight the one that is related to the version of the installed firmware.
- Resetting to factory settings is carried out. This is done taking into account the fact that all settings will have to be set manually.
If the device stops working in cold weather, then there is a possibility of frost and snow appearing on the surface. Long-term use in such conditions can cause the appearance of oxide. When disassembling and cleaning the surface, you need to provide high-quality insulation, which will eliminate the likelihood of the problem reoccurring.
Sequence of actions if the battery on a Lada Vesta runs out
If Vesta's battery runs out, the first problem the car owner faces is the inability to open the door using the transmitter. The manufacturer took into account the possibility of such a situation, so it provided the possibility of getting into the cabin with a low battery.
Removing the decorative cover
First you need to remove the decorative plug. There is a groove at the bottom. By using it to pry the cover with the ignition key, it can be removed. When dismantling the plug in the cold, you should be careful, as the plastic is very fragile and breaks easily.
After removing the plug, the car owner will have access to the lock. Any dirt should be cleaned off with a rag.
The lock
The ignition key is used to open the door lock. If the machine cannot be unlocked, the cylinder should be treated with penetrating lubricant. In cold weather, you may need to warm up the lock or use special defrosting equipment.
Opening the door using the ignition key
If the battery is discharged, it will not be possible to close the doors in the normal way using the central locking system. The locks of all doors except the driver's are equipped with a special groove with a closing button.
Groove location
- Having found the groove, you need to insert the ignition key into it.
The ignition key is inserted into the slot
- Press the key down. Down button. If you slam the door, it will close.
Door ready to close
Using the above method, all three doors must be closed. The driver's door is locked with a key.
To start the power plant with a discharged battery, it is recommended to use a ROM. The starter-charger must be connected observing the polarity. The car can be turned off after 30-40 minutes. During this time, the discharged battery will have time to partially restore its charge.
The process of charging a dead battery
If you have a charger, starting the engine is possible either with or without removing the battery. Charging with rated current is preferable, but will take much longer. Increased current will speed up the process, but will negatively affect the battery life.
22 Jul 2019
Modification of the trunk and external trunk opening button for VAZ 2110, 2111, 2112
Modification of the trunk of VAZ 2110, 2111, 2112
After changing the trunk lid, it became too heavy and began to open poorly. There are many solutions to this problem, but a friend suggested the easiest and fastest way. It is necessary to tighten several turns of the spring with nylon ties. I pulled five turns on each. After this procedure, the trunk bounces like a young one.
The ties are not particularly noticeable; the spring is covered with a boot and looks neat. Certainly. It would be better to use black zip ties.
Since we're on the subject of the trunk, I'll show you another small life hack. If the trunk lid dangles when closed, and, in my opinion, it cannot help but dangle, you should wrap a little electrical tape around the lock bracket. The play disappears completely, the trunk will close more quietly.
If the electrical tape is of high quality, it lasts for a long time; I reapply it about once every six months.
External trunk opening button VAZ 2110, 2111, 2112
Installed an external trunk release button. Recently I had to remove the rear reflector and glue the reflector to the base substrate. At the same time, I installed a trunk lock control button. This need is long overdue after the seven-year operation of the 111 station wagon. The button is placed in the middle of the metal grab handle - it doesn’t interfere with your fingers, and it’s convenient to press.
Button in reflector
The button is a little exotic - a VK-2 piezo button (zaotexkom.ru/production/piezo/), it was possible to embed an ordinary (waterproof) one into the plastic bulkhead, but since the button had been waiting for its place and hour for a long time, it was installed. It has one remarkable property - the pulse duration is limited to 1 s when pressed and held for a long time. The wires were brought out through the rubber seal of the license plate illumination harness. Then through the left rubber corrugation of the trunk lid into the interior and along the pillar to the left rear lights. It was immediately decided that the wire from the button would go to the alarm module, i.e. to the console area. All the switching and blocking is there. Connection and blocking.
1. The power relay for opening the trunk lock is controlled by the negative alarm and nothing prevents it from being fully activated.
2. Blocking is perhaps the most important and responsible part of this idea. After some thought, I settled on the option of two-level blocking. The button is active if TWO
conditions are met - the car is disarmed
AND
the driver's door is unlocked.
In my opinion, this is enough, the functionality and ease of use of the button is not compromised. The criterion is this: if there is access to the salon, the button is active.
3. Implementation - just
ONE
additional low-current miniature (12V) relay and diode. All.
The button switches the relay winding to negative, +12 is applied to the winding when disarming. In my case, this is the radio control channel. The control “Minus” is taken from the microswitch (MS) of the driver’s door actuator; a diode is needed to decouple the circuits. If he drives. the door is unlocked (position “Open” MP) when the relay is activated, it passes minus to the winding of the lock power relay. The lock works. Over 10 days of operation, no mutual influences were detected. In principle, they should not have existed, because... I first thought through the circuit, then assembled and installed it.
Rules of service
A good battery lasts at least three years. Therefore, if the battery is discharged before this period, you should not immediately run to the store to buy it. It is recommended to check the charge level first. Batteries often lose capacity due to improper maintenance, temperature fluctuations and other factors.
Proper maintenance involves checking the catholyte level, its volume and operating temperature. This is best done using a hydrometer. If the density of the liquid is below normal - in winter 1.25 g/cm3, in summer - 1.29 g/cm3, distillate is added to the batteries being serviced.
A load fork can help. It should be connected for 5-6 seconds, and if the voltage shows more than 9 volts, then everything is fine with the battery. Such a device is either purchased ready-made or made independently from 6 lamps with a power of 55 watts.
Why does the Vesta trunk not open with the key fob?
The remote controlled system is quite complex and may fail to function. The main reasons why the trunk of a Lada Vesta cannot be opened using the key fob:
- The electric drive fuse has blown;
- the lock is loose or clogged;
- The batteries in the control panel are low;
- the supply wire is broken or broken;
- The control unit is broken.
You can try to unlock the door with the remote control by holding the button for 3 seconds. If this action does not help, then the lock is adjusted according to the manufacturer's instructions.
The trunk can be opened with the key fob. Photo source: https://www.youtube.com/watch?v=B9qSDTPevlE
It must be remembered that the opening of the Lada Vesta trunk is blocked if the engine is running.
Features of the standard camera
The standard video camera can expand the viewing angle to 170 degrees.
It is simple and can last for a long period, the image is transmitted to any display. Features are as follows:
- The matrix is photosensitive, color.
- The housing protection is organized according to the IP 67 standard. It determines the high resistance of the device to high moisture and dust.
- The viewing angle is 170 degrees. This indicator is typical for most rear view cameras.
- The operating temperature range varies from -30 to 70 degrees Celsius.
- 12V voltage is supplied for power supply. It is used to power various elements of the vehicle, so there are no difficulties with connection.
- The device is capable of generating parking lines on the image, which significantly simplify vehicle parking.
The original camera is produced under the ParkCam brand. If installed correctly, it can last for a long period.
Solution
In this case, you can simply install an additional spring in the trunk of the Lada Vesta. This option is the simplest and cheapest. It was demonstrated by one of the Drive participants, Sergei Akulov, known in the community as Seliter, using his Lada Vesta as an example. This method involves purchasing and installing an additional spring.
The spring from the VAZ-2101 is perfect.
According to the author, he bought a spring from the handbrake of a VAZ 2101 (“Kopeyki”), which can be found in any car store. Then all that remains is to install it. To do this, remove the standard spring, insert the purchased one directly into it, which clings to both edges of the standard spring. This allows you to strengthen the factory one.
In the end, all that remains is to adjust the spring. For example, Seliter set it to 3 clicks, thanks to which the Vesta trunk lid opens completely. However, you can set it so that it opens only 50%. This is a matter of taste.
Video in which the spring opens the trunk completely
In addition, he noted that one additional spring quickly stretches and after a week stops opening the lid completely, which forces him to install a second one on the other side.
And in this story the lid opens only halfway
Of course, this method cannot be called a full-fledged solution to the issue, but as a temporary measure it is more than suitable.
How to charge the battery?
You can revive the battery or recharge it in several ways:
- from another car - lighting a cigarette;
- using a charger;
- pusher or towing.
The most reliable and correct way is to use a memory. It is extremely important to monitor the charging process - the jars should not boil. Even on a hermetically sealed battery, this chemical process can be easily identified by hissing and gurgling. A high-quality charger automatically controls the state of the electrolyte and voltage, alternating high and low charging current. Cheap Chinese chargers do not know how to do this, so the owner must monitor the process himself in order to turn off the 220 socket in a timely manner.
Reasons for discharge
On the 2021 Vesta, released in the Luxury trim level, there is a factory mistake - self-discharge of the battery. The manufacturer himself points out this problem and recommends taking such actions. Swap certain contacts, which will automatically update the software version and reset all electronic unit errors. But it is better to entrust this procedure to specialists, especially if the car is still under warranty.
On other vehicle configurations, battery discharge is possible due to something else. For example, many owners, contrary to the ban, install high-power halogen lamps or simultaneously turn on fog lights with optics. The battery quickly loses capacity due to unnecessary additions. Unfortunately, no matter how new a domestic car is, it is far from being a foreign car. Therefore, you should always try not to load the electrical system.
Other common causes of discharge:
- crooked installation of electrical-related equipment;
- regular driving at speeds 1 and 2;
- frequent movement over short distances within 30 km - while using many electrical appliances at the same time (powerful acoustics, heated steering wheel and seats);
- cold weather and lack of thermal insulation of the car hood.
A neighbor showed how for 70 rubles he brought his Lada Vesta closer to the premium segment
Welcome to the channel! German Alexandrovich is with you.
Lada Vesta is a raw budget car. It may be good if we take into account only domestic cars. But there are a lot of shortcomings in it. And that's a fact.
Take, for example, opening the trunk. I don’t argue, there is a corresponding button on the key fob and it works. Not like in Kalina. And the trunk opens. Well, how does it open...
The lock unlocks. And then lift the lid with your hands. This is not a premium segment for you, if you bought a budget car, you will suffer.
In wet weather, when the body is dirty, you don’t want to touch it at all.
The dealer, of course, has a ready-made solution for installing an electric drive for the trunk lid. But the price of this kit is far from “budget” - for a sedan it’s about 32,500 rubles, plus installation costs 5-10 thousand.
Once I saw in my neighbor’s yard that his trunk opened on its own. And I know him well, he will definitely never spend so much money on such things in his life. His wife will saw him to death.
I became interested, and I came up to ask what was what.
It turns out that he read it on the forums and made this modification a long time ago.
I'm telling you.
You need to spend only 70 rubles by purchasing 2 clutch fork springs from a VAZ-2101 “classic”. The spring number is 21011602155. They are sold at any car market. Next we work with our hands. Last time. Down with manual opening!
- We remove the covers from the standard West springs in the trunk.
- We insert a regular cord into the lower ear of the purchased springs.
- We push each small spring into the factory one. We hook the upper ear to 14 - 15 turns of the West spring. You will need pliers here.
- We hook the ears of the clutch springs to the coils of the large springs.
Almost done. The trunk now opens on its own. It might even “shoot”. The main thing here is not to overdo it. Otherwise you will be left without glass or you will bend the lid.
You need to adjust it for yourself. It's very simple, move the main spring into special slots in the mounting bracket. The neighbor put the left one in the second groove (if you count from the lanterns), the right one in the third.
How to install
Installing a camera on a Lada yourself does not require the use of special tools. Self-installation allows you to save significantly on costs. The instructions for carrying out the work are as follows:
- To gain access to the element in question, you must disassemble the rear trunk door. The casing is attached with bolts and clips, so there are no problems with disassembly. If a non-original camera is used, then you have to change the mounting location for the new device.
- The wires are connected in the direction of the lamp wiring. Laying the power cable together will eliminate the possibility of damage.
- In the absence of the required circuit, you can identify the cable responsible for reverse with a multimeter.
- The camera is connected using special chips. Therefore, there are no problems with carrying out the work. If missing or defective, you can purchase them at a specialized store.
Those who installed a new audio system or carried out other similar work have no problems. Over time, corrosion and oxide may develop on the surface and cause display problems.
Connection
It is best to connect the installed button on the trunk lid of the Lada Vesta to a parallel button, which is located in the sedan interior.
The connection is made to a standard key
In this case, 2 wires are connected to 2 wires (yellow and black), which go to the factory button from the fuse box. Moreover, there is no need to solder - just buy terminals.
Installing a button on the trunk lid of the Lada Vesta will significantly increase the comfort of using the luggage compartment.
The result of the work is shown in the video.
How to connect
The wiring on Vesta is designed for long-term operation. Therefore, you can install the camera yourself. The recommendations are as follows:
- The cable can be laid on any side of the body. It is recommended to use plastic waterproofing corrugation, which will reduce the likelihood of damage to the wiring.
- The connection is made using special chips. When connecting them, you need to choose an installation location that is not exposed to influence.
- At the time of connection, attention should be paid to the condition of all contacts. This is due to the fact that oxide in most cases causes signal loss.
There is no problem connecting the camera to the Lada. On sale you can find a large number of adapters that are cheap.
Connection
The easiest way to connect the button on the trunk lid is parallel to the button located in the cabin. We connect the two stretched wires to the black and yellow wires that go from the fuse box to the standard button. In order not to disturb the electrical wiring of the car, you can use quick connection terminals (without soldering).
After this modification, you can open the trunk on Vesta without a key, simply by pressing a button (provided that the car is open).
By the way, instead of a button you can use a sensor (more details):
If there is no trunk release button in the cabin, but there is one on the trunk lid
. We install a button in the interior instead of a plug. We pull the wire from the button to the TsBKE unit (aka BCM), connect it to the contact of connector S2 and the ground of the car. Only the trunk lid can prevent it from opening under its own weight.
