03/17/2021 10,607 VAZ 2110
Author: Ivan Baranov
A modern car includes many complex devices, instruments and components. During operation, they wear out and require either repair or replacement from time to time. The article examines cases when it is necessary to remove the gearbox and provides instructions on how to remove it from a VAZ 2110 car.
[Hide]
Repair manual for VAZ 2110, 2112, 2111 (Lada 110)
You will need: keys “10”, “13”, “17”, a large screwdriver with a flat blade.
Place the vehicle on a lift or inspection ditch. Raise the engine hood and lock it in this position. Before removing the gearbox, disconnect the wire from the “–” terminal of the battery, drain the oil from the gearbox and remove the starter (see “Removal and installation” in the “Starter” subsection).
1. Disconnect the clutch cable from the clutch release fork and remove it from the bracket on the box (for more details, see “Replacing the clutch cable”).
2. Disconnect the block with wires from the speed sensor by squeezing the spring clips.
3. Remove bolt 1 securing the ignition module bracket to the gearbox and two bolts of the upper mounting of the gearbox to the engine. Bolt 2 (front of the car) is short, bolt 3 is long.
4. From the bottom of the car, disconnect the block with wires from the reverse light switch.
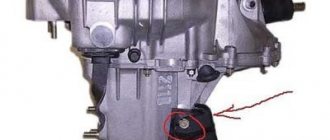
5. Two bolts securing the torque arm to the gearbox.
6. Loosen the bolt of the gear shift rod clamp and disconnect the rod from the gear selector rod hinge by sliding it back.
7. Remove the wheel drives (see “Front Wheel Drives”). Tie the plug inserted in place of one of the drives with a rope or wire so that it does not fall out when removing the box. The right drive does not need to be completely removed. It is enough to disconnect it from the gearbox and, moving it to the side, hang it from the body.
8. To make it easier to remove the box, unscrew the two fastening bolts and disconnect the left ball joint from the steering knuckle (for more details, see section 6 “Chassis”, subsection “Replacing the ball joint”).
9. Unscrew the nut of the lower right mounting of gearbox 1 to the engine (engine side)
Please note that on models with a fuel injection system, a support bracket 2 for the intake pipe is installed under this nut, which must be removed from the stud
10. If necessary, loosen the upper nut securing this bracket.
11. Unscrew the three fastening bolts and remove the lower cover 1 of the clutch housing 2.
12. Remove the bolt from the lower left mounting of the gearbox to the engine.
13. Hang the engine using a hoist or board (for more details, see Section 4 “Engine”, subsection “Removing and installing the engine”).
14. From the bottom of the car, unscrew the nut securing the left power unit support.
15. Unscrew the two nuts securing the rear support of the power unit to the body.
16. Unscrew the two bolts securing the rear support of the power unit to the gearbox, holding the nuts with a second wrench from turning, and remove the support.
17. Inserting a screwdriver between the clutch housing and the cylinder block, slide the gearbox off the guide bushings. Be sure to hold it while doing this.
18. Move the gearbox as far back as possible, passing the rear cover of the box over the front suspension brace (the input shaft should disengage from the clutch). If the input shaft cannot be disengaged from the clutch, push the engine to the side. Lower the front end of the box and remove it from under the car.
19. Install the gearbox in the reverse order of removal. For more details on installing front wheel drives, see “Front Wheel Drives”. After installation, fill in oil, adjust the clutch release drive (see “Adjusting the clutch drive”) and the gear shift lever (see “Adjusting the gear shift control drive” in the “Gearbox” subsection).
VAZ 2110 gearbox device
The Volzhsky Automobile Plant's 10th series vehicles are equipped with a five-speed manual gearbox. It is two-shaft, has five gears for forward movement and one reverse gear for reverse. The main gear, differential and the gearbox itself are combined in one housing. When connecting the crankcase to the cover, it is possible to seal it with a gasket or sealant that is resistant to gasoline and oil.
The two-shaft system is represented by a primary and secondary shaft. The first is a block of driving gears, the second contains driven gears that provide forward movement. The two groups of gears are in constant mesh. The secondary shaft parts can be removed for replacement or repair.
The secondary shaft is made empty inside to lighten the weight of the structure. At the locations of the gears there are circular grooves that ensure the supply of lubricant to the surface of the shaft during operation. The rotation of the fifth gear gear is carried out through the bushing. The shaft splines are used to install synchronizer hubs. The shafts themselves are installed in the box body on bearings - a pair of roller bearings on one side and a pair of ball bearings on the other.
The differential uses two satellites. The pretension of the bearings in it can be adjusted by changing a special ring from thick to more or less thin. This ring can be found under the outer differential bearing cover. The speed sensor is connected to a plastic gear located on the gearbox housing, which, in turn, is driven by the drive gear on the differential housing.
When driving on a bumpy road, the engine experiences vibrations, which, if the rubber dampers are worn out or sagging, can lead to displacement of the gearbox shafts. This can result in unpredictable transmission disengagement when the gears on the two shafts become disengaged. To compensate for such vibrations, a reaction rod is provided in the connection between the gearshift handle support and the gearbox housing. It is equipped with a rubber gasket to dampen vibration from the engine, which causes the gearshift lever to shake.
You can read more about the clutch design in a car here: https://vazweb.ru/desyatka/transmissiya/sceplenie.html
You can find out how much oil is in the gearbox by checking the dipstick. According to factory standards, the gearbox holds 3.5 liters. If the oil level drops, it is necessary to add it, otherwise accelerated wear of the gears can lead to breakdown. Technical regulations require routine oil changes every 90 thousand kilometers.
Malfunctions
Every car owner with experience begins to feel a malfunction in the car’s gearbox based on characteristic signs. Most gearbox breakdowns are associated with wear of rubbing parts, because they experience constant significant load while driving. However, such wear rarely reaches a critical state immediately. This is usually a gradual process, which is why a novice driver is always advised to learn to “listen” to the car. The sooner you notice a problem, diagnose it accurately and fix it, the less repair work will need to be done and the less it will cost.
It is recommended to regularly check where the vehicle is parked for stains to monitor leakage of technical fluids.
You can classify signs that indicate breakdowns as follows:
- Noise in manual transmission. This may be a crackling, knocking, rustling, grinding, as well as beating of the gear shift lever. Knocking can occur during different phases of the box's operation. An experienced motorist can even determine from such a rustle which parts are at risk. For example, noise when a car turns into a turn indicates wear on the differential gears.
- Gears are hard to engage. In addition to the wear of parts of the gearbox itself, the malfunction may also lie in the clutch. In addition, there is a risk of deformation of the gearshift control rods. Remember that plastic parts break much more easily than metal parts.
- Spontaneous “dropping out” of the gear while driving. Over time, gear teeth become chipped and worn down, becoming shorter. The slightest vibration disengages them and the transmission “flies out”. In this case, it is also necessary to check the engine mounting.
- A sharp click and loss of smoothness when changing gears. If the clutch is working properly, then the cause of such a problem is most often the failure of the synchronizer blocking ring of the desired gear.
- The box “eats” a lot of oil. Increased oil consumption is primarily a leak. It can occur through a depressurized crankcase, as well as worn oil seals, which are located on almost any hole in the box body.
Malfunctions also include rattling of the gearshift lever. More information can be found here: https://vazweb.ru/desyatka/salon/boltaetsya-rychag-kpp.html
Most of these faults cannot be solved in any other way than by replacing worn parts. The gearbox is close to the center of mass of the car and breaks down much less often than the engine or suspension.
Such gear failures cannot be eliminated in any way except by replacing the unit
Therefore, if something happens to it, repairs will definitely be required. In order to find out which wear parts cause noise or interfere with the smooth movement of the lever, you need to remove and disassemble the gearbox.
When and how often do you need to repair the gearbox on a VAZ 2110
(“Volzhsky Automobile Plant”) provides comprehensive information on when and how often the gearbox needs to be repaired. It turns out that this mechanism does not have a service life as such. The only thing AvtoVAZ engineers insist on is the timely replacement of transmission oil:
Accordingly, the plant does not have any specific wishes or requirements for preventive or repair work. However, in any case, regardless of the mileage, it is necessary to carefully monitor all the nuances in the “behavior” of the box, since repairs will be necessary if the slightest malfunction occurs.
Gearbox VAZ 2110 disassembled
VAZ 2110 gearbox malfunctions
The main and most common malfunctions of the VAZ 2110 gearbox include:
Let's talk in more detail about these faults and how to fix them
The transmission does not start
No, the transmission is on! This is probably the most common problem of the VAZ Ten. There can be many reasons:
In any of the above cases, you will probably need to overhaul the gearbox to identify the exact cause and subsequent repairs.
Knocks out gear when driving
The main cause of problems with the gearbox is excessive wear of the synchronizer, secondary shafts, looseness of the gearshift lever, or violation of the rules for fastening the gearbox and engine to the car body.
Repair usually comes down to adjusting the shafts, adjusting the rocker clamp; less often there is a need to replace synchronizers, and in very rare cases the flywheel needs to be replaced.
The process of repairing a VAZ 2110 gearbox
If the problem is not solved immediately after it occurs, after a couple of thousand kilometers (and sometimes several hundred kilometers are enough), the box may become unusable and cannot be repaired, but only completely replaced.
Crunching and grinding in the box while driving
There are many reasons why a crunching noise occurs when the VAZ 2110 gearbox is operating. Eliminating some of them does not require much intervention in the mechanism, while others require a near-overhaul of the box. Most often, the gearbox crunches when changing gears for the following reasons:
Above are only the most common reasons why the VAZ 2110 gearbox fails. At the same time, we should not forget about possible manufacturing defects.
The process of assembling a VAZ 2110 gearbox
Instructions for removing the gearbox
The procedure for removing the gearbox is labor-intensive and time-consuming. It’s easier to replace it with a VAZ 2110 by visiting a car service center, but you can do it yourself.
Tools
To carry out the procedure, you will need tools consisting of:
- a set of wrenches, socket or open-end wrenches;
- set of heads with extensions;
- flat screwdriver;
- mounts;
- pliers;
- jack;
- clean rags.
In addition, you should prepare a container to drain the used oil. You can use a plastic 5 liter bottle.
Tools should be prepared in advance so that they are nearby while working.
Sequencing
To remove the gearbox, you need access to the underbody of the car, so it needs to be lifted. This can be done using a lift, or driving the car onto an overpass or inspection groove.
Since the removal work is quite complicated, you will need an assistant.
The following video demonstrates replacing the clutch, the first step of which is removing the gearbox.
Removing the gearbox from a VAZ 2110 car consists of a sequence of steps:
- First, you should remove the engine mudguard (protection). To do this, use a socket wrench to unscrew the mudguard mounting bolts and remove the protection.
- Next, we dismantle the engine compartment shield on the right.
- The next step is to drain the oil from the gearbox. To ensure high-quality drainage of oil, it is recommended to warm up the engine before draining, allowing it to run for several minutes. Next, place a prepared bottle or other container under the drain hole and unscrew the drain plug.
Draining oil from the box
When the oil has completely drained, clean the plug and hole from dirt. Then screw the plug back. After draining the oil, you need to turn off the power to the car by disconnecting the negative terminal from the battery. Next, you need to dismantle the air filter: disconnect the hoses of the crankcase ventilation system, air supply and air flow sensor. The air filter housing is removed along with the throttle valve, sensor and hose. Then you need to remove the starter from the car. First you need to unscrew the nut that secures the tip of the clutch wire connecting the starter to the positive terminal of the battery. Next, you need to remove the tip from the contact bolt. Now you need to disconnect the traction relay control wire, unscrew the fastening nuts and remove the starter. At the next stage, we disconnect the clutch drive cable from the gearbox bracket and the gear shift fork. To do this, you need to pull the clutch cable out of the fork lever in the engine compartment. Then you should loosen the fastening nut of the cable sheath to the bracket on the gearbox. While holding the sheath, you can pull the cable end out of the bracket. Now you need to disconnect the wire connector from the speed sensor, as well as from the reverse sensor.
Disconnecting the reverse sensor connector
Next, disconnect the jet rod. It is attached to the buffer using two nuts. After unscrewing the nuts, remove the bracket. Now the rod can be dismantled. Now we disconnect the gear shift rod from the hinge. Then we tighten the fastening bolts on the clutch housing cover and remove the cover. Now we remove the wheel drives. A wooden plug should be installed on one drive to avoid any problems during installation. Moment of insertion of the plug into the hole
Then we remove the right drive, but you can simply move it to the side and not remove it.
To simplify the removal procedure, you need to loosen the ball joint bolts. After unscrewing the mounting bolts, you need to remove the lower crankcase cover. Then you need to unscrew the lower bolt securing the gearbox to the engine. Next, we hang the power unit using the prepared support. You can use a board as a support. After unscrewing the fastening nut, remove the left engine mount. Having unscrewed the nuts that secure the rear engine support to the body, and the bolts securing it to the gearbox, holding the nuts from turning, we dismantle the rear support. To move the box from the guide bushings, you need to insert a screwdriver between the cylinder block and the clutch housing. When moving the box, it should be held so that it does not rest on the crankshaft diaphragm spring. Due to significant load, the spring may become deformed, which will lead to malfunction of the unit.
How to repair a gearbox on a VAZ 2110
Adjustment does not always achieve the desired effect. Therefore, the motorist will need to carry out repair work. Practice shows that repairing a VAZ 2110 gearbox involves dismantling and reassembling the gearbox. Now I will tell you in detail how to do this.
How to remove/dismantle a VAZ 2110 box
How to remove the box? Before disassembling the gearbox, it must be cleaned. It is important that water does not get inside the box.
The process of filming from a regular location requires caution. That is why this procedure should not be carried out alone. Repair of a VAZ gearbox, its dismantling and assembly should be trusted to professionals. This will reduce the chance of damage to any components of the gearbox.
Video: Do-it-yourself dismantling of the VAZ 2110 gearbox
How to properly disassemble a VAZ 2110 gearbox
In order to disassemble the VAZ 2110 gearbox and carry out further repairs, you must perform the following steps:
Video: Instructions for disassembling the gearbox on a VAZ “Ten”
How to remove the gearbox on a VAZ 2110
Car repair is a rather complex and time-consuming operation, and it is usually entrusted to car service professionals. Certain machine components do not generally require dismantling and repair by the driver in a garage. However, repair services are becoming more expensive, and vehicles break down more and more every year. Owners of products from the domestic automobile industry are not yet deprived of the opportunity to troubleshoot problems in their “iron horse” on their own. Transmission breakdown is one of the common problems that cause headaches for the owner of VAZ cars. Today we will talk about how to remove the box on a VAZ 2110, diagnose it and carry out feasible repairs.
How to remove the box on VAZ 2110 and 2112? A couple of hours and you're done
Novice drivers often wonder how to remove the box on a VAZ 2110 and 2112. But this work may be required in a variety of situations. For some reason, there is an opinion that working with a car’s transmission requires a highly qualified auto mechanic. In fact, this is not entirely true; dismantling can be done by any beginner. But, at the same time, you just need to know the correct sequence of actions. This will not only allow you to remove the box faster, but will also save you from complications in the future. Today we will analyze how such work is carried out in practice, we will consider in detail all the nuances available here. How to remove the box on a VAZ 2110 and 2112 is a question that drivers ask themselves if there are obvious problems with this unit. In fact, there is nothing super complicated here. But, before starting work, it is better to carry out diagnostics so as not to remove the gearbox in vain.
Clutch adjustment on a VAZ 2110 after replacement
Setting up the transmission system will help to complete the repair efficiently. To do this, loosen the adjusting nuts on the cable. The clutch pedal will rise. We take a ruler and measure the distance from the front wall to the pedal in the cabin. The working stroke, regulated by the operating instructions, should be 120 mm (±5mm).
Press the pedal several times. Then, tighten the adjusting nut, simultaneously measuring the distance between the pedal and the wall. As soon as the desired value of 12 cm is reached, tighten the nut, holding the lock nut with another wrench. A similar adjustment operation, after replacing the clutch with your own hands, can be performed on a VAZ 2110 with a 16-valve engine.
Gearbox adjustment
It is not always necessary to remove it to get the box working properly. Although, if replacement of gearbox bearings or other repair measures is planned, simple adjustment is not enough.
Adjustment is required in several situations:
- Recently, the input shaft bearings were replaced on a VAZ 2110 or another type of repair with the mandatory removal of the gearbox;
- There is a constant overshoot of one of the speeds;
- The gears are switched slowly, poorly, or are knocked out directly while driving.
Which clutch is better to put on a VAZ 2110
Below are the most famous companies that produce clutches for the VAZ 2110, I suggest you familiarize yourself with them and make your choice.
KraftTech – there is no marking on the factory release bearing, but the thrust bearing is designated as X2200C; driven disk – Y 3200A B0206. Main features: four damper springs, there are 18 petals on the diaphragm spring. The box bears the designation: 2110 W3200C B2240.
Luk – the kit does not include a release bearing, its marking is: SKF 500 063820; the pressure plate is branded 2 D24 120 0252 10, and the driven disk is branded 320 030810. The latter has marks for precise orientation during installation. The driven disk has six springs, the basket has 18 petals. The side is last marked.
Valeo - marking is applied only to the bearing: Valeo SNR BB 126 18S50. The kit includes a mandrel for precise installation. The spring element of the pressure plate consists of 18 petals. There is a mark on the package - 21102-21103-21108-2111-2112 826622.
VIS - there are no marked parts, the only special sign is the approval mark - AYA70. The pressure plate spring has 12 lobes, the driven disk has 4 large and 3 small damper springs. On the box: 2110-1601180.
Pilenga - there are no markings or designations on the parts, but on the packaging it is noted: CK-P-4005 2110. The driven disk is equipped with 4 small and 4 large damper springs. The pressure plate spring includes 18 lobes.
FINWHALE and QML - smooth start of vehicle movement from a standstill; uniform movement of the car without jerking; the softness of the clutch pedal ensures comfortable driving and reduces driver fatigue; high safety properties make it possible to increase the service life of gearbox synchronizers and other transmission parts; predictable stable resource, reliability and durability; ease of installation, the clutch kit includes a centering mandrel and lubricant, it is possible to replace the clutch in the absence of special tools and materials, there is no need to buy them; and, finally, an excellent price-quality combination. High quality clutch kit at an affordable price.

