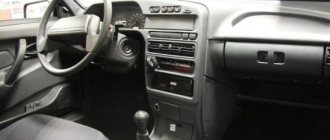
Appearance and location of the stove motor
The device is located in the middle of the so-called torpedo and is a small DC electric motor to which a fan protected by a plastic casing is attached. This motor has three operating modes and is designed to supply warm air to three zones: on the windshield, on the passengers’ feet, or directly into the cabin.
Heater motor of a VAZ 2114 car
Step-by-step replacement process
- Open the hood and disconnect the negative terminal of the battery.
- Behind the engine shield, unscrew the four screws securing the fan casing and remove it. Phillips head screws.
After removing the casing, remove the two screws that hold the fan housing in place.
Using a slotted screwdriver, open the latches and separate the plastic fan housing into two halves.
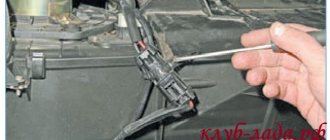
Disconnect the heater motor power supply terminal (it is located above the gas pedal).
Unscrew the nut by ten and remove the ground terminal of the heater motor (the terminal is located above the gas pedal).
After removing the wires, remove the fan along with the motor.
Unscrew the two screws and you will be able to remove the plastic casing.
- After completing the above operations, the fan and motor are free. We take a new fan and reassemble it.
The process of replacing the VAZ 2113, 2114, 2115 stove fan is clearly shown in this video:
When does the heater motor need to be replaced?
There are several signs that will tell a car owner that something is wrong with the heater motor. Here are the most common of them:
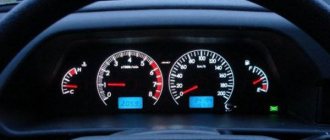
- When you try to turn on the stove, you cannot hear the hum of the motor, and this picture is observed at all three speeds.
- The motor supplies air at all speeds, but operates intermittently.
- The operation of the motor is stable, there are no interruptions in the supply of warm air, but instead of a uniform hum, extraneous sounds are heard, a grinding sound, which later develops into a piercing creak.
Important points
In order for the stove repair to proceed as quickly as possible, and its results not to disappoint the car owner, you should adhere to the rules below:
- When removing the old motor, be sure to turn it. If this is not done, part of its fastening may break and get stuck in the torpedo, or more precisely, in the mounting bracket. And getting to the stuck fragment will not be so easy.
- When tightening the mounting screws with a Phillips screwdriver, you should not use too much force: they are small, so the threads in their sockets can easily be stripped.
As practice shows, replacing an engine is not particularly difficult even for a novice car enthusiast if he has held a wrench and a screwdriver in his hands at least once in his life. The whole procedure takes 40–50 minutes maximum. The main thing is not to overdo it with tightening the fasteners, and everything will be fine.
How to replace the VAZ-2114 stove motor with your own hands
A warm interior is the key to good and comfortable travel by car. A non-working stove can not only cause discomfort, but also become an argument against further travel by car at all. It’s one thing when you came to the garage, noticed a non-working heater and refused to move further in the car during the breakdown, but if this breakdown caught you on the road, the nearest service center is far away, and it is not possible to drive a car with a non-working interior heater, because the windshield becomes covered with frost and further movement becomes dangerous. Then the only option left is to either transport the car using a tow truck, or try to fix it yourself.
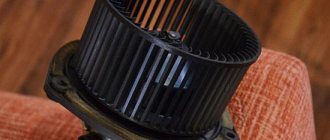
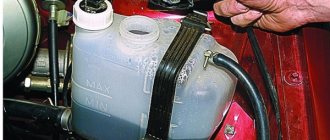
External view of the VAZ 2114 heater fan motor
Diagnostics
The primary task is to identify the cause of the breakdown and assess your own capabilities in a specific situation.
Let's start with something simple and move on to something more complex:
- We check the fuse (F-7 with a voltage of 30 A), which is responsible not only for the heating system, but also for the operation of: the cigarette lighter, heated mirrors, glove compartment lights, and headlight washers. Therefore, when this fuse blows, all of the above devices refuse to work. If it is working, we move further along the chain.
- Turn on the car's ignition and switch the speed control to positions 1, 2, 3 in order. If the fan does not work in any of these positions, we move on.
- If the electric motor does not show signs of life in the first and second positions of the speed switch, but starts working in the third position (the fan is powered at the first and second speeds through a resistor, and at the third speed the current flows directly to the electric motor), the problem lies in the resistor or in the motor itself. switch
- If the heater motor turns on after the car engine has warmed up, the problem is a faulty ignition relay. Solved by replacing the relay.
- If the heater motor refuses to work in any mode, there remains one malfunction - the heater motor itself.
The process of dismantling the fan motor
For the final verdict, let’s apply “+” directly to the motor by removing the positive wire terminal from the motor. If the motor does not come to life, the last thing you can try is to try to clean the place under the ground mount on the electric motor. Often this place oxidizes and the contact weakens.
Basic heating system malfunctions
If the stove stops supplying warm air to the cabin, or if this air is supplied with great difficulty, then the fan is not always to blame.
Thus, we can distinguish the following main types of malfunctions of the electrical component of the heater:
- fuse is blown;
- contacts in the common block have oxidized;
- The heater switch has failed;
- The additional resistor burned out.
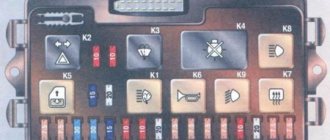
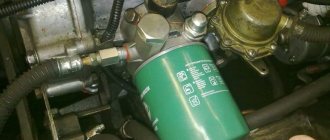
The first thing to start troubleshooting with is the fuse, designated in the general block as F7 and rated for an amperage of 30 A. It should be carefully removed from the block, ringed and, if necessary, replaced with a new one rated for the same current. .
VAZ 2114 fuse box
Since fuse F7 protects not only the motor of the VAZ 2114 stove, but also devices such as mirror heaters, glove compartment lighting and the cigarette lighter, then the failure of the fuse element can be judged by their performance.
The second thing that should be checked (if the fuse turns out to be serviceable) is its contacts at the point of attachment to the common block. If oxides or severe dirt are noticeable on them, they should be removed with a cloth moistened with VD or kerosene, or simply with very fine-grained sandpaper. Very often, such basic repairs can return the fan to normal operation.
Poor contact of the VAZ 2114 mounting block
The third step of checking should be the switch, for easy access to the contacts of which the center console should be removed. After this, you should take a device, which is a 12-volt car light bulb with wires soldered to its outputs, and alternately connect its “positive” wire to contacts 1, 2, 3 of the switch.
The negative wire must be connected to body ground, and the ignition must be turned on. If in all modes the light comes on with different brightness, then the switch is working; if not, it means it needs to be replaced.
Sometimes a faulty additional switch resistor is to blame for the stove’s incorrect operation, which can be indicated by the fan turning on only in mode 3.
Having checked all the specified components (as well as ringing all the wires connecting them), you should also check the motor of the VAZ 2114 stove. Very often, the same oxidized contacts are to blame for its inoperability, which should be cleaned in the same way as the contacts in the mounting block or soldered wires that need to be soldered.
We recommend: Choosing summer tires
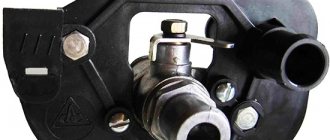
In order to check the fan for sure, it should be connected directly to a 12-volt voltage source - if its impeller remains motionless, then the device has failed and requires replacement.
How to remove the heater fan on a VAZ-2114
If none of the above brings success, then we will remove the electric motor of the stove; for this you will need a screwdriver and a small set of keys.
- Disconnect the terminals from the battery.
- There is a positive terminal and a negative terminal located in the cabin under the dashboard; they must be disconnected.
- Next, we move into the engine compartment of the VAZ-2114; the fan casing cover can be removed after unscrewing the four fastening screws.
- After opening the casing, you need to unscrew the two screws that secure the fan.
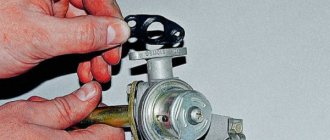
- Next, we unscrew the screws that secure the air intake grilles to the housing in front of the windshield. Let's take them off.
- Next, we remove the electric motor of the stove, since all its fastenings have already been removed. The fan is placed on a hook located on the body - move it towards you and lift it up.
- After removing the fan housing from the hook, you need to rotate it 90 degrees to remove it from the casing, or disassemble the heater housing for convenient removal.
- We disconnect the motor with the impeller from the casing.
- Remove the impeller from the motor.
- There are several further options: either replace the electric motor with a new one, or try to bring the old one back to life (if this is appropriate, for example, by replacing the brushes. If the winding is broken or there are problems with the armature, then it is better to replace the entire motor).
- Next, we collect everything in the reverse order, removing all the debris from the heater shaft.
New and old heater motor
After the work has been done, we enjoy the rustling of the heater motor, the warmth and comfort of our car. These simple tips will help you save money and continue your planned trip.
Why doesn't it work
There are several reasons why the propeller may not turn on when the temperature situation requires it:
- The electric motor of the fan, that is, the drive, has failed;
- The fuse broke and burned out;
- Relay failed;
- The wiring is broken;
- The sensor connectors have lost contact;
- The sensor has failed.
Finding the fault
| Problem search area | Explanation |
| Propeller check | The connector on the propeller is disconnected and connected directly to the battery. If the fan starts working, everything is fine with the drive. If the propeller still does not spin, the problem is in the electric motor. |
| Wiring and contacts | If the propeller does not work, you must check the condition of the wiring and make sure that the sensor contacts are working properly |
| Fuse | You can find these two elements in the engine compartment on the left, closer to the driver, inside the mounting block. The fan is supplied with a fuse designated F4 with a rated current of 20A. The test can be performed by pressing the horn button. Why? Yes, because it is also connected to this fuse. Or check with a tester |
| Relay | It is located in the same place as the fuse. For an effective test, it is best to take a relay that you are 100% sure is working, install it in place of the old one and check |
| Sensor | To test the sensor, disconnect power from it. If it works, the propeller will start working in emergency mode, that is, it will blow constantly. Disconnect the connector and turn on the ignition. If the propeller spins, then the sensor is broken. Need replacement |
When to change
If the fan itself is the cause of all the problems, it is not necessary to change it, since in some cases it can be repaired. Failures are often associated with bearings or brushes.
If the cause of the breakdown is the failure of the electric motor due to a broken wiring or short circuit, it is not worth the risk of repairing it. It is easier and better to replace the entire drive.
Checking for open circuit
If you drive a car that does not have a cooling propeller, this will lead to overheating of the coolant and destruction of pipes, rubber elements, gaskets of the main cylinder block and valve covers. It is not far from destroying the components of the piston group.
Fuse
Operating a vehicle with a broken fan is strictly prohibited.
Price issue
Before starting to solve the problem of a radiator propeller not working, it is important for many people to learn about the cost of components and labor. A new element today will cost approximately 1.5-2.5 thousand rubles, depending on the model and region. The cost of replacement at a service station will be from 400 rubles and more
Although it is not necessary to spend money on this, since replacing it yourself will take you no more than half an hour. Yes, and there’s nothing particularly complicated here
The cost of replacement at a service station will be from 400 rubles and more. Although it is not necessary to spend money on this, since replacing it yourself will take you no more than half an hour. Yes, and there’s nothing particularly complicated here
A new element today will cost approximately 1.5-2.5 thousand rubles, depending on the model and region. The cost of replacement at a service station will be from 400 rubles and more. Although it is not necessary to spend money on this, since replacing it yourself will take you no more than half an hour. Yes, and there is nothing particularly complicated here.
temperature sensor