On Chevrolet Niva SUVs, all-wheel drive of the rear wheels is implemented by using a rear axle in the transmission design. Axle shafts are installed in it, which drive the wheels through splined joints.
To ensure fixation and smooth axial rotation, support single or double row bearings are installed in the drive design.
Device
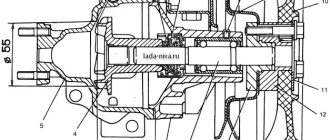
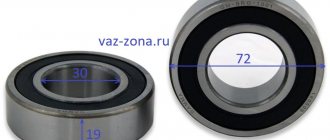
Structurally, the rear axle axle shafts are identical and interchangeable. In Figure 1 you can see that the axle shaft number 22 engages internally through the splined hole of the semi-axial gear; a single row ball bearing 8 is pressed onto the outer part of the shaft.
The axle bearing on a Chevrolet Niva is pressed into the beam seating belt from the inside by a self-clamping reversible oil seal 11, and from the outside by a rubber ring.
Replacing the front crankshaft oil seal for Chevrolet Niva engines
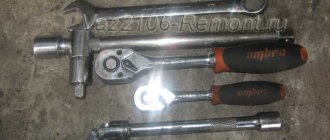
Tools:
- Socket wrench
- Head for socket wrench 10
- Head for socket wrench 38
- Ratchet wrench
- Flat screwdriver
- Hammer
Parts and consumables:
- Engine front crankshaft oil seal
- Sealant
Notes: A sign that the front crankshaft oil seal needs to be replaced is oil leaking around its lip. In this case, oil is sprayed out by the rotating crankshaft pulley, as a result of which the entire front part of the engine and engine compartment becomes oily.
Helpful advice: Before replacing the crankshaft front oil seal if a leak occurs, check the cleanliness of the engine crankcase ventilation system, since if it is clogged, the increased gas pressure in the crankcase causes a leak even with a working oil seal.
1. Remove the oil pan guard and engine compartment splash guard as described here.
2. To avoid damage, remove the crankshaft position sensor as described here.
3. Remove the accessory drive belt as described here:
A. On a vehicle with air conditioning, use the A/C compressor drive belt as described here.
b. With the generator located at the bottom: Remove the power steering pump drive belt. Loosen the nut securing the generator to the tension bar and, moving the generator towards the engine, remove its drive belt as described here.
4. By engaging fifth gear in the gearbox and braking the car with the parking brake.
5. Using a 38 socket, unscrew the nut securing the crankshaft pulley.
Useful advice: It is not always convenient to place the knob, then we use a ratchet wrench.
6. On a car with air conditioning, unscrew the nut securing the drive pulleys of the air conditioning compressor and auxiliary units.
A. No air conditioning.
b. With air conditioning.
Helpful Hint: If the nut is tightened too tightly, use a pipe of a suitable diameter as a wrench extension or loosen the nut by hitting the wrench handle with a hammer.
7. Remove the pulleys.
A. No air conditioning.
b. With air conditioning.
8. Using a screwdriver.
9. Remove the oil seal.
10. Lubricate the new oil seal with engine oil and install it in the timing cover, oriented with the working edge towards the inside of the engine.
Note: The working edge is distinguished by the presence of a spring.
11. Press the oil seal into the cover using the old oil seal as a mandrel or with a socket of a suitable size.
12. Reinstall the removed parts and adjust the tension of the power steering pump and generator drive belts.
The article is missing:
High-quality photos of repairs
Basic parameters of factory parts for repair
Main technical indicators of the unit: diameter and length of the axle, number and length of the spline belt, type of bearings and sealing seals. These indicators are determined by the design features of the system and the calculated traction forces under comparable operating conditions at the time of design and production.
Often, under the influence of large loads, deformation of the axle shafts occurs, premature wear and jamming of the support ball bearings occurs, deformation and fatigue wear of the sealing seals, followed by leakage of transmission oil from the axle.
Factories producing spare parts for the domestic automotive industry are constantly striving to improve manufactured vehicle components and assemblies. They regularly offer consumers a newer, more reliable, more modern product.
Let's consider the technical parameters of the drive elements of the rear axle of an SUV.
Half shaft
Main characteristics:
- Catalog number: 21230-2403069-00, 21230240306900, 2123-2403069.
- Length: 760 mm.
- Diameter for oil seal: 35 mm
- Weight: 8.4 kg.
- Manufacturer: AvtoVAZ
- Average market prices: 6900 rubles.
Existing analogues:
- axle shaft, standard size for VAZ 2121 Chevrolet Niva, average price 3,400 rubles;
- Russian, the average price is 3900 rubles.
Rolling ball bearings
- Catalog number: 2121-2403080. Designation - GPZ - V76-180508AK2US9.
- Manufacturing index: 180508, 62208-2RS
- Manufacturer: AVTOVAZ
- Average market prices: 400 rubles;
- Inner diameter - 40 mm;
- Outer diameter - 80 mm;
- Width - 23 mm;
- Weight - 440g;
- Rated rotation speed - 5600 rpm.
Foreign bearing manufacturers - NSK, SKF, SNR. Average price from 600 rubles.
Oil seals
- Catalog number: 21100-2301034-00-0 - left and 21100-2301035-00-0 - right.
- Overall dimensions: 35x57x9 mm.
- Manufacturer: AVTOVAZ.
- Average market prices: 45-60 rubles.
Existing alternatives:
- CV joint drive oil seal 2110.08 “RT” universal, manufacturer RUZINOTEHNIKA;
- axle drive seal VAZ-2110-2112, 2123 right/left (35x57x9), manufacturer General Motors.
It is also worth noting the German manufacturer Corteco. This company produces a wide range of oil seals for the VAZ-2123.
Ready-made repair kits
On the spare parts market you can also purchase a ready-made repair kit for servicing the rear axle shafts of the VAZ-2123.
The repair kit for the rear axle shaft of the VAZ 2123 Chevy Niva from ESPRA consists of bearing 2121-2403080, sealing oil seal 2110-2301034 and locking ring 2123-2403084. The average price of such a set is 690 - 890 rubles.
Interesting! Some Niva owners prefer to purchase ready-made kits from one manufacturer, considering this to be a kind of guarantee of the compatibility of the parts being replaced.
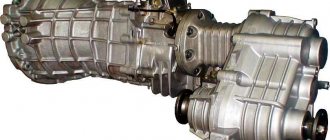
Removal and installation of the Chevy Niva front axle gearbox
The Niva Chevrolet front axle gearbox is removed for replacement or repair. However, disassembling, adjusting and assembling the gearbox requires the use of special equipment and requires the skills of the performer . Repairing a Chevrolet gearbox in a garage almost never leads to the desired result. Therefore, if it is necessary to repair the gearbox, use the services of a specialized workshop. In order to remove the gearbox, prepare a 13, 17, 27 wrench, a 12 hexagon, a socket wrench, a chisel, a hammer, a syringe for filling transmission oil and a container for oil.
Remove the front wheels and drain the oil from the front axle gear housing. Disconnect the front driveshaft from the front axle gearbox
Unscrew the nut and remove the bolt securing the left bearing cover of the Niva Chevrolet front axle gearbox to the cross member of the front suspension. Remove the right front wheel drive and unscrew the three nuts securing the left drive inner joint bearing cover to the front axle gearbox
Turn the steering knuckle so that it pulls the drive, disconnect the gearbox from the drive and remove it. Installation of the Niva Chevrolet front axle gearbox and the removed parts is performed in the reverse order of removal, after which fill the gearbox with oil.
Enhanced modifications
Why are reinforced collapsible axle shafts of the unloaded type better than standard ones:
- The double-row bearing from the Priora front hub can withstand much greater loads and is more durable.
- Alloy steel that has undergone special heat treatment is used in the manufacture of the shaft, due to this it has more torsional strength (steel 35KhGSA and heat treatment hardness 55-56). Manufacturers of reinforced axle shafts are able to increase the torsion limit using stronger materials from the required standard 250 to 350 kg.
- The design of the unit with 24 splines reduces the likelihood of failure of the most dangerous part of the connection;
- Removable hub design;
- Self-locking hub nut;
- Does not require mandatory reinforcement of the rear axle;
- Does not exceed the weight of a standard axle shaft;
- Allows the use of larger diameter wheels;
- This part is completely interchangeable with the standard factory modification.
Disassembly
To get to the failed seal, you will need to remove from your Chevrolet Niva all the parts that make up the right or left rear hub assembly. Only then will it be possible to remove the axle shaft.
Disassembly is carried out in this order:
- park the car on a level place;
- secure the front wheels with stoppers;
- turn off the handbrake;
- slightly loosen the nuts securing the wheel;
- lift the car with a jack;
- remove the wheel;
- clean the end of the axle shaft, which protrudes slightly beyond the dimensions of the brake disc, from dirt and rust;
- spray it with WD-40;
- unscrew a couple of bolts holding the drum (you need a 12 mm wrench);
- Move the above brake element with light hammer blows.
Please note that there are two main methods used to remove the drum. In the first case, it is squeezed out of place by screwing the above-mentioned bolts into the free holes. In the second, they use the same hammer, but using a stump of a block as a protective pad. Without this preventative measure, it is easy to damage the edge of the brake disc.
After dismantling the drum, it is advisable to once again thoroughly clean its seat from dirt and corrosion - this will make it easier to install it back.
Next, you need to remove the axle shaft. On a Chevrolet it is held in place by four bolts - they also secure the shock absorber in parallel. When the fasteners are unscrewed, the rear axle falls down, as the spring simply squeezes it out. You need to put a support under it, otherwise all the oil will spill out.
Please note that in classic Niva models (21213 or 21214) the shock absorber is fixed to the spring cup, while in Chevrolet it is fixed directly to the hub. Accordingly, in older cars there is simply no need to remove it, which means there is no need for a stand.
Replacing the drive, oil seal and bearing
The need to replace the axle shaft and its components may be caused by increased extraneous noise in the rear axle, wear of both the spline joint, and fatigue failure of the support bearings.
Deformation of the sealing gland also often occurs. As a result, the transmission oil level decreases, which can lead to failure of the entire system. Regular inspection and diagnostics of the rear axle will help you avoid complex, expensive repairs in the future.
To replace rear drive parts, you will need the following tools and materials:
- box and socket wrenches in a set;
- flat screwdriver;
- wheel wrench;
- hammer;
- Bulgarian;
- blowtorch or gas torch;
- chisel;
- bench vise;
- jack;
- additional wooden support;
- a mandrel equal to the diameter of the axle shaft seal;
- reverse hammer.
The process of disassembling and replacing the axle shaft:
- Place the car on a lift or on an overpass. Work should be carried out with the handbrake turned off.
- Remove the rear wheels by unscrewing the mounting nuts. Replacement
- The rear brake drum is attached to the hub with 2 bolts. To remove, use a 12mm wrench and a hammer (preferably with a plastic striking part) to tap the casing around the perimeter.
- After removal, it is necessary to clean its inner surface with a metal brush and remove the outer shoulder using a grinding wheel and a grinder. This will provide you with faster and easier assembly of the brake mechanism in reverse order.
- To avoid having to reassemble the rear brake mechanism, tie it together with a binding wire or rope to the rear spring.
- Unscrew the 4 mounting nuts from the support bearing plate bolts.
- To prevent the rear axle from lowering, support it with a block of timber or fix it on a jack. Place a wide container on the floor to collect leaking transmission oil.
- Remove the shock absorber bracket.
- Using sharp movements, pull the axle shaft out of its seat using a reverse hammer.
Oil seal replacement process:
- Remove the rubber plug from the bridge flange.
- Using pliers with a slotted screwdriver, carefully remove the old seal. Be careful not to leave marks on the oil seal seat mirror in the rear axle housing. Otherwise, the transmission will regularly leak through risks in the metal.
- Before installing a new oil seal, its outer seat must be lightly lubricated with WD-40 or axle oil. For pressing, use an old oil seal or a mandrel of suitable diameter and a hammer. When installing, ensure that the seal housing is aligned evenly and coaxially with respect to the axis.
Installing a New Seal
After removing the axle shaft, the metal shield where the brake pads are attached will remain hanging on the copper pipe with the fluid, so it should be fixed by inserting the 2 upper bolts back into the holes. Then follow the instructions:
- Remove the thick rubber gasket from the rear axle flange.
- Pull out the old oil seal by prying it with a screwdriver or pliers. Clean the seat and wipe with a rag.
- Lightly lubricate the new seal with transmission oil and insert it into the socket of the Niva rear axle as evenly as possible.
- Using a round pipe adapter, press the oil seal into the socket with light blows of a hammer. You can use an old seal as an additional attachment.
At the end of the procedure, you must thoroughly wipe all parts free of oil - the brake cylinder, pads, drum and metal shield. Before reassembling, it would be a good idea to check the axle bearing for wear and grease. Wear is indicated by difficulty turning, binding, or slight noise. If you discover a malfunction, take the axle shaft to the nearest car service center; you will not be able to replace the bearing without special equipment.
To check the grease inside the bearing, you need to pry the plastic covering the rollers with an awl and remove it. Then add thick Litol-type lubricant inside and put the plastic in place, and then begin assembly.
At the end, it is important to check the oil level in the rear axle gearbox of the Chevrolet Niva. The test is carried out on a fully assembled car, standing on a level area. The filler plug is unscrewed from the gearbox housing, after which the oil level is determined visually or using a thin wooden stick.
Read news about the new Niva
- Dismantling and assembling the gearbox Niva 2121, Niva 2131
- Replacing the drive gear oil seal of the front axle VAZ 2121 Niva 2131
- Removal and installation of transfer case seals Niva 2121, Niva 2131
- Niva Chevrolet front hub repair
- Niva car steering gear
- Test drive of the new Suzuki Vitara crossover
- Generator Niva 2121, 21213, 21214: which one is installed, replacement
- All-wheel drive with automatic transmission for a million – choose a crossover – car magazine
Also interesting: Checking and eliminating play in the steering wheel and steering column of Niva Chevrolet
Replacement: step-by-step instructions
First, unscrew the bolts securing the cardan to the flange and hang the cardan shaft under the bottom. After this, you need to measure the torque of the shank using a dynamometer or canter. To do this, wind a cord around the flange, tie its end to the measuring device and pull. Memorize or write down the force at which the shank begins to rotate. This will come in handy when assembling the unit.
- Hold the flange with a wrench and unscrew the fastening nut.
- Remove the shank from the splines using a puller.
- Use pliers and a screwdriver to remove the cuff.
- Install a new oil seal and moisten its seal with transmission oil.
- Carefully slide the shank onto the slots and insert into place.
- Tighten the nut with a torque wrench with a force of 12-15 kgf.
- Check the rotation force of the shank with a cord and a canter (dynamometer).
- If necessary, tighten the fastening nut.
- Screw the cardan to the flange.
The work takes no more than two hours. After replacing the oil seal, especially if it had to be changed due to oil leakage, it is necessary to check the transmission level in the gearbox.
How to install a new oil seal
When the axle shaft is removed from the car, the nearby metal shield used to mount the pads will be essentially loose. It will only be held in place by a thin copper tube filled with brake fluid. To prevent the latter from breaking, the shield must be temporarily secured with a pair of previously unscrewed bolts.
Removing and installing the oil seal is done as follows:
- remove the gasket from the bridge flange (do not tear it, although it is thick, it is still rubber);
- remove the damaged oil seal - pick it up with a flat screwdriver;
- thoroughly clean the area where it previously stood with a cotton, lint-free cloth;
- Before installation, the new seal must be wiped with oil (necessarily with transmission oil);
- place the element in the socket and make sure there is no distortion;
- Press it in with a piece of pipe so that the rubber is not damaged - place the old oil seal on top of it.
Now it is important to thoroughly clean all removed elements from dirt and oil. It is absolutely unacceptable to leave traces of grease on brake parts:
- drum;
- cylinder;
- pads;
- shield
If only the oil seal was changed on the Chevrolet, then it is advisable to inspect the axle bearing as well. The part is checked for wear, lack of play and presence of grease on the rollers. If an element breaks soon, then it:
- rotates tightly;
- makes noise;
- rattles when shaken.
Please note that you cannot replace the bearing yourself. This operation will be performed for you at a car service center. You can only check if there is lubricant inside. To do this, carefully lift the plastic plug covering the rollers and look inside. In the absence or its obvious insufficiency, ordinary Litol is laid. The plastic ring is then placed in place.
Now you can assemble the knot. Follow all steps described in the instructions in reverse order.
Finally, be sure to check how much oil is left in the gearbox of your Chevrolet. To do this, lower the car onto its wheels and make sure it is level. Then:
- find the neck plug on the casing;
- turn it inside out;
- take a look inside.
If there is not enough lubricant, add it using a hose and funnel. It is better to do the work with a partner - one will add oil, and the other will monitor its level.
Useful tips
Many drivers combine oil seal replacement and transmission oil change. If you decide to do the same, then it makes sense to find out what type of lubricant is used in your case. It is not recommended to mix different types of oils. This will lead to performance problems. If it is necessary to change the type of lubricant, it is recommended to first flush the system.
When removing the axle shaft, oil will begin to flow out. Therefore, it is better to drain it in advance. If you do not want to change the lubricant, then you need to take measures against its leakage. To do this, simply raise the side of the car from which you are changing the oil seal higher. This way you will avoid lubricant leakage. But, in any case, there is a risk of lubricant leakage. Be sure to add a new portion of oil after all work has been completed.
When reinstalling the brake drum, pay attention to its condition. Often there is a development along the shoulder. It should be removed using a regular file. This simple action will significantly improve braking.
In some cases, oil seal wear can be caused by a bent axle shaft. In this case, knocking noises will be heard when moving, and the oil seal will be worn out on only one side. In many cases, you can even visually determine the damage. Such a defect can only be corrected in a workshop on a special stand. If this is not possible, then you will have to buy a new part.

