05/14/2021 43 017 VAZ 2109
Author: Ivan Baranov
The problem of incorrect activation of speeds in VAZ cars can be called spontaneous, since it is familiar to many car owners of Russian-made cars. Now you can find out why the reverse gear on the VAZ 2109 does not engage and how to fix this problem.
[Hide]
Troubleshooting
Many transmission malfunctions that cause the reverse gear to disappear or fall out can be eliminated without removing the unit from the car.
If the cause is a loosening of the bolt securing the clamp on the rod, then to correct the defect it is necessary:
- Place the car on a lift.
- Completely loosen the clamp nut.
- Place the gearshift lever in the fully engaged reverse gear position.
- Fully engage reverse gear at the gearbox using the shift rod on the crankcase.
- Tighten the clamp mounting bolt.
Backstage adjustment
If tightening the clamp does not help get rid of the problem, then you need to check the condition of the shift drive parts. One of the reasons why the reverse gear does not engage may be a poorly adjusted rocker.
To make adjustments to the mechanism, you may need the following tools:
- two wrenches with a size of 13 mm, preferably a socket design;
- any wrench or 10 mm socket;
- small hammer;
- slotted screwdriver.
Since the cause of malfunction of the link can be wear of parts, spare parts may be needed:
- universal joint of the rocker;
- Sometimes the shift rod seal may need to be replaced.
Two people are required to adjust the rocker or replace parts of its drive. One person must change gears from the passenger compartment, and the second must adjust the travel of the shift rods.
The order of work is as follows:
- Provide access to the bottom of the car by placing it on a pit or a lift.
- Using a 13 mm wrench, loosen the clamp installed on the gear shift rod.
- Remove the rod from the box rod.
- Using a screwdriver, carefully remove the boot.
- Using a 10 mm wrench, unscrew the fixing bolt on the cardan shaft.
- Knock off the cardan shaft with light blows of a hammer. It is important not to damage the shaft.
- Remove the universal joint seal boot.
- If there is an oil leak, the sealing gland on the box rod must be replaced.
- Install a new boot (or leave the old one if it is intact) and install the universal joint on the shaft.
- Align the hole on the cardan with the notch on the shaft.
- Tighten the 10 mm clamp and install the boot completely in place.
- Install the rod on the cardan rod and adjust the gearshift lever travel.
- The second person should sit in the driver's seat, set the gear shift lever to neutral, move it slightly to the right and hold it in that position.
- After this, you need to tighten the 13 mm clamp nut.
Typically, after such a repair, the reverse gear starts to engage without problems. In addition, the operation of the entire gear selection mechanism on the VAZ-2109 becomes clearer.
The video from the author MegaMeyhem shows the process of replacing the backstage.
Changing the gearbox oil
If the oil seal on the rod is damaged, oil leaks out of the gearbox housing, and dirt can get into the box itself. These factors may be the reason why reverse gear stops engaging. In addition, the oil in the box loses its properties during operation, so it must be replaced preventively at least once every 35–40 thousand kilometers. Before replacing, you need to check the condition of the oil in the box. To do this, you need to remove the oil dipstick installed in the gearbox housing and visually assess the quality of the oil. The presence of metal and dirt particles in the oil on the dipstick is unacceptable. The oil itself should be quite liquid and not stick to your hands in a thick layer.
Dipstick with oil level marks
To replace, you will need the following materials and tools:
- New oil. When purchasing oil, you need to consider the type of gearbox. For fairly rare four-speed gearboxes, three liters of oil are required, for newer five-speed ones - 3.3 liters. The oil itself must have a tolerance of 80W-85, the manufacturer does not matter.
- A container for draining old oil with a volume of at least 4 liters.
- A funnel with a hose for pouring new oil or a syringe.
- Wrenches 12 and 17 mm of any type.
- Rags and cleaning solvent.
The actual work order is as follows:
- Place the car with the heated gearbox on the pit.
- Remove the rubber plug from the gearbox ventilation valve installed on the top of the crankcase.
- Clean the valve and plug from dust and dirt. It is convenient to clean parts with thin wire and a rag.
- Reinstall clean parts.
- Wipe off dirt from the bottom of the box. Unscrew the plug on the bottom of the box housing.
- Place a container under the drain hole and drain the oil. It will completely merge in at least 20-25 minutes.
- After this, screw the drain plug back into place and carefully tighten it with a wrench. First, the plug and hole must be thoroughly wiped with a rag.
- Pour fresh oil through the oil level dipstick hole in the box.
- During filling, it is necessary to check the oil level, which normally should be between o and “MAX” on the dipstick rod.
- If there is an overflow, the oil can be pumped out with a large medical syringe with a tube on the spout.
- Within a few days after the change, it is advisable to check the level and appearance of the oil. You also need to make sure that there are no leaks through the plug and box seals.
We recommend: Replacing struts for Lada 2112 (VAZ 2112)
Rubber crankcase ventilation cap Drain hole on the crankcase Dipstick in the upper part of the crankcase An oil funnel installed in the dipstick hole
On early versions of front-wheel drive VAZ gearboxes there is no hole for the dipstick. To fill the oil in the crankcase of such boxes there is a control hole closed with a threaded plug. Filling is carried out using an oil syringe. The oil level is considered normal when it reaches the lower edge of the inspection hole.
The arrow indicates the inspection hole on the side of the gearbox housing. Filling oil with a transmission syringe.
Replacing the gear selection mechanism
One of the common reasons why the reverse gear of a VAZ 2109 does not engage is the breakdown of spring 2 installed in a separate mechanism.
Gear selection mechanism
To access it, it is necessary to remove and repair the mechanism itself, located inside the box.
A short list of necessary actions:
- Disconnect the car.
- Remove the air filter completely.
- Remove the left wheel and loosen the CV joint hub nut.
- Drain the oil from the gearbox crankcase.
- Remove the two bolts securing the left ball joint to the steering knuckle.
- Unlock and remove the steering tip.
- Remove the fist from the CV joint splines.
- Completely remove the left drive.
- Remove the starter and negative wire from the gearbox housing.
- Remove the gear shift rods from the gearbox and clutch.
- Unscrew the speedometer drive cable.
- Place a support under the box housing and remove the box support fastening
- Remove the gearbox from the vehicle and disassemble it.
When disassembling the gearbox, it is necessary to check the condition of the gear locks, since wear is the main reason why the reverse gear spontaneously jumps out of gear. You can get to the lock without removing and disassembling the box; it is located on the side of the crankcase and is closed with a screw plug. Disassembling the gearbox and inspecting the gear selection mechanism will also help solve the problem in which the reverse gear on the VAZ-2109 does not turn off.
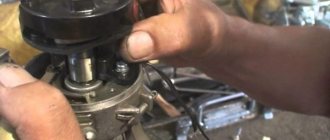
Spring replacement
Often, owners change the entire mechanism assembly, which costs on average about 2 thousand rubles. But you can disassemble the mechanism and get by with replacing the spring, which costs up to 50 rubles.
You need to do the following:
- Remove the stopper from the blocker axle and remove the axle itself.
- Unscrew the lever axle nut.
- Remove the axle and replace the spring.
- Reassemble in reverse order.
First speed is not fixed
When starting to move from a standstill at first speed, especially from difficult ground such as sand and snow, you have to hold the gear shift lever, since it does not hold on its own, the gear is switched to neutral. There can be three reasons for this failure:
- The link is loose and does not fix the fork;
- gear and coupling wear;
- displacement of the engine on the mounts and knocking out the box.
The condition of the fasteners of all parts and assemblies should be completely checked. The gearbox is rigidly fixed to the engine. However, when the motor slides on cushions, the first speed may be knocked out. Tighten all bolts and check the rigidity of the mounting on the body. You can do this kind of work yourself.
Fasten the link more rigidly to the shift lever, select the backlash, because it is responsible for fixing the lever in the desired position. To do this, you need to put the car in a pit. Open the lid and check. Pay special attention to the condition of the gearing.
When worn, gears can slip and jump out without transmitting torque. When you press the lever with your hand, the clutch adheres forcefully and engagement occurs.
New box
There are problems when the car is picked up from a service station, but the gearbox of the VAZ 21093 does not engage the speed. At the same time, when the engine is not running, the shift lever moves smoothly, without a crack. As soon as you start the car, the gears stop shifting. First of all, check the movement of the gear and fork along the splines - along the axis of the shaft. Since you have opened the box, pay attention to the position of the driven disk, whether it is installed correctly.
If malfunctions are discovered shortly after servicing the car at a service center, you should not tinker with it yourself. Send your car back and let the locksmiths find and fix their problems themselves. Remember that you do not have to pay for reworking low-quality repairs.
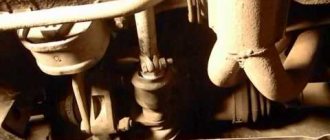
Replacing and adjusting the gearbox driveshaft
So, if only reverse does not work, and all other modes do not fail, then you will need to replace the universal joint and adjust it. To do this, prepare a new spare part, a gear selector shaft seal, a set of keys, a hammer and several screwdrivers of different sizes.
Carry out the work according to the instructions:
- Place the machine on an overpass or over a pit. Find the gearbox from below and loosen the clamp bolts on its drive rod. Remove the actuator completely from the stem.
- Using a screwdriver, pull the boot towards the unit. Often during this step the boot is completely damaged, in which case it can be removed and then a new one installed. Unscrew the fixing screw on the universal joint.
- Carefully tap the driveshaft off the assist shaft with a hammer. Remove the boot if you have not damaged it previously. Install a new oil seal on the speed shaft.
- Install a new boot, place the cardan on the shaft so that the position of the fixing screw coincides with the recess on the shaft.
- Tighten the retaining screw and place the rod on the rod, but do not tighten the clamp.
- To make the adjustment, ask an assistant to move the gearshift lever to the neutral position and a short distance to the right. He should hold it in this position while you tighten the clamp.
If the reason for the failure of the reverse gear was hidden in the cardan of the carriage, then you will no longer have problems after this repair.
The reverse gear of the VAZ 2109 does not engage well
If the reverse gear on a VAZ 21099 is lost, then the reason in most cases lies in the box itself. It is necessary to examine the unit to understand why the problem occurred. Some of the simpler factors include:
- insufficient clutch release. If the clutch disengages poorly, then all speeds can be affected, but in fact the problem situation often concerns reverse gear;
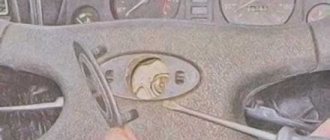
- damage to the gearbox lever. The reason that the reverse gear is difficult to engage may be hidden in a banal breakdown of the lever. If you eliminate it, then there is no need to go deep into the unit and carry out diagnostics;
- bad oil. If an oil product of inadequate quality is poured into the transmission, this can greatly affect its operation. But usually, bad oil affects all gears of the car. If there is a suspicion that the problem lies in the liquid, then it should be drained from the unit, and then a new one should be added.
A common cause is poor rocker adjustment. The problem is solved by adjusting the part. The backstage situation is a common one, so it’s worth taking a closer look at how you can fix it.
Fixing the problem
Let's look at several ways to help fix the problem with engaging reverse gear.
Backstage adjustment
Before you begin solving the problem, take with you everything you might need:
- new gearbox driveshaft;
- speed selector shaft oil seal;
- two ring wrenches 13;
- wrench 10;
- hammer;
- screwdriver.
Cardan and boot for VAZ 2109
New gear selector rod oil seal for VAZ 2109
Socket wrench 13
10mm wrench
Construction hammer for work
Flat head screwdriver
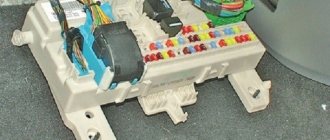
We recommend: Opel Astra H fuses and relays in a complete set
To fully replace the cardan, you will need to drive into a pit or overpass. In addition, you will need an assistant who will shift the gearbox lever while you adjust it.
Let's start replacing the cardan and adjusting the rocker:
- You need to crawl under the bottom of the 2109 and find your gearbox. Take two 13mm wrenches and loosen the clamp located on the transmission drive rod. After this, you can remove the drive from the gearbox mechanism rod.
- Then take a screwdriver and, with a little force, pull the boot closer to the unit. If you accidentally damage the boot, you can simply dismantle it so that it does not bother you. Now take a 10mm wrench and unscrew the locking screw on the cardan.
- Next, take a hammer and very carefully knock the gearbox driveshaft off the shaft. Do this carefully so as not to damage the shaft. Remove the cardan boot if you did not remove it initially. If necessary, replace the speed selector shaft oil seal.
- At this point we can consider that half the work has already been done. Now you need to install the driveshaft of the box. We install the element in the reverse order. First, install the new boot in place, and then place the cardan on the shaft. Remember that the position of the retaining screw must coincide with the recess on the shaft.
- When the universal joint is in place, tighten the fixing screw and install the boot on the universal joint. You also need to put the gear shift drive rod on the cardan rod, but there is no need to tighten the clamp.
- Next, you will need the help of another person, since you need to adjust the gearshift lever. Ask your assistant to sit in the driver’s seat: he should set the gearshift lever to “neutral” and move it slightly to the right. In this position, an assistant should hold the lever while you tighten the cardan clamp.
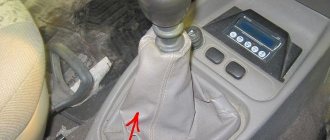
Loosen the drive rod clamp.
The boot is highlighted in red, which must be pulled towards the box using a screwdriver.
Place the drive rod onto the rod.
When the cardan adjustment is completed, you need to check how the speeds on the lever are switched on. If the problem that caused the reverse gear to not engage in your VAZ 2109 was in the cardan, which is most likely, then after replacing the element the fault should disappear.
Changing gearbox oil
Also, one of the common reasons why reverse gear in a VAZ 2109 does not engage is poor gear oil. As stated above, the liquid has already lost its properties and its further use does not make sense. But how do you understand that the transmission fluid has already exhausted its service life? This issue should be taken seriously, because the fluid replacement procedure is not that cheap. Therefore, you need to know for sure that the gear oil has lost its properties.
- Pull the dipstick out of the gearbox hole to measure the level and drop a drop of liquid onto a white cloth. If at least one of the following conditions occurs, change the oil immediately.
- The lubricating fluid is discolored and may have a slightly black tint. Also, even in a small drop of oil you can see metal particles or other dust.
- The transmission fluid is opaque and appears very viscous. If you try it by touch, the substance will stick to your hands. In addition, if you drop this oil onto a piece of cloth or napkin, it will be absorbed very slowly compared to new oil.
- Very cloudy or foamy liquid. This may mean that transmission oil has entered the engine. If so, then the problem with engaging reverse gear is the first thing you will notice. If the car continues to operate on poor transmission fluid, then it may be necessary to completely repair the gearbox and the entire transmission system.
Checking the TM level in the box using a dipstick
If you realize that the transmission fluid has already exhausted its service life, then, apparently, the time has come to replace it. Moreover, if the solution to the problem with engaging reverse gear depends on this. Prepare:
- New transmission oil (hereinafter referred to as TM). Please note that if your VAZ 2109 is equipped with a four-speed gearbox, then three liters of TM will be enough for you. If your car has a five-speed gearbox, then you will need 3.3 liters of consumables. For VAZ cars, it is recommended to use transmission fluid with a viscosity class of 80W-85. In practice, many VAZ car owners fill the checkpoint of their cars with Lukoil.
- Container for collecting waste consumables. An old bucket or basin will do. If there is neither one nor the other, then you can take a regular plastic water bottle and cut off its upper part.
- Set of wrenches.
Lukoil transmission fluid for VAZ 2109
Homemade container for collecting used transmission material
Wrenches and sockets
We recommend: Installation and dismantling of the UAZ stove
To carry out the work, you need to go into a garage with an inspection hole.
- Reach under the bottom of the car and locate the transmission fluid drain cap. It is located at the bottom of the gearbox unit.
- Find the rubber cap on the unit itself: it needs to be cleaned. Also clean the gearbox breather and reinstall the rubber cap.
- After this, you can start draining the waste liquid. Take a wrench and unscrew the drain cap of the gearbox unit. Before doing this, do not forget to place a container under the drain hole, prepared in advance for collecting waste consumables.
- Now you need to wait 20-30 minutes until all the “working off” has been drained. Please note that the car must be warmed up. If the temperature of the gearbox unit is not high, then the TM will be thicker and will not be able to completely leak out of the box.
- When all consumables have been drained from the gearbox, you can screw on the drain cap. Tighten it as tight as possible, but do not over-tighten it to avoid stripping the threads. After this, open the hood and find the dipstick to check the level of consumables from the gearbox. Pull it out and insert a hose into the hole, at the other end of which a regular watering can is installed. Fill with fresh TM.
- When pouring consumables into the transmission system, periodically check the level of the substance in the gearbox using a dipstick. Ideally, the TM level should stop midway between the MIN and MAX marks.
- When new oil is added, check its level in the gearbox just in case. It is also advisable to check the TM level after a few days. This is done in order to find out if there are leaks in the system.
Drain plug VAZ 2109
Remove the rubber cap and clean the breather
Unscrew the drain cover
Fill consumables through the dipstick hole
Filling an old-style gearbox with oil through a syringe
The red arrows indicate the filler and drain holes on the old-style gearbox
If your VAZ 2109 has an old-style gearbox installed, then it will not have a hole for the dipstick. But the drain and filler plugs will be located nearby. In general, the procedure is no different, only you will have to pour TM into the unit using a special syringe.
Characteristic
As we said earlier, a 4-speed transmission was also installed on the car. The assembly of the gearbox for the VAZ-2109 of this type did not last long. Therefore, it is now very difficult to meet “short-winged” cars with a 4-speed manual transmission. It's practically a rarity. 95 percent of the “nines” came with a more modern, 5-speed manual transmission. It was two-shaft, with synchronizers in all gears (except reverse). Structurally, this gearbox is combined with the main gear and differential. It differed from the 4-mortar in a different location of the crankcase ventilation pipe. It was located on the clutch housing (previously it was on the rear cover). A dipstick also appeared. But the gear ratios remained the same.
In Russia, these cars stopped being produced back in 2004. But you can still find spare parts for the VAZ-2109 gearbox in stores. Their price is quite reasonable. If necessary, you can buy a complete transmission for 5-6 thousand rubles.
Causes
The reasons why reverse gear engagement is poor or difficult may be as follows:
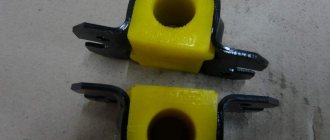
- loosening of the fastening clamp of the rocker, due to which the length of the rod is not enough to fully engage the gear;
- jamming of the reverse speed lock;
- spring breakage and debris getting into the guide grooves of the gear selection mechanism;
- spontaneous loosening of the selection mechanism mounting bolts;
- the clamp bolt is cut off;
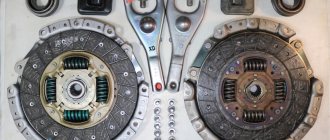
- wear of the clutch disc and release bearing;
- incorrect adjustment of the clutch and clutch pedal;
- low oil level in the box or the need to replace it.
Reverse speed of automatic transmission does not engage
In practice, reverse gear may not be engaged in both manual and automatic transmissions. Taking into account the fact that automatic transmissions are different, it should be noted that some problems of manual transmission robots are similar to “mechanics”, while “classic” automatic transmissions have their own list of problems due to which the reverse speed disappears.
- The level of the ATF transmission fluid has deviated from the norm, the fluid in the automatic transmission is contaminated or has lost its properties. As you know, an automatic transmission is extremely sensitive to the level and quality of oil. For this reason, the check should begin with the transmission fluid.
How to change gearbox oil
If you need to change your oil, then first of all, buy it. A four-speed gearbox will require three liters of transmission fluid. You will need to pour 3.3 liters into a five-speed gearbox. If you are changing the oil for the first time, then buy 80W-85 class fluid. It is perfect for use in the VAZ-2109 gearbox. Car owners prefer to purchase Lukoil brand products.
The work of changing the oil in the box is carried out as follows:
- Place the car on an overpass or over a pit, warm it up slightly so that the liquid is not viscous. Locate the oil drain plug on the bottom of the box.
- The unit has a rubber cap that needs to be cleaned along with the breather. After cleaning these parts from dirt, return them to their place.
- As soon as the preparatory work is completed, place the container, twist the plug with a wrench, and begin draining the transmission oil.
- The waste liquid will drain completely within half an hour.
- Screw on the plug, tighten it well, but do not strip the thread.
- Under the hood, find the transmission dipstick and remove it. In place of the probe, stretch a hose, at the other end of which a regular watering can or funnel is installed. Pour transmission oil into the box through the hose. On older units, the fill plug is located next to the drain plug.
After the work is completed, check the lubricant level with a dipstick and take a control measurement after 2-3 days. If necessary, add oil; if it becomes critically low, inspect the box for leaks.
Box nuances
The VAZ 2114 uses a five-speed manual gearbox. It is quite simple in design, which allows you to independently carry out preventive and repair work.
Device diagram
Experts recommend identifying a malfunction at the initial stage of its occurrence, since delaying means wasting even more time, effort and money.
If you have a mechanic
Gears shift poorly in a car with a manual transmission for three reasons. The first of these is a malfunction of the clutch when it does not completely disengage (drive). The first sign of this malfunction is that the reverse gear is engaged with a characteristic crash. The rear one reacts to this anomaly more noticeably than other gears, because it is the only one not equipped with a synchronizer.
The second reason is a defect in the gear selection mechanism of the gearbox. And finally, the third is excessive wear of the gearbox synchronizers.
There are also several clutch malfunctions in which manual transmission gears shift poorly:
- Air in the clutch release hydraulic drive or fluid leakage from it. The malfunction is eliminated by replacing failed components of the hydraulic system and pumping it.
- Worn or broken clutch release fork. The part requires replacement or repair.
- Warping (runout greater than 0.5 mm) or too thick new driven disk.
- Failure of the basket (temperature deformation of the pressure plate or its distortion).
- Loss of mobility of the support bearing of the gearbox input shaft (at the end of the crankshaft to which the flywheel is attached).
- Jamming of the clutch driven disc hub on the splines of the gearbox input shaft. To eliminate the defect, clean the splines of the gearbox hub and input shaft. It wouldn’t hurt to lubricate them a little with lithol.
- There is too much free play in the clutch release fork. Its value needs to be clarified with the manufacturer, since it is slightly different for different cars. Until you find out the value of this parameter for your car, set it from 5 to 8 mm. Too little free play of the fork is also undesirable, as it leads to clutch slipping and increased wear of the release bearing.
Excessive wear of synchronizers mainly occurs in those gears that are engaged more often: these are usually first, second and third. The rear one is not included in this list because it does not have a synchronizer. When your gear shifts poorly, and you assume that the reason for this is wear of the synchronizers, firstly, you should only have difficulties with this while driving. Secondly, in this case it switches better if you use double squeeze.
For those who don’t know what double squeeze is. To shift to a higher gear: depress the clutch, engage neutral, release and depress the clutch again, engage the gear.
Backlash in the so-called “helicopter” is one of the reasons for unclear gear shifting
To switch to a lower gear: double squeezing must be combined with re-engaging, that is, when the clutch pedal is released and the gearbox is in neutral, you need to press and release the accelerator pedal. This is how gears are changed in cars that do not have synchronizers. If the gearbox shifts easier using double squeezing, then the culprit for poor gear shifting is most likely worn synchronizers.
Look for damage or check that it is adjusted correctly. Don't even think about the clutch and synchronizers.