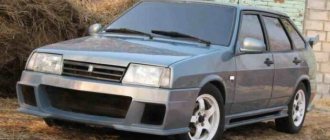
Many car owners of the wonderful classic VAZ-2107, especially those who like to upgrade their cars, do not like the design of the steering wheel due to its large size.
Due to the fact that the steering column on this car is not height adjustable, the large diameter of the steering wheel makes it difficult to sit comfortably in the seat. Surely tall drivers have encountered this problem.
Therefore, replacing the “original” steering wheel, which is more similar to the steering wheel of a steamship, with a smaller steering wheel with a “sporty” design helps solve this problem.
To replace this vehicle control, you must remove the factory one, and you may also need to remove the steering wheel if the sound signal does not work.
To remove the steering wheel you will need the following tool:
- flat screwdriver;
- 24mm head with wrench and extension.
Step-by-step replacement of the steering wheel
You can remove the steering wheel in a VAZ-2107 yourself, but in order for the process to be completed correctly, you need to do it step by step:
- The battery lock must be done first to prevent short circuit. To do this, it will be enough to disconnect the negative terminal from the battery.
- Using a small screwdriver, you need to pry off the Lada logo, which adorns the middle of the steering wheel. This logo is not only a decoration of the steering wheel, but also an original plug that covers the fastening element.
- After the plug is removed, you can see a 24-size nut inside, which must be unscrewed. Before unscrewing, you need to set the steering wheel to a position in which the wheels of the car will “look” directly from the body.
- A size 24 socket must be inserted into the extension so that it is convenient to put the tool on the fixing nut. Next, you need to insert such a device into the so-called knob and try to turn the latch with a sharp counterclockwise movement. In this case, you should hold the steering wheel with your knees so that the structure does not turn when unscrewing the lock. If the nut does not come off the first time, you need to repeat the whole process again, but experts do not recommend completely unscrewing the lock. This is explained by the fact that the steering wheel is quite firmly attached to the shaft, and if it is removed with a sharp jerk, the structure can hit a person hard in the chest.
- Once you feel that the fastener has become loose, you need to start swinging the steering wheel in different directions. You can completely remove the steering wheel from the shaft after you hear a peculiar click. This will indicate that the steering wheel is starting to hit the nut, so the clamp can be completely unscrewed without fear.
Such simple manipulations and a minimum of tools will help VAZ-2107 owners remove the steering wheel without much effort for further replacement of the structure or troubleshooting any problems.
Malfunctions of the steering column of VAZ 2107
Given the simple design of the column, there are few options for malfunction. It is important to monitor its condition and promptly eliminate problems when they arise. There are several main types of faults:
- Column creaking. The cause of the squeak may be wear of the column parts, deformation of the trim panels, or malfunction of the steering switch unit.
- Steering wheel play. There are probably two reasons for this. The first is that the steering wheel fastening nut has been loosened. Fixing this problem is easy. But if this is not done in time, the splines on the shaft will break and the steering wheel may turn, leaving the car uncontrollable. Another reason is wear of the steering gear worm gear. Then it is necessary to adjust the gearbox or repair it.
- Play in the plane of the steering wheel or column axis. This is a dangerous malfunction that appears when the elements of the mounting bracket or spline connections are worn (loose).
Loosening the nuts and bolts of the spline fasteners over time leads to the abrasion of the splines, causing the car to lose control. Therefore, the column play must be eliminated immediately.
We recommend: Replacing antifreeze on a VAZ 2107: instructions and photos
Installing power steering
If a motorist wants to install power steering on a VAZ-2107 with his own hands, which the manufacturer did not consider necessary to install in one of the most budget cars in the whole world, he can take one of two possible paths. Firstly, you can select the optimal steering rack that has power steering and then decide on its further location in the car. True, such an action will require enormous labor and money. Secondly, which is more expedient, you can buy a ready-made kit at an auto parts store that allows you to perform all possible most useful manipulations on the stationary steering rack.
The purchased power steering for a VAZ-2107 will consist of many parts: a pump, a pulley, a steering gear, a hydraulic cylinder, an expansion tank and a hose system.
To install power steering on a VAZ-2107, you need to start with a pump, through which pumping is carried out and a certain pressure is created in the unit. This pump must be placed on the cylinder block, since it will operate due to a belt drive. The next step is to determine where to install the crankshaft pulley. Then the steering gear is replaced. The car owner should check the size of the purchased device in advance, since it will most likely differ from the factory analogue, which may require modification of the installation location of the device.
When installing power steering in your car, you should pay close attention to the hydraulic cylinder, which should be located in the car according to the instructions. Further modernization consists of the location of the expansion tank and the sequential connection of a set of parts with high-pressure hoses. The installed reservoir must be equipped with a special fluid intended directly for the power steering. As a result of the manipulation, it is worth pumping the system.
Replacement
This must be done in the following sequence:
- We disconnect the negative terminal of the battery just in case.
- Carefully, using a screwdriver (preferably the screwdriver slot is small), pry up the “Lada” badge in the middle of the steering wheel, which is a plug, and pull it out. As a result, we see a 24 nut inside.
- We put the steering wheel in a position so that the wheels “look” straight.
- We take the head of the required size, insert it into the extension, and then put it on the nut. We insert the crank into the extension, rest our knees on the steering wheel so that it does not turn when unscrewing the nut, and with a sharp movement of the crank counterclockwise we try to twist the nut. I don’t recommend unscrewing the nut completely, because... The steering wheel sits firmly on the shaft and, if removed abruptly, can hit you in the chest painfully.
- Then we take the steering wheel in both hands and rock it, from side to side, pulling it up. Moreover, it is desirable that the range of movements be frequent. When our steering wheel hits the nut, unscrew it completely and completely remove the steering wheel from the shaft.
With these simple manipulations and using a simple tool, you can remove the steering wheel on a VAZ-2107.
After removing the steering wheel, you need to inspect the copper horn contact located on the steering column. If necessary, clean it and bend it.
If your horn does not work, you must first remove the steering wheel in the sequence indicated above, and only then unscrew the screws on the back of the steering wheel to remove the panel along with the fasteners and contact plate, placing the steering wheel on the workbench.
Because it is easier to do this in the public domain than to look for holes by touch in the limited space of the car interior. And, as a rule, the sound signal does not work precisely because of the contact that is located on the steering column, so it may not be necessary to completely disassemble the steering wheel.
Good luck to everyone and safe driving!
We recommend: Runflat tires: what are they and what are their features
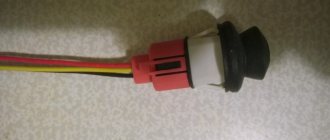
Steering wheel horn button: faulty
If, after diagnosing the signal, relay and fuse, no damage is found, then you need to examine the signal activation button on the steering wheel. Since the steering wheel rotates regularly, and the need to send a signal can arise at any moment, there is a moving contact between the steering column and the steering wheel. Using the latter, it is worth closing the circuit even while turning the steering wheel. In addition, the button has 2 more contacts that allow the motorist to press the horn. Any of these contacts, mostly movable, can stop working. Therefore, the first thing you should do is clean it, and then make sure the button is functioning. To do this you need to perform a number of actions:
- Set the car wheels straight. The steering wheel should not move to the side.
- Use a screwdriver to pry off the “Lada” badge from the steering wheel button.
- Using a 24mm wrench, unscrew the steering wheel nut, which is located under the icon.
- Remove the steering wheel from the shaft by rocking it effortlessly while holding it. If the steering wheel does not want to be removed, it makes sense to hit the shaft with a spacer.
- Using a Phillips screwdriver, unscrew the 4 bolts located on the opposite side of the steering wheel and remove the horn button.
- Take out the button and disconnect the wire coming from the contact on the steering wheel.
- Use sandpaper or a file to clean the moving contact, which is located next to the shaft on the steering wheel. Bend the contact slightly upward towards the handlebar.
- Clean off debris, remove remaining lubricant particles, sand and coat the moving contact area (ring shape) located on the steering wheel with graphite lubricant. This way you can get rid of the squeak and ensure a good connection.
- On the previously removed button, clean both contacts and then reassemble the button. Make sure the contacts touch each other.
- To avoid spontaneous activation of the signal of the 2107th VAZ model, check whether the springs of the horn button are loose or not. If necessary, stretch the springs and replace them.
- Install the steering wheel on the shaft in the position it was before disassembly.
Remember that the signal is very important for all participants in traffic rules. In addition, you will not be able to pass the inspection if the sound signal is faulty.
Features of dismantling
VAZ-2107 cars are equipped with two versions of steering wheels, which have minor differences. The main difference is the appearance and fastening of the front decorative part, which performs the additional function of turning on the sound signal. Let's look at both options for removing the steering wheel on a VAZ-2107, and let's start with the new model steering wheel.
- Disassembling the VAZ-2107 steering wheel begins with the fact that it is initially necessary to remove the minus terminal from the battery. This is done to prevent the creation of an unintentional short circuit.
- Using a screwdriver, you need to pry off the “Lada” badge, located in the center of the product, behind which there is a central nut at “24”.
- It is advisable to align the wheels so that they are straight. This is necessary so that during assembly it fits into the same slots, and the steering wheel also stands straight.
- Using a wrench with a 24mm head, remove the nut. To unscrew the nut, you must rotate the knob to the left. To unscrew the nut, you need to rest your feet on the steering wheel, protecting the product from turning, or ask a friend for help.
- Once the nut is loosened, it is not recommended to unscrew it completely. Now you need to carefully knock the steering wheel off its seat (the spline joint may stick). As soon as the product moves from the shaft, you can unscrew the nut completely and dismantle the steering wheel.
After removing the product, it can be replaced or repaired. If you need to replace the shaft bearing, you will have to remove the decorative trims and bracket to gain access. If it is necessary to remove the old-style steering wheel, this is done according to the following scheme:
- On the back of the steering wheel, unscrew the 2 screws in the holes using a screwdriver.
- Remove the decorative panel together with the fasteners and the horn contact plate.
- Next, unscrew the nut a little, knock the steering wheel off the splines, unscrew the nut completely and remove the part.
Old-style steering wheel without lining
Once the repair work is completed, the product must be installed in place. Be sure to set the steering wheel in the correct position. This is done for the purpose of driving convenience and so that during a trip part of the steering wheel does not block the view of the instrument panel.
The cover plate itself with signal contacts
There are marks on the steering shaft and contact plate that need to be aligned. After the product is put on the slots, you can begin to tighten the nut in a clockwise direction. Installation of decorative elements occurs in the reverse order of removal.
Repairing the horn switch on the steering wheel
If the sound alarm does not work, then after dismantling the steering wheel it is necessary to inspect the contacts. Often, for repairs, it is enough to clean and lubricate the contacts and then install the parts in place.
You can look for the cause of the malfunction of the signal without removing the main mechanism, but you will have to struggle with unscrewing the bolts that secure the decorative trim of the steering wheel. Most often, the reason for the signal not working is in the contacts located in the steering column, so it may not be necessary to completely disassemble the steering wheel.
This material will help you understand the question of how to remove the steering wheel for repair work. If you plan to replace the steering wheel, then it is imperative to select a new product so that it matches the splines of the car shaft. When replacing a standard product with a new one, a problem may arise only in connecting the signal, since not on all models the contacts will coincide with the steering column. To install a new steering wheel, you will need to disassemble it and connect the horn.
Why the signal does not work on the VAZ 2107
Why is the signal not working
on a VAZ-2107 and what to do
Automatic horn is a very important part, which ensures traffic safety, prevents collisions with the principles of passenger cars, and a collision with a pedestrian suddenly escapes on the road. Different car models use different horn designs, but in our article we will talk about the native VAZ- 2107
. You can find out how the signal works, what modifications are options for use in these machines, and what to do if a failure occurs.
Where is the signal for the VAZ-2107 car
The Russian automaker produces several modifications of VAZ- 2107 , which consumers love in the market. The design and layout of all of them has a number of features:
- Some versions of the car use only one sound, which is installed directly behind the front radiator radiator. In our version, you can simply go to the detail and change it if you need to solve it;
- The range of modifications is immediately equipped with two sound signals. They are installed specifically behind the radiator and have a different tone, which allows you to reliably warn pedestrians and drivers of other cars about a possible threat of collision.
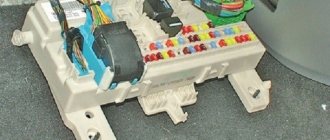
The RS-528 audio relay is installed in the mounting block of both machines, which is often one of the main reasons for the failure of this part.
Today, of course, F7, which eliminates excessively high supply voltage and drop, is also included in the circuit, as well as a button located specifically on the control wheel.
Checking the operation of relays and fuses
The horn doesn't work. How to find the reason.
How to find the right video. about this step here Support the project! MAP.
VAZ2107 alarm repair
No
the signal
worked . Checking the circuit Check the fuses.
What to do if the signal does not work on a VAZ car2107
, and for what reasons might it
malfunction
? The most common one is a blown fuse. Under high load, it fails and interrupts the electrical circuit, thereby eliminating more serious emergency situations.
If you encounter the problem of a blown fuse, it must be replaced immediately. In addition, you will need to carefully inspect the contacts of this part, thoroughly clean them of soot and dirt, or repair them.
The next diagnostic step is to check the sound relay function. If it clicks when you press a button, you should look elsewhere for the cause of the failure. Otherwise, the relay will need to be replaced within a few minutes, even without proper experience.
Diagnosing the signal and its power buttons
To find out if your car is using the correct signal
, disconnect it from the relay and connect it directly to the battery. If the sound does not appear in this case, the reason may be as follows:
- contacts located directly in the device body are burnt out or heavily soiled;
- The signal is not configured correctly, making the sound very low or inaudible.
Troubleshooting is done by adjusting the signal (just turn the special screw on the back of the case) and cleaning the contacts.
Another reason why the alarm may not work is a broken or worn button. To restore normal operation, you can either replace the entire part or reintroduce the pins to which the wires are connected perfectly.
As you can see, you do not need to contact a car service to diagnose and repair the horn. Almost any work can be done with your own hands without spending a lot of time on them. We strongly recommend that you do this without hesitation to avoid getting into an accident due to a non-functioning horn.
There is a special offer on our website. You can get a free consultation with our corporate lawyer by simply submitting your question in the form below.
How to return the sound signal yourself
If the steering wheel needed to be removed because the sound signal stopped working, then the removal process is carried out in the same sequence as previously described. Next you will need to do the following:
- Be sure to check the steering play, which should not exceed 5 C, and the copper contact of the horn. The contact is located on the steering column; if traces of oxidation or other types of contaminants are noticed on its surface, they are carefully removed;
- Next, the connecting fasteners on the back of the steering wheel are unscrewed so that the entire panel assembly can be removed, including the contact plate;
- The removed steering wheel with the panel should be placed on a table or workbench to find the failed contact. The latter is most often the main reason why the sound signal disappears;
- if the contact is disconnected, you just need to solder it back to its original place and install the panel with the steering wheel.
We recommend: What to do if one low beam headlight does not light up
Horn functions
The signal is provided to anticipate the danger of an accident, as well as to warn pedestrians about the possible danger. The signal is received by pressing a button mounted on the steering wheel. Traffic regulations limit the use of the signal to 2 situations. The first involves informing the driver of the car being led before the maneuver. The situation falling under paragraph 2 of the traffic rules is more extensive. The following are likely:
- A person is moving through a transition into icy conditions, and the icy surface does not allow the driver to suddenly brake. Of course, a pedestrian will be able to react when he hears a sound signal.
- The driver who entered the adjacent lane may not have noticed you in the side view mirror and began to change lanes. By signaling, you will be able to attract attention.
- There may be an animal on the roadway. Using the horn you can drive him out of the way.
- When leaving a secondary road, your car may not be noticed by another driver heading towards the main one. In this case, the sound signal will help stop his car.
- A cyclist rides in the center of the road, not from the edge. The signal will force him to let a moving car pass.
And there are many similar situations. Justified and timely use of a sound signal will protect road users and help avoid possible danger.
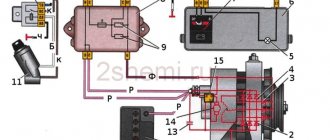
Replacing the steering column of a VAZ 2107
Replacing a steering column is a rather difficult task, but it can be done independently if you have some experience in car repair. You will need the following tools:
- Wrenches 17 (socket and open-end).
- Socket heads for 17 and 30.
- Handle with ratchet.
- Mount.
- Hammer.
- Collar.
The column is removed in the following order:
- Disconnect the battery.
- Remove the steering wheel.
- Remove the steering shaft housing.
- Remove the wire block from the ignition switch.
- Remove the ignition switch.
- Remove the steering column switches.
- Remove the steering shaft clamped in the column.
- Using a 30mm socket and a powerful wrench, unscrew the steering column mounting nut. The tightening force here is significant, so the knob must be a fairly long lever. If you can’t unscrew it, you can lengthen the knob by putting a piece of pipe on it.
- Unscrew the 3 bolts securing the column to the body. The procedure is not easy - the distance between the parts and the body is too small, the bolts are difficult to keep from turning. A handle with a ratchet will come in handy here, which will speed up the process.
- Remove the column from the shaft. To do this, you need to knock the column off the tie rod splines using a pry bar. This must be done in jerks, resting your feet on the body.
- Unscrew and remove the shaft seal installed at the bottom of the column.
After dismantling the old column, it is necessary to clean the seat from dirt. Before installing a new column, you should check the condition of its hinge joints and needle bearings. If everything is in order, you can begin installation, which is done in the reverse order of removal.
When installing a new VAZ 2107 steering column, you must pay special attention to ensure that all fastening bolts and nuts are well tightened. Considering how important this unit is for driving a car, play, and even more so, slippage of the steering column splines can lead to tragic consequences.
When installing the steering wheel, pay attention to the position of its spokes.
After completing the installation of parts and connecting the wire block to the ignition switch, you can connect the battery. Column replacement is complete.
Tuning the VAZ-2107 steering requires time, money, effort and certain knowledge from the car enthusiast. However, competently carried out modifications to the steering system of the vehicle improve the behavior of the car on the road, making the car more maneuverable and controllable by the driver.
How to trim a steering wheel correctly?
It's time to move directly to covering our steering wheel with the purchased braid, or to putting on a cover. As mentioned above, this activity is not as simple as it might seem at first glance. To simplify the whole process, I have prepared special photo instructions.
How to put the cover on the steering wheel?
The cover is pulled over the steering wheel from top to bottom. It is better when two people participate in this process: one fixes the cover at one point, preventing it from slipping and warping, and the second carefully tightens it. Sometimes the cover is put on quite tightly, and it is impossible to do without male strength.
How to cover a steering wheel with braid?
The process of tightening the cover may seem like a small thing to you compared to the complexity of covering the steering wheel with a thread and a needle. There are many methods, each of which depends on the individual characteristics of a particular braid model. I will suggest one method.
First, we put our cover on the steering wheel. In the case itself, holes for threads are already made in advance, because... the leather is quite thick, and it will be very difficult to pierce it on the steering wheel (all the work will “go away” and don’t expect a good effect.). In one place our thread with a knot is pierced, and the process of covering the steering wheel has begun.
This cladding method is the simplest, fastest and does not require special skills.
However, this cross method looks much more attractive. This stitch completely replicates the cross stitch method.
There is also this method.
This article was about how to choose a steering wheel braid. Ride in comfort!
Car steering is one of the important mechanisms of any vehicle. It includes several components that are responsible for moving the car in the direction specified by the driver. An integral part of the steering mechanism is the steering wheel. Its presence allows you to control the front axle and steer the wheels.