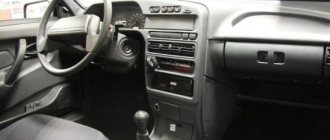
How to Remove the Dashboard of a VAZ 2105
How can I update the VAZ 2105, give it rotation and functionality through the instrument panel?
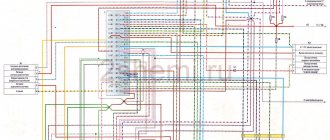
The dashboard informs the driver about the current state of the car. The article discusses the VAZ 2105 dashboard, its common faults, notes on removal and repair, as well as neat settings.
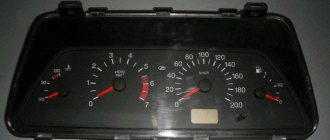
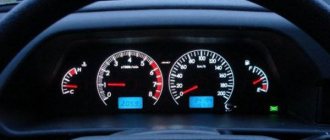
Description and location of indicators and instruments on the panel
In order to fully use the information provided by the dashboard, you need to know the location and purpose of its devices and indicators, and their characteristics. The description instruction describes neatness. The standard panel consists of a set of measuring and control devices, as well as signaling devices.
Panel of VAZ 2105 devices
Typically the toolbar contains the following components:
- speedometer. speed indicator with odometer;
- coolant and fuel level thermometers;
- indicator lamps for battery charging, oil level, fuel reserve;
- warning lamps, side lights, high beams, direction indicators;
- voltmeter;
- alarm unit;
- rear window heating switches, rear fog lights;
- switches for outdoor lighting and electric fan heater.
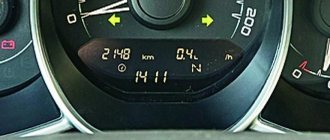
When installed, the on-board computer becomes possible to monitor more than 20 characteristics that allow you to monitor the operation of machine components and systems. The information is displayed on the screen ( video author RusLan 404).
Cleaning removal and repair may be required for the following defects:
- The backlight does not blink on the control panel . Wiring, contacts and fuses must be checked.
- The sensor does not work, the pointer works, the indicator lamps do not light up. First of all, check the fuse in the mounting block and replace it if it is blown.
- If the arrows point in different directions, the most common cause is poor contact with the ground.
- Malfunctions may be related to the operation of the dashboard . We need to remove the shield and make a diagnosis.
- Sometimes a neat presentation is caused by a lighter. The instrument panel does not work or does not work properly.
- Control panel performance sometimes disappears after setup.
Replacing lamps on a VAZ 2105. 2104 panel
MY TASK AND THE TASK OF THE AFFILIATE PROGRAM.
Replacement of torpedo vases 2105. 02/21/17 part 1.
Hi, I'm tired of promoting videos on YouTube and do you know why they have ads for this ad.
Adjusting the LED backlight
Installation and repair instructions
Removing the control panel may be necessary for repairs, panel adjustments, sensor replacement, and more. The procedure is simple and can be done at home.
Tools and materials
To disassemble and repair the dashboard, you need to prepare the following tools and materials:
- a set of keys;
- Screwdriver Set;
- diagnostic tester;
- new sensors and spare parts;
- items to customize.
When buying originals, it is better to avoid fakes.
Action algorithm
To disassemble neatly, follow these steps:
- Disconnect power from the machine by disconnecting the negative terminal from the battery.
- Remove the cover from the steering column by unscrewing the mounting bolts.
- After removing the plug and unscrewing the two screws, the instrument panel is removed.
- The plugs are then disconnected.
- After opening the glove, unscrew the mounting bolts. We unscrew the bolts in the same way to secure the shelves for things.
- It is necessary to pull the handle of the hydraulic light corrector to take off . Then use a wrench to unscrew the lock nut and tighten it.
- Disconnect the backlight power cable while wearing the glove.
- After unscrewing the two bolts, the Insulation Control Unit must be replaced.
- Next, clean up the spill.
- Next step. Unscrew all console equipment.
- While unscrewing the last two mounting nuts in the center, carefully remove the panel from the studs and remove it from the cab.
Next, repairs, adjustments, replacement of the sensor are required, backlighting is installed. After completing all the manipulations, assembly is performed in the reverse order.
To make assembly easier, disassemble the wires and disassemble the devices and sensors during disassembly.
Disabling wired connectors
Customization Ideas
The VAZ 2105 was slightly modernized, mainly the engine. Five-wheelers, like UAZ cars, often go into tuning the dashboard to give it a modern look and expand functionality.
Setting up the VAZ 2105 is possible in the following ways:
- purchase a ready-made kit, which includes dials for sensors, instrument panels, lighting parts, wiring and connection terminals;
- a budget option. instrument lighting with LEDs of different colors;
- More technically challenging is the texture and color change of the console.
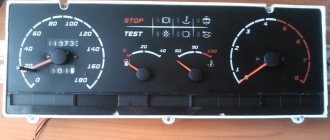
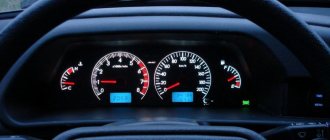
Using LED backlight, you can change the design of your control panel to make it stylish and personal.
Photo gallery
The VAZ is presented in a photo gallery with 2105 photos of different options for customizing the control panel.
Video “LED lighting for VAZ 2105”
This video demonstrates how to make a speedometer LED (made by Roldugin TV).
Description and location of indicators and instruments on the panel
In order to fully use the information that the dashboard provides, you need to know the location and purpose of its instruments and indicators, and their characteristics. The instruction manual provides a description of the device. A standard panel consists of a set of measuring and control instruments, as well as alarms.
Instrument panel VAZ 2105
The dashboard typically contains the following components:
- speedometer – speed indicator with trip meter;
- coolant temperature and fuel level indicators;
- indicator lights for battery charge, oil level, fuel reserve;
- control lamps, turning on side lights, high beams, direction indicators;
- voltmeter;
- signaling unit;
- switches for heated rear window, rear fog lights;
- switches for exterior lighting and electric heater fan.
When installing an on-board computer, it becomes possible to monitor more than 20 parameters that allow you to control the operation of components and systems of the machine. The information is reflected on the display (the author of the video is RusLan 404).
Removing the dashboard of a VAZ 2107
“Tidy” VAZ 2107 is a set of indicators and instruments that help the driver monitor the condition of the car, performance of systems and speed. The dashboard also includes the heating and ventilation control panel of the “seven”.
Before removing the dashboard, be sure to disconnect the battery ground terminal.
Further operations are performed in the following sequence:
- remove the plastic handles from the heating and ventilation control levers;
- pull out the handle of the daily mileage reset button;
- remove the decorative trim of the self-tapping screw securing the instrument panel;
- Unscrew the fastening screw using a Phillips screwdriver and pull out the panel;
- unscrew the knurled nut securing the speedometer cable and uncouple it;
- disconnect the vacuum air supply hose;
- unplug the wire connectors from the devices;
- pull out the dashboard.
Replacing a VAZ 2105 torpedo with a VAZ 2107
This alteration had been planned for a long time, all the parts were lying around and waiting in the wings. The installation of the torpedo was accelerated by a leaking heater radiator.
To replace you will need:
Torpedo VAZ 2107
(used 800 RUR)
Beard 2107
(200 RUR)
Wiring 2107 injector: from the fuse box to the dashboard
(used 800 RUR)
Dashboard, VAZ 2107 injector
(2900 RUR)
The whole job took me 2 days, I did everything slowly. The first day was spent disassembling the old torpedo and replacing the heater radiator (it’s still a mess)
I worked with a friend, more than half of the time was spent talking.
I was very pleased with the work done, all that remained was to set the clock and deal with the ESP buttons (I plan to move them to the armrests of doors with a kalina block)
The appearance will change a lot, 07 torpedo in my opinion
AutoNews / Reviews / Tests
How to Remove the Instrument Panel on a VAZ 2105
Nuance for replacing the device panel of the VAZ 2104-2105-2107
Disconnect the ground wire from the battery.
Unscrew the fastening screws and remove the facing casing of the VAZ 2107 control shaft.
- panel and its accessories
- 1 - ashtray body
- 2 — bracket for securing the glove box lid lock
- 3 - ashtray
- 4 - glove box lid lock
- 5 — decorative insert for radio mounting panel
- 6 — radio mounting panel
- 7 — insert of the lower panel of the radio receiver mounting
- 8 — facing of the radio mounting
- 9 — liner of the upper panel for mounting the radio receiver
- 10 – plug for the windshield heating symbol display
- 11 — instrument panel
- 12 — loudspeaker trim
- 13 - instrument panel
- 14 — instrument panel insert
- 15 — glove box body
- 16 — glove box cover
- 17 — hinge link of the glove box lid
- 18 — instrument panel shelf
Using a narrow sharp tool, remove the side window heating nozzles from the device panel, the body ventilation nozzles of the VAZ 2105 and the plug 10 of the windshield heating sign board from the device panel 11.
Replacing lamps on the panel of a VAZ 2105 - 2104
Hello, I'm tired of advertising on video clips on YouTube, and you understand why their advertising, for this advertising...
Replacing the VAZ 2105 torpedo. 02/21/17. - part 1.
MY AFFILIATE PROGRAM Log in and EARN.
- — Unscrew the screw (located under the plug) securing the shield of 11 devices, remove the shield, disconnect the plugs and wires from the devices.
- — Remove the facings 12 from the left and right loudspeakers, overcoming the resistance of the two holders located along the upper edge of the facings.
- — Unscrew the four screws that secure the speakers, pull them out of the device panel and disconnect the wires.
- — Remove shelf 18 and body 15 of the glove box by unscrewing the screws securing them.
- — Unscrew the nut of the speedometer day counter and pull out the counter cable from the instrument panel of the VAZ 2104.
- — Remove the electronic clock, cigarette lighter and light switches and heated rear window from panel 6 of the VAZ 2107 radio mount. Disconnect from their wires.
- — After unscrewing the fastening screws, remove the radio and disconnect the wires of the VAZ 2105.
- — Pull out the lower insert 7 of the radio mounting panel by the upper part.
- — By pressing on the left and right sides of the edge of the panel 6 for fastening the radio receiver, release the hooks of the upper insert 9 and pull it out of the panel.
- — Remove the decorative insert 5 mounting panel by pressing out the two hooks in the upper part of the insert from the inside.
- — Unscrew the 6 screws of panel 6 securing the radio receiver (including two screws that immediately secure the device panel) and remove panel 6.
- Instrument panel mounting points. Arrows indicate attachment points
Through the gaps in the panel 11 of devices and the glove box, unscrew the four nuts of the upper fastening of the device panel, as well as the two remaining screws of the lower fastening, remove the panel and the panel insert
Install the device panel in reverse order.
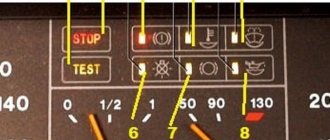
Location of lamps on the instrument panel: 1 – speedometer illumination lamp (AMH 12-3-1 (T3W); 2 – indicator unit (A 12-1.2 (W1.2W); 3 – battery charge indicator lamp (AMH 12- 3-1 (T3W); 4 – instrument cluster illumination lamp (AMH 12-3-1 (T3W); 5 – insufficient oil pressure warning lamp (AMH 12-3-1 (T3W); 6 – fuel reserve warning lamp (AMH 12-3-1 (T3W); 7 – voltmeter backlight lamp (AMH 12-3-1 (T3W); 8 – indicator lamp for turning on the external lighting (AMH 12-3-1 (T3W); 9 – indicator lamp for turning on the direction indicators (AMH 12-3-1 (T3W); 10 – high beam indicator lamp (AMH 12-3-1 (T3W)
Instrument needle illumination
In the process of tuning the VAZ 2107 instrument panel, you can beautifully illuminate the arrows. It is better to take the tachometer and speedometer as an example, since the four small instruments have very miniature arrow mounts.
To work you will need:
-four white LEDs, 3mm long;
- four resistances of 1.5 kOhm each;
- a piece (length - four mm) of plexiglass for the hands;
-black paint or red nail polish;
-two caps for the arrow body (women’s mascara can help) and two furniture plugs;
After this, we decide how long the arrow will be (let's take 30 mm plus the mount itself inside the cap). Then we carefully grind the plexiglass on the machine; it is important to grind it in such a way that the arrow at the top is even and pointed at the bottom. In this case, the light will go along the arrow and its illumination will occur more evenly.
We grind the opposite end of the arrow at an angle of 45 degrees. We put it on glue. We paint the arrow with red varnish (please note that the bottom of the arrow must be painted more than once, but in several layers. In this case, the light will not fall on the instrument scale. To fix the arrow on the axis of the instrument, you can use a furniture plug. It must also be placed with glue.
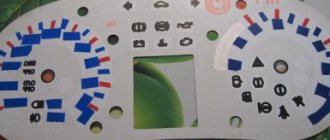
After this, we weigh the standard arrow, as well as the one we made ourselves (the difference can be 100 mlg, which, in general, is not significant). Let's disassemble the "tidy". We dismantle the white scales and implant two LEDs. This process requires special patience and accuracy. The LEDs should be painted black on the sides. This will reduce the amount of light that will reach the scale.
If light leaks out from under the arrow, you should make a ring and paint it with red varnish. After this, you need to put it on the scale. Thus, a white trail is formed around the arrow body. We attach the LEDs to the dimensions. Then we definitely test the backlight. As a result, it should turn out that it will be bright even during the day. Perhaps the backlighting of the numbers will not be enough, but this is not so important - the main thing is that the arrow glows beautifully and very brightly.
Possible reasons for dismantling the shield
In what cases is it necessary to remove the dashboard of a VAZ 2107 car? There may be several reasons for this:
- panel tuning;
- replacing burnt out light bulbs;
- repair of individual devices that have failed.
VAZ 2107 is a legendary car, which hundreds of thousands of car enthusiasts have repaired independently.
Replacing the instrument panel VAZ 2110 - 2112 step by step instructions
In order to remove and replace the instrument panel of a VAZ 2110, perform the following steps:
- So, the first thing you need to do is use a screwdriver to unscrew the two screws located at the top of the tidy.
- Next, use the same screwdriver to unscrew the two bolts that are located at the bottom of the dashboard.
- Carefully pull the plastic cover towards you and move it to the side so that it does not interfere.
- We unscrew the two screws that secure the tidy directly.
- Now we turn off first the first and then the second dashboard power supply.
- Pull the panel towards you; it should slide off the brackets.
- When the dashboard is completely dismantled, you can begin further work, in our case this is replacing faulty light bulbs.
- Attaching light bulbs couldn't be simpler - we take the body of the light bulb, turn it and take it out of the socket. We install a new one in its place.
- Further assembly is carried out in reverse order according to the same principle.
Video: Replacing the instrument panel VAZ 2110 – 2112 (instructions)
Tuning scales
In the basic version, the background of all scales is black. The marks on them look too faded. This style was relevant about 2 decades ago. Nowadays, this design looks rather poor.
A chic, sporty look is achieved by installing white scales with contrasting black markings. They can be made on a color printer using self-adhesive film.
When making improvements at this stage, do not forget to exercise maximum caution - the mechanisms are extremely fragile.
How to dismantle the instrument panel: step-by-step instructions
First of all, you need to open the hood of the car and remove the negative terminal from the battery in order to de-energize our dashboard. After this, the work is performed in the following sequence:
- unscrew the dashboard shelf and the glove compartment body using a special screwdriver;
- turn off the power to the light bulbs that illuminate the interior of the glove compartment in your car;
- We very carefully remove the additional dashboard along with the clock and other devices. To do this, you will need to pry the part with a screwdriver and pull it out of the special grooves;
- turn off the cigarette lighter and warning lamps by removing the corresponding wires located behind the additional panel;
- we remove the switches located in the immediate vicinity of the gearbox lever and disconnect them from the on-board network;
- We unscrew the screws that you will immediately see under the switches and the bolts intended for fixing the main console of the torpedo. After this, you can freely remove it without fear of damaging the wires;
- remove the steering column cover;
- remove the heating system cover together with the air duct deflectors;
- dismantle the heater control unit;
- unscrew the last nuts holding the torpedo. For this purpose you need to use a key of 10.
Console tuning
Tuning the VAZ-2107 console is an optimization of the front panel, as a result of which many useful features and advantages can appear in the car, such as a new tape recorder, clock or cigarette lighter. Refinement of the beard of the VAZ-2107 allows you to make the vehicle more original and functional. Anyone can, through simple improvements, install a player, a modern clock, a USB socket, devices for monitoring the electrical network and small “pockets” for small items in the car.
Among the main tools, without which tuning the standard beard of a VAZ-2107 is impossible, it is worth noting: an electric jigsaw and drill; "grinder"; locksmith corner; a simple pencil; ruler; glue and stapler for furniture.
Do-it-yourself tuning of the VAZ-2107 beard may involve the manufacture of a new panel, which will initially have special areas for the location of switches and indicators. The easiest way to tune the console is with ordinary plywood with a thickness of about 6 mm. It is advisable to use artificial leather as finishing materials, which perfectly matches the color with the rest of the interior elements. Recently, car owners have even adapted to introducing carbon fiber.
Tuning the VAZ-2107 beard can be done with the help of a comprehensive modernization, which will “radically” change the interior of the car. Replacement on doors and other interior elements can be made using carbon fiber and leatherette. The new console will need to be positioned in place of the factory fixture, which must first be dismantled. By removing a standard beard, the motorist can quickly take measurements to further create drawings.
The most common reasons for dismantling
There are a lot of reasons for removing the tidy on a VAZ 2107, and some of them can be called banal, but nothing can be done. The most common reason when you need to remove the instrument panel is a burnt-out backlight bulb. Replacing light bulbs in the dashboard of a VAZ 2107 is carried out only when dismantling the device, and this procedure is simply impossible to perform otherwise.
The dashboard on the VAZ 2107 must also be removed for a number of the following reasons:
- Malfunction of pointer indicators.
- Failure of the instrument lighting, as well as lack of functionality of the arrow indicators.
- Replacing the device with a new one, for example, if a digital panel is installed instead of the factory instrument panel.
- Tuning or upgrading the device.
As practice shows, most often the need to dismantle the dashboard arises precisely because the backlight bulb burns out. If the device is dismantled for this reason, it is recommended to immediately replace conventional light bulbs with LED ones.
Required Tools
Before starting work, you will need to prepare the necessary tools so that you do not have to be distracted during the process. Despite the fact that the work of removing the device in question is quite labor-intensive, to implement it you will need a small set of tools, including:
- Phillips and slotted screwdriver.
- Electrical tape to indicate chips that are disconnected from the device.
- Work gloves for unscrewing the speedometer cable.
When all the tools are prepared, it remains to make sure that the parts and elements that are planned to be installed or replaced on the dismantled device are available. After this, we proceed to perform the main part of the work.
Instructions for removing the dashboard on a VAZ 2107
Initially, it should be noted that the process of dismantling the tidy on VAZ 2107 cars, the injector and carburetor are identical, therefore the instructions described below are appropriate for sevens of all years of manufacture. Having prepared to carry out the work, you can proceed by following the following sequence:
- First you need to turn off the power to the car, for which you remove the negative terminal from the battery. This must be done, since the work will be carried out in the electrical part, and the likelihood of a short circuit occurring is quite high.
- Next, we move into the interior, and using a slotted screwdriver, we remove three caps from the levers responsible for the operation of the heater.
- Using a slotted screwdriver, remove the plastic plug on which the heating sign is depicted. This plug is on the right, and under it there is a Phillips screw that needs to be unscrewed. (There are 2 screws under the plug, but only one needs to be unscrewed - the top one, which secures the right side of the dashboard).
- Next to the hazard warning button, there is an odometer reset button, which is secured with a plastic nut. The nut must be unscrewed and removed with the washer located behind it. The button is recessed inside the panel.
- The right side of the tidy is weakened at this stage, and it remains to perform several additional manipulations in order to completely dismantle the device. To do this, pull out the right side of the device, thereby freeing access to its rear part. Here you need to disconnect all the chips and wires to perform dismantling.
- Initially, the power chips for the stove button are disconnected. Be sure to remember the location of the wires. It is recommended to take photos so as not to be confused when assembly is carried out.
- Next you need to disconnect the speedometer cable. It is secured with a special nut, which can be unscrewed by hand.
- All chips connected to the dashboard are disconnected. It is almost impossible to confuse their locations, since they have different fastenings and differ in size.
- The supply hose is removed from the economizer fitting. This cable is located on the left side of the device.
- After all the chips, cables and wires are disconnected from the device, you can dismantle it.
If the question arises about how to remove a VAZ 2107 torpedo, then this is also not difficult to do, for which you will need to unscrew an additional dozen fasteners. There are just a lot more reasons when you need to remove a torpedo or a beard. After the instrument console is dismantled, you can begin to repair, modernize and replace it. Once the work is completed, all that remains is to install the device in its place. This is done in the reverse order of removal.
In conclusion, we summarize that the work of removing the dashboard is not at all difficult, and only takes a couple of hours of time along with the repair. By devoting a few hours of time, you can not only fix the breakdowns, but also tune the panel, which displays all the most important information when driving a car.
How to get rid of unevenness
Typically, irregularities occur when a smooth section of the dashboard gives way to a sharp bend. In this case, in this area you need to warm up the surface again with a hairdryer, after which it can be stretched in the right directions and smoothed. Do not forget that the material is very delicate and can be easily scratched.
Important! In hard-to-reach places where it is necessary to glue the material, for example, near an air duct, you must first heat and stretch the leather substitute, only then glue it along the edges of the hole.
For the VAZ-2105, tuning the dashboard should not be difficult, since everything in the car can be removed quite easily and the surface lines are smooth. With due desire and effort, the tuned car will be completely transformed, and the work will be of high quality and will decorate the interior of your car.
