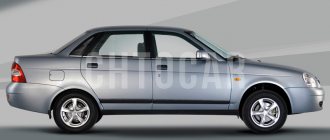
The standard tape recorder on a luxury Priora received a more positive rating among users than a negative one. This is a very good device with extensive functionality, the only drawback of which is the not very high power of the built-in amplifier. There are not many sound settings, but the receiver is not designed for musicians with refined ears; it is more suitable for the average user. For those who want more “sound” in their car, the Ural radio is recommended, and we will tell you how to install it below.
Main characteristics and functions of the radio on a Priora car
Device in the car
To prove the acceptable quality of the Priora radio, let's consider its main characteristics. The car radio operates on FM and AM frequencies, with the former being perceived in the range from 65 to 108 MHz, having stereo separation of more than 30 dB and sensitivity at a noise/30 dB ratio of 12 decibels. The AM band operates at frequencies of 522-1620 kHz, with an intermediate frequency of 450 kHz and a sensitivity of less than 43 dB.
The closest buttons to the driver of the Lada Priora on the radio are the buttons located on the left side:
- turning on/off the receiver;
- instant mute (Mute);
- selection of operating mode (Mode);
- selection of frequency range (Band);
- scanning frequency range / tracks / sequential tuning on a station (Scan). In scan mode, the receiver will pick up all stations in the selected range and play for a few seconds. By pressing again you can select the corresponding station;
- start/pause playback or select a radio station (1);
- scanning tracks or selecting a radio station stored in memory as number 2 (2\Int);
- to select a station recorded at number 3 or to play tracks repeatedly (3\RPT);
- to select a radio station recorded under number “4”, or to play music in random order (4/RDM);
- button “5” makes it possible to either go to the radio station stored in memory as number five, or go to the next folder when playing an MP3 disc (F+/5);
- button “6” makes it possible to either go to the radio station stored in memory at number six, or go to the next folder when playing an MP3 disc (F-/6).
Driver's seat
In the center of the radio panel in the Lada Priora there is an SD card loading window (at the top), a disk loading window, a liquid crystal display, cell phone control buttons, a slot for the built-in microphone, a hole from the “Reset” button (activated by a sharp thin object when an error is displayed , all buttons to initialize the system do not work). At the bottom there is an encoder knob, control buttons, and a menu selection confirmation button.
Closer to the passenger located in the front seat of the Lada Priora, on the radio panel there are such functions as:
- disc eject button (top);
- enabling the automatic search function for alternative frequencies (AF). This option allows you to find the best broadcast for a specific channel;
- automatic tuning to stations, scanning of stored stations, searching for a folder or a specific track (using the AS/PS search method);
- Search for thematic radio stations using the RDS (PTY) function. For example, you can select stations that broadcast only rock, pop, weather, finance, etc.;
- enable the feature for the messaging service (TA);
- button for displaying additional data (Info);
- selecting equalizer mode (EQ)
- selecting a radio station stored in memory under numbers 7, 8, 9, 0 (buttons 7-0).
- The standard radio on the Priora has the ability to use buttons “1” to “0” to dial a phone number.
The choice of tape recorder mode is carried out through the “Mod” button, in the menu of which you can select a radio receiver, memory card, disk, USB or information from the navigator using a brute force method. The recorder will play navigation signals (if a navigator is connected) while playing the currently selected main function (eg radio) in muted mode.
Installation of wiring, amplifier for audio system in Lada Priora
Due to numerous requests, I hasten to tell you about the standard Priora tape recorder Yes, yes, you heard right, such a thing exists
I’ll say right away that this 1Din device with a false panel has the following characteristics: reads CD/MP3, is equipped with USB, two-channel output, has built-in BlueTooth and is equipped with an LCD display
And so, let's turn it on.
By the way, one of the advantages of this device is that it fits well into the overall interior of the car.
First, let's go over the quick buttons: ST - stereo/mono switching. BAND - switching bands. AF—turn on/off the mode for receiving alternative frequencies when receiving RDS stations. TA—turn on the traffic information standby mode. PTY—select the program type when receiving RDS stations. SCN - scanning during playback. RPT - repeat song/disc (folder) SHF - shuffle =) MODE - switch modes. AS/PS - auto scanning and memorization of memorized stations, selection of tracks. SCAN - scanning stations. DISP - options for displaying information on the display. EQ—switch equalizer presets.
Radio.
Well, the radio is like a radio. Ranges FM1-FM3, ORT and MW1-MW2. There is auto and manual tuning, auto scanning with memorization, review of memorized stations, as well as a choice of stereo/mono modes. There is also a mode for receiving RDS stations, searching and waiting for traffic information to be received, searching for stations based on the type of programs being transmitted, as well as searching for alternative frequencies.
CD player.
What we have: Reads Audio, MP3 and WMA CD(R, RW)... Everything is as usual: switching between tracks, rewinding, repeating a track/disc, shuffling, moving 10 tracks forward/backward and scanning the disc. It is also possible to select a track by number or by file name (only for MP3, it seems) + select a folder on an MP3 disk.
USB.
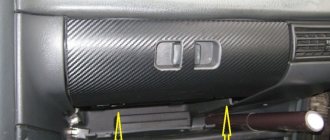
The input for the flash drive is located in our glove compartment.
USB version 1.1 and 2.0. File systems FAT12, FAT16 and FAT 32. The maximum capacity of a flash drive is 120 GB. Listening functions are similar to those of a CD player.
Next we should talk about equalizer presets. We have only 4 of them:
And as a rule, no one uses such presets... so here, this is clearly unnecessary.
The next stage of my story will be the quick settings block. You can dig into them by pressing the central toggle switch once.
As we can see, we were not spoiled with the settings either. They only gave us the opportunity to mock the timbre adjustments for low and high frequencies, as well as the transfer of sound from left to right and from front to back.
Further. If we press the central toggle switch longer, we will find ourselves in a block of settings, which, as a rule, are set once.
INVOL—sets the initial volume level. ADJ - setting the current time. BEEP - turn on/off the sound confirmation mode for pressing buttons. TAVOL — setting the volume level when receiving traffic information.
BTVOL - volume control in Bluetooth mode. EON—turn on the mode for receiving RDS stations with extended service.
LOUD - enable loudness compensation. LOC - enable local/long-distance reception mode.
Next I’ll tell you about BlueTooth. It's a useful thing, I'll tell you. The only annoying thing is that if you are not alone in the car and you receive an incoming call, the contents of which you would like to keep to yourself, then you have to hang up, because all passengers will be able to listen to the interlocutor, because it broadcasts through all the car speakers
By the way, you just need to connect the phone to the device once and then it will connect itself, unless of course the Bluetooth mode is activated on the phone. So, let's call.
After your interlocutor picks up the phone, we see the following inscription
And the call time begins to display on the screen. You can end the conversation with the handset key (the one on the bottom right) When we receive an incoming call, we hear the ringing music of your phone in all speakers, and there is such an inscription on the screen
after a few seconds it changes to the caller's number
Everything would be fine, but the entire number does not fit on the screen, but moves in a creeping line - this is quite inconvenient if you are in a difficult traffic situation at that moment... Well, then we can skip the call by pressing the “handset” button on the bottom right or answer by pressing handset button on the bottom left
By the way, using the same Bluetooth, you can listen to music from your phone
That's probably all, although it would be necessary to show two tulips for the exit, located in the same glove compartment.
So, let's draw some conclusions. Among the advantages, it is worth noting the following: - fits quite well into the interior of the car. — no need to carry the socket with you. — good ergonomics, you don’t need to reach for it to control it, your hand can easily find all the buttons. — The LCD display displays information clearly, without distortion, everything is perfectly visible in any lighting. — price, with this audio system + 4 speakers and antenna the car becomes more expensive by 6,000 rubles. (declared by AvtoVAZ) Of the minuses: - frequent freezing when listening to a flash drive, on which there is a lot of different information. — an incomprehensible antenna: in the city the reception is worse than outside the city. =) - very limited functionality, small number of settings. — after a conversation via Bluetooth, when listening to USB, for example, not often, but still, the radio starts playing. =( - for building a good car audio, IMHO, it’s still not suitable. Even though people wrote on the forums that they connect amplifiers and subwoofers.
Verdict. People who just listen to the radio or songs from the 70-80s in the car are definitely a must-have. Also suitable for the first time for those who, like me, are financially limited when buying a car, but still want music in the future. is going to install more reputable audio devices.
Something like this.
Choosing the sound in the car
The device looks impressive.
Owners of the Lada Priora can choose one or another sound timbre for their interior by pressing the EQ key and then selecting the style “classic”, “rock”, “pop”, “vocal”, etc. To more accurately configure the parameters, you need Briefly press “8”, then select the mode using keys 4-5 and 5-6 – the desired value. Here you can select “Fade” – balancing the front and rear speakers, “Balance” – harmonizing the side speakers, “Bass” – low frequencies, “Treble” – high frequencies. A review of the manual indicates that improved sound quality can be achieved by using the "Loud On" mode. In addition, in the same “section” you can set stereo or mono mode, enter sound signals for pressing keys (Beep On / Of), etc.
What are RDS features? Radio stations sometimes accompany their broadcasts with such options. For example, RDS in text form allows you to broadcast the name of a song, station, etc. on the display. In the “TA” mode, you can receive traffic information from certain radio stations on the display.
The disc playback mode is quite simple. The CD is inserted, started, paused using the "1" key, and after removal the radio automatically turns on. Scanning tracks (Int key) allows each track to be played for 10 seconds; to stop scanning, the key must be pressed again. Music from a disc can be played repeatedly (RPT button) or in random order (RDM). The radio successfully reads music from memory cards or via a USB connector. If the media contains music tracks, playback begins immediately after placing the media in the appropriate slot. Memory cards are ejected by pressing again.
Audio, video and photo
The radio supports audio formats: MP3, WMA and WAV. While a tune is playing, the display shows information about the album, artist, and cover art (if any). You can adjust the shades of sound using the equalizer (there are 6 pre-programmed settings for Jazz, Rock, Voice, etc.). The sound quality is not bad, quite clear, without audible cuts in the highs or lows.
MMS supports only one video format: WMV with a resolution of 320*240px. To play video files you will have to use a converter, for example, Xilisoft Video Converter Ultimate. It will not be possible to play a video without conversion, for example, in 720p resolution, the picture will slow down, and the sound will lag behind the video, due to the insufficiently powerful processor.
Review of MMC Lada Granta (luxury) and Lada Kalina 2 (standard)
Review of MMC Lada Kalina 2 (luxury) and Lada Priora (luxury)
The radio is capable of opening photos, supported formats: JPEG, .JPG, .JPE, .BMP, GIF, .PNG. For example, a photo with a resolution of 1400x800px and a size of 1MB will open in about 1 second, and a photo of 1978x3456px and a size of 7MB will take as much as 9 seconds.
It is worth noting that after purchasing a car, the antenna comes as a gift. You will have to install it yourself.
Using the radio to make phone calls
Device control panel
The instructions from the Priora radio also contain information that the device supports the Bluetooth function and can be used for a wireless headset or playing tracks from Bluetooth devices. To do this, press one or the other key with the phone icon, and the device name (or Disconnect) will appear on the display. First you need to turn on Bluetooth on your mobile phone and perform a search. If everything is in order, the “hands free” message will appear on the phone and you can connect (the PIN code is “0000”). Then a beep and Bluetooth icon will appear.
As the manual says: if you need to accept a call, you need to press the left button with the phone icon, and to interrupt the connection, press the right button. You can dial a number after switching to Bluetooth mode. After this, use the numeric keypad to type the name of the mobile phone, after which you need to call the subscriber with the left button with the phone icon. Ending a conversation, as well as disconnecting, is done by pressing the right button with the phone icon (short or long, respectively). A PIN code for the phone (instead of four zeros) can be set by pressing the Scan button in Bluetooth mode, entering a new code and pressing confirmation (button “8”).
In Bluetooth mode, for some phone models, you can transfer address book data from the phone to the radio. To do this, press AF/PS, view the address book via PTY, select the desired number by rotating the encoder knob. In addition, you can delete one number via AF or all numbers via TA. Therefore, you need to be careful when using Bluetooth.
As we can see, the standard radio on the Priora actually has a variety of functionality, so its cost can reach up to 5-6 thousand rubles, but many drivers don’t like it, which is why they change it. In the “standard” configuration (as opposed to the “luxury”) there is no radio, but the car has all the necessary preparation to install any receiver, including the “Pioneer”.
Review of the standard radio (MMC) of Lada Granta, Kalina 2 and Priora (luxury)
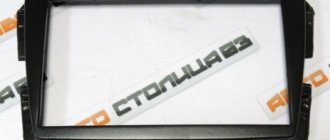
Currently, depending on the vehicle configuration, several types of 2 din radio can be installed. The first is called “2 DIN audio system, without CD drive, without TouchScreen”, the other “multimedia system without CD drive, with a 7-inch display with TouchScreen” (MMC). In the review we will talk about the MMC with a touch screen (LCD display), which is installed on the Granta (sedan and liftback), as well as on the Lada Kalina 2 and Lada Priora.
Catalog numbers MMS Lada:
- Monoblock 2190-7900010-00 - MMC Lada Granta (luxury) and Lada Kalina 2 (standard)
- The screen is separated from the buttons 2192-7900200 - MMC Lada Kalina 2 (luxury) and Lada Priora (luxury)
MMC runs on the Windows CE 6 operating system. This is specially optimized for devices with a minimum amount of memory, by the way, in our case the memory is only 128MB. Despite this, turning on the radio does not take much time (about 2-3 seconds).
How to connect Bluetooth to Priora
If you're tired of listening to the radio on the go with its constant advertisements, and your favorite music sticks and CDs are taking up too much space in your car's glove compartment, then you can use the simple tips below to connect your own mobile phone to the radio. Memory cards of modern phones can be a real replacement for flash drives, since they have a large capacity and allow you to download an unlimited number of songs. In addition, the phone is always at hand, so using it to listen to your favorite music on the radio is very convenient.
But can I connect my phone to the radio? This is not a problem for modern devices - if you have the necessary connectors, you can do this in a couple of minutes. We will help you connect your phone to the head unit not only quickly, but also “smartly”.
The phone is connected to the car radio via a standard connector
Being able to listen to songs is not the only reason why you should connect your mobile phone to a radio. Another - very hot - is the ability to manage phone calls without distracting yourself from driving or buying expensive wireless headsets.
What you need during the connection process
If your car radio model has an AUX input but does not have an audio cable with the correct connector, you will need to purchase one. It is relatively cheap and the cost varies depending on its length. To connect your phone to the radio, you'll need a small audio cable, and you'll save on buying one.
You can also use a regular USB cable; nowadays every mobile phone owner has one. And USB connectors are located on almost all models of modern car radios.
