Print this article Font size 16
When the instrument panel on a VAZ 2109 does not light up, this is one of the common malfunctions of this unit. To fix a problem, you first have to find the cause of its occurrence.
Tidying up nine
What to do if the instrument panel on a VAZ 2109 does not light up
:
- Types of panels
- Why doesn't it light up?
- Popular faults
When the instrument panel on a VAZ 2109 does not light up, this is one of the common malfunctions of this unit. To fix a problem, you first have to find the cause of its occurrence.
Tidying up nine
Types of panels
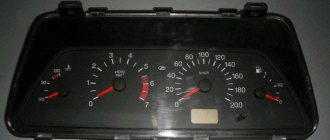
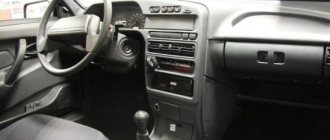
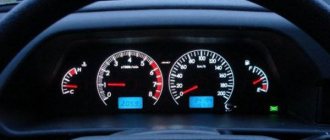
Instrument panels on the VAZ 2109 are of at least three types:
- Low panel;
- High panel;
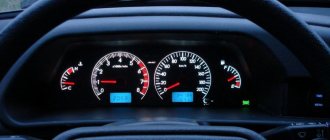
- Electronic panel on nines with Europanel.
Europanel
On versions with a low panel, failure of the entire panel is extremely rare. This is due to the fact that here the speedometer and econometer are equipped with mechanical drives. Therefore, it is unlikely that they will fail along with the electrical component.
Dashboards with a high panel do not have an econometer, but the speedometer is also based on a mechanical cable drive.
Why doesn't it light up?
If suddenly electrical appliances and indicator lamps on the dashboard stop working, certain actions must be taken.
- First, remove the cover of the mounting block and make sure that the fuse is intact. The fuse markings are located on the inner surface of the cover. You should look for fuse F16 or F5, depending on the year of manufacture of your VAZ 2109.
- If the fuse is intact, be sure to check whether the contacts of the fuse you are looking for have not oxidized. It is not uncommon for shields to fail due to broken contact.
- Check if there is power to the dashboard. To do this, you will need a warning light and the ignition on. Disconnect connector X4 in the mounting block and check for voltage at pin 3. The disadvantage of the VAZ 2109 design is that when it rains, the mounting block immediately becomes wet. This causes oxidation of the contacts in the pads, which causes the electrics to stop working. Sometimes not only the contact is oxidized, but also the board of the Nine mounting block.
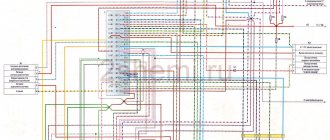
If none of the above actions yielded results, you will have to be disappointed. After all, now you need to remove the dashboard and check the condition of the wiring, contacts, and negative connections. Here it is better to trust a professional electrician or set aside a whole day to troubleshoot problems yourself. There is no need to rush here.
Where did the backlight go?
Popular faults
If we talk about the dashboard of VAZ 2109 cars, then they are characterized by certain problems. We will tell you about them, and also tell you how to act correctly in a given situation.
| Fault type | Your actions |
| Gasoline level and temperature indicator does not work | In most percent of cases, this situation occurs due to breakdown of devices, sensors of these devices, or an open circuit of the power supply. Therefore, first check the circuit for continuity, make sure that the fuses have not blown. If this is not the case, check whether the gas level and temperature sensors are working. Only if none of the actions allowed you to get rid of the breakdown, you can begin to replace the devices themselves. No options, the problem lies in them |
| When the fuel tank is full, the arrow points to zero | If you have worked on the fuel level sensor, the fault most likely lies with you. When manipulating this device, the float limiter is often knocked down. Either the limiter is installed incorrectly or adjusted, causing the resistor winding to end. To resolve the problem, remove the sensor and then adjust the limiter again |
| The fuel gauge needle regularly jumps and ends up at zero | Here, most likely, the resistor has weak contact with the current collector. Another possible option is that there is a break in the resistor. To resolve this situation, we recommend replacing the hot level sensor with a new measuring device |
| The fuel level lamp is constantly on | If this lamp is constantly on, there is probably a short circuit in the fuel level sensor supply wiring to ground. Another option is that the sensor’s flexible bus is shorted to the fuel intake pipe. You will have to disassemble the device to align the bus and get rid of the resulting short circuit |
| Indicator lamps do not work on the dashboard | There is a high probability that the light bulbs have simply burned out, or they are poorly held in their seats due to loose contact. Replace the bulbs, but first try tightening the contacts. Traces of oxidation may be detected. When cleaned, the light bulbs can work normally again. Also, do not exclude the possibility of wiring breakage or oxidation of the tips of the supply wiring. Try going over the wires with a tester, cleaning the contacts if necessary. |
| The speedometer does not work, the flexible shaft is noisy | In such a situation, you will have to change the speedometer drive cable or replace the entire speedometer assembly. But before you bother so much, check that the fastening nuts of the tips are tightened correctly and properly. The flexible shaft may make noise during operation due to deformation or violation of the permissible bending of the shell of less than 10 centimeters during installation |
Last resort - complete dismantling
The instrument panel of the VAZ 2109 is not so complicated that you cannot figure it out on your own. But in the absence of experience, it is better to entrust the repair to specialists, or to enlist the support of a partner who understands this matter.
No Comments Yet!
Source: https://luxvaz.ru/vaz-2109/343-chto-delat-esli-ne-gorit-panel-priborov.html
Reasons for turning off the dashboard on the VAZ 2114
Turning off the dashboard lights does not bode well for either the driver or the car. Because this malfunction is usually followed by others. Therefore, the backlight should be repaired immediately.
Many drivers install LED lights instead of standard incandescent lamps.
You should also understand that if the lights on the dashboard go out, then the problem must be looked for somewhere in the on-board electrical system. This means you can’t do without a multimeter, a soldering iron and electrical tape. Here are the main reasons for turning off the backlight:
- fuse burned out;
- the light bulbs have burned out (or LEDs - in later VAZ 2114 models the panel is illuminated by them);
- the wiring in the on-board electrical network is damaged;
- The common contact board of the instrument panel burned out.
Let's consider these points in more detail.
Burnt fuse
80% of cases when the backlight turns off is due to a blown fuse. It is located in a safety block installed under the steering column of the car. Usually the fuse indicated in the documentation as F10 is lit.
In the block the fuse is located on the right and is designated as F10
We recommend: Air filter for Opel Astra H
It is he who is responsible for the dashboard lighting, side lights and license plate lighting. On early VAZ 2114 models, fuse F10 was brown or red.
On early VAZ 2114 models, F10 fuses were brown
On later cars they started putting green ones. It is not difficult to understand that the fuse has blown. It's enough just to inspect it. The housing of a blown fuse may be slightly blackened or melted, and the conductor inside the housing may be severed. The faulty fuse is replaced with a new one. Typically this solves the problem.
Burnt out light bulbs
Dashboard lights operate under less than ideal conditions. They are regularly exposed to shaking, power surges in the car's electrical network and temperature changes. All this significantly reduces their service life. Especially if these are not LEDs, but ordinary incandescent lamps, which were equipped with the first VAZ 2114 models. There are a total of 19 lamps (but this number also varies depending on the year of manufacture of the car, and the number of lamps should be specified in the technical documentation for the car).
Another reason for light bulbs to burn out is their improper installation. This is most often observed on early VAZ 2114 models, where drivers decide to independently replace obsolete incandescent lamps with new LEDs, making some changes to the electrical circuit. Without proper qualifications, this operation is not so easy to perform. Here's what the sequence for replacing light bulbs looks like.
- The steering column is lowered to the bottom position until it stops. Above it is the dashboard cover with four mounting screws. They are unscrewed with a Phillips screwdriver.
To remove the dashboard cover, just unscrew 5 bolts
- To the right of the panel there is a row of buttons. Next to it there is another screw hidden by a plastic plug. It is pryed off with a knife (or a flat screwdriver). The screw is unscrewed.
- Now you need to remove the car radio from the niche by unscrewing its mounting bolts, and also remove the plastic handles from the heater controls.
- The instrument panel casing is freed from its fasteners. It should be pulled towards you, extending it 15–20 cm. This will be enough to gain access to the rear wall of the instrument unit.
- A number of recesses with light bulb sockets are visible on the wall. They are removed manually. To do this, the socket together with the lamp is turned counterclockwise until a characteristic click is heard.
The arrow on the back wall shows a socket with a light bulb; it is unscrewed by hand
- Burnt out lamps are replaced with new ones, then the instrument panel is reassembled.
Wiring damage
Problems with electrical wiring are the worst case. To figure this out on your own, the driver needs to have serious knowledge of electrical engineering. In particular, he must be able to read automotive electrical circuits well. Not all car enthusiasts can boast of such skills. It is for this reason that it is better to entrust the search for a damaged section of on-board electrical wiring to a qualified auto electrician.
His actions boil down to the following: he determines the key sections of the circuit and sequentially “rings” them using a multimeter until he finds a broken section of the wiring. Completing this work may take several minutes or several hours - it all depends on where exactly the circuit break occurred.
Panel contact board problems
If all of the above measures do not lead to anything, the last option remains: damage to the contact board in the dashboard. This part is a combination of several microcircuits. It is not possible to repair it in a garage without special diagnostic equipment. So the car owner has only one option - to replace the entire board. You can purchase it at any auto parts store. It costs about 400 rubles. Let us list the stages of its replacement.
- First, all the steps mentioned above in the paragraph on replacing light bulbs are performed.
- But instead of unscrewing the bulbs, you should unscrew the four bolts at the corners of the rear wall of the dashboard.
- The back wall is carefully removed along with the board, which is attached to the wall with plastic latches.
The contact board in the dashboard of the VAZ 2114 is held on by simple plastic latches
- The latches are bent with a knife, the damaged board is removed and replaced with a new one. The panel is then reassembled.
So, the owner of a VAZ 2114 can solve most problems with the dashboard lighting on his own. All that is required is the ability to use a screwdriver. The exception is the case of damaged wiring. It is strongly recommended that you contact an electrician to identify the damaged area. This will save a lot of time and nerves, which, as we know, are not restored.
How to change the mileage on a VAZ 21099
What prompted us to write this note was the question of how the mileage that cars travel on Russian “motorways” is actually displayed on the odometer. Agree, believing what the speedometer indicates, taking into account how widespread it is, when buying a car, will only occur to a completely gullible person.
Why is it necessary to wind the speedometer (mileage)? How to wind up a speedometer?
, like in no other country in the world, checking mileage is a more widespread procedure. Well, it’s not customary for us to demonstrate the actual mileage that a car has covered. The most fascinating thing is that winding up the speedometer, by hook or by crook, has a real reason. Practically, impartial reality forced us to the widespread dissemination of the “rewind the speedometer” procedure.
In the ancient times of the existence of such a country as the Russian Alliance, and even more so - the times of perestroika and post-perestroika collapse, Russian monsters of the automobile industry produced the “most modern”, “ultra-reliable” cars “Volga” and “Zhiguli”, assembled with the latest technology. Oh, yes - and also Moskvich.
Naturally, there were also “Cossacks,” but this magic of technology deserves another review: for example, “how to hand over scrap metal.” The quality of the products left us wanting not just the best, but a lot of the best. There was virtually no talk about a sufficient supply of spare parts.
We had to travel around towns and villages in search of the necessary parts.
It’s worth remembering, but for those who can’t, just take into account that these iron monsters have already achieved almost half a year of repairs after 120 thousand km. Standard problems that arise after such a run: a clutch that requires replacement, problems with the chassis, lost compression, an engine whose properties beg for a complete overhaul, etc.
So, if you don’t improve the mileage on a VAZ, it will be very difficult to sell such a car. Or for means that didn’t make much sense. But you still need to sell. Naturally, this bright idea first came to the owner of the car: HOW to twist the VAZ speedometer? An easy procedure - and the trusting client is sure that he will still travel a couple of 10 thousand km. This, in fact, is where the legs of the uncontrollable passion of our car enthusiasts grow from to wind up the speedometer at any cost.
How to change the mileage on a VAZ 21099
If checking the mileage on a VAZ is quite simple even for an inexperienced mechanic, then on modern cars ordinary mechanical odometers have begun to be replaced with increasingly complex devices. But it is unrealistic to suspend our person if he really needs to rewind his mileage. Now you can check the mileage on any car.
Yes, every day, with the development of technical thought, the procedure for winding the speedometer becomes more and more difficult.
The kilometers traveled by the car are now stored not only in the chip of the speedometer itself, but are also duplicated in completely different modules. Data can also be stored in the ignition module. And in the key, in the immobilizer, in the light module, in the interior and brake control units, in the engine control module - anywhere! The microcircuits into which data is recorded are conventionally dubbed “dots”. Depending on the car manufacturer, there can be from one to 4 such points!
Speedometer winding has become available only to highly qualified specialists with the most modern equipment. Although the development of the process itself did not undergo any special changes.
- The first method to change the speedometer is to reprogram the memory with data by connecting a programmer directly to it.
- The second method for checking mileage is programming the memory by connecting the programmer to the connector on the composition of devices in the car.
- The 3rd method of winding the speedometer is programming the memory with data by connecting the programmer to the car diagnostic connector.
THIS IS INTERESTING: What problems can there be with the flywheel?
The 1st method requires a huge amount of time and labor, but the 2nd method is much more science-intensive. He asks the mechanic to figure out both the memory encryption and what protocols are used to access it.
The 3rd method of winding up mileage will become virtually impossible in the near future. Manufacturers do their best to deny access to non-certified mechanics and electricians to programming car microprocessors. In other words, the newer the car, the more difficult it is to check the mileage on it, and the less likely it is to check the speedometer through the diagnostic connector.
Well, such a thing as storing data at several points significantly increases the financial costs of those who want to change the speedometer.
Let's summarize: winding up the speedometer of a new foreign car is an expensive pleasure, but checking the mileage on a VAZ is completely time-consuming and affordable.
Source: https://vivauto.ru/kak-smotat-probeg-na-vaz-21099/
Other reasons why one low beam headlight does not light up
Sometimes the abnormal operation of headlights lies in very unusual reasons. Thus, there is a known case when the owner of a Niva turned off the low beam after he dismantled the headlight cleaners, which had long ceased to function. As a result, for a long time he could not understand why the low beam on both headlights turned off. Only through experimentation did he manage to discover that for the headlights to work normally, the presence of any motor, be it left or right, is necessary. Ultimately, it was necessary to create an imitation of the presence of these elements by closing the contacts going to them.
This example illustrates that if, after checking all electrical circuits and the functioning of all elements, the malfunction cannot be eliminated, you should remember whether any changes or improvements have been made to the design of the car in the foreseeable past. After all, it cannot be ruled out that in the process of making changes, some brilliant idea of an engineer at the car plant was violated, which provoked the disappearance of the light.
In cases where all of the above measures were taken, but it was not possible to achieve normal operation of the low beam lamp, you should contact specialists at a service station. Otherwise, further searching for the reason why one low beam headlight is not on may take a lot of time without achieving the desired result.
Finding out the reasons that caused the low beam to fail and gaining experience in eliminating them will also help if the opposite problem occurs - the high beam stops lighting while the low beam is working normally. As a rule, the causes of the malfunction in this case are the same as those described above, only they are also supplemented by inadequate operation of the steering column switch. By the way, it can also be the reason why one low beam headlight does not light up. And in this case, it is best to simply replace it.
The backlight of the instrument panel of the VAZ 2110 does not light up - Do-it-yourself car repair
Cases when the dashboard on a VAZ-2110 does not work are not uncommon for owners of domestically produced cars. Any car has some shortcomings, so car owners simply have no choice but to fix the problems that constantly arise. And you will learn further about what to do when the dashboard on a VAZ-2110 stops working.
Arrangement
So, what can you see on the instrument panel in this car? The combination consists of several components:
- antifreeze temperature indicator in Celsius;
- tachometer - number of revolutions of the power unit;
- right and left turn indicators;
- speedometer - vehicle speed;
- fuel reserve - the volume of fuel in the tank;
- image of a gas station - a signal about the need to refuel;
- control indicator for starting dimensions;
- brake fluid level indicator;
- starting high beam headlights;
- knob for adjusting the clock;
- display with total and daily mileage;
- alarm control indicator;
- clock screen;
- battery charge level;
- check engine - indicates an engine malfunction;
- indicator indicating the handbrake is engaged;
- oil pressure level;
- choke light - only available on carburetor engines.
Features of panels of different VAZ-2110 models
On VAZ-2110 cars of different years of production you can see different options for instrument combinations.
- The first models had a built-in electromechanical panel with factory number 3801010. Visually, the device can be easily identified by the mechanical odometer, which is built into the speedometer scale. It is driven by the engine, but the rest of the indicators operate on the magnetic principle. At the back of the shield you can find two power strips placed at right angles.
- A little later, a dozen were released with an electronic panel equipped with a display at the bottom of the speedometer. Occasionally there are panels with a suction indicator or an airbag light in the same place. There are cars with dual displays - under the speedometer and tachometer.
- It is extremely rare to find dozens with panels intended for the VAZ-21106. Such shields are equipped with technical number 21106-3801010. This panel can be identified by the display at the bottom of the tachometer and the extended range of the speedometer.
- The latest VAZ-2110 models are equipped with shields that are unified with the 2118 model. They have one difference - the combination of scales. Unlike the old model, the signs on these panels are placed chaotically and slightly shifted to the right.
Source: https://avto-voshod.ru/ekspluatatsiya/ne-gorit-podsvetka-paneli-priborov-vaz-2110-2.html
Instrument panels VAZ VDO (LED)
You can install a more beautiful and convenient panel with LED indicators, the so-called VDO panel. Here VDO is the panel manufacturer.
| Connecting VDO on a Kalina car | ||
| 1 | Pink-white | To electric power steering |
| 2 | Blue and white | To the hazard warning indicator |
| 3 | Gray-blue | To emergency oil pressure sensor |
| 4 | Brown blue | To the parking brake switch |
| 5 | Yellow-blue | To the immobilizer control unit |
| 6 | Black | To the airbag control unit |
| 7 | Yellow | To the outside light switch |
| 8 | Blue | To the right turn signal switch |
| 9 | Blue with black | To left turn signal switch |
| 10 | White-blue | TO ECU |
| 11 | . | To brake pad wear sensor |
| 12 | . | To seat belt sensor |
| 13 | Black | To the traction control control unit |
| 14 | Red-blue | "RESET" key on the steering column switch |
| 15 | Pink-blue | To brake fluid level sensor |
| 16 | Black | To ABS |
| 17 | Green | To the high beam switch |
| 18 | White | To the instrument cluster light control |
| 19 | Brown | Panel weight |
| 20 | White-red | Terminal "30" |
| 21 | Orange | Terminal "15" |
| 22 | Yellow-red | To fuel flow sensor |
| 23 | Orange-white | MK key "forward" |
| 24 | White black | MK key "back" |
| 25 | Black and white | Outside temperature sensor (-) |
| 26 | Yellow-green | Outside temperature sensor (+) |
| 27 | Pink | Fuel level sensor |
| 28 | Grey | Speed sensor |
| 29 | Green-white | Coolant temperature sensor |
| 30 | Brown-red | Tachometer (low voltage) |
| 31 | . | Official. Panel diagnostics. |
| 32 | Brown-white | Terminal “L” of the generator relay regulator |
VAZ 21099 instrument panel does not work reason
- Tips for motorists
- The instrument panel on the VAZ 2109 does not light up: do-it-yourself repairs, popular faults Types of panels
- Why doesn't it light up?
- Popular faults
- 1 Topic by Andrey08 2009-12-16 13:01:12 Topic: Not Working: All Tidy, Wipers, Fern Guard on VAZ 21099
- Re: Not working: All tidy, wipers, fern on VAZ 21099
- Re: Not working: All tidy, wipers, fern on VAZ 21099
- Re: Not working: All tidy, wipers, fern on VAZ 21099
- Re: Not working: All tidy, wipers, fern on VAZ 21099
There can be at least three options for instrument panels installed on a VAZ 2109 car. The first combination of the instrument panel is placed on those “nines” where there is a low front panel. The second instrument panel combination is installed on “nines” with a high front panel. And the last third instrument panel combination, which is already electronic, is installed on “nines” with a “European panel”.
On instrument panels that are placed on a low panel in VAZ-2109 cars, there will most likely not be an option with a complete failure of the entire instrument panel. Since on these panels, the speedometer and econometer are mechanically driven, and the likelihood that they will fail together with electrical devices and warning lamps is very small. There is no econometer on the high-panel instrument panel, but the speedometer also has a mechanical cable drive.
If all electrical devices and warning lamps on all three versions of the dashboards stop working, then first of all you need to open the hood, then unfasten the cover of the mounting block and see if the fuse through which power is supplied to the instrument panel is intact. The fuse markings are located on the inside of the mounting block cover. Depending on the year of manufacture of the car and what combination of instruments is on it, you need to check the fuse designated as F5 or F16.
If the fuse is intact and its contacts are not oxidized, then next you need to see if power is supplied to the instrument panel . This can be done using a control lamp with the ignition on. Disconnect connector X4 on the mounting block and check whether there is voltage at pin No. 3.
The fact is that the mounting block on the nines will always be wet during rain, it’s not for nothing that drivers call this place a swamp, and because of this, oxidation of the contacts in the pads often occurs, which leads to electrical failures. Sometimes not only the contacts, but also the circuit board of the mounting block oxidize.
If the driver was unable to find a fault in the above mentioned places, he will have to remove the instrument panel and check the condition of the contacts in the two blocks, as well as the reliability of the connection of the ground wire, but this is already more painstaking work.
The instrument panel on the VAZ 2109 does not light up: do-it-yourself repairs, popular faults
- Types of panels
- Why doesn't it light up?
- Popular faults
When the instrument panel on a VAZ 2109 does not light up, this is one of the common malfunctions of this unit. To fix a problem, you first have to find the cause of its occurrence.
THIS IS INTERESTING: Quick answer: How much oil should be poured into the Slavuta engine?
Tidying up nine
Dashboard illumination Kalina 2 from ignition
Today we will tell you about an interesting and useful modification to the Kalina 2, or more precisely, about how to activate the instrument lighting in DRL mode, so that during the day the dashboard will also be illuminated but without turning on the headlights.
On Kalina 2 there are daytime running lights that light up during daylight hours, but in DRL mode the instrument panel backlight does not light up. and everything would be fine, but for me, as a person accustomed to having the dashboard illuminated, it was very uncomfortable without the instrument panel illumination, and I didn’t really want to turn on the dimensions or the low beam because... I have DRLs and I need to use them, and in my configuration there is a light sensor and I always have the lighting control knob in the auto position, which is very convenient. In general, I decided to redo the instrument panel lighting so that it would turn on when the ignition is turned on. Everything is very simple. you need to remove the dashboard, and in the dashboard connector, bite off the wire from the dimensions and reconnect it to the ignition - that is, the dashboard backlight will work not from the dimensions, but from the ignition. Dimensions pin No. 4 yellow wire. Ignition pin No. 21 orange wire. However, this method has one drawback. in the luxury configuration with a light sensor, the body electronics control unit receives information about the inclusion of the lights via the CAN bus from the dashboard and, accordingly, considering that the lights are on, extinguishes the DRLs.
So I'm done with reconnecting the DRL. 1. removed the mounting block and the block and connected to pin 116 (terminal s of relay K6)
2. on the front harness block, connected to wire No. 14 (orange), cutting it off from the block - goes to the DRL
3. on the chip to the rear harness I connected the relay control from the size wire, contact No. 26 - yellow
4. I took the mass from a mus-a class 31, or you can take it from any nut on the body. We take a five-pin relay and connect it in a normally closed version
between pin 116 on the fuse block and wire 14 of the relay block. control accordingly from the dimensions. Using this scheme, we get the following: after starting the engine, power appears at pin 116 of the fuse block and the DRLs light up. When the lights are turned on, our relay opens and the DRLs turn off. Here's a video of how the whole thing now works:
Modernization and modification of the instrument panel on the “Nine”: brilliant ideas
The dashboard in any car is one of the main components of the electrical circuit, used to monitor the condition of the main units. Since the tidy is practically the only component with which the driver most often visually interacts, many car owners are thinking about improving it. How to tune the VAZ 2109 dashboard and what is the pinout of the control panel, read below.
LED backlighting of the tidy on the “nine” with a low panel
The instrument cluster on the VAZ 21099 or 2109 is a fairly reliable unit. However, even this can fail over time.
The main malfunctions characteristic of the VAZ instrument panel:
- The lights on the instrument panel of the VAZ 2109 stopped lighting. If only a few light bulbs refuse to work, then most likely the reason lies in their burnout. If the instrument panel lighting stops working completely, then most likely the problem is a poor power supply. As practice shows, power problems are usually caused by either damaged wiring or oxidation of contacts at connections and connectors. If this is the case and the backlight does not light up due to oxidation, then you can get rid of this problem by cleaning the contacts or replacing them. If the problem lies in the lighting sources, then replacing the lamps will solve it.
- Another problem, oxidation on the circuit board, is common in older vehicles or vehicles with moisture present. Due to oxidation of the board, the backlight and some instruments may not work, in particular, fuel level and coolant temperature controllers, tachometer, etc. If the needles do not rise on the tachometer, speedometer, fuel consumption sensor and generator voltage, or they work chaotically, then you need to carry out a full check of the dashboard.
- VAZ 2109 cars are characterized by the problem of a non-working speedometer. As a rule, it appears as a result of wear of the cable connected to the box, or due to repairs to the device and its incorrect connection. If the cable is worn out, then you just need to replace it, there is nothing complicated about it. The main thing is to connect the cable correctly so that its tip fits exactly into the groove on the tidy speedometer.
- Damage to the board itself. Such a malfunction occurs quite rarely, but, nevertheless, it should not be forgotten. If the structural board fails, the shield will have to be repaired, but if this does not help, then it will need to be replaced.
Instrument panel pinout
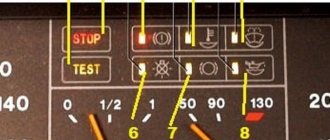
VAZ 2109, 21099 cars can use low and high center consoles, as well as Europanels. Depending on the type of torpedo, the combination of the instrument panel and its pinout, as well as the position of the indicators, will be different. Below are photos and symbols of components on instrument panels with different torpedoes.
Photo gallery “Designation of indicators on dashboards”
1. Pinout and designation of instrument indicators with a low panel 2. Pinout and designation of instrument indicators with a high panel 3. Pinout and designation of instrument indicators with a “European panel”
Panel tuning options
If you decide to tune your instrument panel, then most likely you will be interested in knowing what options exist for doing it. The tuning shield, as you know, pleases the driver’s eye, so this issue is relevant for many car owners.
Dismantling the shield
To tune the dashboard, you first need to remove the device itself.
To do this, you only need to disconnect eight fasteners; to do this, you can use a regular knife:
- First, the fastenings on the driver’s side are disconnected;
- then you need to release the latches located there, on top;
- after this you can disconnect the middle part of the tidy;
- the panel itself is dismantled (the author of the video is Artem Volivach).
Improvement and replacement of backlight
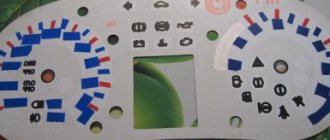
To perform backlight tuning on a VAZ 2109, the lighting sources must be replaced after removal; in this case, it is advisable to use diode bulbs, and if necessary, the scale itself can be modified.
The tuning procedure includes the following steps:
- First, dismantle the standard insert where the scales are located. Remove all the arrows and set them aside, then make corresponding holes for them in the new pads. To prevent the arrows from sticking when operating the instruments, the holes can be made wider.
- Next, you need to remove all the standard lighting sources - just dismantle the entire circuit and install diode devices instead of the old light bulbs. When installing new sources, observe the polarity, since if it is confused, this will lead to the inoperability of the device as a whole.
- Once the lamps are installed, you can begin to refine the scales. Take the new pads and, using fluorescent paint or a marker, paint the numbers on the scales. Such a marker or paint will be required so that when the instrument is illuminated with LEDs, the numbers glow more brightly and stand out.
- After the backlight tuning is completed, you will need to carefully install the circuit and install new overlays on top of it. When installing, be careful not to damage the panel elements.
“Instructions for replacing the speedometer cable on a VAZ 2109”
How to repair the speedometer on a “nine” if it stops working - visual instructions for replacing the cable at home are given in the video below (the author of the video is Vladimir Edwin).
The article was useful. Please share the information with your friends.
Source: https://avtozam.com/vaz/2109/tyuning-pribornoj-paneli/
Device
At the same time, the dashboard on the VAZ 2110 includes:
- Tachometer;
- submeter;
- Fuel level indicator;
- Coolant temperature sensor;
- Indicator lamps in the amount of 12 pieces;
- 6 hanging dashboard
; - Spare socket for warning lamp;
- A pair of terminals for connecting wires.
- In older dashboards, the devices are symmetrical.
- The instrument panel of the new model is distinguished by the location of two indicators offset to the right. coolant temperature and fuel level in the tank.
Neat pinout
As for the instrument panel, the VAZ 2110 model uses two types. It all depends on the year of manufacture of the car, as there is an old and an updated version.
Before you begin to solve the problem yourself, we recommend that you familiarize yourself with the splash protection panel on the VAZ 2110. In other words, you need to understand where each wiring leads, what it is intended for, what fuses are available, etc.
All this is easy to find out using the information from the operating instructions. With such visual literature and a machine in your hands, you can fix common instrument panel faults without the help of specialists and special knowledge in the field of electronics.
Fuel consumption of VAZ 2114 at idle speed
How to reduce fuel consumption on a VAZ 2114 is a question many car owners ask. What the gasoline consumption of a VAZ 2114 should be is usually indicated in the factory documentation. It ranges from eight to 9 liters. per 100 km.
This spread depends on the driving style and its mode (city, highway, mixed). If the characteristics of your steel “favorite” fit into these frameworks, then most likely no intervention will reduce them.
But if your VAZ 2114 has high fuel consumption, then this is already a reason to carry out diagnostics and most likely repair the systems of your car.
If you yourself do not have sufficient knowledge or skills, then it is better for you to contact a special workshop where they will accurately answer the question: why the fuel consumption of the VAZ 2114 has increased.
Here we will talk about possible causes and methods for eliminating them.
Prerequisites for the huge fuel consumption of the VAZ 2114
Possible reasons
Increased fuel consumption of the VAZ 2114 may be caused by the following reasons:
- Clogged air supply filter;
- Inadequate tire pressure;
- The fuel filter is dirty;
- Unusual wheel radius;
- Malfunction of the oxygen supply sensor;
- DSA is out of order;
- Incorrect DPRV readings;
- Low fuel pressure;
- Low compression.
First, let's look at the simplest reasons for high fuel consumption.
Gasoline consumption on a VAZ 2114 may increase due to a dirty fuel filter; check it for debris and replace it if necessary. Dirt packed into the air filter can increase the gasoline consumption of a VAZ 2114 by about three liters. Despite the fact that its cost is about 100 20 rubles. Very low tire pressure also has a negative impact, as does an unusual wheel radius. It’s clear: in order to turn a larger wheel, more force is required.
Next, let's find out which sensors affect fuel consumption
The lambda probe assesses the state of the exhaust (the presence of oxygen in the exhaust gases). In other words, based on the volume of oxygen in the exhaust, it provides regulation of the working consistency. It is installed in the exhaust system; it must be emphasized that it is the only one located on the “pipe”, so you can’t go wrong. An oxygen sensor error can be seen either with the help of an on-board vehicle, or when passing diagnostics at 100. Here are some prerequisites for its “death”:
- Poor quality gasoline;
- Stiff valves;
- Incorrect mixture;
- Oil scraper rings allow oil to flow into the mixture;
- The advance angle is set incorrectly.
THIS IS INTERESTING: Best answer: What should the level be in the float chamber?
Lambda probe VAZ 2114
If the fuel consumption of the VAZ 2114 has increased, then you should also check the speed sensor. It transmits data about the current speed of the car to the control unit, and it monitors the operation of the engine in idle mode and controls the air supply, bypassing the throttle valve. It is diagnosed in the same way as the previous one. This device is located on the top of the box. Some signs of its malfunction:
- The engine stalls at idle;
- Interruptions in the operation of the speedometer, or its complete failure;
- Idle speed “floats”;
- High fuel consumption;
- Loss of engine traction.
Fuel consumption of VAZ 2114 at idle speed
Speed sensor VAZ 2114
Next comes the camshaft position sensor or, as it is also called, the phase sensor. It works in a phased injection system, determining the engine operating cycle and generating a pulse signal. It should be clarified that it is not installed on all VAZ models. A malfunction is indicated by a “check” light on the dashboard. The functionality check is also determined at 100, or when reading error data on the BC. How to “identify” that he is acting up:
- Engine dynamics drop;
- Gasoline consumption increases;
- The self-diagnosis mode fails.
The average fuel consumption of the VAZ 2114 also depends on the working condition of the fuel pump. On this VAZ model it is electronic, and wear of its parts leads to a drop in pressure in the fuel supply system, which certainly does not have the best effect on consumption. You can find out this parameter by measuring it using a pressure gauge on the fuel frame of the engine. Here are the symptoms that should alert you to the pump:
- The engine is shaking;
- Power drops;
- Consumption increases;
- The engine stalls at idle;
- CO is overestimated.
Frozen pressure in the fuel rail of VAZ 2114
The condition of the injectors is also important. At times, during engine operation, they become clogged and need to be cleaned. There are various options for this procedure: turn to specialists, clean it yourself (if you know how to do it), use additives and consistencies specially created for these purposes, or connect the car to a special stand. The choice is up to you. Reasons for injector inspection:
- Excessive consumption of fuel;
- Increased exhaust toxicity;
- Unsatisfactory engine dynamics;
- When accelerating, dips are felt.
Injectors VAZ 2114
Increased consumption in idle mode
Does the VAZ 2114 have higher fuel consumption at idle than normal? There are sensors watching everything here too! Typical consumption, with the electronic load completely turned off, is 0.8-1 liters per hour. If this indicator is very much exceeded on your car, then we check the sensors described below.
Idle speed sensor (ISR). Its purpose is to automatically adjust idle speed. It is located on the throttle assembly, or rather secured with a pair of screws on its cover. This sensor does not have an electrical diagnostic system and therefore its condition can only be judged by these signs:
- When starting a cool engine, high speeds are not observed;
- The engine stalls at idle;
- Idle speed “floats”;
- When you turn off the speed while driving, the gearbox stalls.
Idle speed regulator VAZ 2114
TPDZ. A device for a clear dose of consistency or, more simply, a throttle valve location sensor. By its name you understand that its function is to “show” to the controller what position the throttle valve is currently in. It is part of the throttle assembly and is attached to its body. The malfunctions of this device are very identical to the symptoms of DXX, but it is connected to an electrical diagnostic system and if it breaks down, the “check” light will notify you about it.
In addition to all the circumstances listed above, there are some more: insufficient compression in the engine, incorrectly set ignition timing, the gas distribution system is not adjusted, lack of spark plugs, breakdown of high-voltage wires. These prerequisites can also have a negative impact on the average fuel consumption of the VAZ 2114.
If you feel the strength within yourself to remove them, then go ahead! If you have doubts about this, it is better to contact a special service center, this will help to avoid unnecessary costs.
Source: https://avto-melvin.ru/rashod-topliva-vaz-2114-na-holostom-hodu/
Types of problems and troubleshooting methods
The turn signal works correctly if the following indicators are met:
- the presence of the ignition on ensures the operating mode;
- moving the steering column switch up and down must be accompanied by turning on the turn signal on the corresponding side;
- The turn signal should flash at a rate of 60 cycles per minute.
Flashing at a certain frequency
Any other turn signal behavior indicates a problem. The most common causes of malfunctions include:
Non-blinking turn signal. The problem requires familiarity with the basic principle of relay operation: the current passing through the lamps leads to heating of the measuring resistor - an element that determines whether a particular lamp needs to be turned on. Consequently, the lamp resistance, different from the nominal one, changes the time the turn signal is turned on: it begins to blink. In this situation, it is recommended to lightly tap the relay (this helps if there is a weak connection or moisture). If you have replaced the relay, but the turn signal does not blink, but is constantly on, then there is poor contact with the fuse block. Replacing a fuse that was found to have a resistance value that does not correspond to the nominal value can also help.
Turn signal light
Stopping the operation of one turn signal is incompatible with a relay malfunction (problems of this type cause the operation of both turn signals to malfunction). One of the turn signals may fail due to a burnt-out light bulb (the simplest option) or a faulty wiring or socket. The new tab must not only fit into the turn signal socket, but also correspond to the power indicated on the lamp
If after replacing the light bulb the turn signal still does not start working, you need to pay attention to the socket. If there are traces of oxidation on it, then you should start removing them
Sandpaper or a needle file works well for this. And if the light bulb is in too tight contact with the contacts, then you need to bend them with thin-nose pliers. This must be done as carefully as possible, preventing the contacts from closing, which can lead to another problem - the turn signals working in a checkerboard pattern. The normal state of the cartridge means that the cause of the malfunction lies in the wiring. First you need to make sure that the wire is securely connected to the socket. In this case, it is unacceptable for the wires to be closed to each other or to have a ground short to the metal body of the car. In this case, it is necessary to replace the wires or at least insulate them. If at the same time the hazard lights do not work, then the relay definitely needs to be changed - it is faulty.
Does not burn
Also, the reason for the turn signal not working may be the switch itself. To check it, you need to get to the steering column switch and unmount it. By the way, if a problem occurs in the form of a hazard warning light that does not turn on when there are normally working turn signals, you just need to replace the button responsible for turning on the emergency lights.
A dim turn signal light is a signal to check the suitability of the model and power. If everything is in order, then cleaning the contacts of the light bulbs can correct the situation.
Relay
A turn signal relay making a clicking sound is also not normal. The malfunction is hidden in the mounting block, or more precisely, in the relay contacts. Clicking sounds may occur if the contact is oxidized or is too tight. This can also be caused by a defective relay. The problem can be fixed by cleaning the contacts or installing a new relay.
Turn switch
A turn signal that does not work on one side, either front or rear, or in the repeater, indicates that the steering column switch is broken, there is no contact with it, or that the same relay has failed.
Priora fuse box
The turn signal circuitry is protected by an 8-amp fuse located in the mounting block. If it breaks down, turns will stop working on both the left and right sides of the car.
The light signaling system ensures traffic safety, so the driver should always have at least light bulbs of the required power with him.
Why the VAZ-2115 instrument panel does not work: repair
Some owners of a VAZ-2115 car sometimes encounter such a problem as a non-working instrument panel. Often this malfunction is caused by unqualified interventions when eliminating various problems with the car. In addition, the problem may begin due to a manufacturing defect. To identify the cause of the breakdown, you need to contact a car service for diagnostics.
Reasons why the PP stopped working
In fact, there are not so many of them and the most common are:
- The easiest one is poor contact between the panel and the electronic control unit. The problem is solved by replacing the plug or simply cleaning the contacts.
- A breakdown in the instrument panel itself or malfunctions. To solve the problem, all connectors are reconnected, taking into account the correct connection diagram.
- Malfunctions of the tachometer, speedometer, fuel level controller. In this case, the cause is mechanical or electrical. To troubleshoot problems, replace regulators or check the operation of fuses.
- The illumination of the VAZ-1215 software stopped working. In this situation, it is necessary to find out the cause of the problem.
It is unlikely that a simultaneous failure will occur in the operation of the sensors on which the operation of the PP directly depends. If we take into account that they do not work directly with devices, but through an ECU (electronic control unit), then, accordingly, malfunctions will lead to the PP stopping working. In addition, it is worth noting that the engine will also stop working.
There are situations when all devices on the panel stop working simultaneously. In this case, the car driver must check the condition of fuse F16, which has a power of 16 A.
To check, you must turn on the hazard signal or turn signal. If they don't work, it means the fuse has blown. Therefore, we can conclude that a short circuit has occurred. To fix the problem, check the electrical circuit.
However, it also happens that the fuse is intact and in working condition, but the instrument panel on a VAZ-2115 car stops working. Here the reason is much more difficult to find out. The solution to the problem is to remove the instrument panel and check whether voltage is flowing from this fuse to the terminals of the white and red blocks. The white block supplies power to the speedometer, tachometer, and temperature gauge. And the red one is the fuel gauge.
If, as a result of checking, the terminals show a voltage of +12 V, then this indicates that the PCB does not work as a result of poor contact of the wire that goes to the ground of the car. If the +12 V voltage is not reflected at the terminals, then it is necessary to disassemble the mounting block and look for the cause of the problem.
What to do if the VAZ-2115 instrument panel does not work
As mentioned above, it is necessary to establish the cause of the instrument panel malfunction. If they are significant and cannot be repaired, then in this case it is necessary to install a new PCB. For a better outcome when installing the panel, you need to know and follow the following instructions:
- Replacement of the instrument panel is carried out strictly in accordance with the pinout.
- First you need to disconnect the cable going to the cigarette lighter.
- Dismantle the control panel. It is necessary to unscrew 2 screws located along the edges, top and bottom of the instrument panel.
- The next step will be to dismantle the lining. The difficulty is that it is held in place by clamps, so you need to swing it a little.
- After this, all wires going to the instrument panel are disconnected (light alarm connector, clock, speedometer, fuel level sensor).
- The very last step is to dismantle the control panel. All the bolts that secure it are unscrewed. At this stage, you should perform actions very carefully, as you can really damage the wiring.
Source: https://ladaautos.ru/vaz-2115/pochemu-ne-rabotaet-panel-priborov-vaz-2115-remont.html
VAZ 2109 - troubleshooting instrument cluster
The instrument cluster installed on a VAZ 2109 car is a panel built into the dashboard on the driver’s side and includes a set of various instruments necessary to monitor the current condition of the car. This includes devices for monitoring oil pressure, engine speed, driving speed, as well as a number of indicator lights that indicate the operation or malfunction of certain vehicle systems.
In this article, we will look at popular faults and how to fix them.
- The temperature and fuel level indicator does not work.
In most cases, the reason for this may be either a malfunction of the devices themselves, their sensors, or an open circuit in their power supply. Therefore, to eliminate the defect, first of all it is worth ringing the circuit and checking the fuses. Then we check the functionality of the temperature and fuel level control sensors. And only then, if the above reasons are not identified, replace the devices themselves.
- The fuel tank is full and the needle returns to the beginning of the scale.
If any manipulations have been made with the fuel level sensor, it is necessary to check whether the float limiter has been knocked down or incorrectly installed/adjusted and, as a result, the resistor winding has ended. To resolve this problem, remove the sensor and then readjust the limiter.
- The fuel level needle constantly jumps and often falls to about.
In most cases, the problem lies in the weak contact of the resistor with the current collector. Or there was a complete break in the resistor. To fix the problem, replace the fuel level sensor.
- The fuel level lamp is constantly on.
The sensor supply wire has shorted to ground. Or a short circuit between the flexible sensor bus and the fuel intake pipe. Disassembly is required to straighten the busbar and eliminate the short circuit.
- The indicator lights on the instrument panel do not work.
Carrying out preparatory work
Not a single tuning of a domestic car can be carried out without changing the dashboard. You can make beautiful modifications yourself at minimal cost, and the interior will change dramatically. You can create a new high-quality instrument panel as follows:
- First you need to come up with an unusual design for the tachometer and speedometer, as well as for other sensors. In the age of modern technology, you can find a ready-made version on the Internet, download it, and then print it on a printer. After this, the surface is laminated, which will give it even greater beauty.
- The next step is to dismantle the standard panel. To do this, remove the lining from the steering wheel. You can avoid problems during further installation work by marking the position of the steering wheel relative to the shaft.
- Next, carefully unscrew the nut that secures the steering wheel. We are removing it.
- There are screws located in the area of the car lower casing, then we disassemble the steering column.
- After completely dismantling the dashboard, you can unscrew the arrows from the old speedometer, tachometer and various sensors.
- To give an even more unusual look during installation work, you can repaint the arrows in bright colors.
- You can use spray paint. In order to create a contrast between the hands and the dial, it is recommended to make the latter black. The arrows are often bright red.
- After this, you can install the dashboard in the reverse order and other interior elements that were disassembled at the time of dismantling.
Using the above method, you can significantly change the dashboard and make it unusual. Some owners also install special lighting. Tuning the instrument panel of a VAZ 2109 can be completed in about a few hours.
Low beam does not light up VAZ 2114
Every second generation of Samara received new front optics, new wings, new bumpers with a more streamlined shape and an electrical circuit with minor changes, depending on the type of engine, carried over from the old eight and nine. Therefore, problems with electrical equipment remained the same. Today we are interested in the problem of the passage of light on a VAZ-2114 car: it may not burn out at all, it may burn out once, or only one light may light up.
Why is the low beam not on?
LED modules, xenon, bi-xenon on the VAZ-2114 are almost fantastic.
Our Samara is equipped with pre-launch halogen lamps with two filaments, each of which is responsible for the low beam or the main beam.
Study the spiral. It usually burns.
First of all, it is worth checking the integrity of the spiral; visually this can only be done with good vision, but it is easier to install a well-known work lamp and make sure that the spiral has burned out.
Main reasons
Neighboring rights are disabled
This is the main and most common reason, but there are many reasons why the lamp does not light:
- fuse The second reason, which is also quite common. blown fuse. Not everything is so simple here, since two fuses, F13 and F12, are responsible for the operation of the high beam beams on the VAZ-2114. Each of them has a nominal value of 7.5 A, the first is responsible for the left headlight and the beam in it, the second, F12, for the right headlight. Therefore, if only one headlight is off and the other is on, then the fuse is most likely to fail.
Low beam fuse box
When inspecting the light bulb contacts
Diagnostics and replacement of the low beam button
Methods for diagnosing headlights on a VAZ-2114
Swollen right next to the dissection
Actually, the diagnosis consists of checking the integrity of the filaments on the lamps, the presence of reliable contact, and checking the relay. However, in addition, you should call the wiring from the headlight to the fuse box.
To do this, use either a standard multimeter or a test lamp.
To diagnose the circuit, you need to use an electrical circuit, find both wires on it, which are responsible for the operation of the low beam.
Depending on the year of manufacture of the VAZ-2114, the color designation may be different.
Our task is to gradually call each section of the circuit and establish the location of the break or short circuit. The damaged part of the wire is replaced with a new one, the circuit is checked and assembled in working order. Good luck to everyone and bright lights!
Several times I had to change the lamps solely because of the frankly dirty Chinese quality. It burned down after a couple of weeks. He even faulted the power supply, generator and wiring. After all, everything is made for us, so to get there we have to do everything blindly, by touch and try not to break the device without skill. When, on the advice of electricity, he selected high-quality lamps, the problem immediately disappeared.
Source
Post Views: 2
