Key to Lada Vesta
The Lada Vesta car comes with two ignition control panels: one is the main one, the other is a spare one. The basic (flip) remote control has three buttons on its body. The first two are responsible for the locking and unlocking options, and the third button is responsible for the functionality of the trunk. Spare ignition keys for Lada Vesta have a disadvantage: there is a delay in the door signal when pressed. The buyer will use the second remote control in case of loss of the main one. The spare ignition key for Lada Vesta does not have the option of opening and closing the car and is intended for use in a critical situation.
Key to Lada Vesta
Where to get a spare key
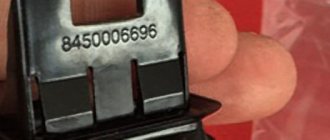
If you need to manufacture, purchase, or duplicate a Lada Vesta flip key, you need to know the number with the code that is engraved on the tag. Using this number, the dealer organization determines the appropriate kit. Some models allow the use of three or four remote controls. You can buy a Lada Vesta key at car dealerships or online stores.
In accordance with the modification and equipment of the car, the Lada Vesta key has a different shape (from the simplest to the modern folding one).
Based on this, it is possible to do it yourself.
- There are blanks available on the market. You need to know the car model, otherwise the board will not fit in size;
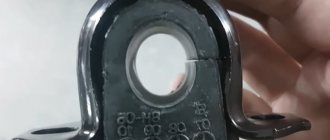
- The second stage will be copying the tip. If excluding the fasteners from the body is not enough, the product itself is disassembled, and then the blade of the Lada Vesta ignition key is sharpened;
- Finally, to complete the work, the chip in contact with the alarm should be programmed. Craftsmen who know how to operate a soldering iron have no problem performing such an operation.
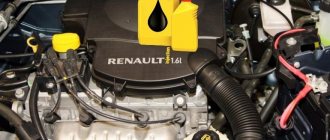
Some configurations of Lada cars (XRAY, Vesta, Largus, Granta, Kalina or Priora) can use an ignition key with a built-in remote control (factory alarm), which controls the central locking. If it stops working, first try changing the battery.
How to disassemble a Lada key
For Lada Vesta/XRAY: open the key body by unsnapping the latches around the perimeter using a thin slotted screwdriver.
For Lada Largus: unscrew the fastening screw (Phillips screwdriver), and then open the key body, unclicking the latches around the perimeter using a thin slotted screwdriver.
For Lada Priora/Kalina/Granta: unscrew the fastening screw (Phillips screwdriver), and then open the key body, unclicking the latches around the perimeter using a thin slotted screwdriver.
The process is also shown in the video:
Let us remind you that if after replacing the battery the standard alarm still does not work, read these instructions. By the way, do you know how to make a flip key for a Lada yourself?
LADA VESTA. ELECTRICAL EQUIPMENT OF THE LADA VEST A - REMOVAL / INSTALLATION OF MAIN UNITS AND PARTS
1 GENERAL DESCRIPTION OF THE SYSTEM, DEVICE AND OPERATION FEATURES
The electrical equipment is made according to a single-wire circuit - the negative terminals of sources and consumers of electricity are connected to the car body, which acts as a second wire. Rated voltage 12 V.
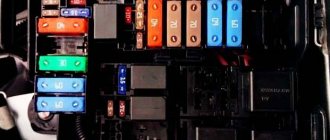
The vehicle's main power circuits are protected by fuses. Before replacing a blown fuse, it is necessary to find out the cause of its blown and eliminate it.
Attention! When repairing a vehicle or electrical system, it is necessary to disconnect the earth wire terminal from the battery.
When operating a vehicle and when checking the electrical circuit of the vehicle, it is not allowed to use fuses that are not provided for by the design of the vehicle.
LADA VESTA.
BATTERY – REMOVAL / INSTALLATION Removal
Place the car in a working place, apply the parking brake, turn off the ignition, raise the hood.
Before disconnecting the terminals from the battery terminals, you must:
– wait until the electric fan of the engine cooling system stops;
– wait until the end of the data saving procedure in the ECU (1 min).
Do not remove the terminals from the battery terminals while the ignition is on, as this may cause errors in the ECM or lead to failure of electrical components.
The reliability of the visual battery status indicator is not guaranteed by after-sales service, so the visual indicator should not be used as a means of monitoring battery status.
Loosen the tightening of nut 7, Figure 2-1, of the bolt securing the battery ground wire terminal (wrench 10).
AvtoVAZ key training procedure (Video)
And once again about learning ignition keys on cars produced by AVTOVAZ. Not everyone apparently understands the technology for reading the key code and, accordingly, the learning procedure causes difficulties.
The key code is read remotely! And in fact, there is no need to even insert the key into the ignition switch, because you can turn on the ignition with a simple jumper (connect the pink wire on the ignition switch block and the blue-black one) and the ignition is on.
The main thing is the presence of both a training chip (in a key with a red plug) and then a working chip or control panel in the reader area (communication coil). Correct operation is ensured when the chips are located at a distance of up to 3 cm from the coil and approximately in the center.
The coil is located under a plastic cover that covers the lock cylinder. The easiest way to carry out the procedure is to still have a sting from your key, even without a chip. The main purpose of the sting is to turn the ignition on and off during the procedure.
At the end of the article there is a video on how to train or retrain keys in a way that may be necessary if you need to train an additional chip or if an anti-theft lock with a different key is installed...
All steps in the learning process are announced by the beepper of the body electronics unit.
Insert the learning key or bring the learning chip in, turn on the ignition, wait 2-3 seconds, turn off the ignition.
The immobilizer light blinked - the procedure opened. The lamp will blink during the entire procedure. And if it suddenly goes out, it means something went wrong or you made a mistake somewhere. Start over...
Removed the training key or chip to the side.
We inserted a working key or brought a working chip, turned on the ignition - we wait...
Three beeps, pause, two beeps, turn off the ignition.
Removed the working key (if you need to train another working chip or key, repeat the previous step with the second chip or key...
They inserted the learning key again or brought up the learning chip (this is the last step - closing the procedure) and turned on the ignition...
Three beeps, a pause, two beeps, the ignition is turned off, but we do not remove the training chip from the communication coil. We watch the lamp. After the warning lamp doubles its flashing frequency (on previous generation cars) or the buzzer sounds (Priora 2, Kalina 2, Granta Lux), turn on the ignition again and wait 3 seconds. That's it - training is complete!
to the article: Procedure for learning AvtoVAZ keys (Video)
In the LADA KALINA operating manual, it says twice in bold Russian on white: “The remote control training procedure must be carried out at pre-sale preparation points in the presence of the car owner. If the owner of the vehicle refuses to carry out this procedure, an entry must be made in the service book with the signatures of the dealer and the owner,” however, in the showroom when purchasing the vehicle, they did not offer me anything like that, and quoting this phrase had no effect - in response to me they mumbled something inarticulate, indicating the high professional training of the employees. Armed with the article “Procedure for learning AvtoVAZ keys” printed from your website and the “Technical passport “Transponder for APS-6″”, I tried to retrain the transponder according to the instructions contained in them, but got stuck at the very beginning. “Turn off the ignition and remove the learning transponder from the ignition switch. The immobilizer lamp on the instrument panel is flashing - it’s not flashing, it is, however, that’s all. Hence the question. Either the above materials do not apply to my 2015 Kalina 219420, or I misunderstood something. Could you please clarify the situation?
Good afternoon! What should you do if the training key is lost and the immobilizer is activated? I purchased a new training key, but how can I unsubscribe the old key? The new key, of course, is not recognized by the immobilizer and it is impossible to enter the binding procedure
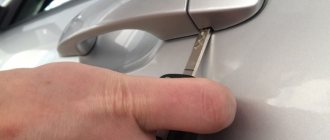
How to open a Lada Vesta if the key is left inside
It will be useful for the car owner to learn how to open the door of a Lada Vesta without a key if its only copy remains inside a locked car. The main difficulty here is to unlock the doors without damaging the locking mechanism and the upholstery of the car. Today, several methods are known for accurately opening locks with improvised objects.
Using a tennis ball
In discussions, you can come across a description of a technique for breaking into a car with a tennis ball with a hole. The trick is to use it as a pump to create a powerful air draft that will lift the door flag and open the car. In fact, the described method is nothing more than a myth that came from cinema.
The procedure for converting the ignition key into a switch
The keys on various configurations and models of Lada differ in shape, however, the process of independently converting them into switchgear ones is quite simple. You will need to purchase a blank switch key, after which a copy of the key tip is made. The key chip is then trained to work with the alarm system installed on your car.
When choosing a flip key without a chip, you should take into account the dimensions of the workpiece, since its board should easily fit inside the case. If the standard key board breaks or wears out, it is better to buy a flip key with a chip.
Sometimes, to make a key groove, you have to remove the tip, for which the pin at the base of the key is squeezed out. But there are cases when such a procedure may require disassembling its body. The key learning process has already been described above.
How to replace the battery in a Ford S-Max key - DVRs All about cars
To do this, press any button on the key. I didn’t know that when replacing a battery there could be such nuances and the way to solve it is to change the position of the key.
Start of sales of the new Lada Vesta Cross station wagon: Review of the new Lada 4x4 Urban model of the year. Could a Chevrolet Cruze appear in Russia?
How the body of the Lada Grant liftback will change this year. Lada Largus Cross of the year in a new body configuration and prices: We change the battery in the key for Ford Focus 2 with our own hands. Contents 1 When is it necessary to replace the battery in the key for a Ford Focus 2? Insert a flathead screwdriver and slowly turn counterclockwise until the key comes apart. Using your hands or using the same screwdriver, remove the half with the Ford emblem. There will be a microcircuit in one half, and a battery in the other.
It should be pulled out and replaced. Assembly is carried out in reverse order.
Insert a screwdriver into the groove and separate the two parts of the key. The part on which the logo is located must also be disconnected.
This is where the battery is located. It should be taken out and a new one installed. This completes the work. After replacing the battery, certain problems may occur. This means that the key needs to be reprogrammed. You must turn the ignition key to position 2 four times in a row. It will sound in 10 seconds.
How to determine if the battery is dead
For Lada Vesta, Largus and XRAY cars. If the clarity and range of the remote control decreases, the battery must be replaced.
For Lada Priora, Granta and Kalina cars. If the supply voltage of the remote control is within normal limits, then each time you press any button on the remote control, the indicator lights up with a short flash. If it lights up with two short flashes or does not light up at all, then the battery should be replaced.
Read also: Skoda Octavia fuse box under the hood
Replacement in a switch key
Using a flat-head screwdriver, you need to separate the two parts of the key. The part on which the company logo is printed contains the battery itself . It also needs to be separated into two parts using a screwdriver. There will be a microcircuit in one half, and a battery in the other. It should be pulled out and replaced. Assembly is carried out in reverse order.
Replacement in chip key
Insert a screwdriver into the groove and separate the two parts of the key. The part on which the logo is located must also be disconnected . This is where the battery is located.
It should be taken out and a new one installed. This completes the work. Assembly is carried out in reverse order.
We take out the old battery and install a new one.