New cars in car dealerships may be equipped with a Starline A39 alarm system, which is not listed in the product lists on the manufacturer’s official website. Therefore, after purchasing a car, we recommend that you familiarize yourself with the features of setting up and operating this anti-theft system.
User manual
Programming functions using a key fob
Advantages and disadvantages
Download instructions for installation and operation of the Starline alarm system in PDF format
Video “Functions of the Starline system”
Comments and Reviews
Auto Safety Forum - Car Alarms
And in other cases what?
Panda? A96? In general, I’m the same, only 90% of requests from users are just cheaper, but of maximum quality. So it turns out A93, the best price/quality ratio. And if there is no heating on the windshield, then the range is more than enough. Nobody complained. If anyone needs 1 km or more, then take a fuel and lubricants module.
Let them move the antenna, for example, under a torpedo. The range should increase to a point that is satisfactory for you.
"Weak" and "Weak"
"with a smiley face are different things even on a technical forum. I’ll be honest - I’ve never seen the 525 model in person, even though I’ve been repairing StarLine alarms since 2009.
Added after 12 minutes
AliBaba
, Hello. Use Alec67's recommendations.
Badly. Serious mistakes were made. In particular, on the installation and placement of the communication module.
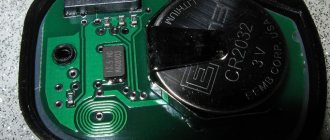
a) this is a different alarm with a different communication module (there is not a whip antenna, but a dipole, and even with shortening circuits.) b) Its design is such that when sticking it on the glass it is impossible to move the antenna horns closer than 3-4 cm to roof metal (the module body does not allow this to be done). c) It must be assumed that A61 was installed in another place (or by another master).
I emphasized the main thing. Not only that, the alarm antenna is in the area of the heating filaments. so it is also in the silk-screen printing zone AND IS COVERED BY A MIRROR, which is made of metal and screwed to the metal of the roof - it is ALSO a SCREEN for radio waves. So this is not enough - it was probably stuck along the roof close to the edge of the glass (the distance from the pin to the metal is LESS than 5 cm). (And it’s even worse if you stick a tint film in the upper zone of the glass. Most of these films contain metal salts in the composition - this is also a screen. Just metal is a little weaker.) But you wrote that you don’t have anything like that.
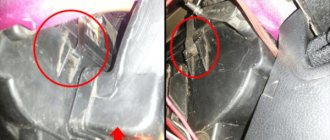
Look at the windshield in the light - it has the shape of a trapezoid, and the area of the heating filaments is a rectangle (they are clearly visible in the light) - there are no filaments in the lower corners of the glass.
Following Alexander’s recommendations, place the alarm communication module in the lower corner of the glass farthest from you, so that the pin is directed upward and, IF POSSIBLE, there is at least 5 cm from any point of the pin to the metal, silk-screen printing and heating filaments. If this cannot be done, then at least the pin should be on a “clean” area of the glass and at the same distance from these BARRIERS (body metal, silk-screen printing/tinting, heating threads) for the propagation of radio waves. Let us know the results.
PS I’ll put A93 (A39 is its version for car dealerships) en masse. I follow the manufacturer's recommendations. I did the same with the A91 (the alarm with auto start is the sister of the A61) - no one complains about the range and no one has complained.
Alarm behavior at -40 and other characteristics when installed on a new machine
The alarm was installed in November 2021 on a new car at the dealership,
The alarm itself costs 14,500 rubles and the labor for installing it costs 14,280 rubles.
I chose the cheapest alarm option since the car is also insured under CASCO.
The alarm system was made in Russia.
This particular A39 alarm model appeared in 2014 and is installed on a huge number of cars.
Alarm warranty 1 year.
The alarm has
- smart start
- dialog control code
- shockproof control key fob;
- 128-channel noise-resistant transceiver
- the charge lasts up to 60 days in security mode;
- registration of evacuation and jacking of a car thanks to the presence of a 3D shock and tilt sensor;
- Operating temperature range from -50 to +85 °C ;
Reviews about the work of A39. Positive and negative opinions of owners
Owner reviews were taken from the websites AvtoProfi.ru, https://otzovik.com/, www.drive2.ru, irecommend.ru, avtobez.com.
| Positive | Negative |
| I use Starline a39 dialog turbo timer. Installed in the showroom of a Kia Serato. I didn’t really delve into the intricacies of the connection, since I trust professionals, and there is a guarantee for their work. The alarm performed well. It slows down a little in cold weather, but everything is fine. I've been using it for six months now. | After installation at the car dealership, I encountered several problems. The second key fob did not want to be removed from the alarm. I went to the service center and it turns out I need to install a tag on it. The tag was installed, and another problem began - spontaneous activation. I went to the service center and they set it up. Now, when the handbrake is installed, auto start is set, which should not happen. In short, I'm already tired of going to the service center. |
| Excellent alarm, all functions work. What I like most is the engine heating and the ability to view it on my phone. It's also good that there is a PIN code and engine lock. Even if someone gets into the car, they still won’t be able to steal it. | Terrible alarm and terrible service. When the A39 started to malfunction, I contacted the official call center, where my issue was not resolved. They sent it to the station where they installed it. But I bought the car second-hand in another city, and I don’t know where it was installed. Now you have to look for specialists yourself and pay money. |
| The alarm was purchased at a Renault service center. I immediately stuffed it with everything I could, because the installation is free only once. I bought a module for mobile communications (it turns out that a regular chip is inserted there, like on a phone). Now I can talk to my car on the phone))). I also asked to install window closers so that they would close on their own. Of course, I had to buy a few more things, but now it’s a complete set! | It works very poorly in cold weather. It slows down and doesn't work. Autorun cannot be turned on exactly when it is needed most. I didn’t like the keychain at first, it was kind of flimsy in appearance and scary to hold in my hands. I shouldn’t have agreed to this signal. |
| I haven't been using it for long, about a month. Very satisfied. There are simply a huge number of functions, I didn’t even have time to try them all. It is convenient that there is auto start and a temperature sensor in the cabin. The battery charge also shows. I need this because I often leave my car under guard for a long time. | The manual is very confusing, setting something up on your own is almost impossible. |
| One of the most reliable and modern Starline alarm systems. It has everything you need and even more. I think that I don’t use half of the functions at all. As for the work, it's excellent. Everything works, the car obeys perfectly. It’s good that there is an additional engine lock; you can sleep peacefully, knowing that your brand new car won’t be stolen. | This alarm was sold to me when I bought a new car at the dealership. I agreed in a hurry, which I now regret very much. There is simply no signal. The key fob is inconvenient and eats batteries like crazy. Often triggered by loud sounds and passing cars. There is not a word in the manual about how to set up the shock sensor. On my previous car I had an old APS, and it was much better. And here there are a lot of bells and whistles, but no sense. |
Features of Starline A39
The manufacturer offers several options: basic equipment Starline a39 and a39 2can 2lin with modules for connecting via a digital bus.
Both versions have the following technical features:
- reliable protection using an interactive signal code;
- stable operation in conditions of urban radio interference;
- control using two remote controls, one of which has an LCD monitor;
- automatic control of connection loss;
- tilt and impact sensors, signaling when the car is placed on a tow truck;
- authorization using a PIN code;
- auto engine start with various action algorithms;
- monitoring and control using GSM and GPS communications;
- control channels for connecting additional functions: folding mirrors, adjusting the driver’s seat, and more.
Advantages and disadvantages of the A39 system
The positive and negative aspects of car alarms are outlined in the table:
| Advantages | Flaws |
| Automatic engine start. Saves time on warming up and creates a comfortable atmosphere in the cabin. | Not available for free sale. Alarm systems are installed only by official dealers. |
| Keychain with two-way communication, LCD monitor and convenient buttons. | The remote control is made of fragile material and cannot withstand being dropped from a height. |
| Possibility of connection via digital buses. Facilitates installation and ensures reliable operation of the system. | Poor performance at sub-zero temperatures. Many owners note that the Starline A39 with auto start is unstable in severe frosts. |
| Control via smartphone. Allows you to control your car anywhere there is mobile coverage. | The need to purchase additional modules (for a system without CAN and LIN connections). |
| Dialogue code. Makes it impossible to intercept the signal using special hacking devices. | Frequent marriage. This model is the leader in the number of defective copies. Since the A39 is installed in car dealerships, it can always be replaced under warranty. |
Cost of A 39 and its equipment
Since the A39 is only supplied to car dealerships, its cost includes installation. It depends on the specific salon and brand of car, so it is difficult to calculate the final price of the equipment. For those who want to purchase the Starline A39 car alarm separately, official representatives recommend paying attention to the A93 model, which is almost identical. Its price is about 200 dollars (the price is current as of 10/04/18).
The complete set of A39 consists of the following parts:
- main and additional keychain;
- car siren with volume control;
- service key for emergency control and settings;
- central control module;
- transceiver (receiver);
- autostart module with temperature sensor;
- 2CAN and 2LIN module;
- GSM module;
- starline a39 car alarm instructions;
- set of wires and connectors for connection.
Some configurations do not include a siren and hood switches, so you need to purchase them separately.
Specifications
The alarm considered in the review has the following technical data:
- control frequency range - 433-434 MHz;
- number of control channels - 128;
- the range of action of the main communicator when issuing commands is 0.8 km, when receiving data on the state of the security system and the vehicle - 2 km;
- range of the auxiliary key fob - 15 m;
- type of power source of the head unit - on-board network with a voltage of 9-18 V;
- current consumption when the system is in security mode - no more than 20 mA;
- current consumption when connecting a GSM module - 33 mA;
- power consumption when connecting several auxiliary modules - 36 mA.
Equipment
The Starline A39 alarm kit includes all the products necessary for installation and operation of the system:
- head unit with control processor;
- main communicator with feedback capability and LCD display;
- batteries for the key fob (AAA batteries);
- additional pager that does not have a display;
- power module;
- auxiliary relay with socket;
- transceiver with built-in antenna;
- engine blocker bypass;
- siren;
- installation set of cables for connecting the security system to the power source;
- wires for connecting additional modules and sensors;
- antenna cable;
- GSM transceiver;
- led indicator;
- cables for connecting limit switches;
- engine temperature sensor;
- emergency mode button;
- limit switch with fasteners;
- terminal for connecting to a power source;
- Supporting documentation.
Functions
The Starline A39 alarm system is equipped with the following functions:
- prevention of criminal acts related to engine starting (main and auxiliary relays are provided for this);
- activation of the alarm mode in case of impacts and attempts to evacuate the vehicle;
- several security modes (with or without sound notification);
- alarm mode with or without siren;
- automatic activation of security functions when the deactivation key is pressed by mistake;
- receiving information about attempts to steal or damage a car to your phone or key fob;
- “Anti-robbery” mode;
- autostart based on temperature, user command or specified time;
- control of adjustable elements of the interior and body;
- the ability to control the operation of the system using a standard car key fob;
- receiving signals from an adjustable shock sensor;
- the ability to connect additional modules from Starline;
- determining the location of the vehicle.
Advantages and disadvantages
User reviews indicate that the device has the following advantages:
- the ability to work with autorun by pressing one key;
- compatible with most modern cars;
- the presence of a shock sensor equipped with a smooth adjustment system;
- ability to synchronize with a computer;
- automatic system diagnostics.
The negative qualities of car alarms include the following:
- fragility of the pager body;
- increased risk of false alarms and incorrect operation in winter;
- the need to purchase additional modules;
- small diameter of installation wires;
- the need to reconfigure some parameters.
How is it different from the A93 model?
Differences from A93 include the following characteristics:
- lack of an interactive authorization system;
- impact resistance of the body of the A93 alarm key fob (in the A39 model, the pager is characterized by increased sensitivity to mechanical damage);
- functionality (model A93 has a wider range of modes and options).
Basic alarm faults
Sometimes the Starline A39 car alarm can malfunction and cause problems for its owner. Among the most common complaints:
- The alarm does not pick up at 20 meters and does not go off. The reason why the car is not disarmed may be a bad signal. In this case, the car simply does not have feedback from the key fob, and accordingly, it does not perceive commands. In this case, you need to check the condition of the power supply element of the remote control, perhaps precisely because of the weak signal, and replace the battery if necessary. Additionally, you need to check the area for radio interference.
- There are also options when the siren goes off spontaneously. The reason for this behavior is that the shock sensor is too sensitive. Both stages (impact and hacking) can be adjusted using a standard screwdriver, reaching the sensor itself (it has special controls).
- Sometimes autostart with automatic transmission does not work on the car, and SP lights up on the key fob display. This means that the car tried to start the car four times, but the starter simply did not have enough force. It is recommended to start it manually or increase the duration of its operation. In this case, for autostart it is necessary that the car is in neutral and the parking brake lever is fully tightened.
- If the alarm does not work, and additional software errors appear (the car starts and stalls, does not close the doors, does not disarm, etc.), then it is best to reset to factory settings. After this, most of the problems should disappear, but if they can’t be fixed, then it’s better to take the car to a specialized service center, where qualified specialists will sort out the issue and fix all the problems, perhaps the mass is loose or the contact is lost somewhere.
How to install
According to the installation instructions, the installation procedure includes the following steps:
- Connection to power source. The black ground wire is equipped with a metal tip, which is connected to a standard nut on the body. The +12V battery terminal is connected to the head unit connector using a thick cable.
- Connecting the relay to the positive cable. The safety switches and the head unit are powered by separate fused circuits. When connecting the processor device directly to the battery, a copper cable is used. A 30 A fuse is installed separately.
- Connecting the system to the CAN bus. A separate connection is created to control the headlights and door locks.
- Installation of an auxiliary relay. They break one of the engine power circuits, where a protective part is introduced.
- Installation of limit switches. When connecting these elements, it may be necessary to disable the CAN bus control capability. The brake pedal and parking lever are connected to the limit switch terminals.
- Connection of the unit with the siren and headlights. A standard horn can be used to provide sound notification.
- Installing the engine temperature sensor and immobilizer bypass.
- Installation of emergency button and LED element.
- Connecting the antenna module to the head unit.
- Installation of additional blocks and controllers.
Installation of alarm system Starline A39
There are certain rules for installing car alarms. It doesn’t matter which model the Starline A39 is installed on: Mazda6, Hyundai or Skoda 2018: the location of certain elements will be the same.
To install the Starline A39 alarm system on a car you will need:
- set of wrenches with socket heads;
- drill with drills;
- soldering kit: blowtorch, rosin, tin, etc.;
- heat shrink tubes, insulating tape.
- Car alarms are installed exclusively on cars with an electrical circuit of 12 volts. It is advisable to place the main unit in a place protected from vibrations. The most preferable installation location is under the dashboard - this guarantees concealment from prying eyes, as well as a minimum length of connecting wires. The block is fixed using self-tapping screws or double-sided tape to eliminate the possibility of spontaneous movement.
- A transceiver with a signal diode is mounted on the windshield of the car. The main condition is a distance of at least 5 centimeters from metal parts in order to avoid interference or distortion when receiving signals. The interior temperature sensor is mounted so that it is away from heat sources or direct sunlight for it to work correctly.
- The engine temperature sensor must be mounted on its body using one of the M6 bolts. It is advisable to attach it closer to the crankcase cover rather than the cylinder head.
- A siren is also mounted in the engine compartment. The main condition is to avoid moisture, and also place it away from large heat sources to prevent the horn from melting. Also, the siren connection wires should not be accessible from under the car so that an attacker cannot cut them.
- The shock sensor is located near the center pillar. It is advisable to mount it so that you can access sensitivity settings if it triggers too often.
- The Valet service button is installed in an accessible but hidden place. The inner sides of pockets for small items, the central tunnel between the seats, the plane under the decorative plugs of the front panel, etc. are suitable.
- Also, to connect and configure automatic start on cars equipped with a manual transmission, you will need to program the neutral and connect the limit switches to the handbrake. If the car is equipped with an automatic transmission, then the owner must move the lever to the parking position, otherwise autostart will not occur.
- First, all nodes are installed, and then the system is connected according to the diagram below.
Power is supplied through two main wires:
- black. The negative terminal that needs to be attached to the car body is ground;
- red. The positive wire, which is recommended to be connected to the battery or ignition switch.
If the car can be started using the Start button, then the connection is made in a slightly different way:
- the red contact is attached to the battery, but through a fuse designed for a current of no more than 30 amperes;
- The blue wire is connected to the brake pedal;
- the yellow-black cable connects to the start button;
- the yellow and green contacts remain unused.
To implement autorun and turbo timer, an additional algorithm is used:
- the red wire connects to the battery;
- yellow cable to the ignition system;
- green – to the ACC output;
- blue is redundant;
- the black and yellow contact is connected to the starter.
User manual
According to the operating instructions for the Starline A39 2CAN 2LIN alarm system, the security system is configured and used as follows:
- The key fob is switched to tag mode. To do this, long press the “1” key. Activation of the simple security mode is accompanied by the appearance of a red light indication.
- Adjust the range. To do this, press the “4” button 11 times, after which the ignition is turned on. Simultaneously pressing buttons “1” and “3” causes a blue indicator to appear. After this, briefly press the “2” and “3” keys and go to the range change menu. The indicator is changed using the buttons “2” and “3”. In a similar way, other settings necessary for comfortable use of the system are changed.
- Switch on security mode. To do this, briefly press the “1” button. Repeated pressure deactivates the function. To enable the silent security mode in the Starline A39 CAN alarm system, use buttons “1” and “2” in sequence.
When the engine is turned on or the car doors are open, some functions of the Starline A 39 CN 2 CAN signaling are not activated.
Sources:
https://www.alarmforum.ru/forum55/thread13935.html https://irecommend.ru/content/povedenie-signalizatsii-v-40-i-drugie-kharakteristiki-pri-ustanovke-na-novoi-mashine https: //remont-avtovaz.ru/signalizaciya-starline-a39/ https://support.starline.ru/topics/18919-vskryili-starline-a39-za-10minutno-avto-kia-cerato-2016g-s-akkp- korobkoj-5e-ugnali-stoyal-zamok/ https://autotuning.expert/avtosignalizatsiya/starline-a39.html
Starline A39 settings
The Starline A39 car alarm has many functions that make life much easier for the owner. But to set them up and activate telematics, you need a key fob that will be tied to the car. The binding process is carried out as follows:
- you must press the Valet service button seven times with the ignition off;
- the ignition turns on, and the car emits seven sound and light signals confirming the transition to the desired mode;
- Now on the key fob you need to hold down the first and second buttons until the melodic signal from the remote control.
You can attach a spare key fob in the same way, the main thing is that the interval between actions does not exceed five seconds. Exiting the settings mode is done by turning off the ignition, after which the car will blink its headlights three times.
Service mode
This option is needed to diagnose the Starline A39 alarm system at a service station or service station. If it is activated, the security functions are disabled, it is impossible to link new key fobs and some additional settings. Switching to this mode is possible using the service button. If the owner does not know where it is, then this operation can be performed from the remote control:
- the car is disarmed, and then the second or third key is pressed for four seconds;
- after two signals (one melodic and one short), you need to briefly press buttons two and three to move the cursor to the wrench icon;
- confirmation of the choice is made by briefly pressing the first key.
Turning off the mode occurs in the same way.
How to set the clock on the Starline A39 key fob
It is extremely important to correctly set the clock on the Starline A39 remote control. Due to an incorrect indicator, various operations (auto-heating, etc.) may be performed incorrectly. To set the clock at the correct time you need:
- press and hold button 4. This allows you to exit to the functions menu, which will be indicated by one melodic and two short sounds;
- Now the clock on the display has started flashing. Using keys two and three you can increase or decrease this indicator;
- Pressing button 4 again allows you to go to setting the minute indicator;
- it is carried out in the same way, by pressing keys two or three;
- The next step is to set the alarm. And to confirm the value, simply do not touch anything for eight seconds. The parameters will be saved automatically.
Setting up the shock sensor
The Starline A39 security system is equipped with a shock and tilt sensor, which eliminates the possibility of theft by diving onto a forklift. This setting is easy to configure. To adjust the parameters of the shock sensor you need to:
- turn off the ignition, and then press the third button for a long time, and then briefly press the same button again;
- using the second and third buttons we adjust this indicator;
- The menu can also be accessed by pressing button three (long press).
You can also adjust the tilt sensor:
- turn the ignition key to the Off position;
- press the fourth key until the signal sounds, and then briefly again;
- Use buttons two and three to set the required value (factory setting is 10);
- exiting the mode is similar to the first step.
How to turn on the turbo timer
This security system, in addition to auto-warming, has a convenient timer function that allows you not to turn off the engine with a turbine after long or intense trips. The fact is that as a result of such trips, the turbine impeller warms up to a temperature of 850-1000 degrees. Rapid shutdown leads to a serious temperature difference and a decrease in service life.
This function allows the engine to operate remotely, up to a suitable temperature. You can program this option as follows:
- We press the second button until the corresponding sound signal. After this, the left icon on the display begins to blink;
- use buttons 3 and 4 to move the cursor to the Turbo symbol;
- after pressing the first key, three beeps will sound, and the car will turn the headlights on and off twice;
- The first key sets the desired value from R01 to R06. The numerical value at the end is equal to the number of minutes of the turbo timer (maximum period - 6 minutes, minimum - 1 minute);
- press button one for a long time until the sound signal sounds;
- The Turbo symbol becomes active, which means that the turbo timer will work according to the specified settings.
Setting the warm-up time
Auto start is an extremely useful option, because the owner gets out and gets into the car, ready for the trip. However, at different temperatures, the auto-warm-up time may vary. You can increase the operating time of the motor as follows:
- if the engine is already running and you want to extend this action, then you should hold down the first button;
- each long press will add 5 minutes to the set parameter;
- the maximum value in this case is 30 minutes.
How to reduce engine operating time during autostart
If you want to set the default warm-up time, and not extend it while the engine is already on, this is done through a special programming mode.
- press the Valet service button five times with the ignition off;
- turn on the ignition, listen to five sound and light signals from the car, confirming the transition to programming mode;
- On the key fob, briefly press button three to go to the SF table;
- Now press key three for a long time, and then briefly press it again;
- by briefly pressing the third button, we switch to the corresponding function two (auto-warm-up time);
- now, using the first button, the parameter changes (it can be set to 10, 20 or 30 minutes);
- When the ignition is turned off, the system retains the set value.
How to enable autorun
You can set the key fob to automatically start the engine at a specified temperature. This allows you to start and warm up the engine in extremely low temperatures. To do this you will need:
- place the cursor on the corresponding thermometer icon, and then press the first key when you hear a melodic signal;
- by short pressing the first button, we set the appropriate value in the range from -27 to -3, in increments of 3 degrees;
- Long press the first button until two short beeps sound.
The display will now show the corresponding icon and the engine will start automatically if the temperature drops below the specified value.
Silent mode
The Starline A39 system has a silent security option, which is useful at night in densely populated areas. In this case, the car will not make sounds, and when trying to enter the cabin, the car's dimensions will flash. In this case, there will be a noticeable vibration on the key fob, and corresponding alerts will be written on the display. Setting up this mode is very simple - just hold down the first key for a long time (until a melodic signal is heard), and then briefly click on the second button. The key fob will play one sound, and the display will show an icon with a crossed out speaker.
How to open the trunk with the key fob
To perform this function correctly, you will need to connect the trunk limit switches. The electronic key is connected through an additional channel that requires separate activation. After this, when you press the second button for a long time, and then the first briefly, the car will respond with three sound and light signals, and the trunk lock will open. If the security mode is disabled, the shock sensor is also deactivated.
Disabling Confirmation Tones
If necessary, the Starline A39 system offers programming of the volume of siren signals. To do this, go to the programming menu:
- Press the Valet service button 5 times;
- after this, the corresponding table is selected, and then the third key is pressed for a long time, then briefly;
- The volume level indicator appears on the display (factory setting – 2). Using keys 2 or 3, the required level is adjusted from one to nine;
- To remember the parameters, you must turn off the ignition.
Correctly locking windows
To perform this task correctly, it is necessary that the car has window closers, for example, like on the Skoda Octavia A7. This option is carried out through the programming mode and through additional channel No. 4:
- go to the programming mode by pressing the Valet button five times with the ignition off;
- turn on the ignition, listen to five sound and light signals from the car, confirming the transition to programming mode;
- using the third key on the remote control, select additional channel four;
- set the necessary parameters on the third function (time delay - five seconds);
- The selection is remembered after the ignition is turned off. Now the windows will automatically go up without jerking after arming the car.
How to change your personal code
Each Starline A39 alarm model has a personal code. It is necessary for emergency exit from the security mode (if the key fob is lost or the anti-theft mode is deactivated). Its parameters are set through the programming mode:
- Press the Valet service button four times with the ignition off, and then it turns on;
- now the service button is pressed one more time;
- one siren signal confirms the transition to the corresponding mode. Within five seconds, enter the first digit of the personal code (in accordance with the table) by pressing the corresponding buttons on the remote control;
- similar actions are performed to program the second digit of the code;
- The value is stored automatically - just do not press anything for 10 seconds.