How to remove the front seat of a Lada Vesta Sedan
The process description is suitable for many car brands.
- We place the car on a level surface and open the front doors.
- Move the driver's seat all the way back. Remove two screws (head 10).
- Move the chair forward as far as possible and unscrew the two screws at the back. The size is similar.
- We remove the chair from the car interior and place it on the surface of the workbench for work.
Using the same principle, we remove the front seat of the Lada Vesta.
Unlike “Classic”, “Lux” and “Comfort” chairs have:
- greater rigidity;
- lateral support;
- quality of fabric upholstery;
- the presence of an armrest;
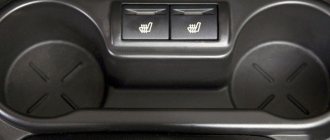
- heating system.
How to remove the back seat on a Lada Vesta
The rear seats structurally consist of an upper backrest and a lower sofa. We dismantle them separately from each other.
To remove the rear seat sofa, you must:
- Open the rear doors, and together with your partner, lift the sofa up, thereby removing its front part from the latch.
- Move the sofa towards the luggage compartment, remove the lower hinge from the lock.
- Remove the sofa from the car interior.
Removing the backrest separately
Experts say that the backrests can be removed separately by pulling the latch located behind the seat. If you press on this hook from the trunk, the backrest should recline.
But at the same time, there are many complaints that the clamps are made of low-quality material , and therefore can often break. Therefore, to avoid such troubles, it is recommended to remove the backrests only with a pillow. This increases the service life of the chairs.
Removing the back of the rear seat on a Lada Vesta
- Unscrew the seat belt fastenings on the left and right side of the backrest (bolts at “14”).
- Unscrew the screws at the base of the back (2 in total).
- We unfasten the fastening one by one and remove the backrest from the car interior.
If necessary, we carry out preventive maintenance and install in the reverse order. On the Lada Vesta SV station wagon, the rear seat is removed by pressing the side plastic latches and folding the backrest to a horizontal position.
If the chairs squeak
A creaking sound in a Duster is not considered a breakdown, but many car owners and passengers can be annoyed by this sound. Creaking occurs due to the friction of elements made of plastic, leather or other finishing materials against each other or against metal parts.
If the Renault Duster seat squeaks in the lower position, then it is enough to apply graphite lubricant to the seat slide. At the same time, process the lifting mechanism. If the squeak remains, you need to remove the chair and inspect it. Especially carefully on the sides. Places that create squeaking may show themselves as shiny or scuffed.
Most often in Dusters, the creaking appears after a short mileage, and its source is under the seat of the Renault seat. To eliminate the unpleasant sound, the chair must be removed and turned over. At the bottom of the seat, on the side, there are springs. They rub against the upholstery loop. This can be seen by the polished surface area on the spring.
To eliminate the squeak, it is enough to isolate the spring with a rubber gasket. To do this, take a hose of suitable length and diameter, cut it to length, put it on a spring and secure it with plastic clamps.
Another popular reason for Renault squeaking is in the back of the chair. It will have to be opened. The inside is polyurethane foam, which must be treated with anti-squeak powder. It is green or blue. If it is not there or is small, then Renault has saved money, and you need to improve it. In theory, in this case there should be a warranty replacement of the chair, but it depends on how you can negotiate with the dealer.
The Renault seat belt fastener may also creak, creating a “cricket” effect. Spray it with WD and forget about it for a while.
The next Renault Duster II model will have a third row of seats - there will be more creaking and work.
How to put covers on a Lada Vesta without removing the front seats
Standard set of covers:
- front and rear headrests (2 pieces each, plus one small one);
- front backrests (2 pcs.);
- base (2 pcs.);
- backrest is composite (2 pcs.);
- rear sofa (1 piece).
Before you start putting on the covers, remove the seat pad and the plastic handle for the lumbar support.
- To do this, we press the casing at the location of the handle, and use pliers to squeeze the metal bracket out of the core.
- Pull the cover carefully without damaging the fabric.
- We put the braid under the bottom of the chair, pull it through, and tie it in a knot. We first move the chair forward (backward) all the way for convenience.
- We put the covers on the backrests, tuck the material under the plastic clamps of the headrests. You can remove them with a flat screwdriver or by hand.
- We insert the braid into the gap between the back and the base, pull it tight, and tie the thread.
By analogy, we put covers on the passenger seat.
Step-by-step instructions for dismantling
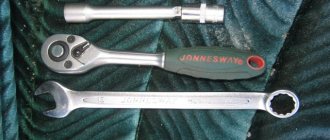
Before starting work, we prepare the necessary tools. To remove the seats we will need:
- flat and Phillips screwdrivers;
- key to 10;
- pliers;
- repair kit (depending on the situation).
It is better to work with gloves so as not to accidentally injure your hand on sharp metal corners.
The procedure is as follows:
- Unfasten the rear seat upholstery buttons on the trunk side.
- Pull back the loop and remove the latch near the headrest.
To get to the latch, you need to pull the loop near the headrest
- We pull out the hooks on the back from the metal brackets that are on the body.
Remove the hooks that hold the seats to the body
- The armrest mounting frame is fixed with three screws; we unscrew them for further dismantling.
- To remove the armrest itself, use a 10mm wrench and unscrew the nuts.
Use a 10mm wrench to remove the armrest fastening nut.
- The mounting pad is secured with two latches; we press them out with a flat-head screwdriver.
To remove the mounting pad, press the two latches
- Unscrew the fastening bolt and pull out the seat cushion lock.
After unscrewing the mounting bolt, the lock can be easily removed
- Dismantling ends by unscrewing the last two nuts with a 10mm wrench, after which the base of the lock is removed.
We recommend: Checking the pump on a car engine
Purchase and replacement of rear seat latches Lada Vesta
The luggage compartment of the car is spacious, but sometimes it is not enough to transport oversized cargo. The owners remove the back and dismantle the sofa.
During frequent installation and dismantling, the mountings for fixing the pillow wear out. The material is plastic and will crack if not handled carefully.
| Name / catalog article | Price in rubles |
| Latch 8450006696 (old model) | From 150 |
| 8450030620 (new sample) | From 190 |
| Analogs from General Motors A2656521 | From 170 |
*prices are as of March 1, 2019.
Conclusion
The process of dismantling the front seats and rear sofa is simple. If you follow the described recommendations, installing the covers will take no more than half an hour.
How effective the covers are is up to you to decide individually. Don’t forget that every time you get into the car you rub down the seats, subsequently holes and scuffs form. The service life of the seat is reduced by a third. When selling a car, worn out (damaged) seats serve as the basis for a discount on the price of the car.
How do car seats fold out?
To fold the seats in a car from France Renault Logan, you need to do a few simple manipulations:
- All front seats, including the driver's seat, can be reclined using the seatback tilt adjuster; you need to lower the backrest even to the level of the rear row seats, and then you get a spacious sleeping area that will appeal to those who like to travel.
- In the 2nd version of the Logan model, all rear seats can be easily and simply folded out using locking buttons, and you will not achieve a flat floor, but this design is much better compared to the 1st generation Logan.
- The 1st generation model initially did not have the ability to fold out the rear row of seats, and the only way owners had to increase space was to completely remove the backrests of the rear seats from the car.
Reviews
| № | Positive | |
| 1. | Ivan , 38 years old (drive2.ru), Sverdlovsk: I have a basic modification of the Lada Vesta, the seats are good and practical. In order not to get them dirty and wipe them every time I plant them, I bought covers. | |
| 2. | Vladlen , 43 years old (prom.ua), Samara: after a collision with oncoming traffic in winter, he dismantled the seats. The first time, I was a little doubtful of my abilities, but it turned out to be much easier. | |
| 3. | Peter , 46 years old (autotoday.com), Krasnodar: I’ve been using the car for three years, there are no covers, scuffs are visible on the seats. | |
| 4. | Gennady , 37 years old (rozetka.ua), Rostov-on-Don: I rented the car at a dealership and immediately bought covers so as not to get the seats dirty. It's been two years now and the interior looks like new. | |
| 5. | Dmitry , 44 years old, Kursk (avtoflit.com): you need to buy covers, because the bag is in the cabin, the ash falls, and burns the fabric. Due to the loss of appearance, the value of the car decreases when selling it. | |
| 6. | Vyacheslav , 41 years old, Saratov (autotoday.com): I treat the car with care, but in three years the upholstery has worn out, abrasions are visible in places. Considering that I am going to sell the car in the spring, this will negatively affect the price. They often ask for a discount. We urgently need to buy covers. | |
| Negative | ||
| 7. | Victor , 37 years old (prom.ua), Uralsk: the quality of the material is poor, the car is two years old, and the upholstery looks like it’s 100 years old. | |
| 8. | Fedor , 43 years old, Moscow (avtoflit.com): I heard that you can install front seats on a Lada Vesta from Renault Logan. They are more practical, better quality, more comfortable. | |
| 9. | Kirill , 33 years old, St. Petersburg (drive2.ru): I don’t know how it is in other configurations, but in the basic version the workmanship of the seats is poor, the upholstery is cheap and wears out quickly. | |
| 10. | Vasily , 44 years old, Pskov (autotoday.com): after purchasing a Lada Vesta, do not delay with covers, as the upholstery wears out to holes in a year and a half. | |
Can the backrests be removed separately?
This is not difficult to do; you also need to pull the loop behind the headrest, and then unfasten the upholstery and remove the backrest from the lower fastenings. Many car enthusiasts complain that the locks are made of low-quality materials, and after several removals the latches no longer hold the parts properly. Therefore, unless absolutely necessary, it is recommended to remove the backrests along with the bottom pillow. This will increase the service life of the seats.
In the VAZ 2110 model, the seat fastenings are made quite simply. Dismantling these structures requires tools that every car enthusiast can find.
- Author: Alexander Orda
How to remove the rear seats on a VAZ 2110 and 2112? When it is really necessary Before removing the rear seats on VAZ 2110 and 2112, indicate all the nuances of this work. This is not difficult to do, but there are some peculiarities. This model, although it is the progenitor of several models, from 2111 to Lada Priora, still differs in some elements from its brothers. True, not too much. Ten at one time was positioned as a completely modern car. For the first time, a carburetor with a self-priming pump and many other novelties was used on domestic cars.
How to remove the rear seats on a VAZ 2110 and 2112
, a question that is often asked by owners of this car. The design of the seats and their fasteners is as simple as possible, but at the same time reliable. This allows you to remove the seats at the right time. Once upon a time, entrepreneurs who used a car for work took out seats when necessary to travel for goods. They then returned them quickly and easily.
Begin disassembly by loosening the back of the upholstery. It is fixed with buttons located on the outside. Then pay attention to the seat. First, the pillow correction handle is removed from the right. After this, you need to raise the seat on the right side. Also go left. Then move the seat cushion forward and remove it. Half the work is already done.
The headrests are removed from the locks. To do this, press the fastening buttons and pull the headrest up. The second section is similar.
Don't lose the lock buttons. In addition, the upholstery is completely removed, otherwise the seat cannot be removed. The seat lock is locked for the hinge.
It is located behind the back. The right side of the backrest is raised, its mounting loops removed from the hooks of the car located on the floor. Likewise, the left side is removed.

