The best manufacturers of CV joint boots
Each brand has an individual list of pros and cons that affect operation, as well as customer choice.
MARUICHI
Description. The Japanese company MARUICHI is considered one of the market leaders in the field of rubber-metal parts, which includes anthers. The brand is distinguished by proven quality, which is achieved by high-tech production and the use of durable materials.
We supply boots not only to the secondary market, but also to the assembly line, which allows customers to receive similar parts for their cars.
The boot is made of a rubber mixture, which has increased resistance to mechanical loads and frost resistance.
Spare parts can withstand temperatures down to -50 °C.
Equipment. The standard equipment includes the boot itself, good quality molybdenum grease, clamps, and a retaining ring. Often the kit also includes a hub nut.
Life time. The service life exceeds 3 years, with a guaranteed service life of 1 year.
Pros of MARUICHI
- High quality combined with a low price.
- Analogue to original spare parts for Japanese cars.
- Long-term operation due to wear resistance of rubber.
- Frost resistance, which is important for northern regions.
- Good packaging and inclusion of lubricant.
Cons of MARUICHI
- Narrow clamps.
- Some models supplied to the secondary market differ from the originals, which requires the correct selection of the optimal boot.
TRACK
Description. The domestic manufacturer TREC occupies a significant segment of the anther market in Russia. This is due to the introduction of innovations in production and high-quality products that have international quality certificates, including environmental ones.
The boot is made of high-strength polyurethane, which increases service life and resistance to mechanical damage. There are several series of anthers available on the market, differing in characteristics and configuration.
Equipment. The standard kit includes a boot, clamps and lubricant. In the classic series, only the boot is supplied.
Life time. The guaranteed service life is 12 months or 40,000 km. In practice, the actual duration of operation depends on operating conditions and compliance with all rules. The boot can protect the unit for more than 5 years if treated with care and appropriate maintenance.
Pros of TRACK
- In production, thermoplastic elastomer is used, created on a polyurethane basis, which increases the strength indicators relative to rubber three times.
- Resistance to temperatures ranging from -65°C to +110°C.
- They last a long time with proper installation and maintenance.
- Good price/quality ratio combined with a large selection.
- High quality durable stainless steel clamps.
Cons of TRACK
- It is difficult to select a boot with the required dimensions for a number of foreign cars, since the products are more aimed at the domestic market.
- There may be a defective batch under this brand, so it is worth checking the place of manufacture when purchasing.
HORSE
Description. The Russian company HORS is part of a diversified holding association that supplies spare parts to the secondary market. Rubber-metal products, including anthers, are considered one of the production lines.
The boot is made of silicone with a good level of frost resistance. This allows it to be used in northern regions.
The element retains elasticity at temperatures from - 50 C to + 250 C. Wear resistance, which is achieved through high-quality silicone, is taken into account. The difference is considered to be a good level of protection against any aggressive substances.
Equipment. The kit includes clamps, the cover itself and lubricant.
Life time. The guaranteed period is 1 year, but practice shows that the service life significantly exceeds 3 years with proper installation.
Pros of HORSE
- High-quality design with a seal at the clamp attachment point, which ensures structural strength and reduces the possibility of dirt penetration.
- Heat and frost resistance.
- Possibility of installation on domestic and foreign brands of cars.
- Long service even in difficult conditions.
Cons of HORSE
- There are low-quality copies in the form of fakes. They cost less than the originals.
SWAG
Description. SWAG's enterprises are located in Germany. Boots are among the aftermarket parts that are supplied to international markets. In the manufacture of spare parts, high-quality materials with increased resistance to damage, including mechanical damage, are used.
Despite the fact that the company supplies a number of models of anthers for assembly line assembly, the quality of the originals is much higher than the parts supplied to the secondary market. The difference will be a low price segment compared to competitors with European quality certificates.
Equipment. The kit includes a cover, clamps, lubricant, and may also include a retaining ring. Each series has its own equipment.
Life time. The warranty is issued for one calendar year. The duration of actual operation depends on many factors, but the average period exceeds two years.
Pros of SWAG
- Budget option with European quality.
- Large selection of anthers for all brands of cars.
- There are models similar to original spare parts for German and Czech cars.
Cons of SWAG
- A large number of fakes.
Lemforder
Description. Lemforder is part of a large concern that plays a leading role in the production of auto parts. The silicone boot is designed for long-term use and has all European and international quality certificates.
Rubber-metal products are supplied in branded boxes and with protective logos, as the percentage of counterfeit products is high.
Spare parts are similar to the original parts that are used to assemble German and American-made cars.
The difference between the products is also considered to be the ability to choose the best option for any brand of car without loss of service life.
Equipment. The kit includes clamps, boot and retaining ring. For some series, a special lubricant is provided, which allows you to extend the service life.
Life time. The warranty is issued for 12 months. The service life of the protective element is more than 5 years with proper maintenance and professional installation.
Pros of Lemforder
- Inexpensive case option with good quality.
- Proximity to original parts, which facilitates installation and installation.
- Long-term operation due to the resistance of silicone to negative factors.
Cons of Lemforder
- When purchasing, you will need to check the spare part for logos and special codes, the country of the manufacturer, since there are a very large number of fakes, which are not only low in cost, but also of poor quality.
- If a non-recommended lubricant is used, the boot may be subject to accelerated wear.
Replacing CV joints
In order to replace a failed grenade, it is not at all necessary to contact a service center. The motorist himself is quite capable of performing this procedure.
Tool
In order to replace CV joints, you will need the following set of tools and accessories:
It's time to change the CV joint
To increase the service life of CV joints, you should regularly check the condition of their boots. Even a small crack on the boot can cause the CV joint to fail.
The repair itself can be carried out anywhere, but it will be much better if the car can be placed on an overpass or placed above a sufficiently deep repair pit - this will greatly facilitate the efforts of the car enthusiast and make the process itself more accurate.
Process
The entire replacement of grenades occurs as follows:
CV joint device
After the new CV joint is installed in its place, all that remains is to reassemble the entire assembly in the reverse order. At the same time, it is worth paying special attention to the installation and tightening of the hub lock nut - this should be done exclusively using a torque wrench and tightened strictly with the force specified in the car’s passport. But we’ll talk about which grenade is better to put on a VAZ 2114 below.
Types of CV joint anthers
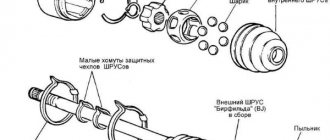
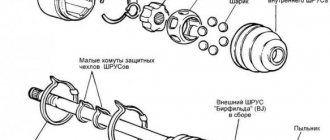
Boots for CV joints are presented in the form of special protective covers that ensure tight closure of the hinge assembly from the ingress of foreign substances and various dirt.
There are two types of anthers:
1. Internal, which is necessary to protect the CV joint in the interior of the vehicle assembly. It protects the element from temperature, various objects and dirt, as well as physical impact.
2. The external or external version of the boot provides protection to external elements. It must have increased resistance to wear and stress. Typically, such protective elements are elastic, since they are subject to compression and stretching during operation of the unit.
Take into account that the two types of anthers have individual characteristics and differ from each other.
What is the dust cover for?
This is a special rubber cover that performs protective functions. Anthers are made in the form of a corrugated tube. During long-term use of the car, various cracks and breaks appear on the surface of the boot, which in turn negatively affect the operation of the grenade (as the CV joint is popularly called).
What is a CV joint boot?
Damage to the integrity of the boot is fraught with serious consequences, because due to dust and moisture entering the mechanism, some of its elements are damaged. Is it possible to drive with a torn CV boot? Experts note that it is highly not recommended to operate a car with such a malfunction, because the hinges may fail due to the ingress of small particles.
Why do you need a grenade boot?
Purpose and classification of anthers
Anthers have a standard purpose, which is divided into three types of actions:
- Protect the unit from moisture, dust or dirt.
- Keep lubricants clean.
- Lubricants are contained within the assembly.
Classification
It is necessary to highlight:
- Front mounted with front wheel drive. They are divided into front internal (near the wheel) and internal (near the automatic transmission, gearbox);
- Rear external and rear internal with installation near the gearbox.
Depending on the material used, the covers can be rubber (silicone) or thermoplastic with a polyurethane base.
The division is also carried out by manufacturer. There are original spare parts that are produced by the company itself, and duplicate ones produced by partners.
Disassembling the drive and replacing the boot
Sequence of work.
The car is driven into a pit, chocks are placed under the wheels, and the car itself is left in first gear.
Before completely removing the wheel, loosen all the wheel nuts.
The protective cap of the nut securing the drive to the hub is also removed.
To prevent the nut from unscrewing from the shaft, it is centered around the circumference, which is why it has bends that fit into a groove made in the shaft.
These bends need to be aligned, this is done with a thin screwdriver or a drift and a hammer.
After aligning the bends, using a socket and a powerful wrench, the nut is unscrewed, and the washer located under it is also removed.
Next, the car is jacked up and wooden stands are placed under its sills.
The wheel nuts are unscrewed and the wheel is removed.
Next, work is done under the car.
If there is a crankcase protection, it can be unscrewed. Then the oil from the gearbox is drained through the drain plug into the prepared container.
Next, you need to unscrew the two bolts securing the lower ball joint to the hub.
This will make it possible for the latter to move sideways. At the same time, you can check the condition of the support itself.
The steering wheel must be turned all the way to the left so that the drive is completely shifted in the inner CV joint, ensuring its minimum length.
After this, the hub is removed from the splines of the drive shaft.
The outside of the drive will be removed.
Then you can go in two ways.
The first way.
Knock down the outer “grenade” without removing the inner CV joint.
To do this, you need to remove the boot clamps, and then cut the boot, and then wipe off the existing grease on the hinge.
Then you need to prevent the drive from moving on the internal hinge.
To do this, take a small vice or a butt wrench, clamp the shaft in them and hold it firmly in your hands.
An assistant, using a soft metal spacer and a hammer, knocks down the CV joint, striking the inner race of the hinge.
With this method, there is no need to drain the oil from the box. But there is a possibility that when striking, the inner race will jump out of the outer inner CV joint.
Also, shooting down a “grenade” in this way is not very convenient, since this work will be done in a limited space.
Second way.
Complete removal of the drive from the vehicle. To do this, a pry bar is driven between the gearbox housing and the internal joint and the shaft entering the gearbox is pulled back and forth.
After this, the drive is completely removed.
IMPORTANT: With this method, the oil must be drained.
The advantage of this method is also the ability to assess the condition and replace the gearbox seal, through which oil often leaks.
In the future we will consider work with the drive completely removed.
Signs of boot failure
If there are any defects on the anthers, they need to be replaced. There are a number of signs by which you can understand that the protective case is no longer performing its function in full mode. Among them:
- The appearance of microcracks.
- Uneven wear on one side of the boot.
- A gap appears.
- The unit releases lubricant that seeps through the cover.
In all of these cases, the external or internal boot will need to be replaced with a new one.
Take into account that the operation of a damaged boot will lead to more serious damage that will occur if the hinge part of the assembly is contaminated.
What to do if the ball joint fails?
It is quite easy to determine that the ball joint is faulty: if there is a creaking when driving on a flat surface, knocking when turning the steering wheel, as well as clanging and vibration in the front suspension, then it’s time for a lift. When the first signs of ball joint failure appear, the boots should be checked for damage, and if the boot is torn, the ball joint will have to be replaced. By the way, experienced auto mechanics advise immediately replacing the support on the opposite side.
Source
Which CV joint boot is better to buy?
The choice of anthers is very large due to the extensive range and the presence of a significant number of well-known brands in this market segment.
When choosing, pay attention to a number of factors:
- The manufacturer must have a positive reputation.
- The boot is not a fake, that is, logos, markings and special codes, including the article number, are checked.
- The choice is made on the basis of similarity to the original native parts.
- The material from which the protective element is made is suitable for the terrain. An example would be the ability to operate in severe frost.
- When choosing rubber, plastic or silicone spare parts, take into account that rubber has a smaller margin of safety, and plastic parts may crack.
The number of ribs is also taken into account. 5-rib boots have greater wear resistance compared to a boot with 4 ribs.
When purchasing, you should immediately check the elements for elasticity and resistance to deformation. This will allow you to choose a strong case for the hinge and increase its service life.
Experts advise not to buy cheap or used items, as they have a shorter service life.
Question of material selection
Although experts say that when choosing a boot you should be guided primarily by the manufacturer and price, in reality it is also worth considering the material of the product . For example, the most common rubber boots have many disadvantages that a competent car enthusiast should know about. Further we will talk only about non-original anthers and their most common “diseases”. Here are the main problems with rubber boots:
- Small operational resource. It is 6 months on average and up to 18 months at best;
- Low frost resistance. The anthers quickly “tan” in severe frosts.
Tripod CV joint
The main difference between a tripoid CV joint and the one described above is that instead of ball bearings, it uses needle bearings. As a rule, such bearings are used in the design of the internal CV joint.
A tripod CV joint is a very “delicate” unit that can fail if even a small amount of dirt gets inside. It is also very demanding on the consistency and operating temperature of the lubricant. The additives that are added to the lubricant also matter.
Due to the fact that the tripod CV joint is installed in close proximity to the hot elements of a car engine, its operating conditions are characterized by elevated temperatures, which can reach 160 degrees Celsius. In addition, like all types of roller bearings, needle bearings require the use of a lubricant with extreme pressure and anti-wear properties, which does not contain solid lubricating additives. The presence of such additives can lead to the formation of jammed lubricant clots, which accelerate wear of the tripod CV joint.
Determination of CV joint failure and causes of failure
SearchReplacement of Inner CV Joint Boot Niva
Faulty grenade VAZ 2110
Before starting the process of replacing a grenade, it is recommended to determine which grenade needs replacement. Simply feeling the shaft play on the overpass is an accessible method for determining the malfunction of a particular grenade. As a rule, a working grenade should not create any play at all.
Note. It is worth noting that a faulty grenade does not necessarily occur on older cars. This situation is often observed when the CV joint fails on a car that has recently left the assembly line.
What are the main reasons for the failure of a grenade? Here they are, listed below:
- the quality of the grenade, which can be low or high (often a fake is sold instead of the original part or a defect is established);
- lubricant that is either completely absent or available in insufficient quantities;
- failure of the boot (see How to replace the boot on a vase), which leads to damage to the grenade (the boot is protection and if it is missing, various abrasive debris and water get into the grenade mechanism);
- incorrect driving style (aggressive driving style);
- poor condition of roads (especially important here in Russia).
Worn CV joint
So, you can determine the malfunction of the CV joint yourself, as mentioned above, by detecting play in the shaft. In addition, the malfunction of a grenade, like any other part or mechanism of a car, is caused by changes in properties, dimensions, formation of wear, etc. As was said above, a grenade is a hinge, the design of which contains elements that rub and are under constant load. If the CV joint is a kind of bearing, then its races must have transverse grooves. This is what allows you to change the angle between the drive and driven axle shafts. Since the grenade, forcing the car to move, transfers significant force to the wheels, over time it loses its performance qualities and forms on the part. development. It also increases the gap. And where there is no close contact between mechanisms and parts, knocking, noise, etc. occur.
Torn boot on a VAZ 2110 grenade
The appearance of a characteristic crunch when turning the wheels is the main sign of failure of the grenade, which most experienced drivers know about. Such a sound can only be produced by metal balls rolling along the gutters.
Note. Such a crunch can appear at any time, but, as a rule, when turning the wheels or sharply accelerating from a standstill. In addition, a characteristic sound may appear when overcoming obstacles.
Slight jerks when the car starts moving will also help to identify signs of a CV joint malfunction. Also, experts recommend changing the driving dynamics to quickly identify faulty grenades. As was said, there are two types of grenades: external and internal. How to determine the malfunction of an external grenade, or as it is also called an external grenade, was indicated above.
Note. The external CV joint differs from the internal one, first of all, in that it is smaller in size and fails much more often than the internal CV joint.
So:
- To determine the malfunction of the external grenade in another way, you need to turn the steering wheel and move away. If the grenade is faulty, it will begin to “crunch”.
- To determine the malfunction of the internal grenade, you will need to drive not in a curved manner, as when checking the outer CV joint, but in a straight line. The internal grenade will especially clearly signal with a sound signal that it is time to replace it when overcoming holes, snowdrifts or shallow ditches.
- You can finally check the malfunction of the grenade on the lift. The front wheels will be suspended and if the CV joint is faulty, a characteristic crunch will appear.
Find a CV joint for a Honda Honda
Selection of a cheap CV joint (grenade) from another car
Unique replacement of CV joint boots.mp4
Eternal CV joint boot.
Installing a universal CV joint boot on HONDA CRV and RENAULT LOGAN
CV joint (grenade) RUVILLE reviews
How to make an outer CV joint puller with your own hands / CV joint puller
https://youtube.com/watch?v=Y5s4cpiwYmw
Replacement and restoration of the CV joint, as well as the intermediate shaft on the Cherie Tigo
(Replacing internal CV joint)):)) Tripoid
Overview of CV joint lubricants
CV joint washing and lubrication in one motion.mp4
Also see:
- Chip keys for Honda car
- Honda Camshaft Sensor Replacement
- Painting a Honda cbr 600 motorcycle
- Honda VTZ 250 reviews
- Honda Adyssey in Kyrgyzstan
- Honda 929 2002 specifications
- Brake discs Honda SRV 2013
- Walking on a Honda HRV
- Bleeding the Honda SRV steering rack
- Fuel pump Honda Civic d15b
- Engine us Honda Dio 35
- Honda element soundproofing
- Honda Civic 6th generation Englishman
- Spoiler for Honda Civic ferio
- Motorcycle 110 Honda
Internal CV joint on VAZ 2110 which is better
Replacing the fuel line of a VAZ 2110 with your own hands
Dear visitors of the site “Everything about cars”! We will be very grateful for your comments on the video clip “Which is the best internal CV joint on the VAZ 2110”; registration is not required for this. We also ask you to let us know if you have any problems playing the video.
Plastic clamps crack over time. You can simply install regular screw clamps of the required diameter.
Such a lubricant with molitben cannot be used like yours. For tripoid, polyurea lubricants are required. Grease for CV joints kills the triship right away
maybe it's 2nd gear? Replaced the fastener and the vibration remained
You can’t fasten the boot with plastic ties, they stretch and fly off over time, as a result the CV joint needs to be replaced again. You only need special metal ones, they press the boot more tightly and hold better.
clear video, without unnecessary water. like.
Good evening everyone, night, morning, day VAZ2112, I hung up the right front wheel, unscrewed it, started it, put it in gear and some unimaginable rocking began. On ice, the car becomes uncontrollable, especially when you give the gas sharply, it starts to drift to the right. What kind of mandula could this be?
no wonder he doesn’t leave for a long time... Hofer final China
I pulled everything together with simple pliers. you're just a handyman. and I also use zip ties, respect. do not use clamps, they upset the balance
Salam to everyone I have a reverse speed sound chick chick chick VAZ 2114
Please tell me. VAZ 2110, unpleasant vibrations from the front right at speeds of 30-60 mph, and at 25-30 mph the car seems to be rolling over a crooked wheel. I changed three sets of wheels, the difference was 0. I towed another car on a cable, the load increased, the front end began to jump up to 50 km/h. We unhooked the cable, the vibrations decreased, but did not disappear. It's unpleasant to drive. I showed the car to the mechanic, he looked at it for a long time, found nothing obvious, no obvious play, no obvious problems with the engine mounts. At speeds above 70 mph everything is fine, the vibrations disappear. On a suspended wheel, vibrations during rotation are not particularly noticeable. There is no crunching noise during acceleration. Inner CV joint?
Replacing the CV joint boot with your own hands - dismantling the drive, replacement procedure
Hello, dear car enthusiasts! The debate about which cars to choose: front-wheel drive or rear-wheel drive will probably never end. Fans of both the first and second systems have their own arguments in favor of their preferences and a lot of complaints about the technologies used in cars with the opposite drive system.
Owners of vehicles with four-wheel drive are quietly observing this, because this dispute does not concern them. Car owners whose car moves through the force of the rear wheels proudly declare that they will never have to rack their brains over how to change the CV joint boot, because this mechanism is simply not in the car.
This, of course, is not the most convincing argument that can prove that the driven front wheels are worse than the rear ones, but you still have to learn how to replace the CV joint boot.
Why do you need to replace the CV joint boot?
Changing the CV joint boot
As you know, the CV joint is a constant velocity joint that causes the front drive wheels to rotate and allows them to turn. The peculiarity of this device is that it transmits rotational motion to the axle shafts, which are at a constantly changing angle relative to each other.
The designers foresaw that a significant load would be applied to the hinge and made it from very strong alloys. Experts say that a good and well-maintained CV joint can outlast a car.
You can achieve this result and save money (after all, replacing hinges is not a cheap pleasure) by following certain rules. And one of these rules is to systematically check the condition and timely replacement of the CV joint boot.
The most important enemies of the CV joint are dust, dirt, sand and water, which can get into the working part while in motion. To protect against these destructive factors, anthers were invented - rubber protective cones that very tightly cover the CV joint mechanism.
If you see that the CV joint boot has torn, it must be replaced immediately. During periodic technical inspections, it is necessary to carefully inspect the anthers and replace them if the rubber has lost its elasticity or cracks have appeared in the folds, especially since this is not so difficult to do.
How to change a CV joint boot - repair technology
In the literature you can find a lot of advice on how to replace anthers. Many people recommend changing them one by one, i.e. First, the boot of the inner CV joint is replaced if it needs to be replaced. And then you should wait until the boot of the outer CV joint wears out or is damaged. This is a pointless waste of time, effort and money. A strong recommendation to all car enthusiasts: if it comes to the need for repair and maintenance of CV joints, the shaft is completely removed and the boot of the outer CV joint and the inner one is replaced at the same time.
There is a logical explanation for this action:
- firstly, if one of the boots has become unusable, then it is absurd to assume that the second one remains in perfect condition; most likely, soon the second boot will also remind itself and the car will have to be repaired again;
- secondly, if one CV joint is removed, then removing the second one is as easy as shelling pears and much more convenient to immediately check the condition of two CV joints and at the same time replace the boots.
- inspecting and replacing the lubricant in the joints will never be superfluous, but will allow you to travel several tens of thousands of kilometers;
- thirdly, even if you replace the boots and lubricant in the CV joints 50 times, it’s still cheaper than buying new joints out of sheer laziness or a stupid “maybe it’ll blow through.”
Replacing the CV joint boot takes a couple of hours
Drivers who are not used to annoying car service specialists with their presence know very well that the best technician for a car is its owner. Regarding the replacement of CV joint boots, it should be noted that this is not such a difficult undertaking, it can save a lot of money, but it takes a very short period of time.
The algorithm for dismantling a shaft with two CV joints is very simple:
- the wheel is removed and the entire “hitch” on the hub is disassembled, which allows you to remove the outer hinge;
- the bolts securing the inner CV joint are unscrewed and... That's it!
Using a regular set of keys and a vice, both hinges are removed and the anthers are replaced.
In the process of replacing CV joint boots, do not be like a bad car mechanic and take the trouble at the same time: inspect the condition of the working parts and update the lubricant.
A master class on replacing the CV joint boot in visual inspection will help you make sure that there is nothing complicated in the procedure.
Signs when you need to change the boot
The experience of car owners suggests that the boot of the outer CV joint is the most important element in the hinge mechanism, which ensures absolute protection from water, dirt and dust. This is the only way the system can effectively perform its nominal functionality.
Rubber covers fail more often. As a rule, they crack or their tightness is broken. To identify the problem, just look at the CV joint itself. If the seal is broken or a crack occurs, there will be lubrication on its surface, because One of the purposes of the boot is to eliminate the possibility of lubricant leakage.
Procedure for replacing the outer CV joint boot
The procedure for replacing the outer CV joint boot, which has a unified design, is identical for most cars with front-wheel drive. The work is carried out on an overpass or inspection pit.
Required Tools
Minimum set of tools required to perform repairs:
- mechanical or hydraulic jack;
- wheel stops and auxiliary stands for holding the body;
- a metal brush to clean the surface from dried dirt;
- hammer and chisel;
- rags for wiping;
- set of wrenches and sockets;
- torque wrench;
- flathead screwdriver and pliers;
- a spatula for applying lubricant to the cavity of the cover.
Progress
Sequence of actions when replacing the external boot:
- Place the car in the pit, apply the handbrake and place chocks under the rear wheels.
- Loosen the nuts or bolts securing the wheel rim to the hub, and then jack up the body.
- Install safety stops under the threshold (if they are missing, it is allowed to use a spare wheel with a board).
- Dismantle the wheel, and then remove the clamps of the central nut (a cotter pin or a bevel of the nut bent into the grooves is used to hold it in place).
- Unscrew the nut; to complete the procedure, you will need the help of a second person to press the brake pedal.
- Remove the brake pads and caliper, which is moved to the side (removing the hose is not required). The caliper is bolted to the steering knuckle, the size and location of the heads depends on the car model.
- Pull off the brake disc. If the part is stuck to the hub, then you need to use a hammer. The blows are applied through a wooden spacer that prevents damage to the disc surface.
- Remove the bolts connecting the hub and the shock absorber housing. Before disassembling, it is necessary to remove the layer of dirt with a brush and wipe the surface with a rag.
- Pull the hub towards you, moving the shaft splines out of the hole.
- Remove the old cover using a knife or screwdriver. At the same time, the old clamps are removed; reusing the fasteners is not recommended.
- Carefully remove old grease with traces of water or dirt from the hinge surface. Grease is removed with a wooden spatula and clean rags or rags.
- Remove the outer hinge together with the housing. To complete the task, you will need the help of a partner, who does not allow you to disconnect the shaft joint near the gearbox housing. The hinge is removed from the axle using a chisel and hammer (the design uses an internal retaining ring that is compressed upon impact).
- Wipe the shaft and CV joint from any remaining lubricant; you can disassemble the unit and wash the parts with gasoline.
- Assemble the assembly and apply a layer of lubricant to the parts; the substance is tightly packed into all cavities and grooves.
- Place a new boot on the shaft; a portion of lubricant is first added to the cavity of the boot.
- Connect the hinge and the axle shaft, first aligning the seating teeth.
- Place the clamps in their original places, and then install the removed parts. When tightening threads, use the tightening recommended by the manufacturer.
Option without removal
The procedure for removing and installing the cover without separating the shaft and the hinge involves the use of a special device that stretches the rubber boot. The method is used in cases where it is impossible to separate parts without destroying the metal elements (due to corrosion or design features).
Possible problems
A common problem is the joint sticking to the shaft. If the hub is secured with a bolt, then to separate the parts it is necessary to screw the bolt into the hole until it stops. After the part rests against the end of the axle, you should make another 2-3 turns with a wrench, which will allow you to remove the hinge. If fastening is carried out with a nut, you will need to completely remove the axle shaft and then clamp the drive in a vice. Tightly fixing the part will allow you to knock down the hinge with a chisel, but if the contact cannot be separated, you will have to cut the inner ring of the CV joint with a grinder.
