A towbar is a towing product designed to connect a trailer to a vehicle. Installing a new towbar on Kalina NA has a number of features. The Kalina hatchback car has a trailer that is not capable of withstanding heavy loads. Therefore, installing a towbar for this vehicle is necessary if it is planned to be used for transporting goods. It will help to use a removable trailer and make the car more versatile.
Types of device for station wagon and hatchback
Installing a towbar on a Kalina hatchback is difficult because the design does not provide for the possibility of its use. The Kalina hatchback body does not have holes intended for mounting a tow bar, so only some models can be used.
There are three categories of towbars:
- removable - easy to install and remove, regardless of conditions;
- welded - has a higher strength index, but it cannot be removed after installation;
- flanged - characterized by simple installation; in this case, it is not necessary to violate the bumper design.
The choice of device for Kalina station wagon depends on the generation. Most towing and coupling products for the first generation are not suitable for second-generation cars. It is also not recommended to use a towing device designed for the Grant sedan. The station wagon has a wide trunk, so there is a need for a tow bar in some cases. It is recommended to use removable type devices for station wagons and sedan. The standard equipment of this type consists of:
- seven-pin socket;
- protective cap;
- electrical wiring;
- installation materials;
- technical data sheet of the product.
If one of the components is missing, the package is incomplete and the equipment may not work. Therefore, when buying a new product, you need to make sure that its elements are in place.
The advantages of the removable type are associated with:
- easy transportation;
- simple installation work;
- convenient storage conditions.
You can buy a removable tow bar at almost any auto store. But some models may have different prices. This feature is explained by the design differences of products for connecting trailers. Therefore, you should choose a device for a specific vehicle.
Some towbars used on second-generation station wagons are suitable for the hatchback. The most acceptable options are welded towing products. They are intended for unibody bodies available in the Tolyatti and other hatchback variants.
A few words about lighting technology
Trailed towable devices, i.e. car trailers, require brake lights. The same applies to side lights and turn signals. In addition, if the trailer weighs more than 750 kg, it is equipped with a reversing light.
There is no separate terminal block that allows you to connect all the “electrics” of the trailer in Grant/Kalina-2. Of course, the towbar will be equipped with a socket, such as shown below. But connecting this outlet by running the cables inside the body will not be so easy.
Standard towbar socket, 7 pins
An experienced installer, when making connections, will be able to implement the diagram shown here:
It is advisable to connect trailer lamps via a relay
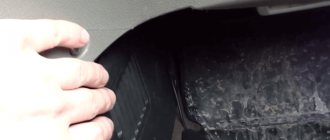
The wires can be passed through one of the holes provided in the floor of the body. These holes themselves are protected by plugs.
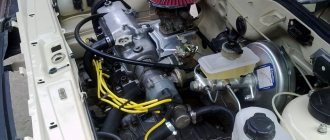
New Lada: Lada Granta clutch replacement
Trunk floor diagram, station wagon/hatchback
There is nothing more to add here. We wish you success.
Anyone who connects the tow bar without the participation of a car dealer may lose the warranty on the electrical system. Any intervention in the electrical circuit will void the warranty if it is carried out without the consent of the dealer. Make a choice.
Step-by-step installation process on a station wagon
On the Kalina station wagon, it is possible to use a towing device on the Kalina. Therefore, it already has holes with screws for attaching the device. The standard size of the screws is M10. Installation requires two people. The first one should hold the tow bar, and the second one should attach it.
If the tow bar for Kalina has not been used before, you will need to use a screwdriver to look for threaded holes. There are a total of six bolts used to secure the device. After they are found, you need to act according to a clear system:
- holes for fastenings are cleaned;
- a towbar is brought to them (it must be placed so that it cannot harm the muffler);
- standard bolts are screwed in (you need to start from the first side hole);
- checking the correctness of fastening;
- the screws are tightened.
For installation, it is recommended to use a spanner type with a cardan mechanism. Additionally, it may be necessary to connect an outlet for the trailer electronics to operate. But you shouldn't do this yourself. DIY installation will take up to twenty minutes.
What exactly do you need to buy for a station wagon?
Let's turn to the official documentation, more precisely, to the catalog of assembly units. In this document, one of the drawings shows the body frame:
Rear floor frame, station wagon
All parts, in addition to the 12th, make up the floor frame. A towbar must be attached to parts “14” and “3”, as well as to channel “13”. These parts are provided with holes (their total number is 6).
The distance from part “13” to the first side hole in our case is 145 mm, to the second – 245 mm. For the “first Lada Kalina” these distances were different. Towbars suitable for the VAZ-1118 are not necessarily suitable for the Kalina-2. However, there are also universal solutions. A drawing of one of them is presented below.
A universal tow bar will have 4 or 5 holes on the sides:
Scheme of a universal towbar (for Granta, Kalina-1 and 2)
If the kit comes with threaded strips, then know that they will not be needed. The standard holes in the body are threaded from the factory. In conclusion, here is a photo illustrating all of the above:
Hole layout, new family station wagon
When making your choice, do not make mistakes! You can take a ruler with you and measure the distance from the plane of the “ears” (see diagram above) to the first side hole. It should be exactly 145 mm.
Mounting the device on a hatchback
Attaching a towbar to a hatchback is more difficult, since the body is not designed for its use.
Before you start attaching the parts, they need to be wiped free of dust and grease. After applying the markings, the fastening process begins:
- holes are drilled for fasteners (at least five special holes will be required);
- parts are treated with an anti-corrosion agent;
- using bolts and self-tapping screws, the socket with contacts is installed;
- the socket is connected according to the instructions;
- wires are being connected.
Sometimes work may be required to remove the bumper.
Choosing a tow hitch for Lada Kalina
The main part of the towbar, in addition to the fastenings, to which the trailer clings is the towbar ball. Towbar balls can be of different classifications, depending on the dimensions of the car and the expected load on it. Lada Kalina uses class A towballs, which means that the maximum load on it can be up to 1,500 kg and 100 kg in horizontal and vertical dimensions.
We recommend choosing towbar devices from Bosal-Autoflex, since they meet all safety requirements, are made of high-quality materials, and also represent a very favorable combination of price and quality. Use only new towbars, as it is virtually impossible to determine the loads applied to used structures.
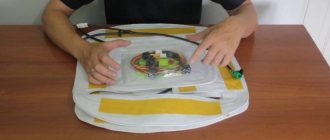
DIY tow bar
To create a homemade towbar you will need:
- metal corners;
- metal pipe;
- working welding machine.
The part in which the corners and the pipe will be connected is indicated. After this, one corner is attached by welding to the rear channel, and the other to the trailer. The operating period of a homemade device is from 5 to 10 years, depending on the strength of the material used. But this option is suitable for those who know how to install a tow bar on Kalina with their own hands.
How to choose a tow bar?
This process implies an individual approach, since there are many product designs and they vary depending on the body version and generation of the Lada Kalina. So, for example, a towbar for the first generation of a sedan may not fit a station wagon in the second generation. Note that for the Lada Kalina station wagon in the same generation, the coupling device designed for the related Grant model is quite suitable.
If we take into account this aspect, then otherwise the choice cannot cause difficulties for the future owner of the product.
Lada Granta fuses
Air filter Lada Granta
Replacing the fuel filter Lada Granta
Electrical connection
The towbar socket is secured using a special bracket. The bracket itself is secured using self-tapping screws and bolts. Lada Kalina wiring includes a standard kit. This kit includes harnesses to connect the outlet. The wires have different colors. Thanks to this, the lights are connected without errors. The equipment is sold together with an electrical diagram indicating how to connect the wires.
For both versions of the Lada Kalina there are the same number of contacts and wires. There is a standard place and connectors for the wires. If the insulation of the wires has been damaged, you must insulate them yourself.
The holes for the wires have plugs. Modern cars are equipped with sensors that monitor the operating condition of the tow bar. You can buy sensors separately if the standard machine design does not have them.
Types of products
Today, some drivers manage to transport heavy luggage in domestic compact VAZ models, but note that the trunks of such cars are not entirely suitable for transporting cargo of this nature. Also, the folded backrest of the rear seat row does not “save” the situation much. For transporting very large items, using a trailer is an excellent solution. The tow bar serves this purpose. Considering that the luggage compartment volume in the Lada Kalina is a modest 235 liters, then choosing a coupling device will be a very effective solution.
Today the market is able to offer its buyer three tow bar options:
- a removable product, the main advantage of which is mobility, because it can be either installed or dismantled at the slightest need;
- a welded device that is not at all easy to dismantle, because this will require the use of special equipment;
- flange design, which involves the simplest installation procedure, allowing you to avoid cutting the bumper.
Tips for using a towbar
If you do not take into account the rules for using a towbar, it can quickly fail. The device has a limited service life and capabilities, which can be increased by following a number of actions:
- it is necessary to familiarize yourself with the technical characteristics of the tow bar in advance so as not to overload it when using towed products;
- the weight of objects in the trailer should be evenly distributed - if this is not done, the controllability of the machine will be impaired (insufficient weight can cause similar problems);
- It is recommended to use safety chains - they will prevent damage to the tow bar and other vehicle components in the event of an unexpected situation with the trailer;
- it is necessary to periodically lubricate the towbar - in order for the lubricant to remain for a long period, you need to use caps and plugs (the features of these components are aimed at improving the performance of the equipment);
- It is recommended to periodically check the diameter of the towbar ball - if due to wear it has become less than 49 millimeters, the ball requires replacement (only original parts can be used);
- Every thousand kilometers you need to check how well the fasteners are tightened.
Low quality towing products should not be used. The lower the quality of the device, the higher the likelihood of an unforeseen situation. Therefore, saving on the purchase of a tow bar is not recommended.
Tow bar for Lada Vesta
In this article we will look at how to choose a towbar for a Lada Vesta, how to install it and use it safely on your car.
Many car enthusiasts cannot imagine their car without a towbar and therefore are eager to equip the purchased Lada Vesta with this device. Today we will learn what aspects should be taken into account when choosing, purchasing and installing the presented device.
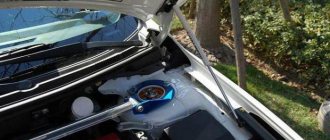
To begin with, let us repeat that a tow bar is a special towing device that is installed on a car and allows you to safely tow semi-trailers and the trailers themselves. Installation of this item is carried out from the bottom of the car and for each individual model its own design is created, which optimizes the load on the car frame.
If we talk specifically about the Lada Vesta car, then this car will also be equipped with a towing device, which will be installed either at a service station, or the car owner will do it on his own. We strongly advise you to approach the selection and installation extremely responsibly, so that later no problems or force majeure situations arise with the transportation of trailers.
How to choose the right towbar for Lada Vesta?
First, let's look at all categories of towing devices:
- With rigid fixation - these are the models that are most suitable for the model we named. The fact is that the ratio of functionality and cost fully satisfies the capabilities of most car enthusiasts. Note that installation of this type is carried out using several bolts and welding;
- Flange type - a device that is mounted on a pre-prepared seat, which guarantees the most even distribution of the load on the car frame. If there is no prepared place, then installation will be impossible, so find out in advance the nuances of this issue when buying a car;
So, as you can see for yourself, there are 4 main types of this unit that can be used for installation. Let's now talk about the installation process itself.
Installing a towbar on a Lada Vesta
The process of installing a towbar will depend entirely on what type of towbar you decide to buy. In most cases, for installation you need to carefully remove the rear bumper, and you may have to make small cuts in the bumper, which will not look very beautiful and attractive.
If you draw up a small work plan, then installing a tow bar involves:
- complete or partial dismantling of the luggage compartment in the car;
- alignment of the holes in the Vesta body with those on the tow bar design;
- adjustment of all connections;
- installation and tightening of the fastener.
Installation tips
I would like to note that the entire installation process has certain nuances that you should be aware of. For example, all holes for connecting the towbar and the body must be treated with grease. This will completely eliminate the ingress of dust or dirt, which means it will extend the service life of both the vehicle and the trailer hitch itself.
Towbar prices for Lada Vesta
The cost of a towbar can vary, not only because of its type, but also because of the company that sells the device. In short, the price on the automotive spare parts market for this towing device varies from 1,500 to 3,000 rubles.
We wish you good luck in choosing this item, which will serve you well if you choose and install it correctly on your Lada Vesta.
Device options
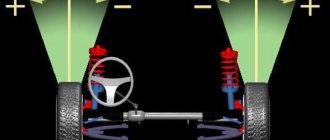
The towing device, which can be used on cars, can have various versions of its type. In our country, a towbar is common, which is based on a towing ball. The thing is that similar devices were previously used, which had a less perfect appearance and did not allow one to fully enjoy all the delights of driving a car with a trailer. Previously, on Soviet cars, a tow hook was usually installed, onto which the trailer drawbar was placed and fixed on top. But at the same time, the drawbar had the ability to move along the horizontal axis, and when turning, the trailer could pull the rear side of the car to the side.
On this occasion, engineers had to puzzle over how to do it in such a way as to minimize the effect of the trailer’s weight on the car. For this purpose, a trailed ball was invented, which was able to provide the very desired smooth movement of the car.
The ball is mounted behind the vehicle and the round trailer tongue is mounted on top of it. This whole structure resembles a ball bearing, in which a round surface moves on the ball. So here, when the car body shifts, it turns out that the trailer, as if on a bearing, moves along the horizontal axis.
Towbar Lada Kalina
The procedure for carrying out electrical installation work when connecting the towbar socket
p, blockquote 45,0,0,0,0 —>
1. First stage of work: determining the connection diagram, the need to use a matching unit, choosing the type of connector
.
p, blockquote 46,0,0,0,0 —>
If at the time of installing the trailer connector, the latter is not yet available, or you do not plan to buy it at all, and you intend to use only rental equipment, it is recommended to immediately install a 13-pin universal connector.
p, blockquote 47,0,0,0,0 —>
Video - why a 13-pin socket for a towbar is preferable in some cases:
p, blockquote 48,0,0,0,0 —>
p, blockquote 49,0,0,0,0 —>
In this case, using a 13/7 pin adapter, you can connect a regular cargo trailer without any problems.
p, blockquote 50,0,0,0,0 —>
p, blockquote 51,0,0,0,0 —>
There is, of course, the opposite option - a 7/13 adapter, but some of the user connections, including for charging the battery, will have to be made outside the connector, which is very inconvenient.
p, blockquote 52,0,0,0,0 —>
p, blockquote 53,0,0,0,0 —>
If you have a car built before 2000, you may not need to install a matching unit. In this case, the rating of the fuses serving the turn signals and rear lights should be increased by 25%.
p, blockquote 54,0,0,0,0 —>
2. Next, it is imperative to check all electrical circuits in the trailer connector
(if available).
p, blockquote 55,0,0,0,0 —>
This can only be avoided if you are using a rental trailer; the lessor checks them and is responsible for their functionality and safety.
p, blockquote 56,0,0,1,0 —>
The most typical malfunctions of trailer electrical equipment:
p, blockquote 58,0,0,0,0 —>
- “rotting” of electrical wiring, especially in the area of connections, contacts, soldering;
- short circuits in the area of rubbing parts;
- failure of light lamps;
- large leakage currents associated with salt coating of roads and driving into bodies of water (boat trailers, especially on the sea coast).
3. At the third stage, a routing scheme is developed
(what wire, what color, what section, where it goes, how it goes, where it connects, what it connects to, and, finally, how it connects).
p, blockquote 59,0,0,0,0 —>
In order. If the purchased trailer connector is equipped with conductors, there is no point in replacing them. Otherwise, you should select conductors in exact accordance with the colors and sections shown in the figures above.
p, blockquote 60,0,0,0,0 —> adsp-pro-3 —>
The most difficult thing is to determine the path of the wires from the connector into the luggage compartment so that it is invisible, the conductors cannot be damaged during operation and cause a short circuit, and the seal of the cabin is not compromised. In most cases, manufacturers provide a standard hole.
p, blockquote 61,0,0,0,0 —>
Connections can be (and are better) made using the standard method: stripping + twisting + soldering + heat shrink. All connections must be made at least with the ignition off. There is a connection option using special clips.
p, blockquote 62,0,0,0,0 —>
p, blockquote 63,0,0,0,0 —>
Such connections do not provide high currents and are not as durable, but in some cases they can be used when using cargo trailers.
p, blockquote 64,0,0,0,0 —>
For further actions you need a minimum set of tools and components:
p, blockquote 65,0,0,0,0 —>
- a set of plumbing tools for dismantling and installing interior elements during cable laying;
- a set of electrical installation tools, if necessary, a soldering iron, solder, flux;
- wires, electrical clips, self-tapping screws, casings, heat shrink, electrical tape, clamps;
- multimeter;
- control lamp;
- mirror (when installed alone).
4. Connection
. At this stage, you need to be as careful as possible; it is better to sign each connection first, and only then carry out the electrical installation.
p, blockquote 66,0,0,0,0 —>
Electrical connections outside the car must be “dressed” with heat shrink (a cambric that shrinks in size when heated with an industrial hair dryer can be used with a lighter).
p, blockquote 67,0,0,0,0 —>
5. Check. At this stage, using a multimeter, the absence of short circuits is determined and electrical connections are made. Only after this can you turn on the ignition and test all functions.
p, blockquote 69,0,0,0,0 —>
If the on-board computer provides information about errors in the operation of electrical equipment, most likely, the use of a coordination unit when connecting a trailer for your car is mandatory.
p, blockquote 70,0,0,0,0 —> adsp-pro-4 —>
Features of the socket connection
To connect the towbar to the vehicle's electrical wiring, we recommend using stranded copper wire. The ideal option is a wire in which each core has a cross-section of at least 1.5 square meters. mm. The wire must have a double layer of insulation.
Features of connecting the trailer hitch, connection diagrams for the 7-pin device, color designations, plug connection diagram, towbar socket connection diagram.
To understand whether you have sufficient information about the trailer hitch.
- How many types of sockets are there?
a) Three types of sockets are available for passenger cars. Thirteen-pin, used in Russia. American or European 7 pin. And there is a special connector.
b) There are two types of sockets on sale. Russian for 13 pins and American for 7 pins.
- What does contact mean, oh?
a) wire going to the left turn signal.
b) Right turn signal wire.
c) A wire that turns on the right and left turn signals.
- Why do they put caps on sockets?
a) The cover is needed to prevent unnecessary wires from being connected to the device.
b) It serves as a protection that protects the outlet from external influences. The cover is needed when the tow bar is not connected to the trailer.
- What contacts can be spliced to simplify the assembly process?
a) You can splice the contacts of two headlights, reverse lights, brake lights, fog lights and side lights. They all turn on synchronously.
b) Any contacts are allowed to be connected. This will make the work easier.
- What does contact mean, oh?
a) Connection to the rear fog lamp.
b) Connection to the vehicle's brake lights.
Answers:
- a) There are three types of sockets - Russian with 13 pins, American or European with 7 pins, as well as a special connector.
- A) The letter “L” indicates the wire connected to the left turn signal.
- B) The cover on the socket serves as protection against various influences. It is closed when the tow bar is not connected to the trailer.
- A) To simplify the work, the following contacts are spliced: two headlights, reverse, brake lights, fog lights and side lights. The connectivity is due to the fact that they all turn on synchronously.
- A) The designation “54G” is a connection to the car’s fog lights.
To transport bulky cargo, a reliable trailer is attached to the vehicle. The connection occurs through the trailer hitch and tight contact with its socket. It is necessary to connect the contacts correctly so that the rear lights on the trailer turn on when driving, signaling to road users that the driver is performing various actions, for example, turning. To connect the signals correctly, you will need to study the trailer connection diagram, as well as the pinout of the towbar socket.
Definition: A trailer socket pinout is a diagram of the connectors needed to connect a vehicle to a trailer with your own hands. An electrical connection is required so that all lighting equipment on the trailer works, in accordance with traffic regulations.