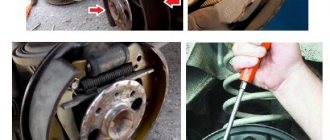
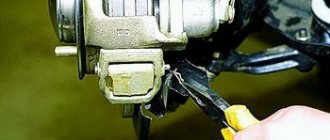
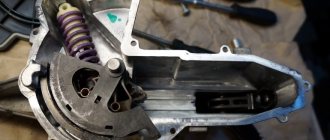
The pads also need to be replaced if the linings are oily, have deep grooves and chips on them, or if the linings are detached from the base of the pads.
We carry out the work on a flat area, inspection ditch or overpass.
Attention!
The brake pads of the rear wheels must be replaced as a set - all four pads. Replacing the pads of only one brake mechanism can lead to the car pulling to the side when braking.
We show replacing the pads on the right rear wheel. Before removing the brake drum, lower the parking cable lever all the way - the car must be released.
We remove the rear wheel and securely fix the car on a factory-made support stand.
To remove the drum, the pads must be brought together.
2283-14-03-01
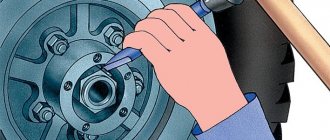
To do this, use a slotted screwdriver to rotate the ratcheting nut of the mechanism for automatically adjusting the gap between the pads and the drum through the threaded hole in the brake drum, thereby reducing the length of the spacer bar.
To do this, use a slotted screwdriver to rotate the ratcheting nut of the mechanism for automatically adjusting the gap between the pads and the drum through the threaded hole in the brake drum, thereby reducing the length of the spacer bar.
Main differences between disc and drum
The braking mechanism consists of several parts and differs in two types of design.
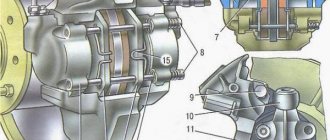
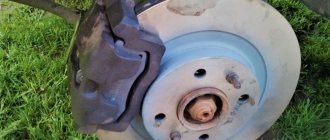
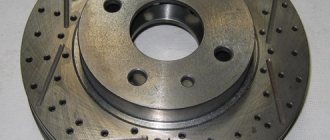
The disk unit has an open design, allowing the device to operate for a long time without overheating. When you press the brake pedal, the brake pads are pressed against the disc mounted inside the wheel rim using a caliper. The degree of compression of the disc by the calipers is very high, which allows the car to brake more efficiently. As a result of heavy loads, the mechanism has a relatively short resource.
The drum mechanism has a closed cylindrical body, which prevents the entry of dirt and dust and has a long working life. The brake pads are pressed against the inner surface of the drum, causing the car to stop. The pressing force of the elements is comparatively lower than that of analogues with a disk, therefore such mechanisms are considered less effective.
The combination of front discs and rear drums is optimal in terms of efficiency and durability. This version of the Lada Vesta justifies itself with its reasonable price and reliability.
DSC_9324
Elements of the rear wheel brake mechanism.
Elements of the rear wheel brake mechanism.
The mechanism for automatically adjusting the gap between the shoes and the drum is made in the form of a composite spacer bar.
When you press the brake pedal, under the action of the pistons of the wheel cylinder, the pads begin to diverge and press against the drum, while the protrusion of the adjuster lever moves along the cavity between the teeth of the ratchet nut. When the pads are worn to a certain level and the brake pedal is pressed, the adjuster lever has enough travel to turn the ratchet nut by one tooth, thereby increasing the length of the spacer bar and at the same time reducing the gap between the pads and the drum. Thus, the gradual lengthening of the spacer bar automatically maintains the gap between the brake drum and the shoes. The same system maintains the parking brake in constantly working condition without any adjustments.
Pads and their articles for the disc mechanism of the rear brake system of Lada Vesta
AvtoVAZ installs TRW pads for rear disc brakes:
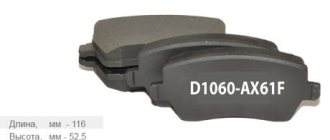
- Pad article number - GDB 1384, price ~ 1400 rubles per set
As such, there have been no complaints about these spare parts from Lada Vesta owners; we can also note the budget price tag and the relatively high quality of the pads from this manufacturer.
Therefore, we recommend purchasing pads installed at the factory. The pads on the disc brake mechanism are changed at ~20-30 thousand kilometers, this number is individual and depends on the driving style of a particular driver, so when replacing rear pads it is not recommended to focus only on mileage. When the pads wear out, you will definitely feel a deterioration in braking, and in rare cases, an extraneous sound may appear. In addition, pay attention to the operation of the hand brake; situations when the hand brake does not hold the car weakly indicate severe wear of the rear brake system.
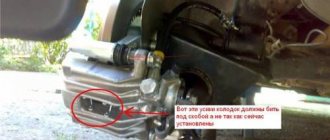
The procedure for replacing the rear pads is not much different from the front ones, so you can use the instructions from the article on replacing the front pads. The only difference is the handbrake cable connected to the caliper, but it does not in any way interfere with the work of replacing the brake mechanism.
Lada Vesta with a 1.6 liter engine is equipped with drum brakes, as a result of which the pads and part numbers will differ. In addition, replacing them will be labor-intensive. Pads on such a system last longer than disc ones, their average service life is ~100 thousand kilometers; again, this figure varies depending on the driver’s driving style. In some cases, the pads wore out only after 200 thousand kilometers.
DSC_9301
The spacer bar is a rather complex mechanism, which, if the elements are damaged or significantly corroded, is best replaced.
If the condition of the spacer bar is satisfactory, then it should be washed in any solvent and a thin layer of grease should be applied to the threads. The spacer bar is a rather complex mechanism, which, if the elements are damaged or significantly corroded, is best replaced. If the condition of the spacer bar is satisfactory, then it should be washed in any solvent and a thin layer of grease should be applied to the threads.
Rear brakes on Lada Vesta
Lada Vesta brakes The manufacturer installs rear disc brakes (RDB) only on sports versions of the Lada Vesta intended for racing.
This is due to the fact that sports cars are not equipped with an ABS safety system, and more efficient devices with discs can cope with skids. For all other versions, the car is equipped with a drum unit at the rear. Each car enthusiast can decide for himself whether to install drum or disc rear brakes on his car. He will not feel much difference from replacing the elements.
Purchase and installation of disc brakes
You can buy Lada Vesta rear disc brakes at any AvtoVAZ specialized store or on online store websites. The average price for a complete set of spare parts is 15 or 18 thousand rubles, depending on the presence of an ABS sensor. The brake pads should be changed after 30-45 thousand kilometers.
In order to install a motor instead of drums, you must follow a certain procedure:
- remove the wheel from the car beam;
- unscrew the nut from the hub;
- unscrew the bearing and remove the drum;
- install the disc and caliper on the beam hub, tighten the bearing;
- tighten the bearing nut.
On a note!
After installing all braking mechanisms, it is necessary to check the brake fluid level in the hydraulic drive reservoir. If it deviates from the norm, you need to add fluid.
Replacing pads
Replacing drum brake pads
Before starting work, the handbrake lever should be completely lowered down. The installation process has its own procedure:
- remove the rear wheel;
- using a slotted screwdriver, unscrew the ratchet nut that adjusts the length of the spacer bar;
- remove the block and replace it with a new one;
- install the drum back;
- tighten the bearing nut.
Important!
Replacing the pads involves installing them on both wheels at the rear, otherwise the car will brake with different forces on the wheels and may lose control.
Lada Vesta rear brake pads must be replaced every 50-60 thousand km. But this does not mean that they do not require additional periodic inspection. Approximately every 15-20 thousand kilometers, it is necessary to inspect the important parts of the car. It is not recommended to buy spare parts at street car markets; there is a possibility of stumbling upon a low-quality product. The cost of a set of rear brake pads for a drum is about a thousand rubles.
DSC_9303
Before assembly, completely screw in the rear end of the spacer bar so that its length becomes minimal.
Before assembly, completely screw in the rear end of the spacer bar so that its length becomes minimal.
Install new rear wheel brake pads in reverse order.
Before installing the brake drum, clean its working surface with a wire brush to remove dirt and wear products from the pads.
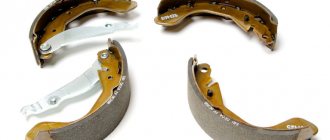
Pads and their articles for the drum mechanism of the rear brake system of Lada Vesta
Original rear drum pads for the Lada Vesta are outrageously expensive, and besides, finding them in retail sales is not so easy:
- 8450076668 — set of Lada brake pads, price ~ 5800 rubles
Agree, the price does not correspond to the status of a budget car. Most often, when replacing the rear brake assembly, analogues are used:
- BP53168 – Fenox, suitable for Lada Vesta
- BS-5717 - Japanese manufacturer Lynx, installed instead of standard ones without modifications
The similarity of spare parts from Ford Fusion is also mentioned, but in this case you may have to resort to minor modifications to the mechanism.
DSC_9261 (Copy)
When cleaning the brake drum, be careful with the ABS sensor reference ring.
When cleaning the brake drum, be careful with the ABS sensor reference ring.
After installing the brake drum, tighten the hub bearing nut to the prescribed torque of 175 N∙m.
It is advisable to install a new self-locking nut. On the left wheel this requirement is more critical than on the right.
Similarly, we replace the brake pads of the right wheel.
We check the brake fluid level in the hydraulic drive system reservoir and, if necessary, bring it to normal.
To adjust the position of the brake pads, press the brake pedal several times. We hold it down and then raise and lower the parking brake (when moving the lever, you must keep the parking brake release button on the lever depressed at all times so that the ratchet mechanism does not work). In this case, clicks will be heard in the brake mechanisms of the rear wheels from the operation of the mechanism for automatically adjusting the gaps between the pads and brake drums. We raise and lower the parking brake lever until the clicking in the brake mechanisms stops.
If necessary, adjust the parking brake.
Installation
Clean the rear brake elements (metal brush).
Apply 1 g of Litol-24 lubricant to the threaded surface of the spacer bar in accordance with the current “Codifier of main and auxiliary materials used in the maintenance and repair of LADA vehicles” K 3100.25100.00018.
Install the pads on the brake shield.
Install the upper and lower tension springs (brake spring pliers type 76 41 30 22 "Stahlwille").
Install the 3 guide shoe brackets as shown in Figure 10-1 (flat-head screwdriver, pliers).
Separate brake pads 1 and 5 with pliers, Figure 10-2, install spacer bar 2 and adjust the outer diameter of the pads by rotating nut 4 of the spacer bar. The outer diameter of the pads should be 202.2...202.7 mm (pliers 67.7812-710, caliper ShTs-II-250-0.05).
Attention
. Damage to any elements of the spacer bar is not allowed, as this may lead to failure of the adjustment mechanism.
Figure 10-2 – Rear brake elements: 1, 5 – rear brake pads; 2 – spacer bar with automatic gap adjustment mechanism; 3 – upper tension spring; 4 – spacer adjusting nut
Install the brake drum in accordance with the requirements of Section 9 of these operating instructions.
Install the rear wheel.
Press the brake pedal 10 - 15 times to set the rear brakes to the working position. Check and, if necessary, bring the brake fluid level in the hydraulic brake reservoir to normal.
Adjust the parking brake.
Check the effectiveness of the service brake system.
Repair price
Service stations estimate replacement of drum system pads at 1,400 rubles. The pads are changed on both sides at once, having been purchased in advance.
The Vesta factory installs FORD pads (article 1433865) at a price of 2,735 rubles. Non-original parts are suitable, they are cheaper, but the quality may be worse.
The factory uses the brake drum for Vesta with article number 432008333R. If wear on the inner surface exceeds acceptable limits, it is replaced. A Lada Vesta drum with ABS costs 7,000 rubles, replacement – 600 rubles.
Replacing a unit by service station employees costs 2,000 rubles. Car enthusiasts do this work themselves. Drums for Vesta can be purchased at a car store.
Device
The unit consists of the following parts:
- The Lada Vesta brake drum with a bearing and an ABS ring is mounted on the rear pillar axle. The body of the part has four threaded holes for fastening the wheel. It has a cylindrical shape and is cast from cast iron. The inner surface is carefully processed to eliminate roughness.
- The pads are semicircular in shape, with a diameter 2 mm smaller relative to the inner diameter of the drum. Friction linings are attached to the outer sides. The upper part of the pads is connected to the brake cylinder, and the lower part touches the mechanical stop.
- The cylinder has two pistons that extend in opposite directions.
- The ABS system contains 2 elements - a speed sensor and an impulse rotor (a metal toothed ring). The sensor is attached to the wheel stand guard. The rotor is pressed onto the outside of the drum bearing.
- The spacer bar consists of a threaded rod that screws into a hollow tube. A ratchet wheel is pressed onto the surface of the tube.
- The upper coil spring returns the pads to their original state after removing the force from the brake pedal. The lower spring maintains constant pressure on the lower ends of the pads against the stopper.
Photo source: https://www.drive2.com/l/530431348347765662/
Knowing the design of the node, you can understand the causes of its problems and quickly fix them.
Removing and checking the unit
It is easy to remove the brake drum on the Lada Vesta. To do this, place the car on a lift or lift the desired wheel with a jack. In this position, the jack must be secured with a metal stand or, if there is none, with a removed wheel. Release the handbrake completely. The wheel bolts are unscrewed with a wheel wrench. After removing the wheel, use a chisel to carefully remove the hub axle plug (it can be easily dented). The opened nut securing the drum to the axle is unscrewed with a wrench.
Before removing the brake drum, it is necessary to reduce the length of the spacer bar, thereby providing greater clearance between the brake linings and the drum. To do this, turn the drum so that the ratchet of the spacer bar is visible in one of the holes for fastening the wheel. Use a flat-head screwdriver to turn the ratchet clockwise. For the left wheel you need to move the ratchet teeth up, for the right - down.
You can quickly remove the rear drum on a Vesta, but not always. If it is difficult to remove due to the bearing, lubricate the hub axle. Remove carefully to prevent damage to the ABS rotor.
Photo source: https://www.drive2.com/l/555625282908717205/
The removed drum is inspected and its internal diameter is measured in two perpendicular directions. If the old bearing has lost its quality, it is replaced with a new one of the same article. Having discovered irregularities in the drum mirror, grind or bore it.
There is a video instruction on how to remove the Vesta rear assembly.
Additional security systems on Lada Vesta
In addition to the main braking mechanism, designed to control the car by the driver pressing the pedal or using the handbrake, the AvtoVAZ car has a number of adaptive electronic devices:
- ABS – prevents wheel locking during emergency braking;
- HSA – assistance when starting off and driving on an incline;
- TCS is a traction control device that helps overcome light off-road conditions without slipping, distributing torque to the wheel depending on its load;
- ESC - exchange rate stability system controls the behavior of the car in a skid, thanks to which the car maintains the specified trajectory;
- EBD is a braking force distribution device that allows you to apply different forces and influence the speed of stopping.
Considering all these innovations on the Lada Vesta, paired with good braking elements, they can prevent any emergency situation on the road related to the stability and control of the car.
