Do you need underbody lighting?
The LED underbody does not provide any benefit or practical purpose to the driver. Its main goal is to attract the attention of others so that other car enthusiasts admire the work of the master. If you look at this creative from the other side, then with the help of lighting you will be able to quickly find dropped keys or a wallet.
Unfortunately, traffic police officers also pay attention to original cars. You need to understand that they will definitely stop the driver of such a car and ask to show documents.
INTERIOR OF THE CAR
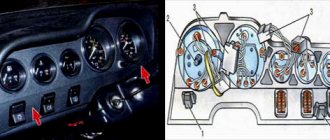
The interior lighting is worth a separate discussion. The interior of the VAZ 2114 is illuminated using the following devices:
- Interior lighting;
- Individual light lamps;
- Instrument lighting on the control panel;
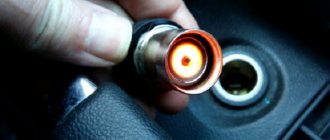
- Light in the glove compartment, cigarette lighter and separate bulbs for some buttons and switches.
The general light in the VAZ 2114 is located in the car interior and illuminates it. The engineers decided that it would be optimal to place it above the heads of the driver and front passenger, so it is simply built into the headliner and bolted there. Usually this lamp lights up when one of the doors is open, and goes out when it is closed. This is familiar to us from the classics, where a similar system was organized with light bulbs on the door pillars.
Interior lighting
Here the lamp lights up when the VAZ 2114 door limit switch, which stands on the racks and is pressed by the door itself, is triggered. There are also separate buttons for the passenger and driver to turn on this lamp if desired.
Allowed or not?
Many drivers do not know whether installing underbody lighting is legal. They are also interested in what fines may be imposed on the owner. Of course, many motorists claim that they have not had any conflicts with traffic police officers over the lighting. But sometimes such tuning is assessed as a deliberate change in the design of the car.
Unfortunately, the law does not have a specific clause on which there are requirements regarding lighting. The driver has the right to make adjustments only after permission from the State Inspectorate, but only if they affect the functioning of the car.
It is believed that if the backlight is installed according to the rules, then no sanctions will be imposed on the driver. Otherwise, a traffic police officer may regard the tape as a device that “illegally” transmits a light signal. In this situation, the driver will be deprived of his license. An additional fine of 3,000 rubles is imposed.
Kinds
Today, lighting for cars is created on the basis of LED strips. They do not heat up, do not fade and shine brightly. Ribbon is available in a variety of colors and shades. If desired, car enthusiasts can install RGB backlighting to control the glow themselves.
In addition to LED strip, the use of neon lighting is allowed. Unfortunately, it is not very popular due to installation difficulties. It is easy to damage. Most often, this option is installed on exhibition models of cars that are not planned to be used.
Tools and materials used
When implementing any type of interior lighting with your own hands, simple tools and consumables are used.
- The installation tools you will need are pliers, a sharp knife, scissors, and a soldering iron.
- Consumables are considered to be tin and rosin for soldering, one or more terminal blocks, screw-on lugs, as well as a toggle switch or a locking button.
The LED strip is sold by length, so the necessary measurements should be made in advance.
During installation, the individual lighting components are connected to each other by a flexible (multi-wire) cable, the core area of which should be 1 square millimeter. Soldering and contact connection points are covered with electrical tape. A conventional multimeter is used as a means of monitoring correct installation.
Design methods
When installing lighting, a motorist can choose one of several options. Let's list them:
Direct connection. The lighting device is connected to the car's electrical network.
Flicker. To create a flashing light, a controller with a specific function is used.
Remote. To control the backlight, the driver uses the remote control or a button on the instrument panel.
Autonomous operation. The operation of the lamps does not depend on the car's electrical network.
The car enthusiast can choose one option, or several at once. It depends on personal preference.
detailed instructions
Do-it-yourself installation of underbody lighting should begin with electrical work. First, you will have to develop an electrical circuit for all LED segments and test it for functionality. There are several connection methods: parallel and serial. The latter is a connection of segments in turn, when 2 wires are connected to the battery. This scheme is best suited when you plan to install a tape along the entire perimeter of the bottom. The parallel method means that the wires from the sections are combined in parallel, and one wire is output to the battery.
Next, the tape is cut into several parts, while simultaneously preparing the wiring for soldering. This is necessary to connect all the segments together. At the joints, the tape is soldered to the wire, remembering to follow the polarity. Only then is the resulting circuit connected to a power source. If everything went perfectly, then the soldered areas are insulated with heat shrink tubing.
As for fastening, you will need a profile. It should be cut into pieces, the length of which should be several centimeters longer than the section of the LED strip. The reserve will be required to install wire fasteners after the soldered areas, and the wires must be long. The fact is that the wires and tape connected by tension can break during vibrations. If the length is too long, the tape will sag, which will result in an uneven glow of the bottom.
Nylon ties will help secure the tape better. They are installed in the profile holes at intervals of 10 centimeters. The excess ends are cut off, and the finished part of the backlight is attached to the base with self-tapping screws.
The next stage of installation is to connect the sections into one electrical circuit. To ensure that the electrical circuit is durable, all wires are individually passed inside the tube and secured with ties. After this, you will have to find a place in the car interior to install the power button. Last but not least, installing a fuse is required.
Once the functional blocks are in place, all that remains is to connect them to the power system. You can connect them to the battery through the cigarette lighter outputs, or use other options for this.
The battery often has high voltage. It negatively affects the operation of LEDs, overloading them. Accordingly, the operating time of the tape is reduced. This can be avoided if you use stabilization circuits. You can assemble them yourself.
The last stage of work on installing the backlight is testing. While in the garage, the driver needs to turn the light on and off several times. If the LEDs are too bright, you will have to force yourself to get used to it.
Installing backlighting requires a person to have knowledge in the electrical field. If the driver is not sure that he can cope, then he should seek help from a specialist.
IMPROVEMENT OF INTERIOR LIGHTS
The interior lighting of the VAZ 2114 can be customized with your own hands to suit your purposes and needs. The most interesting option is considered to be the complete removal of the standard lampshade, and the installation of a programmable analogue along with integrated LEDs instead. It is better to do such an upgrade as soon as it was noticed that the light in the VAZ 2114’s interior does not work - why repair an already broken old lamp if you can replace it with a new and much better one.
In addition, the new lamp will have the following functions that the standard version does not have:
- The ability to select brightness from three possible options, adjusted by pressing a button;
- Automatic shutdown after a certain time if the door is not completely closed or just open. This will prevent the battery from draining overnight;
- Smooth extinguishing of the lamp, switching off occurs within 10 seconds.
Recommendations for use
Many drivers, especially those who do not like tuning, believe that the presence of backlighting is the path to getting fines. In fact, car enthusiasts themselves do not fully understand whether underbody lighting is allowed in the country or not? It is indeed possible to install it, but according to the prescribed rules. In this case, no claims will be made against the owner of the car.
If the driver still decides to take a risk and install a tuning light, then he needs to study the regulations regarding changes to the car. Sometimes traffic police officers know that lighting is allowed, but they specifically extort money and issue fines.
Backlight installation requirements
Having found out that backlighting can be done using different types of tapes, the driver must understand the requirements for its installation. The main thing in installing LED lighting is to position the strip correctly, and the front and back colors must be a certain shade. All these rules are prescribed in state standards.
We list the basic requirements for bottom lighting:
The light located under the bottom cannot illuminate areas beyond it. The “rays” should be directed downward, and the brightness should be moderate. Lights that are too bright will distract other drivers from the road.
The reflected light must correspond to a certain shade. For example, the front is allowed to use yellow or white. You can't have white lights in the back and red or blue LEDs in the front.
The flickering and operation of the LED strip cannot coincide with the flashing of the emergency services. It is impossible for the backlight colors to shimmer from red to blue.
It turns out that there is no penalty for correctly installed lighting. But for violating the rules or for creating an emergency, the punishment is stricter.
Ceiling lamps
By default, the ceiling lamps of most passenger cars contain W5W halogen lamps. To increase the brightness of the glow, LED lamps are usually installed. RGB panels have appeared on the market, allowing you to change the color of the backlight using the control panel. Installation of such panels is simple - you need to do the following operations:
- remove the transparent cap from the lampshade;
- remove the stock halogen lamp from the sockets;
- insert a special adapter with a plug instead;
- attach the LED panel;
- attach the panel to the bottom of the lampshade using double-sided tape;
- close the lampshade.
Interesting! The option with an RGB panel is convenient because no soldering or other connection is required; all the work consists of disassembling and assembling the lampshades themselves. The cost of the set is low, and the decorative effect is very expressive and varied - some models are capable of creating 12 color and brightness options.
Is it possible to legalize the use of backlighting?
If the driver is thinking about how to make the backlight “legally,” then he needs to understand that it is quite difficult. Few people know that neon tape is not certified, i.e. It cannot be installed on any vehicle. Neon glow will not be legalized. That is why it is used extremely rarely.
LED strip cannot be classified as a lighting device. No one can issue a fine on this basis. Despite this, LED strips are also not certified. If a car enthusiast, in addition to installation, makes changes to the design of the car, then he will also be subject to a fine (no more than 500 rubles). But in practice, many inspectors do not pay any attention to tuning, especially if it complies with the rules.


