One bad thing happened to me, after buying the car I went to register it, and the tint on the rear lights did its job, they didn’t register the car, I couldn’t think of anything from a bribe to new headlights, but the funds didn’t allow me, I decided to get rid of the toner myself . Several methods were tried, including brake fluid, various solvents, but they did not give the desired result. The paint held on like a partisan during interrogation. It was decided to polish. After a trip to the auto and hardware stores, the following were purchased: 1. Set for polishing headlights - LAVR
It includes 3 types of sandpaper numbered 1-2-3 Number 1, respectively, the coarsest grit - 800, Number 2, medium grit 1500, Number 3, the smallest grit 2000. The set included a polishing compound consisting of wax and abrasive for finishing . We also purchased 400-grit grinding wheels for directly removing varnish from headlights (the roughest treatment) and a grinding wheel.
How to remove tint from headlights
Nikittaa 09.14.2008 - 10:03
(The car is really Russian, well, the varnish seems to come from a spray can that they sell in the markets)
Post edited by Nikittaa: 09.14.2008 - 13:06
Greetings! Optical tuning has been very popular lately. You can do anything with the headlights: xenon, bi-xenon, LEDs, eyelashes, tinting. The only question is how legal and practical is all this?
Not everyone likes all these modifications, and sometimes the “beauty” that was created by the previous owner has to be corrected by the new owner of the “tuned” car. It is also not uncommon to have to refuse and return the optics to their original condition due to refusal to undergo technical inspection. Yes, yes, it happens. When, because of your “cool” optics, you cannot pass a technical inspection or constantly receive fines and comments from the traffic police, then whether you like it or not, you need to somehow solve the problem.
If there is xenon and you get a lot of trouble because of it, remove it and bring the headlights into compliance with the requirements. If these are LEDs, put the halogens back. If it is a tint film, remove it. What if it's varnish? In this case, you will have to sweat.
In this article I’ll tell you about working (and not so working) methods for removing tinted varnish. You will learn how to effectively remove tint from headlights without damaging them.
So, I’ll start with the least effective, in my opinion, gradually moving on to more workable methods
- Glass replacement. Complete replacement of the headlight glass is a radical method; only a complete replacement of the headlight assembly will be more radical. The process is labor-intensive and requires certain skills and tools, as well as spare glasses. The headlights warm up, after which the sealant softens and allows the glass to separate from the body.
- Mechanical removal. I also consider this method of removing varnish from headlight glass to be radical and recommend using it only if other means have failed. This option involves removing headlight tint using an abrasive. That is, roughly speaking, sandpaper will be used, with which the varnish layer will be erased. The disadvantage of this method is that it is labor-intensive and also radical; the top layer of glass will be removed along with the varnish layer, which will lead to clouding and weakening of its protective properties.
- Nail polish remover (for nails). The principle is this: apply a little product to a rag, wet the painted area, and then quickly remove everything using a rag soaked in solvent. If you delay or do not calculate it, you can get the opposite effect - the plastic will become cloudy or white. In general, there is a high probability of destroying the glass.
- Professional liquid for removing tinted varnish. This product is specially designed for such work, so there should be no harm from it, and the effect is usually positive. Of course, this is not cheap, but it is many times cheaper and more convenient than buying new glass or sanding it with sandpaper. In addition, the simplicity of the method should be taken into account. Unlike all those described above, it is tritely simple: we apply the product to the tint and give the liquid time to react. After the varnish begins to swell, remove it with a rag.
How to remove tint varnish from car lights
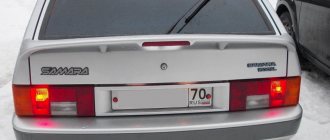
Hi all! When we bought the car, like many others, I wanted to tint the rear lights. I purchased varnish in a can at the market.
Before tinting, I degreased the lights and applied several coats. The polish holds up VERY well. Not peeled, not cracked, etc. But due to the alteration of the rear optics, I wanted to remove the varnish. It wasn’t like that! Solvent 647 does not take. I found information that they remove the varnish with fine sandpaper and then polish it. This crap doesn't suit me. I found an easy option in which the lantern does not suffer in any way
.
To clean the flashlight from varnish you will need: brake fluid, white spirit (to clean the flashlight from brake fluid), rags and time.
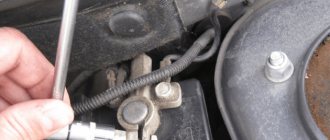
So. I didn't remove the headlamp from the car. Wet a piece of rag into the brake fluid. Without squeezing it, apply it to the varnish. We apply it without fanaticism, so that it doesn’t flow all over the car, but not too much. We get wet and go do other things. After half an hour we approach the car and look at the lantern. In places where the varnish has risen, wipe it with a clean rag and again wet the brake varnish where it has not peeled off. And so on several times. Until the lantern is clean. It took me two hours. When the lantern is clean, soak a clean piece of rag in white spirit and wipe the lantern.
I got a white coating on the transparent glass. In the turning section. I washed it with white spirit.
00888 17 Jun 2014, 16:48
Safety precautions
Most glass cleaning compounds are flammable, have a strong, pungent odor, some are quite toxic and can even cause poisoning and damage to the nervous system if their fumes are inhaled. If they come into contact with the skin, they can cause a burn and penetrate the bloodstream. Therefore, when working with solutions, you must observe safety precautions:
- Do not clean glass near an open fire, any heat sources, including hot objects; with an increased concentration of fumes in the air, a fire can break out even from a spark;
- work in protective clothing and rubber gloves to prevent products from getting on your skin;
- To protect against harmful fumes, wear a respirator and goggles.
Removing tint can be quite a labor-intensive process, especially if there is a lot of adhesive residue left on the glass. But if you purchase one of the described products, you can still give your car its original appearance, and without serious costs.
Coating headlights with varnish
There is no need to spray the varnish too early after degreasing. Residual degreaser must evaporate completely before applying varnish, otherwise it will continue to evaporate after varnishing, impair adhesion and cause “boiling” defects (see paint defects).
The varnish layer should be thin. Although polycarbonate's surface tension is higher than some difficult-to-paint plastics, it is still lower than other easily painted materials. If you immediately apply a thick layer, something like small cracks will appear. Several very thin layers with drying between layers give a good result.
The varnish should not contain a lot of solvent, as it can affect the plastic, but it should not be thick either. The solvent can either promote adhesion to the plastic or destroy it, depending on the amount. The solvent helps the varnish to eat into the plastic, but a large amount of it can cause excessive dissolution of the plastic.
Preparing headlights for varnishing
You need to decide how to varnish the headlights, on the car or in the removed state. If you remove them, then preparation and varnishing will be more convenient. If they remain on the car, then before sanding, they must be covered around the perimeter with masking tape so as not to accidentally scratch the paintwork of adjacent parts.
It is very important to first wash and degrease the surface before abrasive treatment. To clean and degrease polycarbonate, you can use an isopropyl alcohol-based cleaner.
Remnants of the old protective coating are visible on the headlight
It is better to start sanding with P400-P600 paper. It will remove the remnants of the destroyed protective coating, as well as minor damage and scratches on the lens. You can, of course, sand with P1000, but it will take much longer and the varnish will stick worse. It is better to use sanding paper no finer than P600-P800 (wet). The varnish needs to mechanically cling to something. Fine scratches left by P800 sandpaper work well for this. You can additionally treat the headlight with gray Scotch-Brite with matting paste or with a simple comet. This way you will get a uniformly matte surface. The resulting small scratches will be well filled with varnish so that they will not be visible.
Surface preparation by sanding will not change the surface energy of the plastic discussed above. Improved adhesion occurs due to an increase in the number of mechanical adhesion points. Abrasive treatment helps get rid of films and oxidation, increasing the area suitable for adhesion. All remnants of the old protection must be removed. To check the result, you need to periodically wipe the headlight dry. The result is a uniform matte surface. Next, the headlights are covered with masking tape around the perimeter, the adjacent areas that do not need to be varnished are covered with paper, degreased, wiped with a sticky cloth, and the varnishing process begins.
How to wipe off glue residue?
If mistakes were made when removing the film coating or the film was old and of poor quality, a sticky layer may remain on the glass.
The main tool you will need for this work will be a plastic spatula. It has a hard but not sharp edge, so it is safe for glass and will not leave scratches.
Depending on the condition of the adhesive stains and their size, one of the treatment options is selected:
- For a soft adhesive mass, of which very little remains on the surface, you can deal with it by wetting the surface with soapy water and scraping it off with a spatula.
- Technical or medical alcohol, as well as purified gasoline, can be rubbed into the dried glue to soften it.
- Using adhesive solvent requires careful work. When choosing this method, it is important to prevent accidental contact of the composition with paint and seals.
After using any method, you must thoroughly rinse and dry the glass so that it remains transparent.
Basic DIY film removal methods
You can have the tint removed by a mechanic, but there is a chance to save money by doing it yourself. Removal methods:
- Fast. You need to take the film by the edge, hook it with a sharp part, then pull it off sharply. Typically this method is used in emergency situations.
- Gradual. Tinting is removed slowly, with gradual heating. First, you need to pick up the film by the edge, then take a hair dryer and apply hot air. Heating to +40...+60 degrees is enough for the material to gently move away from the glass. Typically, most of the adhesive composition remains on the film when heated.
The second method is more effective; it allows you to remove the tint with a minimal amount of dirt remaining. Unfortunately, not everyone has a hair dryer, so the process is not always possible. Also, with strong heating, there is a risk of damage to the plastic on the doors; they will have to be covered with wet rags first. You cannot warm up the glass to more than +60 degrees, this will cause a violation of their integrity and deformation.
If it is not possible to warm up the glass, you can remove the tint from it with a soap solution. The film is lifted by the edge and slowly pulled off, pouring the solution over it. Add liquid liberally to the area where the adhesive joins the glass to reduce adhesion. Some of the glue will still remain, but no more than 10-15%. It is imperative to wipe it off: the side windows will begin to roll down poorly, and a lot of everything will stick to them.
Do I need to use plastic primer when varnishing headlights?
As you know, before painting plastic parts, it is necessary to first spray a special transparent primer onto the surface. This is an adhesion enhancer. Do plastic diffusers need to be primed before varnishing them?
The main problem with coloring plastics is that they have low surface energy. The surface energy of the material “allows” the applied liquid to spread, “wet” the surface and affects adhesion. For normal coloring of plastic, this parameter should be at least 36–38 mN/m. For example, plastics such as polypropylene (PP) and polyethylene (PE) have low values of this parameter. Polypropylene has a surface energy of 30 mN/m, which is below the norm required for problem-free dyeing. A special primer (adhesion enhancer) is designed to increase this parameter. Thus, bumpers made of polypropylene, which are used by most auto manufacturers, must be primed with a special primer for plastics.
As for polycarbonate, its surface energy is 40–42 mN/m. This is not a high value, but sufficient for normal painting or varnishing.
In addition, the adhesion of varnish to polycarbonate is increased due to its slight dissolution by solvents contained in the varnish.
A special adhesion promoter can be used to replace the labor-intensive process of abrasive surface treatment. But in our case, removing the old destroyed protective layer from the headlights involves preliminary grinding, which is described below.