05/31/2021 1,051 Engine
Author: Ivan Baranov
You can do it yourself by heating the engine by heating the oil or antifreeze. For a diesel engine, it is most effective to develop heating for individual elements of the fuel system, for example, a fine filter or separator configuration. It will not be possible to make an autonomous device at home that runs on diesel fuel, gasoline or gas due to the complexity of the process and the high fire hazard of a homemade unit.
[Hide]
We assemble a 220V engine pre-heater with our own hands
Methods for heating the engine.
Our country is characterized by severe frosts in winter, which make starting a car engine difficult. For example, to prepare your vehicle for winter, it may not be enough to replace tires or carry out major repairs or replace the battery. Pre-heating of various units can solve this problem.
To start your car without problems in the cold season, you just need to build an engine pre-heater with your own hands, which is guaranteed to ensure trouble-free starting the first time. Autonomous electric heating is a well-known method of heating antifreeze, which is responsible for starting torque.
Heating.
Our fathers and grandfathers used slightly different heating methods - they warmed up the engine with blowtorches and kerosene lamps, which, by the way, did not always lead to the desired result. The modern market is ready to provide you with a factory-made electric heater, but is there any point in paying decent money when you can make a heating device with your own hands that is not much inferior to a store-bought equivalent? So, if you look at it, an autonomous pre-start heater serves to heat the sump and engine cooling fluid - antifreeze or antifreeze, warming it to such a heating level at which the engine can start even in extremely cold conditions.
The first type of heating is a simple and primitive device that looks like an electric boiler. On the Internet you can actually find a wide variety of videos on assembling the unit with your own hands in order to get to know the heater device better. Its use is extremely simple - you just need to put it “under the hood”, and then it will do everything for you. If we look at factory and store heating models, the principle of their operation looks somewhat more complicated, but the results they show are the same as a homemade device. In addition to its usefulness, the electric heater has one big drawback - the huge consumption of heating electricity (up to 15 kW per night).
As for the 2nd type of heating, it is not only more efficient and economical, but also more dangerous and complex. We are talking about a gas heater, which has repeatedly proven itself in engines running on diesel and gasoline fuel. Like the electric one, the gas version of the heater has its pitfalls - the danger of sudden fire. There are many known situations in which, due to violation of heating installation rules by car owners, entire fires and ignitions occurred in enclosed spaces. In view of these reasons, we will dwell in detail on the 220V electric heater, and will also tell you how to install it with your own hands.
Assembly and commissioning of heater equipment
One of the main advantages when carrying out such work on assembling a heating device is that almost every car owner has all the materials necessary for DIY production. So, you will need:
- Heating in an incandescent coil. For all the time that car enthusiasts have been inventing such mechanisms and devices, the world has not seen anything. For example, an incandescent heating element from old electric kettles would be an excellent example;
- Metal tank. Any container made of carbide metal will do, for example, a small canister;
- Fitting. Fortunately, today such a part can be bought at any retail plumbing store, of which there are now many in every city;
- Junction box, which consultants from an electrical store will help you find.
From all of the above, you get one comprehensive solution that will once and for all save you from the problems of cold engine starting. By the way, in addition to its main purpose, such do-it-yourself engine heating guarantees fuel savings during long-term engine warm-up, and also undertakes to extend the life of your engine.
Engine Pan Heater Installation
The pre-start electric coolant heater, operating from a 220V network, does not require professional intervention during installation, unlike gas heating. Also, you do not need special tools or equipment, and the process itself, if done correctly, will not take more than a few hours. So, we can highlight the following stages of the so-called installation that the heater goes through:
- The coolant needs to be drained. That is, the engine is completely cleaned of antifreeze or antifreeze;
- Then you should remove the standard list pipe, which is secured with two nuts;
- A special gasket is installed in the place of the pipe, and a special clamp is placed under it. This structure is fixed using 2 previously unscrewed nuts;
- The last step is to fill the coolant tank.
Moreover, sometimes there is an autonomous pre-heater, the installation and commissioning of which is carried out slightly differently. You will have to cut it into the fuel hose with your own hands, which goes to the radiator. Fortunately, there are many videos on the Internet that will help you carry out heating installation work without errors. It is important that such heaters must be mounted at an angle of the tray, since the horizontal type can lead to breakage.
Installation
Antifreeze heaters are installed in the engine compartment. Most modern cars may have a special place already prepared for this. If the car is an old brand, then you will have to look for it.
The heater is installed in two ways, depending on the car make and device model:
- Separately.
With this installation method, the device is placed in the cooling system at its lowest point. It is cut into the small circle ring on the hose anywhere. Heating of the antifreeze, as well as the engine along with it, begins precisely from the lowest point of the system.
- In the engine block.
As the name of the method implies, the heater is installed directly into the engine block.
The advantage of this method is that the device demonstrates much better efficiency compared to the previous one. But there is also a drawback, which is the rather high complexity of installation.
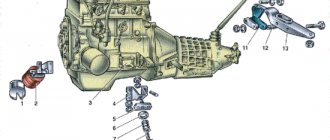
Homemade pre-heater for a VAZ car engine
In winter, starting a frozen power plant causes many problems for car owners. Thickened oil, poor fuel volatility, and increased resistance in the battery make the power unit very reluctant to start. But there is a solution to this problem - install and use pre-heaters. These devices allow you to warm up engine fluids, providing relatively easy engine starting in severe frost.
The car accessories market offers a large number of such devices. But many car owners are in no hurry to spend money, preferring to make an engine heater with their own hands. And this is quite possible; in terms of performance indicators, homemade devices are not inferior to factory ones, and the financial costs will be significantly lower.
In general, factory-made and home-made products use the same principle. Heating elements are used for heating, that is, heating is carried out by electricity, but they can affect both antifreeze and oil. They can also operate from a 220 V network, or be autonomous, powered by the car’s on-board network (12 V). Each of these devices has its own advantages and disadvantages.
Do-it-yourself antifreeze heater? Photo and video.
Below you will find an interesting video clip.
Share your opinion and tell us on social media. networks. After all, a do-it-yourself antifreeze heater? - this is a very interesting topic, don’t you think?)) You can look at the reviews and opinions of other readers below, in the comments.
Most car owners, when they mention winterizing their car, remember replacing tires, buying a new battery, or other activities that help them get through the winter comfortably. And many of them are right, especially those living in less harsh parts of Russia, where the temperature very rarely drops below 10 degrees below zero. But in severe winters, when the temperature can easily stay at -30 degrees Celsius for weeks, you have to prepare your car for winter more carefully, or forget about its existence until the first spring thaw.
Some nuances
A few details about the features of using both types of heaters. If you take a regular passenger car, the volume of lubricant and coolant is not much different (on average, 3.5 liters of oil are poured, and 4.5 liters of antifreeze). That is, theoretically, approximately the same energy will be required to heat both liquids. But there is one nuance - the oil is in one place - the pan, and the antifreeze is located throughout the system. Therefore, in the case of using a device for heating the coolant, circulation is required, but when heating the oil this is not necessary.
And one more thing - the antifreeze needs to be heated quite strongly (at least to 50-60 degrees), but the oil does not require this; you can only slightly increase its temperature to increase fluidity.
Due to these features, it is not advisable to use a 12-volt heater to heat antifreeze, since proper heating will require a lot of energy. Therefore, autonomous devices are mainly used to influence the lubricant, but those operating from a 220 V network are installed in the cooling system.
Next, we’ll look at how to make a pre-heater with your own hands for a VAZ or any other car. Note that there are a lot of variations of homemade devices, but we will describe only two devices that are relatively easy to manufacture.
How to make a 220V antifreeze heater?
A 220-volt heater for a car must be equipped with a pump to ensure fluid circulation through the cooling system. In the absence of a pump, you can independently install and connect autonomous electric heating at a low point of the cooling unit. The heating of the liquid should be at least 50 degrees, but for the operation of liquid systems in winter, high voltage will be required (12 volts is not enough).
What will be needed for production?
To make a 220V heater yourself, you will need:
- a boiler or barrel (any container of a similar shape can be used) made of steel or other metal;
- switchgear (control unit);
- textolite plate (thickness 6 mm);
- heating mechanism (you can install a heating element from an electric kettle);
- fittings and pipes for connection (use of plumbing hoses is allowed).
Manufacturing stages
| Image | Actions |
| |
| Two fittings are installed at the bottom of the boiler or tank. If the tank is solid, then you must first drill 2 holes of the appropriate diameter. It is important that the fittings are installed tightly in the boiler, otherwise the car heater will leak after installation. | |
| A heating element is installed in the hole in the lid. The device is fixed using epoxy glue. | |
| The switchgear is then installed so that the wiring can be hidden in it. The mechanism cover contains connectors that are used to connect the cable. | |
| The end result should be a similar design | |
| The boiler is being installed and fixed; plastic clamps will be required for fastening. You need to make sure that the lid does not fly off the heater under pressure. | |
| A fitting with a valve is being installed, which will be used to bleed residual air from the boiler |
Antifreeze heater 220 V
The first will be an antifreeze heater operating from a 220 V network. To manufacture it you will need:
- heating element;
- Pipe sections;
- Plumbing fittings, tees, adapters;
- Materials for sealing connections;
- Clamps;
- Cable with plug;
- Insulating materials;
Below are the plumbing items that will be required for assembly:
Regarding the heating element. It is best to purchase a heating element for a water heater (for example, “Ariston”), equipped with a thermostat. Installing it in a homemade device will not be difficult, and in addition it will be possible to adjust the heating range. As for power, a heating element of 1.2-1.5 kW is suitable for a passenger car.
The diameter of the pipe and its length should be selected based on the size of the heating element and its mounting thread. The pipe itself should be thick-walled.
To assemble the device you will not need many tools:
- Bench vice;
- Taps and dies for threading;
- A set of keys;
- Angle grinder with cutting wheel (“grinder”).
Having prepared everything, you can start working. Assembling the pre-heater is done as follows:
- We take the pipe and make the necessary measurements, taking into account the existing bends and tees;
- In plumbing tees, the threads are usually already made, so you can immediately screw the heating element into it using sealing materials;
- We cut threads on a piece of pipe (external on one side, internal on the other);
- Screw the prepared section into the tee;
- On the other side, screw the adapter into the pipe;
- We screw another adapter into the third terminal of the tee;
- We connect the cable to the heating element and isolate the connections;
DEFA WarmUp heating system
This Norwegian device, although simple, is very reliable.
Heating elements are developed for many engine models and are installed in engine plugs.
The operating process is simple: the “boiler” heats the coolant, and with it the oil heats up. This device can operate even without a control module.
Those who prefer comfort can take advantage of the complete Defa heating package and install:
- a heating module in the interior that will quickly warm up your car;
- a battery charger that will ensure the battery is fully charged throughout the winter;
- module for controlling the entire system;
- SmartStart control panel, works from a distance of up to 1200 meters;
- special cable for 220V network.
The price of a 220V engine heating system from Defa depends on the configuration and make of the vehicle.
Video: Defa preheaters.
There are similar analogues of domestic production, but the quality is poor!
Other electric heaters
On the market you can buy boilers for heating the engine of other well-known brands, for example:
How do these electric boilers work:
when the device is connected to a 220V outlet, the coolant is heated in its body and, using a valve, due to the pressure difference, a directed circulation of antifreeze (antifreeze) is obtained through the heating and cooling system of the vehicle.
And the thermostat is designed to prevent overheating of the device itself and the cooling liquid.
How to install heating yourself
The purchased kit includes an installation manual that will help you install the pre-start electric boiler yourself.
All instructions are different depending on the device model, but the installation principle is usually as follows:
- drain the coolant;
- attach the electrical device to the cylinder block;
- instead of a temperature sensor, install a tee fitting and screw the temperature sensor into it, and install an outlet for the hose through which the heated liquid will flow;
- instead of a drain plug (faucet) on the cylinder block, install an outlet for a hose for cold liquid, which will go into the heating;
- tighten the clamps on the hoses;
- pour antifreeze (antifreeze).
Video: heating a 220V engine, operating principle and installation on a VAZ 2110.
Methods for heating a diesel engine in winter and what type of heater to choose?
Today there is already good equipment for heating a diesel engine in winter. Mainly produced are types of electric heaters that operate from the car's network to heat the fuel system of a diesel engine.
What types are there:
- heaters for fine filters, installed inside the filter;
- flow heaters, mounted in the fuel line;
- bandage heaters, put on the filter housing;
- posistor-type heaters are installed in the fuel intake in the fuel tank;
- Well, autonomous engine heaters (liquid) are installed in any car.
Video: heated filter separator.
Video: review of Nomakon diesel fuel heaters.
When choosing a heater, I recommend paying attention to the engine design and parking conditions. Autonomous heaters require a supply of fuel in the tank and excellent condition of the battery. Storage heaters are beneficial for frequent use.
Pay attention to electric heaters from a 220V network. The electric option is advantageous for a diesel engine. They are inexpensive. They are especially relevant in cases where the car is located in a garage or at home. You can purchase Severs, Electrostart or Defa models to save your budget.
12V oil heater
Now let's look at how to make a 12 volt engine heater with your own hands. In this case, the device will be used to heat the lubricant. It will be located in the pallet. Moreover, for this you do not need to make any holes in it, since the oil heater will be screwed in instead of the drain plug.
To make it you will need:
- Small diameter tube;
- Nichrome wire 0.6 mm, total length 2 m (in the form of a spiral);
- Ceramic insulators;
- Textolite washers and bushings;
- Small connecting elements (bolts and nuts for them);
- Drain plug;
Assembling the heater is not difficult, but turning work will be required.
The heater is made like this:
- In the drain plug on the thread side we make a hole (not through, there should be about 5 mm left to the end) with a diameter of 13 mm, and cut an M14 thread in it;
- Then you need to make a through hole of 8 mm. We insert a textolite tube of the appropriate size into this hole;
- For manufacturing, you will need a piece of tube 12-13 cm with an outer diameter of 14 mm. On one side we apply an external M14 thread;
- On one side we screw a long bolt with a nut to the nichrome spiral. We throw a textolite washer over it and insert it into the hole of the plug. On the other side we put another washer on, and then secure everything with a nut. This will be the “positive” terminal, so when assembling everything, you need to make sure that the bolt being installed does not touch the body of the plug anywhere;
- We put ceramic insulators on top of the spiral;
- We also screw a bolt and nut to the second end;
- We insert a spiral with insulators into the tube, and then screw it into the threaded hole made in the plug;
- The second end of the tube must be plugged with a plug. In this case, you should make sure that the bolt at the end of the spiral is in constant contact with the plug (it can be soldered);
- We seal the product. To do this, it is better to solder the plug and the connection point of the tube;
Below is a more visual diagram of the heater:
Having collected everything, all that remains is to install and connect the sump heater. There is nothing complicated in the installation, we screw in the product instead of the drain plug and that’s it.
For power, you will need to lay a wire from the battery (only “+”, since “-” is the tray itself). In this case, you will also need to install a switch and a 10 A fuse in the circuit. Such a heater is convenient because it does not require a third-party power source and can be used anywhere. But it is worth noting that during operation it consumes quite a lot of battery power, so you should not turn it on for more than half an hour.
Only two methods for manufacturing a pre-heater for a VAZ are described above. In fact, there are more manufacturing schemes, and knowing the operating principle, you can develop your own device with some other design features.
MANUFACTURING THE HEATER
To make the heater, I needed: a piece of thin-walled pipe 080 mm, two pipes 20 mm, sheet metal, a nichrome spiral and a pump from a Gazelle.
EVERYTHING YOU NEED FOR THIS ARTICLE IS HERE >>>
First, I sawed off a piece 80 mm long from the pipe. From sheet metal 1 mm thick, I cut out two disks along the inner diameter of the pipe (photo 1) and two plates, which I welded into the disks to increase heat transfer (photo 2).
The most difficult thing is to weld the heat exchanger. It is advisable to do this with a welding machine for body work or gas welding so that a continuous seam can be laid.
You can also solder with tin using a powerful soldering iron. After welding or soldering, be sure to check the assembly for leaks with water. Note that the plates are positioned perpendicular to the coolant flow (photo 3).
I used sheet asbestos as electrical insulation (photo 4), placed two circles inside the heat exchanger on both sides (photo 5).
Any nichrome spiral is suitable for heaters (photo 6). We measure two pieces with a resistance of 2.5-4 Ohms (measured with a multimeter). The lower the resistance of the spiral segment, the more it will heat up, but at the same time the risk of overheating and, as a result, burnout of the spiral increases. From thick paronite we cut out two disks along the inner diameter of the heat exchanger, onto which we attach the spirals with M4 bolts.
On the reverse side we attach the power wires to the same bolts (photo 7). We tighten the bolts as tightly as possible to reduce the contact resistance.
For final assembly, we cut out two covers with ears from sheet metal (photo 8) (which we tighten with 05 mm studs (photo 9).