The suspension of any car goes through a series of adjustments when it is factory assembled. The main parameters are examined, averaged and optimized. The car owner can independently change some values, even without making structural modifications. But modified suspension elements are available for sale, and some of them were developed by the manufacturer itself. This means that changing the regulations is allowed, although it is not a fact that this will only have positive effects.
For the Chevrolet Niva suspension, the most popular modification is to increase the ground clearance.
At first glance, all this requires is to install larger diameter wheels, but in reality you have to modify individual suspension units. All work to increase ground clearance is called lifting, although the term “lifting” is often heard among motorists. The Chevrolet Niva elevator can be purchased as a ready-made kit. All that remains is to install it on the car.
But each owner must understand the consequences of such a transformation, and also know which nodes will need to be modified.
Lift options
How and where you will make a lift for your crossover, decide for yourself. I will try to tell you about all the nuances of this procedure so that you understand what to expect and what to prepare for.
Let's start with the existing elevator options. Suspension modification professionals distinguish two types of such procedures:
I will say right away that a body lift lifts the entire body by using stands, modifying the hose and other parts. In theory, such tuning is very simple, but in the case of the Niva it is not used. And why all? Yes, because the Niva 2121 and other representatives of the series do not have a frame. If there was a frame, then there would be no questions.
From this we conclude that for our Niva the optimal solution would be suspension lifting. It provides the following benefits:
- increases crossover cross-country ability;
- lifts the entire machine;
- allows you to install larger wheels without having to trim the arches;
- provides the car with a more attractive appearance;
- makes the Niva an ideal car for fishing, hunting and driving on the most difficult sections of roads and off-roads.
If you raise the car by about 45 mm, achieve a lift of 50 mm, or even take the height to a bold 60 mm, you can easily insert wheels with a diameter of up to 29 inches into the factory arches. Do not forget that installing large wheels affects fuel consumption.
Many people mistakenly believe that it is easier to cut out the arches, insert 33-inch tires there and thereby raise the car. In practice, with such solutions the machine rises slightly. Most importantly, this does not greatly affect the geometric cross-country ability. I would recommend installing 31-inch wheels and lifting at the same time. This combination will provide the best result. Just choose your car wheels wisely and don’t forget about the seasonal rules for storing tires.
I'll make one remark. When lifting the car, the service life of the internal CV joint and the factory boot is reduced. To fix the problem, try replacing the internal boots on the CV joint with external ones, and also lower the FRM (front axle gearbox) by 10 mm. This way it will be possible to reduce the angle of operation of the CV joint.
Materials and tools
I don’t argue that in Samara, Nizhny Novgorod, Moscow or cities like Yekaterinburg and St. Petersburg there are many companies ready to do any amount of work on your car and suspension in particular for your money.
If you decide to do everything yourself, I have nothing against it. I only advise you to use only factory-made, high-quality kits for the Niva elevator.
Kits from Izh Techno have earned good reviews; you can also find excellent options in the store on Sedova Street in St. Petersburg. This store is called Niva 4x4. The T 34 lift kit also showed excellent performance. Each of them is excellent for the Niva, which is why it is widely used by car owners when modifying the front and rear suspension.
There is an option to assemble the kit yourself. But this will require accurate drawings and even more time and effort. I don’t see the point in this, since it is better to take a ready-made set after looking at a review of different sets.
To work you will need to take:
- front and always rear new springs;
- spacers made of rubber for springs with a metal cup;
- spacers for the Nivov ball joint (upper);
- shock absorbers;
- brackets for rear shock absorber springs;
- cup washers;
- set of tools;
- jack;
- durable boards;
- ties for working with springs.
Elevator assembly
The installation procedure is divided into installing a front and, accordingly, rear car suspension lift.
There is nothing particularly complicated here. Especially for those who have already had to work with the suspension, change something, repair and dismantle it.
Let's look at the processes separately.
Front suspension
Let's start with the front of the Niva. Then I’ll tell you separately how work is done on the rear suspension of the crossover.
- It all starts with removing the wheels and releasing the silent blocks. The activities are elementary, so we won’t pay much attention to them;
- Securely secure your Niva. To do this, place a jack under the ball joint. The machine rises until the spring is fully compressed;
- Next, the ties are installed on the fastenings and the fastening elements that you will see on the Niva’s shock absorbers are dismantled;
That's it, the work is completed.
Rear suspension
Here you will have to buy yourself or borrow a welding machine from a friend, because you can’t do without welding. Get a semi-automatic one.
The procedure for lifting the rear suspension of a Niva will look something like this:
- The cups are carefully placed under the Nivov springs so as not to be damaged;
- The rear shock absorbers included in the kit are installed on the car. Additionally, I advise you to secure the bracket by welding;
- When you install the element, your rear axle will move forward slightly. To avoid such a change, all rods must be lengthened;
- The lower cup is cut off and shifted by about 20-30 mm. When moving, pay attention to the crosspieces, which are easily damaged;
- The cups are welded firmly into new places using a welding machine;
- The rocker arm of your brake system is extended. As a result, the extension should add 30 mm;
- Pins are welded under the shock absorbers using semi-automatic welding. Just not yours, but car ones.
Be sure to visit the service station after this. Not to show off the work, but to perform a wheel alignment.
Remember that lifting will require further installation of main pairs with a different gear ratio. And forget about alloy wheel sets. Now only stamped discs will be your property.
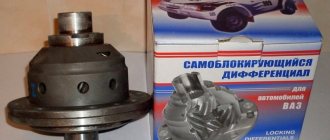
If you really want to perfect the car, then spend a little more money on a new limited-slip differential.
All responsibility for lifting lies entirely with you, even if you ordered the service from a car service center. Remember that the consequences may be very unpredictable. Although practice shows how satisfied car owners are with the elevator and that such reconstruction brings benefits and driving pleasure. The main thing is to do everything correctly and use only high-quality ingredients. Thank you all for your attention! Subscribe to our website, leave comments, ask questions and invite your friends to join us!
( 3 ratings, average: 5.00 out of 5)
Did you like the article?
Subscribe to updates and receive articles by email!
We guarantee: no spam, only new articles once a week!
We will tell you how to properly perform tuning modifications in this material.
Do-it-yourself elevator - drawings, diagrams, sizes, types of kits. Lifting varies in the degree of intervention in the standard structure. For some, it is enough to raise the SUV by a few centimeters, and for others by as much as 20.
Extreme tuning – maximizing cross-country ability for traveling on severe off-road conditions.
- Regular jack Hijack jack Spring puller Balloon wrench Set of socket heads with ratchet Set of open-end wrenches Pry bar Wooden block (stump)
It is advisable to perform such work with a partner. First of all, it's safer. Secondly, some lifting work is performed with four hands. Let's take the front suspension as an example.
Raise the front end. You can safely cling to the standard bumper, only the jack is installed under the pipe securing it.
By removing the wheel, we get full access to the lever and spring. The front suspension 21214 is made using a double wishbone design, which simplifies the task.
The lever travel is limited by the shock absorber. Unscrew its fastening and move it to the side.
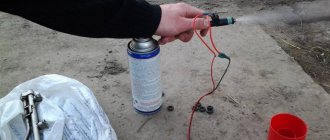
Next you need to free the suspension from the anti-roll bar. The mounting bolts may become stuck due to corrosion, so we will use a penetrating liquid (such as WD-40). The stabilizer silent block clamp can be pryed off with a pry bar.
Then disconnect the hub from the lower arm. To do this, you need to jack up the suspension and fix the steering knuckle of the wheel. You can tie it with wire. Then unscrew the 3 mounting bolts and release the ball joint.
We fix the spring with ties and lower the jack. We remove the old elastic element. In some cases, it is enough to simply lower the lever with your foot, and the spring will come out without the use of ties.
the upper support rings
from the old springs . With their help, the elastic element is centered in the cups.
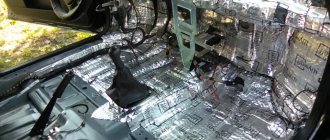
Rear elements
Rear suspension lifting operations are carried out in a pit using semi-automatic welding.
- You need to install more cups under the rear springs. They are attached on top of the standard ones with bolts.
- The rear shock absorbers, assembled with brackets, are put in place and welded. As a result, the rear axle moves forward and to the side, so it is necessary to lengthen all the rods, including the transverse one.
- Cut off the lower cup and move it back 1.5-2 cm so that the cardan cross does not break out. The cups are welded. This is necessary in order to rotate the gearbox shank upward to protect the rear crosspiece during operation. At the same time, the sorcerer’s rocker arm will have to be lengthened by about 3 cm.
- Weld pins under the shock absorbers under the clamp of the metal brake pipe. Complete the assembly by attaching the shock absorbers.
- The final finishing of the bridge is carried out at the wheel alignment stand.
Return to contents
Installation of a ready-made lifting kit for Niva 21212
To understand the process, let’s look at the geometry of the suspension on NIVA SUVs (front axle). The drawings clearly demonstrate the position of the elements relative to each other. If you organize an elevator only by increasing the length of the spring, its bending radius decreases, and lateral loads appear on the mountings of the levers. To compensate for this side effect, spacers are used: under the spring cup and ball joint.
The standard version shows that the axle shaft (CV joint) is located virtually parallel to the ground. The spacer is installed between the spring and the lever. The radius of curvature of the elastic element is small, the softness of the suspension is maintained. The fastening is reliable, there is no backlash. Disadvantage - the additional element adds unsprung masses (aluminum parts can be used to reduce weight). The spacer is installed between the cup and the spring. There are no unsprung masses, the radius of curvature of the elastic element is even smaller than in the previous version. The disadvantage is that the attachment of the additional element is not so reliable.
In all cases, the elevator changes the position of the axle shaft. The load on the tripods (gimbals) increases. When lowering the suspension, the travel of the upper arm to the bump stop decreases. To restore the geometry, a spacer is installed under the upper ball joint. Factory kits are designed taking into account all the design nuances of the front axle and rear axle.
The set includes:
- Drawings for correct installation Spacers Extended shock absorbers New trailing arms for the axle Extended panhard rod New cups and springs
Replacement process: To install the lift kit, a garage with a pit and a standard set of repair tools are enough. Those who independently service LADA 21214 know what we are talking about. Preparation of the front axle is described in the Niva budget elevator section. Only when installing the kit is the steering knuckle removed completely. If you manage to fix it without removing the CV joint, good. Usually it is completely separated from the suspension.
Next, dismantle the lower spring cup and install three ring spacers under it. There are no more modifications to this lever. An enlarged support ring is installed on top of the elastic element.
To compensate for the divergence of the levers, we mount a spacer under the upper ball mount. Since all the parts are from the same set, the sizes are synchronized.
This element is the most responsible. If the geometry “floats”, the front suspension travel will be disrupted. To fine-tune the height, the monolithic upper ball spacer can be replaced with stacked washers. By selecting the quantity, you adjust the parameters of the front axle, just like on a rally car.
If the kit includes new shock absorbers, they should be installed. On standard ones, the rebound stroke may not be enough, and your 21212 will squirm on potholes. The rear axle is completely removed, especially if new support cups are welded under the springs. The eyelets for the levers remain standard, the extended parts from the kit have standard fastenings. Depending on the size of the front axle lift, you may be limited to raised cups, or add spacers for the springs. It is better to choose a customizable Panhard rod. You can adjust its length when changing the clearance height.
To understand the process in dynamics, you can watch a video of Niva’s independent elevator:
Front suspension
- Remove the wheel, release the silent blocks. Place a jack under the lower ball joint and lift the Niva so that the spring is compressed. Place the zip ties on the spring and tighten it.
- Unscrew the shock absorber mount. Remove the upper and lower ball joints and remove the stabilizer.
- Lower the lever and remove the spring. Move the wheel hub to the side and place it on a stand. At this stage it is important not to break the brake hoses.
- Bend the bump stop slightly to make it easier to work with. Replace the two outermost bolts on the cup, near the wheel, with long ones. Install spacers made of washers between the cup and the lever.
- Install rubber spacers with metal cups and a spring. Place them correctly relative to each other. Jack up the lever.
- Install the lower ball joint and stabilizer. Place the upper ball joint through the spacer. Screw on the shock absorber.
- Reinstall the wheel hub, put on the wheel, and remove the jacks.
Return to contents