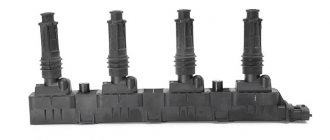
- Where are they installed?
- Fault diagnosis
- Which ones are better to put
- Replacement process
- Recommendations from experienced
Initially, CV joints were positioned as elements with a very long service life. Manufacturers even assured that they could last as long as the car itself.
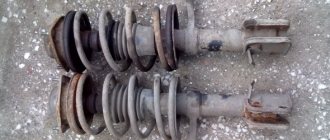
Photo of CV joint for VAZ 2114
But in reality, everything is not as colorful as it is described. A grenade has a life limit. What grenades, you ask. The grenade is the CV joint. People often use the concept of “grenade”. This can be explained very simply - the CV joint looks like a grenade. That's all. Therefore, do not be confused if you hear “grenade” when talking about CV joints. It is the same.
When replacement is required
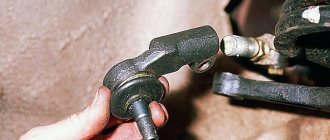
If while driving your car you hear noise coming from the front of the car, be sure to check the condition of the boot. Quite often, replacing the outer CV joint boot of a VAZ 2114 becomes a daily task for service center employees.
To check, just turn the wheels in any direction and look under it. If cracks or complete damage are detected on the boot, the outer CV joint of the VAZ 2114 will definitely need to be replaced.
The presence of damage indicates that dirt has gotten inside the element. Much or little of it is no longer so important. Contamination leads to disruption of the functionality of the device.
In such situations, when the CV joint is damaged, it is strongly not recommended to continue driving under your own power. This is dangerous for you, your car and other road users. Ignoring this recommendation entails even more expensive repairs, since by the time you get to the garage or car service center, you will damage a number of other components and elements of the car.
How to repair a CV joint
Damage to the internal parts of the hinge most often leads to a complete replacement of the mechanism. However, this only happens with significant wear. In most cases, it is recommended to simply replace the CV joint grease and boot. This is often enough to get rid of the annoying sound and make it easier for the parts to interact.
Therefore, if knocking or clicking sounds appear on one of the four CV joints (we will assume that you have already found out which one), you must perform the following steps:
New inner CV joint
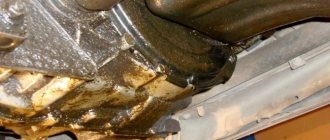
- Drive the car into the inspection pit in order to check the integrity of the boots and the presence of lubricant splashes from under them on nearby surfaces.
- If traces of grease are visible on the boot or other parts, it is necessary to remove the CV joint. Next, disassemble it, remove the boot, wash the internal parts and surfaces, change the lubricant and boot.
- If during the inspection process you find significant play and/or damage to the working surfaces of the parts, you can try to polish them. However, as practice shows, this procedure is ineffective, since you cannot eliminate significant waste with anything. Therefore, the best recommendation would be to completely replace the CV joint .
You can replace the lubricant and boot yourself, as the procedure is simple. The main thing is, when disassembling, do not forget to wash all internal parts and surfaces with gasoline, thinner or other cleaning liquid. And only then apply new lubricant. However, if you are dismantling and replacing the lubricant for the first time, then it is better to have a more experienced car owner or technician with you. Or have him perform the procedure and show you its algorithm. In the future, you can easily cope with such work.
Conclusion
Constant velocity joints are reliable and durable mechanisms. However, during operation, it is necessary to constantly monitor their condition in order to determine in time which CV joint is crunching or making other unpleasant sounds. After all, this indicates a malfunction in its operation. Hinge failure at the initial stage is not critical . You can drive hundreds or even a thousand kilometers with a crunch. However, you should remember that the sooner you repair or replace the CV joint, the cheaper it will cost you. In addition, do not forget about safety. Do not bring the condition of the hinge to a critical state , as this threatens you with a serious emergency situation, especially at high speed. We hope that the above information helped you figure out what to do when the CV joint crunches and accurately determine which one is faulty.
What to choose?
To replace the inner or outer CV joint on a VAZ 2114, a new element will be required. To be fair, we note that the most suitable and high-quality CV joints for the VAZ 2114 model are produced by the manufacturer, that is, AvtoVAZ.
But here comes the most important disappointment - they are not for sale. The only option is to go to a specialized VAZ official car service center. But from the point of view of financial costs, it is not the most reasonable decision.
In addition, there is now a fairly wide range of analogues on the market. Judging by the reviews of VAZ 2114 owners, special attention should be paid to CV joints produced by such companies as:
Photo of GKN CV joint for VAZ 2114
The easiest way to diagnose CV joints
All that is required is to make the following simple movements, and you will most likely be able to find out whether it is worth changing the CV joints, or whether they are still in good condition:
- The first step is to align the wheels straight.
- Jack up one of the front wheels.
- Put the car in neutral, put on the handbrake, and it is advisable to use wheel chocks. There is no such thing as too much security.
- Start the car engine.
- Depress the clutch, engage first gear and smoothly release the clutch pedal (the suspended wheel should begin to spin).
- Slowly and smoothly press the brake pedal, thereby creating a load on the CV joint. If any knocking or extraneous sounds appear, then the internal CV joint is faulty. If the car just starts to stall slowly, without creating any dubious situations, then everything is fine with the internal CV joint.
- Turn the steering wheel to the side as far as it will go. Similarly, we begin to slowly slow down. If the inner CV joint is faulty, then it will continue to knock, and if an additional sound appears, then this is already the outer CV joint making itself felt. If additional sound does not appear, then move on to the next step.
- Next, turn the steering wheel in the opposite direction as far as it will go. We do the same thing.
- Having dealt with the selected side, put the car in neutral, turn off the car, lower the wheel to the ground and carry out all the operations with the second wheel.
Replacement
Armed with new CV joints, also collect a set of necessary tools and materials. It will include:
- Set of heads;
- Spanners;
- Shoes;
- Dry rags;
- Grease for CV joints;
- Jack;
- Anthers.
CV joint arrangement diagram
Now let's get down to work on replacing the CV joints:
- Determine the location where the repairs will be carried out. This could be an overpass, a garage with an inspection hole, or a room with a car lift.
- Stop the engine and apply the handbrake. Use chocks to block the wheels.
- Using a wheel wrench, remove the wheel bolts.
- Raise the required part of the car with a jack.
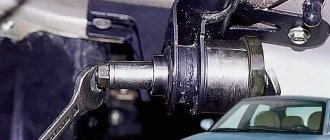
- Loosen the nut in the center of the CV joint. Keep an eye on the puck so you don't lose it. It is not included with the new CV joint.
- Armed with 13mm wrenches, unscrew the fasteners of the upper part of the ball joint. It is not necessary to perform a similar procedure with the lower part, since it will not interfere with the repair process.
- Using a pry bar, slightly rip the grooves off the support and move them aside.
- Knock the hub off the CV joint splines. To do this you will need a hammer and some kind of wooden stand.
- Remove the old damaged CV joint.
- Check for damage to the stem.
- Remove any remaining lubricant from the rod using a dry rag.
- Place a new grenade in the new location. This assembly should include a CV joint, boot, clamps, nuts, and retaining rings.
- When assembling the unit, do not forget to use high-quality lubricants. There shouldn’t be too much of it, but you shouldn’t feel too sorry either.
- Reassemble the parts in reverse order.
- By changing the CV joints, you can simultaneously check the condition of the brake pads. If they are in a sufficiently worn condition, it is advised to replace them at the same time. Anyway, you have already dismantled the knot.
- After completing the repair, check the car in action.
- It’s not uncommon for craftsmen without much experience to leave behind supposedly unnecessary parts after reassembly. Please note that everything that remains after assembly, and that is not the released elements that you replaced with new ones, has its place in the design of the car. Therefore, check where exactly these “extra” elements come from and install them in their rightful place.
Replacing the internal grenade of a VAZ-2114 photo of the CV joint and video
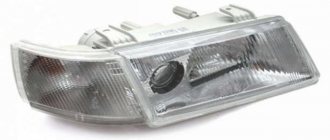
Replacing headlights VAZ 2108-2115
A grenade or CV joint is a car part that transmits torque from the engine and gearbox to the car's wheels. Replacing this element on a VAZ-2114 is a rather complicated procedure and requires certain skills and abilities. This article will tell you how to properly replace a CV joint on a car, as well as how to select the necessary spare part.
Video on replacement on the front-wheel drive VAZ 2113-2114-2115 family
The video will tell you how to replace a grenade on a car, and also tell you about the features and nuances.
The grenade replacement process in detail
Internal grenade
To begin with, before starting the replacement procedure itself, you need to decide on the tools. So, what will be needed when replacing the internal grenade: knobs and heads 13-17, as well as 30; keys 17 and 19; jack; lamp; pliers; CV joint lubrication; wheel wrench; and the spare part itself.
Go!
Now that everything is assembled, you can begin the replacement procedure:
- We remove the lower engine protection.
- Drain the oil from the gearbox.
- Using a wheel wrench, remove the wheel.
- Using a 30 mm socket, unscrew the nut securing the outer CV joint. Unscrew the nut securing the CV joint to the hub
- We jack up the car.
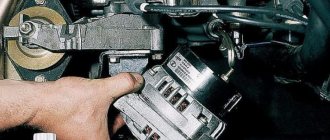
- Disconnect the ball joint from the hub. Unscrew the fasteners and remove the ball joint from the fist
- We pull out the CV joint from the hub. We dismantle the CV joint from the hub
- Under the hood, using a pry bar, we pull out the inner CV joint from the gearbox. Using a crowbar, remove the inner CV joint from the landing mount
- Now, you can pull the shaft drive out, complete with grants.
- For convenience, we clamp it in a vice. Drive assembly
- Using pliers, remove the boot clamp. Unscrew the boot clamp to free access to the grenade
- We remove the boot.
- We take out the grenade. Dismantling a grenade
- Installation is carried out in the reverse order, with all consumables replaced. It is necessary to place CV joint lubricant in the boot. CV joint lubricant LUXE
Original
2108-2215056 – original catalog number of the internal grenade for the VAZ-2114. The average cost is 2000 rubles. Fitting the fasteners is easy and does not require any modifications.
Analogs
Grenade assembly with boot and clamp made by "HOLA"
In addition to original spare parts, you can find quite a lot of analogues on the automotive market, which are in no way inferior to the original in quality and price. All of them are certified and recommended for installation on this vehicle. So, let's look at what analogues can be installed on the VAZ-2114:
| Weber | CVJ 2110-1 | 1500 |
| Master-sport | 400952-ST-SET/5/-MS | 1500 |
| LPR | KLD823 | 1600 |
| SCT | RT 209 | 1800 |
| Fenox | CV16007 | 2100 |
| Fenox | CV16007E7 | 2300 |
| Pilenga | CV-P 2 001 K | 2400 |
| LYNXauto | CI-4602 | 2500 |
| Coram | KCVJ012 | 2500 |
| Hola | CV018 | 2700 |
| Torque | VN-3837 | 2800 |
| Profit | 2810-1028 | 3000 |
| Ruville | 77203S | 3700 |
| Patron | PCV1658 | 4000 |
| Finwhale | FJ-228 | 4000 |
| Mapco | 16081 | 4000 |
Tripoid grenade. They say they last longer!
Some VAZ-2114 owners recommend tripoid grenades for installation.
Replacing the internal grenade on a VAZ-2114, as it turned out, is not so scary, and even more so it’s really possible to do it yourself. To do this, you need desire and a minimum set of tools.
It is worth paying attention to the fact that the choice of part must be approached seriously, because if it breaks on the road, then you will not be able to continue moving
Advice from experienced motorists
There are some useful tips on this matter that are worth listening to.
- If you hear a characteristic crunch while driving in a straight line, it means the CV joint has failed. If this crunching noise is heard only when turning, then the problem lies in a faulty joint.
- Before installing a new CV joint, treat the grenade landing site with lubricant. This significantly extends its service life.
- To adjust the CV joint and seat it properly, use wooden attachments. If this is not done, the risk of damaging the new element is very high.
- The boot should be installed as tightly and efficiently as possible. If you don't do this, dirt and dust will soon get there. These components will quickly render it unusable, and repair work will have to be carried out again.
- The lock nut on the hub is tightened with a special torque tool. Moreover, tightening is carried out strictly with the parameters specified in the instruction manual for your VAZ 2114 modification.
- During a routine inspection of the technical condition of your car, be sure to pay attention to the condition of the clamps and rubber elements to ensure their integrity. Such seemingly insignificant components can lead to serious consequences and significant financial costs.
- The purchase of spare parts, including CV joints, should be made only from trusted sellers, certified distributors. If you buy a bad, low-quality part, just trying to save money, you will have to pay even more to eliminate the consequences that the use of such elements led to.
The CV joint is an important component of any car, and replacing it even on your own is not particularly difficult.
Knocking in the chassis is a frequent companion in life for owners of the VAZ 2114. Many elements that can cause knocking, bad roads, and low-quality parts can cause extraneous noise in the suspension. A common source of the problem is the angular velocity distributor, or CV joint (grenade).
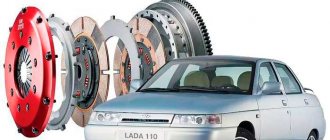
The process of replacing a part is simple, so you can change it yourself. The question is often asked which CV joint for the VAZ 2114 is better: regular or tripoid. Among the most common arguments: tripoid is more reliable, but it hums and vibrates at high speeds. The regular one is less reliable, but the car handles better at high speed. However, you can find opposing opinions and arguments on this matter.
There is no clear answer which type is better. Operation in harsh conditions showed that there is no fundamental difference in driving sensations and reliability. The main thing is to buy a high-quality grenade made of well-hardened metal, install it correctly and monitor the safety of the anthers.
Use of CV joints in a VAZ 2109 car
The installation of CV joints began to be performed on front-wheel drive cars. This is due to the fact that the use of a crosspiece in the cardan transmission, with four needle bearings, as in rear-wheel drive vehicles, does not ensure the required equality of the angular velocities of the shafts - driven and driven. When using such a device, it will be associated with an increase in the dimensions of the unit, the price of the product will increase, and the torque will be transmitted with a large pulsation, which will increase with an increase in the angle between the shafts. The design of CV joints provides a service life the same as the service life of a car, but during operation it was revealed that wear of the elements occurs faster, especially its external parts. Although they are made flexible, from moisture- and frost-resistant materials, the part cannot serve for a long time under the influence of external factors. It is greatly influenced by constant deformation, large amounts of abrasive and moisture. In addition, during repairs or long-term operation of the car, the boot may become damaged, and cracks may appear on the protective rubber, which will lead to failure of the element. The shaft leading to the CV joint may also be damaged. Often this defect is difficult to notice with the naked eye, but with a crooked shaft the operation will not be normal. All this leads to the need for repair or replacement of the CV joint.
How does the internal CV joint of a VAZ 2109 car work?
In order to determine the structure of the CV joint, it can be disassembled. For this:
- The hinge moves and is removed from the spline shaft.
- Use a screwdriver to pry up and remove the plastic stop, as shown in the photo.
Removing the plastic stop
The hinge shaft is clamped in a vice.
Removing the retaining ring
- Using pliers, the separator with the cage and balls is removed.
- Six balls are pulled out with a screwdriver.
- The clip is disconnected from the separator.
If, after dismantling, all parts are in good condition, the assembly can be assembled by first putting 80 cm3 of lubricant into its cavity. Such a complex design of the internal CV joint on the VAZ 2109 shows how difficult it is to disassemble and repair it. And if dirt gets in and the protective cover is damaged, other parts of the CV joint may become unusable. The component elements of the product are not interchangeable, so the best option for a VAZ 2109 car would be to replace the internal CV joint along with the boot (see How to replace the boot). Traces of grease visible on the joint body indicate a break in the boot. If oil leaks at the junction of the gearbox and the drive axle shaft, this indicates wear of the inner “grenade” oil seal, which requires replacement. A characteristic “crunch” when the car moves around corners indicates the need to check the angular velocity joints. A noticeable “play” when rocking the drive axle shaft with your hands or at least a torn joint cover indicates that the VAZ 2109 internal CV joint needs to be replaced.
How to replace the internal CV joint of a VAZ 2109 car
The instructions for replacing the internal CV joint of a VAZ 2109 car with your own hands suggest the following procedure:
- The hub nut is unscrewed.
- You need to remove the wheel.
- Unscrew the ball joint, which will free the strut from the lower arm.
- To ensure free movement of the outer CV joint, the wheel must be moved to the side.
- The outer grenade is knocked out of the wheel.
- Both grenades are knocked out of the gearbox.
Carefully, to avoid damage, the drive shaft is clamped in a vice. The clamp that the boot holds on the body of the inner CV joint is released. A screwdriver is used for this. The boot is removed
It can be cut if further use of the element is impossible due to breakage. The old CV joint is knocked off the drive shaft using a special guide made of bronze. The CV joint and a new boot are put on the shaft.
- The inside of the CV joint is generously lubricated with grease.
- It is necessary to ensure that the direction of the drive and the seat of the product coincide.
How to replace the internal CV joint on a VAZ 2109 can be clearly seen in the video.
Drive Shaft Installation
- New retaining and thrust rings are installed.
- After applying graphite lubricant to the joint splines, the drive shaft is placed in the gearbox housing.
Installation of the drive shaft in the gearbox
- Fixing the shaft in the side gear.
- Installing the unit into the wheel hub.
- Final assembly is performed in the reverse order of disassembly.
On our website you can find a lot of useful and necessary information on this topic.
Fault diagnosis
The VAZ 2114 has 2 external and 2 internal CV joints. First you need to determine which one is knocking. The optimal test would be on a suspension diagnostic stand. If this is not possible, diagnosis by ear is possible.
Two signs indicate a grenade malfunction in a VAZ 2114:
- the sound resembles a crunch;
- It usually appears when turning.
The simplest and most accurate way to do a garage check is as follows:
- Place the car on a flat surface;
- Turn the wheels to one side (to the middle position or a little further);
- Drive off with medium speed. It is worth remembering that starting too smoothly may not reveal a crunch due to insufficient load on the CV joint, and starting too abruptly may lead to the drive flying out of the wheel.
- Repeat the operation by turning the steering wheel in the other direction. The appearance of a crunch indicates a malfunction of the outer CV joint on the side in which the steering wheel is turned.
VAZ 2114 grenade: signs of malfunction and diagnostics
So, the CV joint, which is actually a ball bearing, has races with transverse grooves to change the angle between the drive and driven axle shafts.
It should be noted that on a car with front-wheel drive, it is the grenade that is the weak point for a number of reasons. Even taking into account the fact that all components of the part are made from materials of increased strength, signs of CV joint failure may appear as early as 50-60 thousand km. mileage Failure occurs for various reasons, the most common being:
- damage to the CV joint boot and ingress of dirt and water;
- low quality or complete absence of CV joint lubrication;
- severe vehicle operating conditions, heavy loads;
At the same time, the main sign that the CV joint on a VAZ 2114, 2115 or other car needs to be replaced is the crunch of a grenade. This sound is made by balls rolling along ditches as wear and tear occurs.
By the way, there are two CV joints in the design (outer CV joint VAZ 2114 and inner CV joint VAZ 2114). Although both elements perform the same function, the external grenade fails much faster and more often. The reason is higher loads and rotation angles of the hinge in the hub area. So, signs and symptoms in the form of a crunch often point specifically to the external hinges.
In turn, the internal CV joint can make noise when driving in a straight line and manifests itself when overcoming bumps. Such a hinge will have play when tested. You can also hang the front wheels and engage 1st gear so that the wheels rotate in a suspended state. In this case, the inner CV joint becomes bent and a crunching sound appears from the faulty joint. All the signs discussed above indicate that the CV joint of 2114 or another car needs to be changed.
Replacement
It is better to change a grenade yourself with an assistant.
- remove the wheel, remove the wheel bolts and the hub nut washer;
- unscrew the ball from the steering knuckle;
- pull out the splined end of the outer CV joint;
- pull out the drive with the internal CV joint from the gearbox;
- if you plan to remove both drives, remove the internal grenade from the drive and insert it into the gearbox so that the differential does not move after removing the second drive;
- remove or cut off the anthers, thoroughly clean all hinges with a special liquid or just gasoline;
- when filling the CV joint, use a special lubricant suitable for these purposes; ordinary lithol does not have the required temperature characteristics;
- the retaining rings of each CV joint and the hub nut must be replaced;
- The inner CV joints are inserted into the gearbox until they are completely fixed; when adjusting, you can use a hammer with a wooden spacer.
It is quite possible to diagnose and replace a CV joint with your own hands. This does not require sophisticated car mechanic skills and engineering knowledge, but it allows you to get in touch with the car, see and feel how it works. Whatever the reason for the crunching sound, you need to check the condition of the grenade as quickly as possible. Delaying this will almost certainly mean bringing the part to the point of complete wear, and timely repairs will allow you to get by with “little loss.”
In the design of modern front-wheel drive cars and all-wheel drive crossovers, CV joints (or “grenades”) are used to transmit rotational motion from the engine to the front wheels. The joints ensure a stable speed of rotation of the drive shafts, regardless of the angle of rotation of the wheels and movements of the suspension. This type of drive consists of two hinges, internal and external, which are attached to the axle shaft. The inner CV joint is inserted into the gearbox, and the outer one is fixed in the wheel hub.
The design of the internal and external CV joints is different: The internal CV joint compensates for vibrations of the engine and gearbox, as well as longitudinal movements of the axle shaft when cornering, but has a small bending angle. The external hinge device does not allow axial movements of the working parts, but provides continuous transmission of torque when the relative position of the shafts changes over a wide range (from 40 to 70 degrees).
There are two main modifications of this vehicle chassis unit: a six-ball CV joint and a tripoid constant velocity joint. To determine which CV joint is better, tripod or ball, you need to familiarize yourself with their operating properties.
Signs of failure of the outer grenade (CV joint).
There are two options here:
- signs that your grenade has already broken,
- signs that the grenade will soon come out and break.
How to understand that a grenade will soon break.
Of course, the first sign of a malfunction of the external grenade is a crackling sound. If you hear a crackling noise while driving with the steering wheel turned, it is definitely a CV joint. The greater the angle of rotation of the wheel and the harder you press on the gas, the louder the clicks.
Another sign that does not always appear is vibration on the steering wheel at speeds greater than 80 km/h. The vibration is only slightly similar to the vibration from an unbalanced wheel. It usually manifests itself as a slight twitching of the steering wheel.
How to understand that the outer CV joint has broken.
If the CV joint breaks, the car will stop moving. In any gear engaged, press the gas, the speed increases, but the car does not move.
How to understand that it is the outer CV joint that has broken, and not the internal one or the clutch in general (the first signs of failure are similar to the signs of a clutch failure)? First of all, start the car and put it in any gear. Next, open the hood and look in turn at each of the shafts going from the box to the wheels (one short, the other long). If any shaft is spinning, it means that the CV joint has broken on this side.
I recommend not just visually looking at the shaft, but touching it with some long, hard object, such as a stick. The main thing is that there is nothing on it that can wrap around the shaft!!! When you touch the shaft with a stick, if it is spinning, you will feel a slight vibration. This is usually done in the dark, because it is difficult to understand whether a cylindrical object is spinning, especially in the dark.
CV joint with ball bearings
In general, the part is a housing with a driven shaft (trunnion), into which a holder (knuckle) is inserted. On the inner surface of the body and the outer side of the cage there are guide grooves along which six balls move, held by the separator. The splined part of the drive shaft is inserted into the central hole of the knuckle. To ensure stable operation, the installed hinge is filled with lubricant and sealed with a rubber or silicone boot. For ball CV joints, thick lubricants with molybdenum disulfide are used.
Tripod CV joint with needle bearings
A tripoid grenade design is often used as an internal hinge on modern cars:
In the body of such a hinge there is a three-beam fork, pressed onto the splines of the driven shaft. Three working rollers are attached to the ends of the fork, which can move along the guide grooves of the body when the unit is rotated or axially displaced.
To protect tripod joints from wear and metal scuffing, special synthetic compounds without solid additives are used.
Features of the tripoid joint
Due to the use of needle bearings, tripoids are more resistant to wear, and friction losses of elements in the assembly are also reduced.
Characteristics of tripoid CV joints:
- Possible bending angle up to 18 degrees,
- Maximum axial movement up to 55 mm,
- Engine and gearbox vibration compensation more than 60%.
Also, the tripoid cannot immediately fail, immobilizing the car, which is important for lovers of off-road driving. Despite the sharp crunch and vibrations that arise, the emergency tripoid CV joint will allow you to get to the repair site under your own power.
Ball joint advantages
Which spark plugs are best for the Lada Granta 8 valve: top 9 best spark plugs, which ones are best to install
The six-ball design with compact external dimensions is highly reliable and wear-resistant. The load is distributed over a large contact area, so the CV joint can transmit high-intensity torque without negative consequences for the part.
Also, the ball joint has a large angle of rotation of the cage, minimal play between the elements and, accordingly, low vibration loads when the machine begins to move. The principle of operation of CV joints when the vehicle is moving is modeled in the following video:
Characteristics of the inner ball CV joint with straight pitch grooves:
- Possible bending angle up to 22 degrees,
- Maximum axial movement up to 50 mm.
Indicators of the external hinge “Rtseppa” with radial guide grooves:
- Possible bending angle up to 54 degrees,
- Axial movement is not permitted by the design.