2283-15-14-07
By pressing the lamp and turning it counterclockwise, remove the combined brake signal and side light lamp from the holder.
By pressing the lamp and turning it counterclockwise, remove the combined brake signal and side light lamp from the holder.
By pressing the lamp and turning it counterclockwise, remove the combined brake signal and side light lamp from the holder.
We install the new P21/5W lamp in the reverse order. The protrusions on the base of the combined brake signal and side light lamp are located at different levels and during installation must fit into the corresponding grooves in the holder socket.
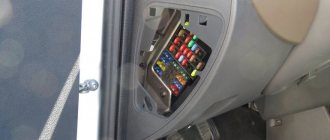
Instructions on how to dismantle plugs on Largus
To dismantle the plugs and subsequently install additional lighting devices instead of the plugs, we proceed according to the following algorithm.
- We remove the standard stern lights. For this purpose, unscrew a couple of screws and disconnect the connectors.
- Now we remove the upholstery from the internal panels of the body pillars of the Lada Largus trunk.
- We remove three fastening components holding each pad on the outside, and the same fastening clamp from the inside.
- We remove the pads. In the 7-seater version, you will additionally need to remove the window fastening elements, pistons and bolts securing the seat belt holders.
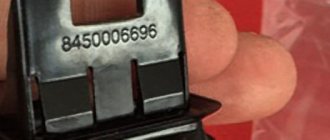
- Next, we remove the studs from the plugs, which after installing the optics will need to be screwed into identical mounting sockets.
- We install the lighting fixtures in place of the plugs and secure them with nuts.
- After connecting to the network, we check the functionality of the devices.
- After making sure that everything works, you can begin installing the standard optics.
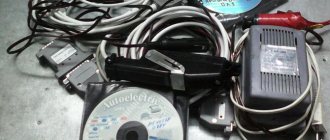
To connect additional Largus optics according to the attached diagram you will need:
- Disconnect the terminals from the battery.
- Connect the wiring of new devices to the section of the cable network that provides power to the main optics.
- The wires in these lighting devices are marked in different colors, where: the yellow cable is responsible for the side lighting, the black cable is ground, and the red cable provides the functionality of the braking mode signal.
- The cable network of pre-installed optics is marked as yellow, black and blue cables. They respectively provide connection: brake signal, ground and dimensions.
- We insulate the connection areas of the cable ends.
- Before checking the operation of the installed devices, we connect the battery.
- Turn on the side lights and press the brake pedal.
This is how you can make tuning on your car and instead of plugs, install additional rear lights, which are decorative in nature.
2283-15-14-08
Similarly, we replace the turn signal lamp (PY21W) and the fog light lamp (P21W) (reverse lamp in the right lamp).
Similarly, we replace the turn signal lamp (PY21W) and the fog light lamp (P21W) (reverse lamp in the right lamp).
Similarly, we replace the turn signal lamp (PY21W) and the fog light lamp (P21W) (reverse lamp in the right lamp).
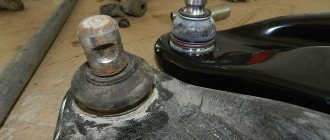
PTF from reflectors.
The next day I removed the rear bumper reflectors. Carefully cut the diffuser from the base with a construction knife. We glue sealed LED strips (I used SMD 5050), two in each reflector, 9 pcs. in each segment.
It turned out to be two rows of 18 LEDs, the third row did not fit. Having drilled holes in the base of the reflectors, I ran the wires through there and soldered the tape to the finished two-pin connector so that it could be removed if anything happened. I sealed everything, and for tightness and reliability I soldered the edges with a soldering iron, it’s still not visible.
Left reflector.
I ran the wires from the right reflector to the left along the rear bumper and further up the bumper to the left lamp. The ground wire for the reflectors (I had a green one, there was no black one) was connected to the headlight ground (black wire), and the power wire (mine was purple) was connected to the pink PTF power wire left over from last time. We don’t look at the numbering of contacts in the diagram, it doesn’t quite match.
2283-15-14-09
The turn signal lamp has two protrusions, located asymmetrically relative to the axis of the lamp, which must fit into the corresponding grooves in the holder socket.
The turn signal lamp has two protrusions, located asymmetrically relative to the axis of the lamp, which must fit into the corresponding grooves in the holder socket.
The turn signal lamp has two protrusions, located asymmetrically relative to the axis of the lamp, which must fit into the corresponding grooves in the holder socket.
Removing Largus taillights - search on DRIVE2
Brighter, brighter reverse (replacing bulbs and adding a light).
1. We do it from the back
PTF
reversing
2. We install lamps of higher brightness. I don't like cars with different lights at the back. That is, on one piece of glass there is a white window for ZH, and on the other there is a red window for PTF.
Removing scuffs above the rear lights - Lada Largus.
Largus has it
Another small problem that I fixed today.
The black trims above the rear
lights have three bumps with which they rest on the body and rub off the paint. The result is this or even worse when it is rubbed down to the metal.
Improved reverse gear without losing the rear PTF - Lada Largus.
Hi everybody! Today I’ll tell you about a modification to the rear
travel and
rear
PTF.
Everyone knows that Largus
only has one
reversing
, and it is located in the right
rear
light.
Repair of rear accessory 2nd generation flashlight - Lada Largus.
Review from the owner of Lada Largus
— electronics.
Lada Largus
2015, petrol engine 1.6 l., 105 l. p., front drive, manual transmission — electronics.
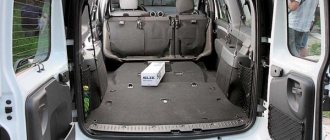
Installation of rear additional lights. — Lada Largus.
the rear ones were purchased
add. the lights sat in the garage for another month until I found the time to install them. I bought them at a car market in my city, took the first generation lights, there were also second generation ones available, but I didn’t like them.
Minus the rear fog light, plus the reversing light.
Review from the owner of Lada Largus
— electronics.
While installing the rear
view camera, I decided to disassemble all the panels
Further in the left lamp for removal
inserts, you must first insert this insert into the lantern itself, snapping off the two ears, and then remove it with narrow-nose pliers.
Diodes in reverse. — Lada Largus, 1.6 l., 2015
Review from the owner of Lada Largus
— electronics. hi all. As soon as the agent returned home after the repair, he immediately began to receive good money.
How to shoot
I won’t paint lanterns, everyone knows that, but it’s cold outside and I wanted to put them up quickly. We took it apart and compared the lamps.
Correct connection of the tow bar and rear accessories.
Finally it turned out to be a relatively warm day, I had some free time and I decided to connect the electrics to the previously installed additional rear
lights and tow bar (www.drive2.ru/l/524122075749680777/).
Second reversing light! — Lada Largus, 1.6 l., 2014.
Review from the owner of Lada Largus
— tuning.
I always didn’t like this Euro standard with one reverse
!
2283-15-14-10
Each lamp holder socket is marked with the type of lamp.
Each lamp holder socket is marked with the type of lamp.
Each lamp holder socket is marked with the type of lamp.
Install the rear light in the reverse order.
[How to save on maintenance of Lada Largus] [Maintenance of Lada Largus at 15,000/45,000/75,000/105,000 km] [Maintenance of Lada Largus at 30 thousand km] [Maintenance of Lada Largus at 60 thousand km of run] [Maintenance of Lada Largus for 90 thousand km of run] [Maintenance of Lada Largus for 120 thousand km of run] [Independent maintenance - general recommendations] [Safety rules for self-carrying out maintenance] [Tools required for carrying out maintenance Lada Largus maintenance] [Lamps used in the Lada Largus car]
Changing the lamps in the rear light of Lada Largus
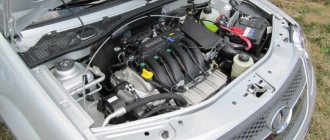
Some technical characteristics and general description
In order not to buy a pig in a poke, having decided to stylishly tune your car, it is advisable to familiarize yourself with the proposed description of the technical characteristics of the product. What material is the additional lighting made of, how long will it last, and how justified is such a purchase? Let's figure it out together. A meager description on the packaging is one thing, and an objective view from the outside is another.
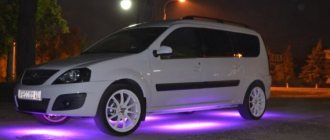
Let’s say right away that such lights shine really well on Largus. It is also noteworthy that this illumination is practically indistinguishable from the illumination of the main lights and is, in fact, its logical continuation. This will definitely emphasize the individuality of your car and will be a simple, but at the same time effective visual tuning.
When it comes to light source technology, LED lighting is currently the most technologically advanced. It is capable of providing high-quality light for tens of thousands of hours and for at least ten years. Such lamps are also not afraid of low temperatures, are economical and shock-resistant. They do not heat up the lamp body like outdated halogen samples. In general, it’s a pleasure.
The red impact-resistant ABS plastic of the lampshade also looks very presentable and reliable, which adds overall points in favor of purchasing the product. After installation, the lights will hardly stand out in any way. The product looks natural and harmonious, as if the lamps were installed there from the very beginning.
The price of such “pleasure” is approximately 3 thousand rubles. It largely depends on the region of the country and the dealer offer of a particular store. You can hardly find a simpler and cheaper tuning of your car. Therefore, from this point of view, this acquisition also seems very attractive. The only thing that upsets us is the cost of installing the lamps at service centers.
Why is it profitable to install additional rear tuning lights on the Lada Largus yourself?
Official service centers estimate the cost of what we are about to tell you at about 3 thousand rubles (the price of the work is commensurate with the cost of the product). The most generous offer from a service center that we saw on the Internet was only 1,500 rubles. It’s unlikely that anyone will want to tinker with your car for less money except you. You can install additional taillights on your Lada Largus yourself, spending about an hour on everything and saving a decent amount of money.
The manufacturer even kindly includes instructions, once again explaining how these lamps are installed correctly. You will hardly need the above-mentioned manual, because you will get all the necessary information from our article. By understanding the algorithm of actions in advance, you can avoid a lot of unpleasant moments of inept and blind tuning.
Cost of lamps
All of the above lamps can be purchased at almost any auto store. For example, a Philips H4 Premium +30 low beam lamp installed from the factory costs about 120-150 rubles. PTF lamp H11 Philips Eco Vision about 500-600 rubles per joke. All other lamps cost no more than 40-50 rubles.
For 15 years I have been repairing various types of cars, including brands such as VAZ, UAZ, Chevrolet, Mazda, Kia and many others. Everything related to the gearbox, engine or chassis. You can write me your question below in the comments and I will try to answer it in detail.