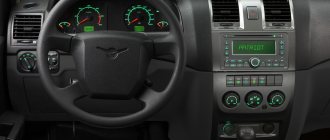
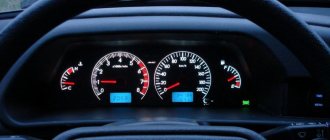
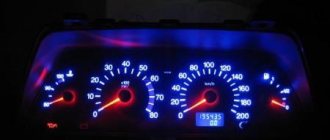
Tuning the instrument panel of VAZ 2114
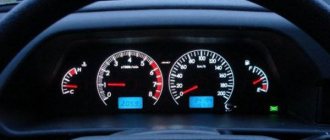
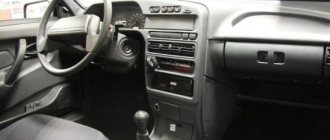
Today, many car enthusiasts are interested in tuning the VAZ 2114 panel. This is explained by its design, which is perfect for this activity.
In general, if we talk about the 2114th model, it should be noted that it is one of the last, well-designed and executed models of the VAZ “family” of cars. For most, do-it-yourself VAZ 2114 tuning in general, and interior improvements in particular, is just a matter of replacing seat covers.
However, this is a deep misconception; there are many objects in the salon that can be beautifully updated. Throughout the history of the VAZ 2114 brand, it was believed that interior tuning is a large-scale, multi-level complex of work, which consists of many different actions to improve various elements and, of course, among others, the instrument panel.
Dashboard buttons
The buttons also have a specific location in the AP layout.
Control buttons on VAZ 2114
Each of them has its own purpose:
- The button located to the right of the speedometer allows you to switch the time and temperature on the electronic display. If you press it for more than 5 seconds when the car is at rest, the current mileage readings will be reset.
- To the right above the speedometer on the dashboard there is a combination of two buttons. Using the button with the image of 2 headlights, the side lights are turned on. The button with one headlight is used to turn on the low beam.
- The button, which shows a headlight with inclined strokes, is designed to turn on the front fog lights.
- A button with horizontal strokes is used to turn on the rear fog lights.
- The button with a rectangle allows you to turn on the function that will heat the rear window.
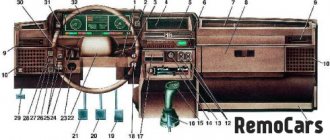
It’s not difficult to understand all the indicators, APs and buttons if you have a layout diagram in the car’s manual. This article helps you understand all the notations.
To summarize, we can say that the AP panel displays the following useful information:
- technical characteristics of the vehicle, the degree of its safety at the time of movement;
- availability of gasoline, level of working fluids;
- information about the dynamics of movement: speed, crankshaft speed, etc.;
- operation of various vehicle devices;
- other useful information, such as time, temperature, etc.
LED instrument panel VAZ 2114
Various sensors and measuring instruments included in the electrical circuit of the car allow you to obtain this information. Since the design and connection diagram of the AP is simple, it is easy to disassemble and assemble. Therefore, if you wish, you can perform tuning, make an overlay, insert additional elements, you can make backlighting from LEDs.
If any indicators on the dashboard begin to light up, you should react to this immediately. A fault detected and corrected in a timely manner will make it possible to avoid problems on the road and extend the service life of the vehicle.
Comprehensive modernization of the VAZ-2114 instrument panel: first steps
Most often, a set of works to improve the dashboard of a VAZ 2114 is important and necessary, but at the same time, an interesting and serious task. The main task is to choose the right details and decorate them beautifully. It is always better to think through all actions related to various updates in advance, in advance.
Subsequently, this will avoid unnecessary mistakes and disturbing fuss. The right decision would be to draw up a work plan that you will follow and thanks to which you will not make mistakes, and the whole process will be a complete pleasure for you.
Possible malfunctions: signs and causes
The PCB is an electronic unit, therefore, like any other device, malfunctions may occur in its operation.
What problems may a motorist encounter:
- The instrument backlight has stopped lighting, but all sensors and indicators are working normally. In case of such a problem, the fault must be looked for in the safety device marked F16. This fuse is responsible not only for the backlight in the tidy, but also for the turn signals, light alarm, and reversing lights. Therefore, if the turns and emergency lights work normally, then the reason should be sought in an electrical circuit break or short circuit.
- The tachometer or speedometer is not working correctly. As stated above, in such cases, you must first check the sensors - crankshaft position, as well as speed. If the sensors are working, then perhaps the problem lies in their poor contact with the car’s electrical network or damage to the connection wiring.
- Only some of the dashboard lights do not work, while all controllers function correctly. In case of such problems, the reason most likely lies in the failure of the lamps on the device; if they burn out, the devices should be replaced with new ones.
- The needle on the fuel level and coolant temperature sensors does not rise or has risen to the highest point. If the arrow lies, then most likely the cause should be looked for in the sensors and electrical connection circuit. The DTOZH in the “Four” is located in the cylinder head, and the fuel level controller is located in the fuel pump. Before replacing a failed device, you need to check the functionality of the connection wiring and contacts. If the arrow rises to the highest point, then most likely there is a short circuit in the electrical circuit. To find the problem, it is better to use the services of an electrician.
- If the panel as a whole is working normally, but some controllers are functioning incorrectly or malfunctioning, then the reason should be sought in the electronic circuit. There may be malfunctions in the processor (video author - Sergey Koshkin).
Tuning the dashboard can be performed in the following sequence:
- First you need to disassemble the car “device”. Every car enthusiast should know how to remove the instrument panel of a VAZ 2114. There is nothing complicated here, everything is quite clear, and the process itself does not require special skills or knowledge.
- Then it is necessary to refine the elements and parts. There can always be many nuances here. They depend on what you want to change and improve in your car. Everything should be thought through very carefully.
- At the end, you need to install the remade, updated “socket” into place.
Backlight
Often, standard light bulbs burn out due to power surges, and some elements of the dashboard are not illuminated. To replace the backlight, a novice driver will have to partially disassemble the panel, remove it, and replace the bulbs. I've already removed the dashboard 4 times and have adapted to bend my hand so that I can indiscriminately change a light bulb from under the panel. But I recommend that you use the following article: How to replace the instrument cluster lighting?
Using colored diodes, you can achieve the desired result for any car enthusiast. It is also worth considering that when replacing the backlight with another one, you need to use an additional resistor along with the diodes, and you need scattering diodes, and not ordinary ones that shine at one point.
How to easily update the “tidy” of a VAZ 2114
Upgrading the 2114's dashboard is actually not as complicated as it might seem at first. Buying such a “device” is quite simple. You should consider what options owners can use to update their VAZ 2114 wardrobe (examples in photos and videos).
1. AMS. This model has several features.
- To begin with, it is worth noting that you can order its design yourself;
- This panel is equipped with an integrated oil indicator, which is missing in the classic version. Its appearance is associated with the very persistent requests of many car enthusiasts to install this “component” as standard.
- This instrument panel looks more interesting due to the colored scales with chrome trim.
2. PRO-SPORT. This “tidy” is designed as an overlay for the instrument panel on the presented model. The updated design of this device gives them an impressive, completely new look. There are two options for its execution: with a light and dark backing. The backlight of the VAZ 2114 panel has a special brightness adjustment, but there is only one color - blue. The scales are glued after installing the insert. This is to give this element of the car an original look.
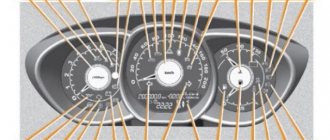
3. AMS-2. The central instrument was the tachometer, which was moved from left to center. The white scales create an overall sporty look for the entire panel. This allows you to quickly read the necessary information from it. The backlight has been redesigned and LEDs are used, with the help of which it is not difficult to read information at night. Installation is recommended to be carried out by qualified specialists, since its installation involves significant “redevelopment” of the classic model.
4. STREET STORM. The main feature of this model is its color design. Nothing was changed in the classic arrangement of instruments,
the emphasis was on the color scheme. The “appearance” of the dashboard has undergone certain changes, however, at the same time, its style fits harmoniously into the existing interior. Another feature of this model should be noted – its backlight. During the day it is light with red symbols. In the dark, you can easily change not only the brightness, but also the color.
5. "North Wind". This model is different in appearance. The developers have shown that even with a standard arrangement of instruments, the entire panel looks dynamic and bright. It clearly shows sporting features. The color of the backlight depends on the shade of the insert scales.
Wiring diagram VAZ 2114 injector - mounting block
Wiring diagram of the mounting block VAZ 2114 injector 8 valves with a full description
K1 - relay for turning on headlight cleaners; K2 - relay-interrupter for direction indicators and hazard warning lights; K3 - windshield wiper relay; K4 - lamp health monitoring relay; K5 - power window relay; K6 - relay for turning on sound signals; K7 — relay for turning on the electric heating of the rear window; K8 - headlight high beam relay; K9 - relay for low beam headlights; F1-F20 - fuses; X11 - terminals of the wiring harness block. The power supply circuit of the injection systems is protected by a fuse-link made of wire with a cross-section of 1 mm. Powerful consumers (starter, headlights) are connected to the VAZ 2114 injector wiring diagram via a relay.
F1 (10A) - Headlight cleaners. Relay for turning on headlight cleaners (contacts). Valve for turning on headlight washers.
F2 (10A) - Direction indicators and hazard warning relay-breaker. Hazard warning lamp.
F3 (10A) - Rear lights (brake lamps). Interior lighting.
F4 (20A) - Rear window heating element. Relay for turning on the heated rear window. Socket for portable lamp.е
F5 (20A) - Electric motor of the engine cooling system fan and switching relay (contacts). Sound signal and relay for its activation.
F6 (30A) - Power windows for front doors. Relay for turning on electric lifts.
F7 (30A) - Headlight cleaners (in operating mode). Relay for turning on headlight cleaners (winding). Heater fan motor. Window washer motor. Rear window wiper motor. Rear window washer timing relay.
F8 (7.5A) - Left fog lamp.
F9 (7.5A) - Right fog lamp.
F10 (7.5A) - Left headlight (side light). Left rear light (side light). License plate lights. Engine compartment lamp. Instrument lighting lamps. Indicator lamp for external lighting. Heater lever illumination display.
F11 (7.5A) - Right headlight (side light). Right rear light.
F12 (7.5A) - Right headlight (low beam).
F13 (7.5A) - Left headlight (low beam).
F14 (7.5A) - Left headlight (high beam). Indicator lamp for turning on the high beam headlights.
F15 (7.5A) - Right headlight (high beam).
F16 (15A) - Direction indicators and relay-breaker for direction indicators and hazard warning lights (in turn indication mode). Turn signal indicator lamp. Rear lights (reversing lamp). Gearmotor and windshield wiper activation relay. Generator excitation winding (when starting the engine). Oil pressure warning lamp. Air damper control. Coolant temperature gauge.
The VAZ dashboard has an electronic combination, as well as conveniently located backlighting. The lamps are illuminated from the inside, which is a feature of the 14th Lada.
Thanks to the instrument panel, the driver knows all the information he needs, what is the reserve and consumption of gasoline, mileage, etc. The panel should be easy to operate with a clear overview of the icons, scale, gauge and indicators.
What is the state of the automobile systems responsible for road safety, driving speed, the rest of the way to the intended object, rational engine operation and gasoline consumption, the operation of the suspension and electrical equipment - all this should be reflected on the control panel.
Signal lamps and equipment control devices must be required on the panel. There are a total of 19 symbols on the panel.
Tuning for your pleasure
The main thing in the process of modernizing any car is efficiency. Every owner would like his car to look original and, at the same time, to feel comfortable in it. Oddly enough, the instrument panel is considered one of the favorite parts for tuning enthusiasts. It can be modified in different ways and, thus, distinguish your own car from a huge number of similar machines.
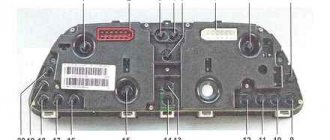
At the starting stage, it is necessary to prepare the material for work. Replacing a VAZ 2114 panel or its original update requires dismantling the standard panel. It will only be necessary to remove the speedometer protective glass. It is important not to break it. After removing the protective glass, you need to “uninstall” the arrows and indicators.
It is important to be careful as the arrows are very fragile. After that, pull out the standard tab. Then you need to change the backlight bulbs. The standard ones were green, but the purchased ones will be blue. We replace standard light bulbs with purchased ones, then check how they work. After that, install a new tab.
All this will look very impressive. At the end we install directional arrows and protective glass. If you modify your car in this way, it will look very beautiful.
Tuning options
You can perform tuning in several ways:
- cover the panel with leather;
- paint;
- install overlays;
- combine materials.
Before tuning the dashboard yourself, you need to familiarize yourself with the rules and the car’s passport. You cannot use fur or ordinary fabric to cover the panels; the paint must be automotive grade. This is due to the operation of the stove, since as a result of high temperatures, ordinary paint and the described materials will begin to disintegrate and release harmful substances.
Before tuning the dashboard yourself, you need to familiarize yourself with the rules and the car’s passport.
You also need to take the choice of colors seriously. The color of the covers and interior trim are taken into account. If black and white are combined in any way, then when selecting other shades you need to use special tables of color combinations.
Panel painting
One of the simplest and most affordable options for tuning the VAZ 21114 dashboard is painting it. Here you can do everything yourself.
The procedure for painting the dashboard:
- The surface is thoroughly cleaned from dust and dirt. To do this, use a soft sponge and a regular soap solution.
- Sanded with fine sandpaper (P240, P280, P320, P360), this will help improve paint adhesion. The panel is also degreased using a special product for plastic; if this is not available, you can use compositions based on white spirit, dishwashing detergent or wet hand wipes.
- The sealant is applied. This is done at the points where the panel comes into contact with other body elements.
- Painting is in progress. In order to properly paint the VAZ 2114 panel, it must be dismantled
The paint can be applied with a brush, roller or spray. In any case, if the panel is not removed from the car, it is necessary to completely cover all areas that will not be painted. To do this, use masking tape. To properly paint the dashboard, it is recommended to remove it from the car. Although this is an easy way to remodel a dashboard, the work must be done carefully, and if you doubt your abilities, it is better to leave it to the professionals.
Panel cover
Another option for tuning the dashboard is covering it with artificial or natural leather or carbon fiber.
The procedure for covering the dashboard:
- Replacing dashboard bulbs on a VAZ 2114 – what bulbs are needed, how many pieces
- The dashboard is being dismantled.
- The pattern is being prepared. To create a pattern for a specific panel element, remove it and cut out the required piece of material in accordance with the shape that will be pasted over, this is done with a small allowance. The pattern is made in accordance with the shape of the element to be pasted over.
- The dashboard is cleaned of dirt and degreased.
- The panel is pasted over. The adhesive composition is selected taking into account the material used for pasting, so as not to damage it during interaction. It should be taken into account that the panel gets very hot in the sun, so the glue must withstand high temperatures. A one-component polychloroprene adhesive is suitable for this; it must be heated to 60 °C to ensure a reliable connection (“Glue-88”, GTA Boterm, Mah). There is no need to heat polyurethane glue; it can be “Moment” (well suited for leatherette), Kaiflex K414, “Titanium”, “Demoskol”. Most often, the panel is covered with artificial or natural leather, carbon fiber
Video: covering the panel with rubber material
Installation of overlays
You can transform the dashboard of a VAZ 2114 using special overlays. davydvolodin: 06/12/2019, 1:04 pm I removed the point about the price because I also didn’t understand what exactly the author wanted to say. On Avito the overlay is sold for 200 rubles. In online stores, plastic panel covers, yes, from about a thousand.”>They are sold in almost all car stores. This tuning option allows you to change the color of the backlight. This occurs through the use of transparent elements and light filters of different colors. Such overlays must be installed correctly so that there is no distortion or displacement, otherwise the illumination of the devices will be uneven. It should also be taken into account that if light filters are too dark, the power of the factory light bulbs will not be enough, and they will not be able to properly illuminate the devices through such overlays.
The dashboard can be transformed using special overlays
In addition, you can install soft pads on the instrument panel. Unlike a rigid standard panel, they have better sound absorption, are more scratch resistant and have a shelf for small items. The cost of the instrument panel overlay is 1200–1500 rubles.
You can install a soft pad on the instrument panel
Europanel installation
Relatively recently, European-style dashboards began to be installed on the VAZ 2114. They have a more modern design and are made of high-quality materials, so they have become very popular among owners of the old-style VAZ 2114.
Europanel has a more modern design and is made of high quality materials
Installing the Europanel is not difficult, since it is designed specifically for the VAZ 2114 and is simply mounted in place of the old panel. The presence of several drawers for small items makes this solution more convenient. Among the disadvantages of the Europanel, owners note that the movement of the heater control levers is rather tight.
Video: installation of europanel
Improved backlight
To achieve a unique visual effect, one of the options for tuning the dashboard is to change the instrument lighting.
Work order:
- VAZ 2114: designation of the instrument panel, indicator lamps, buttons and BI BSK-10
- Removing the instrument panel.
- Removing protective glass.
- Removing the arrows.
- Removing the standard cover.
- Replacement of standard light bulbs. Green backlighting is installed at the factory. It can be changed so that the illuminated dashboard is in harmony with the rest of the dashboard and interior of the car. Typically, multi-colored LEDs in a plastic socket, a DSM LED or LED strips are used for this. It must be taken into account that the car's electrical voltage is 12 V, and the LEDs operate on a power supply of 2–3.5 V (this depends on the color) and have polarity. If you mix it up, the LEDs will immediately burn out. You can purchase ready-made clusters designed for 12 V, or make such a cluster yourself. To do this, several diodes are connected in series to achieve the required voltage. If you take 3 diodes of 3.5 V each, then you need to additionally set the resistance to 100–150 Ohms. Changing the backlight of the dashboard can improve its appearance
- Reassembly of the structure.
Video: Changing the dashboard backlight
Tuning instrument needles
It is quite simple to implement this type of dashboard tuning, such as improving the instrument needles. In the standard design, the lighting of the heating equipment is yellow, the buttons are green, and the indicators are orange. Many people don’t like it because it resembles a parrot and makes it difficult to feel comfortable while driving at night.
To improve the instrument arrows, you need to disassemble the instrument panel and install a red, blue or other color LED under each arrow. To prevent light from scattering, a piece of heat-shrinkable tubing is placed over the diode. The wires from the diode are connected to the heater backlight. As a result of such changes, the instrument needles glow with a rich color.
You can make additional illumination of the arrows
419c7cu-960.jpg
To begin with, the question arises: what is it good for? The old panel was made, to put it mildly, quickly: the steering wheel covers part of the instruments, the “tidy” itself is reflected on the windshield at night, thus turning the road into a computer quest.
Plastic, or rather its quality, does not stand up to criticism. After traveling several hundred kilometers, the entire cabin is filled with an obsessive creaking and terrible roar. Later the glove compartment begins to open. Ventilation is poor and it is cold inside the car in winter. However, all these problems can be solved. However, is it worth buying a car and immediately thinking about repairing it?
Another thing is the Europanel. She looks modern and fashionable. The material is softer and richer. It is certainly less noisy. Ventilation is also good.
Domestic assembly can be felt everywhere. The air flow control levers move slowly and do not reach the edges of the slots. There are also other little things: there is a big gap somewhere, something else falls off, the glove compartment sometimes opens by itself. But in terms of quantity and frequency, this is completely incomparable with the old version.
In addition, several drawers for small items warm the soul. Europanel is a modern and original solution to many problems associated with the “tidy” of domestic cars.
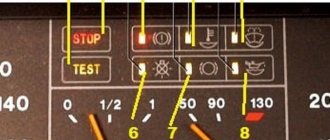
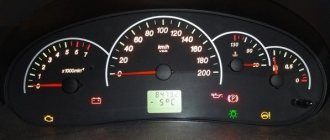
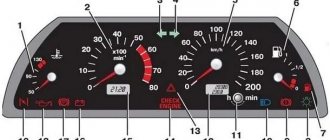
Light indicators on the dashboard of the VAZ 2114
Icons on the instrument panel under No. 3 and No. 4 indicate that the left and right turn signals are on, respectively. Icon No. 8 tells the driver that the side lights and/or exterior lighting are on. If icon No. 9, with an exclamation mark on it, lights up, then there is a problem in the operation of the car’s braking system. In most cases, it may be a low brake fluid level; add fluid to the reservoir. Icon No. 10 on which a headlight is drawn indicates that the high beam headlights are on. Button No. 11 next to the liquid crystal display is used to reset the daily clock and set the clock. Icon No. 13 lights up when the hazard warning lights are turned on. Indicator No. 14 “ ” when the engine is running informs the driver that there is a malfunction in the car’s engine. Liquid crystal display No. 15 – shows the current time and temperature outside the car. Indicator No. 16, which shows the battery, lights up when the ignition is turned on and goes out after the engine starts. If there is a problem with the generator not working, it may light up or flash. Icon No. 17 P in a red circle indicates that the parking brake (handbrake) is engaged. Indicator No. 18, which shows a red tap, indicates insufficient oil pressure in the engine lubrication system. Low oil pressure can also result from low oil level. Indicator No. 19 indicates the position of the air damper, if installed on the VAZ 2114
