To increase safety (so that the driver does not start driving with the door open and for the alarm to work), cars are equipped with open door sensors (popularly “limit switches” or “limit switches”). Their malfunction causes the interior lighting to work incorrectly and prevents the car from being armed. Let's figure out how to check and, if necessary, replace door switches.
Lada Granta "SONN" › Logbook › Connecting standard door switches
Good day to all!
Like many non-luxury grant drivers, after the purchase I learned with horror that the car only has one door switch, on the driver’s side. Of course, when installing the signaling, 3 more missing limit switches were installed. But who knew that they were already installed in the locks. Even the alarm installer was not in the know. AVTOVAZ simply regretted running the wires into the doors to connect them. At first I thought that the limit switches were even better in rapids, but winter put everything in place. In winter, the rubber band on it becomes stiff and the end switch “sticks” when pressed. But that's not all. I noticed that when the car is loaded (5 people in the cabin), when making sharp turns, sometimes the light in the cabin comes on, so the body plays and the door moves back a little, releasing the limit switch. As a result, almost immediately I wanted to convert everything to limit switches in the locks. But it took me a long time to get ready, the car is almost two years old and I just got around to it. But the work took less than two hours, I did it alone. For now I limited myself to the rear doors. The front ones are completely noisy, I don’t want to open them. YES and they work better.
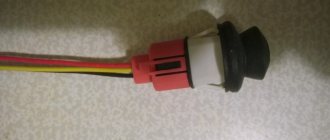
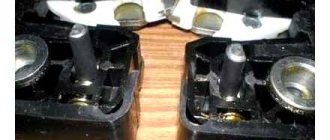
Installation: As it turned out, the terminal blocks do not have terminals for limit switches, so in addition to the wires, you also need to install terminals. In the vastness of the drive I found that the terminals from the ISO connector of the radio are ideal for this task. Thanks bimulyk for this.
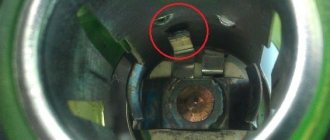
ISO connector of the radio. Carefully remove the terminals from the connector of the radio, do not look at the bottom part in the photo above