I am sure that all Samara owners, both 2108-09 and 2113-14, are not satisfied with the trunk lock, to put it mildly. Therefore, I propose to work a little and correct this drawback by tuning the trunk lock from Kalina and installing it instead of the standard lock on the rear door (trunk) of a VAZ 2114 or 2113.
To bring the castle to life, we will need:
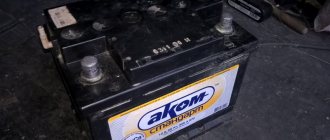
- lock from Lada-"Kalina" (No. 1118-5606010-10);
- time;
- small corner 30 x 30 mm, 1-2 mm thick;
- one M6x 50-60 bolt and two M6 x 25-35 bolts, as well as 4 M6 nuts and washers;
- trunk lock motor;
- a short cable, traction is also suitable;
- drill;
- Bulgarian;
- needle files and files;
- hacksaw for metal;
- keys for 8 and 10;
- vice;
- crimp for terminals;
- pliers;
- lighter.
I thought for a long time about what to put. When I went into the store and saw the Kalina lock, I realized that this was what I would need. Unfortunately, you can’t just install it because it looks more like a door lock than a trunk lock, so it needs improvement. I decided to try to do it myself.
Namely, all the modification consists in the fact that you need to cut off the protruding metal on the top of the lock, you also need to shorten the “opener” lever a little.
Instructions for dismantling and replacing the mechanism
Buy a suitable device.
You can choose the appropriate part for your Lada Granta car. This is a good option because it has an electric drive and a limit switch. Unfortunately, when installing a part of this option, you will have to install your own fastening; you can make it from a small steel angle, for example, 40 * 40 * 4 mm. The corner can be cut with a suitable tool, for example, a grinder. It is important to take into account the dimensions of the purchased device, as well as the place where it will be installed. The manufactured metal part must be coated with a suitable color. Then plug the hole from the previously installed lock. To do this, you can use the plug from the manual window lifter.
It also needs to be painted the same color. If during installation of the product it was necessary to get rid of the wiper, you can use the wires coming from it and connect one to the drive of the part, and the second to the connector of the mounting block. Return the bracket and tighten the finished fixation device.
Trunk lock on VAZ 2109 from Kalina - can it be installed?
VAZ 2114 ignition switch replacement
Having entered a similar request into the search, I found scant information that people actually install locks from Kalina on their nines, after which they forget about all the problems. It seemed to me that I could forget about them too, so I made a list like this in my head:
- The lock is from Kalina (as it turned out during the search, you need it from a sedan, not from a hatchback, they are different in design).
- The mating part, which is attached to the body. By the way, it fits perfectly on the nine; you don’t have to drill any extra holes. But there are minor nuances that will be discussed further.
- Installing a Kalina lock means that the trunk will open only by electric drive (or by a lever from the inside). Therefore, you need to take a kit for the central locking - one gear motor, all the accessories come with it (screws, bar).
- For electrical wiring you need a button; it is not necessary to install a relay, since this will only load the entire circuit. But a fuse of 16 A maximum is worth installing. But 8 A is enough.
Kalina trunk lock on VAZ 2109: reality or myth?
Can a Kalina trunk lock be installed on a VAZ 2109 or not? And why should this mechanism be chosen? In this article we will try to shed light on all these questions. The trunk lock on the VAZ 2109 at one point became a real problem. And it all started unexpectedly - a hole opened on the bumps, and as it turned out, a tooth broke off. It was very early in the morning, so I tied the door to the body and drove on; I installed the new lock (and its counterpart) a little later that day. But then problems began - I changed the trunk locks every six months or a year, and once I got one so bad that his tooth fell apart after a couple of weeks.
The problem, it would seem, is not very serious, but how annoying it is is beyond words. And a couple of months ago it all started all over again - the Lyada knocks on the body, and on bumps it’s generally unbearable. While it was cold, I didn’t start repairs, but at the first rays of the spring sun I decided to get out to the car and see what was going on. This is where the story begins about how I managed to solve (so far partially) this problem.
Reasons for replacing the VAZ 2114 lock cylinder
- In the cold season, when you try to open a frozen lock, it turns out that it simply turns and does not open, and with excessive torque, the lock cylinder can come out of the handle socket along with the key. This problem is most often caused by the destruction of the locking ring and the falling out of the fixing post located in the plastic cap of the rod.
- Another variant of the problem may be the partial functionality of the lock cylinder. Over time, the internal pins of the lock and the teeth of the key wear out, then, when you try to turn the lock, the parts of the lock cling to each other and prevent it from turning. At first, this problem does not seem that serious, but over time, selecting the desired “position” of the key becomes irritating.
- The need to replace lock cylinders often arises when upgrading door handles to new domestic ones or to European handles.
VAZ 2114, 2115, 2113 technical characteristics. trunk volume of Lada 2114
Rule changes
Lada granta liftback technical specifications, dimensions of lada granta liftback. Load capacity of Lada Granta liftback. liftback lada granta trunk dimensions
Car owners who have been trained in driving skills and current regulations according to the old rules must take into account the change not only in requirements, but also in wording. Previously, traffic rules required drivers to “give way to pedestrians.” Now it is necessary to “give way.” From a legislator's point of view, this difference in definitions has a special meaning.
The driver previously had to abandon the intention to start moving at the permission signal if the person crossing the street is already on the markings and he only needs to complete his movement. Now it is assumed that the motorist must study the intentions of the citizens still on the sidewalk and if one of them expresses a desire to cross the road, he must yield and wait until he completes his maneuver.
The rights of pedestrians are now fully protected; if motorists follow traffic rules, citizens will not have to stop on the line separating the lanes of the roadway or change the trajectory of their path.
The second difficult moment for the driver will be the imposition of obligations on him to prevent congestion. In an urban environment, with frequent traffic jams, the intensity of which reaches 9-10 points, the car owner is often forced, in compliance with the requirements for permitting citizens, to stop directly at the zebra crossing. This is strictly prohibited by law and a motorist will have to use all his or her due diligence to avoid committing such an offence.
Lada 2114 white cloud › Logbook › Replacing the trunk lock 2114 with the Kalinovsky lock
A couple of months after I bought the car, a problem arose: at high speed, due to vibration, the trunk began to open. More and more often, imagine, driving at night, driving more than a thousand km, and the trunk opens every 50-70 km, it infuriated me, every time I stopped to close it, I tried to lock it with the key, and it opens again, and since the shock absorbers are new, The trunk opened completely. Well, there was nowhere to go, so I had to drive 1200 km overnight. There
I've already been fiddling around during the day, trying to move the lock and tighten/loosen the rubber bands on the door, but it's no use. With the same problems, I returned home a day later, and continued to drive, still opening up a couple of times a day on uneven sections of the road. And I realized that I needed to do something with the lock; a friend suggested installing a Kalina lock. I went shopping, but couldn’t find everything I needed right away. I bought a lock in one store, and a trunk button from 2110 in another, and an activator in a third. (but I couldn’t find the second part of the lock anywhere, there was no hook, so I decided to make it myself)
I arrived at the garage and started filming my own one, took it off quickly, tried it on and how it was. It was decided to attach it to the rear wiper motor mount.
cut off what was not needed
screwed it into place and looked to see if it was sticking anywhere
checked how the lock fits
Drilled holes with a drill and tightened them
It was decided to install a clutch cable from a motorcycle (Minsk) since the wire would dangle and rattle, but the cable was just right, especially since it was in a case.
I ran the wire to the button, through the trunk into the roof, there I wrapped it with electrical tape and put a fire-resistant hose on top of it, in case the wire was rubbed somewhere to prevent it from shorting out.
Then the wire went between the ceiling and the trim to the front window pillar, then along the pillar under the panel to the button.
Button
Yes, yes, I know that it looks terrible, but I whipped it up, for a while, until the Kalinovsky hook was delivered.
You can see in the photo that I had to trim the door cover a little so that the lock would close.
place of the lock drain, covered it with a sticker for a while
everything works perfectly, the trunk door fits tightly, and the main thing is that now I don’t have to run around to lock the key when I leave the car in the parking lot. I don’t know how much everything cost, since I bought everything in different stores and didn’t remember the prices.
The process of installing a lock on a VAZ 2109
This is where the fun begins - either I’m lucky, or others have had less luck, but it turned out that the lock from Kalina fits perfectly onto the bracket, which is already screwed to the boat under the rear wiper motor. True, I had to bend the petals a little and drill holes (from the trunk side). I found a photo of Kalina's castle and showed the excess parts with a dotted line - cut them off using a grinder or a hacksaw.
I immediately felt the disadvantage of this bracket - the connection is a little flimsy, so the lock can move and, as a result, the trunk of the Nine will not close. To make the connection stronger, you need a major corner. During my search, I came across a plate with perforation. I made a corner out of it and cut a hole for the lock lever (which opens the trunk). In the photo you can see this corner. You install it on the lyada and attach a lock to it. The rigidity is sufficient, so the door will not open while moving.
However, even if you use the first bracket, the likelihood of opening the trunk is extremely low. And now about the answer. In the photo you can see that it is screwed with the same bolts as the original one, into the same holes. One thing - I had to lift it slightly, for this I used two washers installed under the nuts of the cylinder head cover of the classic. They form beautifully, have a large support area, and the loop ultimately does not move to the sides.
To implement the electric drive for opening the Kalina lock on the VAZ 2109, a gearmotor with two wires was chosen. There is no point in taking five - there is no need for a limit switch. Check how the drive works - the rod is in the middle position, when connected to power (minus to blue, plus to green) it is retracted, when the polarity is reversed it is pulled out. Therefore, dance according to these parameters; for me it turned out to be more convenient to use the retraction mode, since it seems to me the most suitable.
Either now everyone has started actively repairing their cars, and at the same time their houses, but I couldn’t find a wire with a cross-section of about 0.75 square meters. mm. Well, maximum one and a half! Not anywhere, there is a yellow-green one (for grounding), and even that one is 2.5 square meters. mm. Therefore, the choice fell on a two-core one, the cross-section of each core is 0.5 square meters. mm. The Chinese usually use these in their household tape recorders. I screwed the gear motor to the bar and installed it on the trunk door. I screwed it onto the lock lever; to be honest, I don’t know what to call it correctly. Let this be an adapter that connects the lock rods and the drive spoke. This will probably be correct, but if not, then correct me. In the photo they are on the left in a bag.
These are the holes that appeared after I removed all the “unnecessary” stuff. And now all that’s left to do is to install the wires in the following sequence: cigarette lighter – button – motor output (green). The blue one, as you understand, needs to be screwed to the ground, fortunately there are plenty of bolts and nuts there. And the funny thing is that I removed the wiper and I already have at least three wires down to the steering column switches! I call and the choice falls on white with a blue stripe, and I use it as a feeder. And the purchased wire will be useful for something else. That's all, you try, evaluate, if necessary, loosen the fastening and move the lock body in the desired direction. And now one small “bonus”. There is a limit switch on Kalina's trunk lock, and I plan to use it to turn on the trunk lighting. I think the blue LED strip will be just right.
And to do everything as expected, you will have to use this circuit with a relay. The likelihood of damage to the button is reduced to zero. And the time has come to sum up and count the costs:
- Castle Kalina sedan - 450 rubles.
- The response part is 135 rubles.
- Electric drive - 170 rub.
- Button - 60 rub.
- Wire - 50 rub.
- Plank - 33 rub.
- Total - 898 rubles.
Is it advisable? It seems to me that yes, because in three years I have changed at least six locks! It is also advisable to install gas equipment to save on fuel. Each lock costs on average 400 rubles (once they were 350, and then the price went up). Therefore, it is better to do it once and for a long time. And if you got here, you obviously encountered a similar problem. It can be solved, do it, don’t be afraid, you won’t make it worse. Subscribe in the comments and share your experience. Perhaps someone has tried Grant's Castle? What are the advantages?
Didn't find the information you are looking for? on our forum.
Kit selection
Installation will not be possible if you do not have at your disposal a set of equipment necessary for installation. Buying it is not difficult, but you need to think about which specific option is best for you.
In total, 2 solutions to the current situation are being considered. Namely.
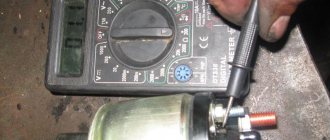
How to check current leakage on a car with your own hands and find the cause
Category: DIY repairs
- Factory set. Purchased from trusted and reputable manufacturers. The kit contains almost everything you need, so you don’t have to assemble different elements. But the price is naturally higher;
- Amateur kit. Here we are talking about independently preparing all the necessary components. The motorist is faced with the question of where exactly to get them and how to choose a set so that everything fits. It is difficult to do this without relevant experience and certain knowledge. But you can save a lot of money financially.
I don’t know what exactly you will choose, but I want to give one piece of advice. Buy an electric drive equipped with an inertia mechanism. This will allow you to turn off the drive when an obstacle appears in the path of the luggage compartment lid. Roughly speaking, the drive will not pinch your hand or head when you poke around in the trunk.
So the inertial mechanism is a very useful thing.
If we talk about assembling a homemade kit, then it is important to collect several basic elements. These include:
- power window module 2 pieces;
- 2 mechanisms for lifting glass;
- wires;
- diodes;
- electromagnetic relay;
- five-pin relays;
- four-pin relays;
- Relay connection block;
- springs for the lid lock;
- power tools;
- wiring;
- nuts, bolts;
- Bulgarian, etc.
As you can see, the set is quite impressive. Therefore, consider whether it is worth trying to assemble the kit yourself. Sometimes it is much easier and even more economical to purchase a ready-made factory kit with a guarantee and all the associated benefits. Price does not always play a key role.
Installing a new part
The removal and assembly algorithm is the same, although the instructions for installing the cylinder mechanism have its own nuances. Before inserting a new cylinder into the core, the part is lubricated with a silicone substance and only then inserted into the handle. Further algorithm of actions:
- The return spring is inserted next to the cylinder.
- The functionality of the key is checked. It should turn easily in all positions.
- A pin is installed on the tip of the rotary rod. Connection is being made.
- The inner and outer panels are screwed on, the handles are fixed, and the plug is returned to its place.
- The main three screws are tightened from the inside.
Recommendations
Reassembling and lubricating individual parts will not work if the fragments are heavily worn. It is better to remove the cylinder from the core and install a new one. Recommendations for replacing the VAZ 2114 door lock:
- Partial repairs or lubrication will only temporarily restore life to the closing mechanism. If problems arise, it is better to replace the entire cylinder.
- After installation, it is necessary to periodically lubricate the mechanism. Experienced motorists use silicone substances for this.
- The repair procedure is carried out in a well-lit room at a comfortable temperature.
- To change the element, you will need a set of screwdrivers, pliers and lubricant.
- Sometimes the springs have to be replaced along with the cylinder. They are purchased separately.
The cylinder fragment is sold as a set. The price depends on the manufacturer. If you buy a cheap Chinese version, it will cost about 150 rubles. It is better to give preference to VAZ spare parts. The cost of such a kit is 400-500 rubles.
Withdrawal procedure
Depending on the reason, a complete or partial replacement is performed. It is not recommended for the average person to engage in reassembly, since there are too many nuances in this process, but almost anyone can replace the mechanism. Step-by-step instruction:
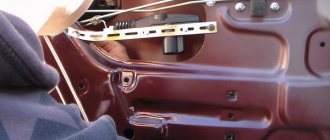
- Three screws are unscrewed. They are located on the inside of the handle. To do this, use a Phillips screwdriver to remove the cover.
- The front trigger glass position switch is removed along with the wiring harness block. To do this, the wires are first disconnected.
- The plug on the armrest handle is removed, the element is picked up with a thin corner of a screwdriver.
- Unscrew the 2 screws on the handle that hold the inner panel.
- The plastic clips are pressed out to remove the lining.
- 6 pistons are removed to remove the door card.
- The external fastenings are removed, the nuts are unscrewed with an 8mm wrench.
How to remove cravings
To remove this piece, you will need an impact screwdriver and a size 8 wrench. The piece is attached to the internal locking mechanism and the lock switch. Algorithm of actions:
- The internal lock of the outer handle rod is completely disconnected.
- The handle is removed along with the rods.
- The pin is removed from the end of the rods.
- The plastic tip is removed from the core of the cylinder device.
- The return spring is removed. The old larva is being removed.
Installing a new part
The removal and assembly algorithm is the same, although the instructions for installing the cylinder mechanism have its own nuances. Before inserting a new cylinder into the core, the part is lubricated with a silicone substance and only then inserted into the handle. Further algorithm of actions:
- The return spring is inserted next to the cylinder.
- The functionality of the key is checked. It should turn easily in all positions.
- A pin is installed on the tip of the rotary rod. Connection is being made.
- The inner and outer panels are screwed on, the handles are fixed, and the plug is returned to its place.
- The main three screws are tightened from the inside.
Replacing and adjusting the trunk lock on a VAZ 2108, VAZ 2109, VAZ 21099
Welcome! Want to learn how to properly replace a trunk lid lock? If yes! Then, in this case, we have prepared an article especially for you, after reading which you can easily replace the trunk lock on cars of the Samara family. The duration of replacing the trunk lock will be around 10-15 minutes, but if this is not the first time you are doing this work, then you can do it in 3-5 minutes. The entire progress of the work will be in photographs, making everything very clear to you.
Summary:
Adjusting the latch and replacing the trunk lock on a VAZ 21099:
Removal: 1) First, to remove the lock from the trunk lid, use a wrench or an extension with a head cap to unscrew the two nuts that secure the lock to the trunk lid.
2) Once the retaining nuts are removed, remove the inner lock from the cover by hand.
3) Next, remove the small spring from the same place and check its condition.
Note! If the spring suddenly becomes too compressed or skewed, replace it with a new one!
4) And then from the inside of the trunk lid, remove the button with the cylinder and check the condition of the button in the same way.
Note! Replace the lock button that is not working and also slows down when pressed with a new one!
Note! The trunk lid lock of the VAZ 21099 car is not dismountable, so do not try to repair it or do anything with it. If the lock is in a defective condition and is faulty, then it must be replaced with a new one!
1) First, put the entire system back together. That is, if you previously removed the button with the cylinder and a small spring, then install them in their places in the reverse order of removal.
2) Next, take the new lock in your hands and install it in its place, still tightening it with the same fastening nuts.
3) After installation, try closing and opening the trunk lid. If, when closing the lid, the trunk lock suddenly does not fit into the hole in the latch, usually in this case a distinct knock is heard in the area of the lock, and the lid closes very poorly, in this case:
• First, pick up the extension cord with the union head and use it to remove the two bolts that secure the clamp.
• Next, adjust the clamp and then screw these bolts back. Thanks to this operation, achieve clear closing and opening of the trunk lid.
Adjusting and removing the latch, as well as replacing the trunk lock on a VAZ 2108, VAZ 2109:
Removal: 1) At the beginning of the operation, remove the trim from the trunk lid, to do this:
• First, use a screwdriver to pry up the “10” pistons and then remove them.
• And after removal, remove the trim from the trunk lid of the car.
2) When the casing is removed, use a wrench or socket wrench to remove the two nuts that secure the lock to the cover.
Note! When unscrewing the nuts, be careful, because immediately behind one of this nuts there are two “negative” terminals, which can be very easily damaged!
3) Next, when the nuts are unscrewed, disconnect these two “negative” terminals from the metal stud.
4) And then remove the lock from the luggage compartment lid.
• Now let's move on to removing and adjusting the latch.
Note! If you do not want to remove it and know that it is well adjusted, then continue reading below, in the “Installation” section!
1) To remove the clamp, first unscrew the two bolts that secure the clamp using a wrench.
Note! If the trunk lid does not close well, or when closing the lid there is an impact in the area of the lock, then in this case, adjust the position of the latch by moving it in the desired direction!
2) Then use a screwdriver or hand to pry up the fastener and then remove it from the car body.
Note! If the trunk lid again does not close well and has vertical play, then in this case, adjust the position of the lock exclusively in height!
3) Finally, remove all shims.
Note! If necessary, increase or decrease the number of shims. This will make the trunk lid easier to close!
Installation: 1) To install the lock and door trim in place, follow the steps below:
• First, attach the new lock to the place where the old one was installed.
• Then put two “negative” terminals on one of the studs and then tighten both nuts securing the lock.
• And finally, install the casing in its place, securing it with ten pistons.
2) To install the lock, do the same but in reverse order, that is:
• Increase or decrease the number of shims.
• After this, install the lock retainer on top of these washers and subsequently adjust and tighten it with two bolts.
How to replace the trunk lock on a VAZ 2113-VAZ 2115?
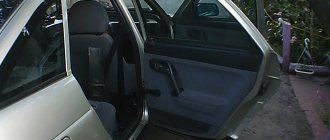
1) As for hatchbacks, the lock can be easily removed on them, but there will be no problems on sedans either, but the principle of replacement on two different bodies is different, first we’ll talk about hatchbacks, if you have a car with such a body, then remove them first the upholstery that is fastened inside the trunk lid with ten pistons, it can be removed very easily, all the pistons were pry off with a screwdriver and then the upholstery was put aside, for more details on how to do this, read the article: “Replacing a spoiler on cars”, point one in that Study the article in detail.
2) After the upholstery is removed, unscrew two bolts and thereby remove the lock from the car, but only when unscrewing the bolts, take into account the fact that under one of them there are several terminals, one of which goes to the tailgate wiper motor, and the other to brake light, well, that's it, the lock has been removed from the car.
Note! To adjust the lock on this type of car, take a spanner wrench (You can use a spanner if there is no spanner, there is simply a chance of breaking the bolts securing the lock) and use it to loosen the bolts securing the lock (Do not unscrew them completely, in this case, by the way, you are adjusting the position of the lock, because in a knocked down position, the trunk lid may be difficult to close, close with a blow, or it is very poorly fastened and opens at all on bumps), then move the latch in the desired direction, ensuring that the lock, when closing the trunk lid, enters the latch without strong force and that the trunk closes firmly (see photo 1), if you need to adjust the trunk lid in height (That is, the lid does not close well and there is play if you pull the lid), then in this case completely unscrew the bolts securing the latch, remove it and then the select the adjusting plates behind it (Always remember one thing, the more plates you put, the higher the trunk lid will stand and it will have a backlash, the fewer plates there are, the worse the trunk lid closes and the stronger it is pressed against the car body, and if there are no plates at all, then you simply won’t be able to close the lid, so look for a middle ground, see photo 2)!
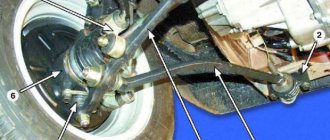
3) As for sedans, they first remove the plastic clips using a screwdriver that secure the lock cover and then the cover is removed (see photo 1), and when it is removed, proceed to disconnect the rod, to do this, the tip of the rod (The rod is indicated in blue arrow in photo 2) remove it from the hole indicated by the green arrow, but keep in mind that the tip is bent and secured with a screw indicated by the yellow arrow, so first unscrew the screw, then straighten the bent end of the rod with pliers and only after that remove the rod from the hole in which it is is how this will all be done, remove the rod from the hole in the lock cylinder lever (see photo 3) and remove it, immediately after that unscrew the three nuts that secure the lock (see photo 4) to the trunk lid and remove it from studs and finally, unscrew the bolt that secures the lock cylinder (see photo 5) and remove it (see photo 6).
Note! The new lock is installed in its place in the reverse order of removal, when installing the nut at the beginning, do not tighten it all the way, but rather tighten it a little and try in different positions of the lock, closing the trunk lid, thereby you will adjust the lock to fit the lid and you will have it It's okay to close!
We install a lock from Lada Kalina on VAZ 2109, VAZ 2108
I don’t know about anyone, but the stock lock on the “chisel” just got me. I'm tired of the fact that the spare parts come with blatant junk, and the fact that sometimes it's simply impossible to adjust it so that it closes and opens normally with an electric drive, it's so crooked and crooked.
I think that those who think that my hands are crooked and I cannot adjust the lock should hold their tongues. Over the course of three years of operation, I changed 8 (if not more!) locks and 2 or 3 counter parts. I regulated everything. I put washers, nuts and other hardware, removed gaskets, always made all the adjustments, looking from the inside, checked the cover for crookedness, looked at the hinges... everything was useless. The locks simply fell apart on the move after 2-3 months of use, the pins flew out, the tongues broke, etc., and my trunk lid flew up during the next jump on the bumps... very cool, especially on the highway at a speed of over a hundred and with a trunk full of junk. Okay, those were the lyrics, let's get down to business.
We will need: -VAZ 2108-09-13-14 "Samara" with a hatchback body (aka "chisels"), -the owner of the above "chisels" who is fucked with a stupid stock lock (or the one who will do all this), - time, -lock from Lada-"Kalina" (catalog number 1118-5606010-10), -a little corner 30 x 30 mm, 1-2 mm thick. You need about 10-15 cm.p., - an M6 x 50-60 bolt (for the mating part) or a mating part to the lock, - two M6 x 25-35 bolts + 4 M6 nuts + washers, - the trunk lock motor reducer (i.e. ... almost any motor, as long as it is reliable, the slightest effort will be enough, since the lock is opened by a spring inside it, and not a drive), - a little cable or rod for connecting with the lock + fittings, - wires, button, relay, terminals, heat shrink – everything for connecting the lock opening motor. -a little paint.
Tools: -electric drill, -angle grinder (aka “grinder”), -files and needle files, -hacksaw for metal (it’s not convenient to work with a grinder everywhere), -spanners and open-end wrenches for 8 and 10, -vise (it’s hard to do without them) – the parts are too small), - crimp for terminals, - pliers, - lighter (shrink heat shrink),
So, initially there was an idea to adapt the door lock (more precisely, the outer part) from the same “chisel” (I changed the locks to silent ones, so I had as many as 4 of them lying around unnecessary). The idea was born while looking at foreign-made trunk locks. In essence, they are approximately the same as door ones (meaning car doors, of course). The idea was not only born, it was even almost realized, see photos 01 and 02. The remains of the stock lock served as a bracket.
The idea transformed when I went to a parts store. I came in with the goal of finding something more suitable... or the counterpart of the door lock from the “chisel”. Searches on the Internet, by the way, didn’t yield anything special. Most of the links were, alas, dead. Only conversations on forums, I haven’t seen any photos at all, because... The links, again, don't work. Maybe I was looking poorly... Well, okay, we’ll do it ourselves)))
And then I saw it - a lock from a Kalina, cat. number 1118-5606010-10. Just what you need. It is similar to a door lock, it can be opened with a cable, the tongue is “covered” with plastic, as on the silent door locks mentioned above. True, there was no “answer” in the store, but it’s not so scary, I made it myself, then I’ll buy my own one. Photo of the castle without modifications – 03 and 04.
Next, the lock needs to be modified (well, how could we do without it))). The modifications consist of cutting off all the protruding metal on the top of the lock, or rather part of the lock opening mechanism and its platform. The “opener” lever is also shortened slightly + a file is made on it for better fixation of the opening mechanism cable. All modifications are shown in photos 05 and 06. The modified lock is shown in photo 07. The block with the wire is a limit switch, as I understand it. It closes/opens when the lock opens/closes (I’m not sure exactly when it closes and when it opens, you can look at the lock and the limit switch - and everything will immediately become clear). Can be used to turn on the trunk illumination or signal that it is not closed tightly. A useful thing, in short. But I foolishly broke it, only then did I realize why it could be useful to me... well, okay. By the way, the salesman in the store said that it was an electric drive of the lock)))
Now we need to make a bracket for the lock. There is nothing complicated here - we have 2 locking pins on the trunk lid and 2 holes in the lock. With this installation of the lock, they are at an angle of 90 degrees relative to each other. We will attach it to 30 x 30 mm corners. I kept the standard lock as a plug, for which it was also modified by sawing off almost its entire working part, i.e. the tongue and its brackets, along a plane parallel to the plane of fastening the lock. The mounting ears survived so that there was something to attach it to. Making the lock open with a key seems too difficult to me in this case. Yes, it is not necessary, in my opinion. It is enough to remove the emergency cable somewhere. The modified stock trunk lock is shown in photos 08 and 09.
The counter part of the “Kalinovsky” lock is a bracket made of a U-shaped rod, onto which it snaps. Due to the lack of this counter part in the store, I made it from a piece of 30x30 angle and an M6 bolt with a nut. The corner before this was “bent” a little with a sledgehammer. The M6 bolt was also slightly bent. This was done due to the fact that the platform on the body for the mating part is slightly inclined. And the lock stands strictly vertical when the lid is closed. The finished response part is shown in photo 10.
Of course, everything was constantly being tried on “from the inside”, i.e. from the salon side. All holes were drilled slightly larger than the hardware for which they were intended - to allow for adjustment. The entire structure is clearly presented in photos 11, 12 and 13
Now we install everything on the car (after painting it first). Between the lock from the Viburnum and the corners we had to put M6 nuts (they are screwed onto the bolts that secure the lock to the corners) as adjusting spacers - the lock was too low. The lock is installed - inside view - photo 14.
In this case, implementing an electric drive is as easy as shelling pears...we place the motor on the desired side and connect the motor to the “opener” lever on the lock. You can connect with anything you want, as long as there is the possibility of adjustment and a fairly rigid connection at the same time. I connected them with a cable, only on the lever I did not put the cable itself, but a “chip” with 2 holes - the cable is inserted into one, the other “chip” is not put on the lever. Photo 15 gives a sufficient idea of the drive structure.
I won’t talk about how to lay the wire (of course, together with the standard wiring - it’s a hassle, but it’s reliable), connect the button (of course, through a relay... the button supplies “+” to the relay winding, the relay supplies “+” to the motor itself... so that they don’t complain later that the buttons melt when connected directly, without a relay), where to embed the button (wherever it’s convenient, embed it there) and how to work with electrics (carefully, carefully crimping the terminals and well insulating the connections and terminals with heat shrink). There is material on this topic in RuNet - at least sit down and eat.
Bonuses: -you can safely weld the hole from the trunk lock. -the lock already has a limit switch, see above for how it can be used. -the trunk lid closes much more quietly, because The outside of the lock tongue is covered with soft plastic. -This lock is more difficult, in my opinion, to break. At least it doesn't fall apart from shaking and impacts.
Funds spent (as of 02-2008): -trunk lock from Kalina - 315 rubles, -drive motor - 100 rubles. -wires, terminals, heat shrink, etc. – 100 rubles, -cable + accessories (cable locks) – 100 rubles.
Total: 615 rub.
The time spent was about half a day (5-6 hours), despite the fact that everything was done extremely slowly)))
- Author: admin
Rate this article: Share with friends!
replacing and adjusting the trunk lid lock VAZ 21099
replacing and adjusting the trunk lid lock on VAZ 2108, VAZ 2109 cars
Recommendations from experienced car mechanics
There are several tips that you need to follow when handling the VAZ lock cylinder and when replacing it. Experts recommend:
- If the lock is jammed and has problems opening, you need to choose the time to replace it. Lubricating the mechanism or repairing it are only temporary measures that can delay the failure of the locking device for several months.
- To avoid having to replace it again after a year, it is necessary to lubricate regularly. To do this, you need to use silicone-based products.
- Along with the cylinder, you will have to change the springs. Please note that they must be purchased separately.
- Before removing the lock cylinder from the packaging (new) or before dismantling it, you must insert the key into it. This will help hold the pins in place. If this is not done, they will fall out, and the work contractor will have to collect them from the floor of the box for a long time.
- The service life of the lock depends on the user. If you carry out preventive maintenance in a timely manner and work with it carefully, the mechanism will last longer.
Try to choose high-quality spare parts, since cheap locks from China (about 150 rubles each) usually do not survive the winter season. It is best to purchase domestically produced kits (AvtoVAZ or DAAZ), which are more expensive, but will also perform their functions for several years.
Removing the old trunk closure and installing a new lock
The easiest part of the replacement process is removing the faulty mechanism.
| Operations | Fasteners |
| First you need to pry off the fasteners using a screwdriver. | Their number is ten. |
| Remove the casing. | The pistons hold the luggage compartment lid trim, which must be removed immediately after this. |
| The next step is to unscrew the two nuts. | They attach the structure directly to the trunk. |
| Remove two terminals. | Immediately behind the nuts there are two terminals attached to the bolts, which also need to be carefully removed so as not to be damaged. |
| After these steps, the old structure can be easily and simply removed. | It is no longer held in place by any fasteners. |
The lock from the Lada Kalina is not completely similar to the device for closing the trunk door of the VAZ 2109, so it needs to be slightly modified. Repair does not require special skills, since you only need to saw off the upper protruding part of the metal and shorten the lever slightly. The counter part of the structure from Kalina is made in the form of a U-shape, so it can be easily installed on the remaining part of the previous closing device and its cylinder, which was left without its working mechanism.
You can install the electric drive in the place you need, not forgetting that the possibility of regulation and its rigid connection directly with the opener lever are a prerequisite. The wiring can be routed directly inside the trunk door, leading into the vehicle interior. In the cabin, it can be put under the trim, and laid along the rear pillar to the bottom. From below it can be hidden under sound insulation and rugs. The button should be placed in the interior of the VAZ 2109 in a convenient place so that it does not interfere and is easy to reach. You need to connect the button via a relay. It will supply “plus” to its winding, and it will redirect it directly to the gear motor, which is connected to the rod of the closing device.
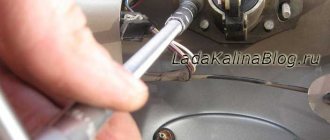
We must not forget that the terminals that are used to connect the button to the new mechanism should be carefully insulated and crimped. Repairs must be carried out with confidence in your capabilities and with an understanding of how not only the mechanical, but also the electrical part of the new lock works. Replacing a mechanical locking device with an electric drive can take from an hour to three, depending on skills and experience.
Algorithm for installing the electric drive of the trunk lid lock
The electric trunk drive of the VAZ 2115 and VAZ 2114 is best installed from the standard kit.
For installation you need to prepare:
- A cable made of metal material. Its dimensions are 1.5 mm by 0.5 m.
- Several wires, about 5 meters long each, for contact connection.
- Self-tapping bolts.
- Contact groups from the terminal block.
- Button to open the lock.
- Holder and fuse.
Electric lock
It works like this:
- You need to fix the bushing with a key 7 and use a screwdriver to unscrew the locking screw of the traction mechanism. Place a washer under the screw.
- From the prepared kit with an electric drive, make a hook with a diameter of about 20 mm. Hook this part onto the lock screw and the electrical wire strip. Install the relay on the trunk using self-tapping bolts.
- Fasten the plate to the activator, leaving a gap of about 15 mm, and then install the activator directly. This is done using self-tapping bolts.
- From the prepared cable, make a rod that will connect the lever of the product to the rack. Connect the part with the locking mechanism and the fabrication tongue.
- When connecting the wires, the cable can be routed using the installation of a roller mechanism, which is located in the window regulator. The remaining wires need to be hidden under the ceiling of the car, pulled under the interior trim.
- Next comes the usual connection to the battery and installation of the fuse.
Adjusting the trunk lock on a VAZ 2114
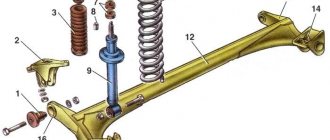
The trunk lock on the VAZ 2114 is made of silumin, consists of a core (lock cylinder), “tooth and fang”. The “tooth” clings to the platform, which is located on the opposite part of the trunk; in this platform there is a recess; the fang enters this recess when the trunk lock is slammed shut. This fang serves not only as a guide, but is also needed so that when the car moves, the body tends to “play”, so when the car is driving, the trunk without such a fang would move to the right and to the left.
Adjusting the trunk lock:
The trunk opens on bumps - the reason: the locking tooth has worn out, it is replaced by knocking out a pin from the trunk lock body. When replacing a tooth, it is recommended to replace the pad, since wear is generated inside the pad, where the tooth locks.
The trunk rattles, shakes or rattles while driving - the reason: the locking tooth or platform may also be worn out. Wear of the seal can also affect the position of the trunk. There are rubber “nipples” located on the trunk lid in the corners; they can be unscrewed, so you can adjust the closing and opening of the trunk, as well as the height of the trunk lid. Just do not twist the “nipple”, as if you twist them, the lid will be under tension in the closed position, and the trunk will open while driving over potholes and bumps.
The trunk opens very poorly - reason: A common reason is the “boiling” of silumin parts, the trunk lock must be spilled with lubricant, to do this, open the trunk all the way and pour lubricant into the hole for the key, stand in this position for 5 minutes. Lubricate all rubbing parts and the spring generously with WD-40.
The trunk does not close well - the reason: usually the locking plate is not secured correctly, the rod that secures the locking tooth has come out, and there are many reasons.
Uneven gaps or a protruding trunk are adjusted using fasteners located under the ceiling. The fastenings are located along the edges of the roof.
Also, the trunk lock often fails - the silumin case bursts; with such a problem, the trunk lock is completely replaced.
Adjustment, repair of trunks, opening, replacement of components and parts professionally.
trunk locks, platforms, external locks, internal mechanisms, window lifters, motors, external, internal handles, Euro handles for VAZ 2109, VAZ 2114 are available at reasonable prices.
Among people living in Russia, there is an opinion that our auto industry creates, to put it mildly, not very high-quality cars. Perhaps this point of view is too biased, but it is an indisputable fact that owners of domestic cars sooner or later have to spend personal funds on car service.
But it is also worth noting the fact that some repair work on domestic cars can be done with your own hands. For example, adjusting the lock or trunk lid, which we will talk about in this article.
How to adjust the trunk lock on a VAZ 2112, 2110, 2111
- Loosen the lock nuts.
- Remove the protection cover from the lock.
- Move the lock in the required direction and tighten the screws.
- Now we check whether the lock can be easily slammed.
- If necessary, the adjustment process can be repeated again. But if the lock closes well, tighten the fastening bolts.
If the lock on the body does not fit into the lock on the lid when closing, then loosen the bolts securing it and move it in the required direction, after which we tighten the bolts back.
How to Change the Trunk Lock on a VAZ 2114
A cylinder lock (cylinder lock) is a type of cylinder locking mechanism that you would like to use where you only return when the key is inserted into the cylinder hole. The uninterrupted operation of the lock cylinder protects the car from unauthorized entry and protects the owner’s property. Therefore, the malfunction of the lock cylinders is a serious problem that requires immediate removal, and other car owners are seriously considering replacing the VAZ 2114 lock cylinder themselves.
- During the cooler months, when you try to open a frozen lock, it simply turns and does not even open, and with the additional force of the rotating lock, the cylinder lock can be released using the key on the recess handle. In most cases, this problem is caused by the destruction of the retaining ring and the loss of part of the column located in the retaining plastic cap of the rod.
- Another possible difficulty is the partial execution of the lock cylinder. Gradually, the internal pins of the lock and the teeth of the key wear out as the parts of the lock catch on each other and prevent it from turning when you try to turn the lock. At first, this problem does not seem so serious, unfortunately, over time, choosing the correct “position” of the key becomes irritating.
- It is often necessary to replace the lock cylinders when updating door handles in the new Russian language differently in Europeans.
Often when repairing a door handle lock, severe wear and tear on the part leads to the replacement of several parts of the device. Try, of course, to repair the lock, but such repairs will not help for long, and after a while you will have to start again to solve this problem.
Before removing the cylinder lock from its packaging or from the door handle, be sure to attach the key to the well. Failure to do so may result in the removal of pins from the lock slots, which may be difficult to reinstall.
Kalinsky castle on a vase 2114
In a VAZ 2114, replacing door lock cylinders is a job that can be done without outside help, with free time and the necessary tools.
Change cylinder lock:
- public keys "8" and "10";
- pliers;
- WD-40 lubricant;
- Phillips screwdriver and flat screwdriver;
- new cylinders and spring blocking for VAZ 2114.
The cost of a set of door lock cylinders with a trunk VAZ 2114 produced by VAZ with product 21140610004520 is 400 rubles, and its analogue with product 21140-610004520 directly from the manufacturer DAAZ is 450 rubles.
The price is indicated for spring 2021 in Moscow and the region.
Use a Phillips screwdriver to loosen the three screws on the bottom of the pad.
Remove the mat. We remove the front shutter window position switch from the pocket along with the wiring harness block, disconnecting it from the wired switch.
Use a screwdriver to remove the cover from the elbow grip.
Loosen the 4.5 Phillips screws that secure the corner handle to the inside of the door panel.
We secure the fasteners by securing the interior lock handle trim to the door panel.
Carefully use a screwdriver to remove the 6 door panel hole covers and remove the door card. Using a number 8 wrench, remove the two nuts that secure the outer lock handle. First
First
Using a number 8 wrench, remove the two nuts that secure the outer lock handle. First.
We disconnect the outer handle rod and switch lock from the internal locking rod.
Remove the outside door handle handle using rods.
Then remove the pin from the end of the rod.
Remove the plastic rod end from the door lock cylinder.
Remove the retaining spring by lifting its ends from the slots in the cylinder on the lock handle.
We remove the old cylinder lock with a key.
Trunk for VAZ 2109
Unpack a new set of larvae. To pre-lubricate what is left for our customer to wipe the parts with lubricant, we insert the door handle into the door handle.
By turning the key, the key should return from any position.
Install the pin onto the tip of the turntable. Handle assembly. Further assembly is carried out in reverse order.
The process of installing a lock on a VAZ 2109
This is where the fun begins - either I’m lucky, or others have had less luck, but it turned out that the lock from Kalina fits perfectly onto the bracket, which is already screwed to the boat under the rear wiper motor. True, I had to bend the petals a little and drill holes (from the trunk side). I found a photo of Kalina's castle and showed the excess parts with a dotted line - cut them off using a grinder or a hacksaw.
I immediately felt the disadvantage of this bracket - the connection is a little flimsy, so the lock can move and, as a result, the trunk of the Nine will not close. To make the connection stronger, you need a major corner. During my search, I came across a plate with perforation. I made a corner out of it and cut a hole for the lock lever (which opens the trunk). In the photo you can see this corner. You install it on the lyada and attach a lock to it. The rigidity is sufficient, so the door will not open while moving.
However, even if you use the first bracket, the likelihood of opening the trunk is extremely low. And now about the answer. In the photo you can see that it is screwed with the same bolts as the original one, into the same holes. One thing - I had to lift it slightly, for this I used two washers installed under the nuts of the cylinder head cover of the classic. They form beautifully, have a large support area, and the loop ultimately does not move to the sides.
To implement the electric drive for opening the Kalina lock on the VAZ 2109, a gearmotor with two wires was chosen. There is no point in taking five - there is no need for a limit switch. Check how the drive works - the rod is in the middle position, when connected to power (minus to blue, plus to green) it is retracted, when the polarity is reversed it is pulled out. Therefore, dance according to these parameters; for me it turned out to be more convenient to use the retraction mode, since it seems to me the most suitable.
Either now everyone has started actively repairing their cars, and at the same time their houses, but I couldn’t find a wire with a cross-section of about 0.75 square meters. mm. Well, maximum one and a half! Not anywhere, there is a yellow-green one (for grounding), and even that one is 2.5 square meters. mm. Therefore, the choice fell on a two-core one, the cross-section of each core is 0.5 square meters. mm. The Chinese usually use these in their household tape recorders. I screwed the gear motor to the bar and installed it on the trunk door. I screwed it onto the lock lever; to be honest, I don’t know what to call it correctly. Let this be an adapter that connects the lock rods and the drive spoke. This will probably be correct, but if not, then correct me. In the photo they are on the left in a bag.
These are the holes that appeared after I removed all the “unnecessary” stuff. And now all that’s left to do is to install the wires in the following sequence: cigarette lighter – button – motor output (green). The blue one, as you understand, needs to be screwed to the ground, fortunately there are plenty of bolts and nuts there. And the funny thing is that I removed the wiper and I already have at least three wires down to the steering column switches! I call and the choice falls on white with a blue stripe, and I use it as a feeder. And the purchased wire will be useful for something else. That's all, you try, evaluate, if necessary, loosen the fastening and move the lock body in the desired direction. And now one small “bonus”. There is a limit switch on Kalina's trunk lock, and I plan to use it to turn on the trunk lighting. I think the blue LED strip will be just right.
And to do everything as expected, you will have to use this circuit with a relay. The likelihood of damage to the button is reduced to zero. And the time has come to sum up and count the costs:
- Castle Kalina sedan - 450 rubles.
- The response part is 135 rubles.
- Electric drive - 170 rub.
- Button - 60 rub.
- Wire - 50 rub.
- Plank - 33 rub.
- Total - 898 rubles.
Is it advisable? It seems to me that yes, because in three years I have changed at least six locks! It is also advisable to install gas equipment to save on fuel. Each lock costs on average 400 rubles (once they were 350, and then the price went up). Therefore, it is better to do it once and for a long time. And if you got here, you obviously encountered a similar problem. It can be solved, do it, don’t be afraid, you won’t make it worse. Subscribe in the comments and share your experience. Perhaps someone has tried Grant's Castle? What are the advantages?
If you find an error, please select a piece of text and press Ctrl+Enter.