How to adjust the 8 valve mechanism in the Lada Kalina model? Most owners of these practical Russian cars sooner or later ask themselves a similar question. Carrying out this procedure yourself will not only be interesting, but also useful in terms of gaining experience.
Now let's move on to a more detailed consideration of the issue outlined here: valve adjustment.
Why is adjustment necessary?
The correct procedure depends on:
- uninterrupted operation of the LADA Kalina engine (operation with a reduced noise level in the timing belt, no errors in the camshaft sensor);
- reduction of fuel consumption to a level close to that regulated by the manufacturer;
- less wear on the camshaft cams and the pushers interacting with them.
- cleanliness of combustion chambers and valve plates due to the absence of carbon deposits.
Valve adjustment in a Lada Kalina car should be carried out with a periodic mileage of 20 thousand km or a little more.
It is not recommended to neglect this procedure, since the regulatory value of the gaps at the valves of the intake and exhaust circuits changes. This circumstance provokes a loose fit of the valve discs to the seat seats, which inevitably leads to the formation of carbon deposits, incomplete combustion of fuel, damage to the discs with subsequent burnout and other troubles in the timing belt in the LADA Kalina model. As you can see, in the absence of the required clearances, there is a violation of the correct functioning of the engine as a whole, and the only harmless point here is the owner’s acoustic discomfort due to the increased noise of the timing belt.
Note that adjustment of the valve mechanism requires 8 valve engines of Lada Kalina cars.
How to adjust the valves?
The main question is how to adjust the valves. To perform this procedure, the owner will need to acquire the following set of tools, accessories and consumables:
- screwdrivers and pliers with long jaws;
- heads for unscrewing bolts;
- ratchet;
- a set of probes;
- crank;
- a syringe to remove excess oil from the head baths;
- tweezers for removing washers;
- adjusting washers of different sizes (thickness) and a device for recessing the valves.
Before the valve adjustment begins, let the engine cool down (temperature no more than 20 degrees).
- Don't forget about safety and remove the terminals from the battery.
- Remove the valve cover with gasket.
- During the procedure, you will need to rotate the crankshaft of the Lada Kalina. To facilitate this action, it is recommended to unscrew the spark plugs, having first removed the tips of the high-voltage cables from them.
- Remove the timing cover.
- Use a syringe to remove the remaining oil from the baths.
- We install the device for recessing the valves on the mounting studs of the motor cover and secure it with standard nuts.
- By rotating the crankshaft (with a key on the pulley bolt or a wheel with 5th gear engaged in the box, after hanging the side of the car), we achieve the TDC position in the 1st cylinder (the rightmost one in the direction of the car).
- From this position, turn the camshaft to an angle of 40-50 degrees (three pulley teeth).
- Using a feeler gauge, we measure the size of the gap between the back surface of the cams and the washers of the 1st (exhaust) and 3rd (intake) valves (we count from the shaft drive gear). The feeler gauge should fit into the gap with a slight “tightness”.
- When the gap size differs from the required value, the pusher should be turned so that its groove is opposite the “adjuster”.
- Using the device, we recess the valve, securing the pusher from turning using a screwdriver (insert it into the groove). Using the latch, we lock the pusher in its lower position.
- We remove the washer using the previously indicated tweezers.
- Read the markings on the washer. It indicates thickness. If the inscription is erased, measure with a micrometer.
- We calculate the required thickness of the washer to be installed using the well-known formula, which, by the way, is different for intake and exhaust valves.
- We select a new washer from the set, with a thickness close to the value obtained in the calculation (deviation - plus 0.05 mm).
- We install the selected washer in the seat (in the pusher). In this case, the surface with the markings should be facing down.
- Having pressed the pusher with the device (drowning it deeper), we remove the latch.
- Now we move on to adjusting the next pair of valves. To do this, we rotate the crankshaft to an angle of 220-230 degrees and carry out the entire list of previously indicated adjustment actions with the valves: 5th (exhaust) and 2nd (intake).
Adjusting thermal clearances in the engine valve mechanism
We measure and adjust the gaps on a cold engine. Remove the engine screen. Disconnect the throttle drive cable from the throttle assembly sector (see “Replacing the throttle drive cable”). Having unscrewed the three fastening nuts, remove the throttle valve drive cable bracket and move the bracket with the cable to the side (see “Removing the receiver”).
Use a Phillips screwdriver to loosen the clamp on the lower crankcase ventilation hose. . and remove the hose from the cylinder head cover pipe.
Use a Phillips screwdriver to loosen the clamp on the crankcase ventilation hose (main circuit). . and remove the hose from the cylinder head cover pipe
Using a Phillips screwdriver, loosen the clamp on the crankcase ventilation hose (idle circuit). . and disconnect the hose from the cylinder head cover pipe
Using a 10mm wrench, unscrew the two nuts securing the cylinder head cover. . and remove the washers.
Remove the two rubber bushings.
Remove the cylinder head cover. Remove the front timing belt cover (see “Checking the condition and replacing the timing belt”). The procedure for checking and adjusting clearances in the valve drive mechanism is as follows. We turn the crankshaft by the bolt securing the generator drive pulley clockwise until the installation marks on the camshaft pulley and the rear timing belt cover align (see “Checking the condition and replacing the timing belt”). Then turn the crankshaft clockwise another 40-50° (2.5-3 teeth on the camshaft pulley). In this position of the shafts, we check the gaps at the first one with a set of feeler gauges.
. and third camshaft cams. The clearance between the camshaft cams and shims should be 0.20 mm for intake valves and 0.35 mm for exhaust valves. The clearance tolerance for all jaws is ±0.05 mm. If the clearance is different...
. then we install a device for adjusting the valves on the studs of the camshaft bearing housings.
Let's sum it up
Now you know how to adjust the valves. When the mechanism in the LADA Kalina model is adjusted, we reinstall all previously dismantled parts, add oil to the engine and start it. We are pleased with the clear and quiet operation of the engine, as well as its improved throttle response.
How are Kalina valves adjusted? Many motorists will be interested in such information. Everyone who has their own car loves and cherishes it, trying to maintain their car as much as possible. Such procedures include adjusting valves.
Why adjustment is needed
A properly performed operation depends on:
- excellent operation of the gas distribution system;
- finding the gaps within normal limits;
- engine operation (it is much quieter and much easier to start, and the camshaft sensor, which controls the entire operation of the car, will show the good condition of the mechanisms);
- reduction of fuel consumption;
- better performance of the pusher and camshaft;
- no carbon deposits (the combustion chamber will remain virtually clean).
Lada Kalina valve adjustment is usually carried out after the car has traveled more than 20 thousand km. There is no point in delaying this, because when gaps appear in the valves, the settings made at the factory are violated, the cylinders are left without a sufficient amount of fuel, and if the gas is incompletely burned, it is released prematurely.
We can safely say that if the valve malfunctions, the entire operation of the car is disrupted. And if the valves burn out, the cylinder head will suffer.
Those who purchased a car like the Lada Kalina 2 know that valve adjustment after a certain mileage is necessary.
This type of machine comes with several types of engines. The first model is 8-valve, with a displacement of 1.6 liters. Valves need to be adjusted periodically. Time passed, and a car appeared with a smaller volume - 1.4 liters, but with 16 valves. Virtually no valve adjustment is required.
But the designers did not think to rest on this; as a result of their creativity, a new Kalina car engine appeared with 8 valves and a volume of 1.6 liters, but with a lightweight piston system. The most prestigious Lada Kalina 2 is a 16-valve model with a volume of 1.6 liters. Adjustment is very rarely needed, but the valves can become bent if the belt breaks.
Engine types
The first Lada Kalina cars received a 1.6-liter power unit and a timing belt with 8 valves. On these models, periodic adjustment of valve clearances is necessary. Later, the manufacturer offered a car with a 1.4-liter engine capacity and 16 valves, the clearances of which practically do not need to be adjusted. The next design option is a car with a 1.6 liter engine and a timing belt with 8 valves, which need to be adjusted periodically. And the “hit” model is the Lada Kalina with 16 valves and a 1.6 liter power plant. Here, adjustment is required very rarely: but if the timing belt breaks, the valves will bend.
How to adjust valves
To adjust the Kalina valves, you need a set of necessary tools:
- several screwdrivers and long-nose pliers;
- heads for unscrewing bolts;
- wrench, probes and ratchet;
- tweezers and a syringe, which will be needed to remove excess oil;
- adjusting washers and a device to accurately recess the valves.
You need to start by checking the engine: it must be cold. 20° is the right temperature for the gaps to be set perfectly.
The valves are replaced after the valve cover is removed, that is, the fastening bolts are removed, the spark plugs are unscrewed so that the engine turns better, and the camshaft and crankshaft are aligned to the marks. The camshaft must contain cams without wear. The head must be free of oil; it is better to use a syringe. You need to attach a tool to the studs to recess the valves.
Then the pistons of cylinders I and IV should lock at the top point. There are several methods, one of them is that the crankshaft does not need to be rotated 3 times and adjusting only 2 clearances, but in one revolution it is possible to adjust 4.
Extreme care is required: the four camshaft cams will definitely be in a position raised from the valve, and this is where the gaps need to be measured. Usually these are I, II, III, V valves. If the gaps are different from the nominal ones, adjustment is needed, and a washer and a formula will help, with which you can find out its thickness by summing the thickness of the removed washer, the nominal gap and the changed gap.
Preparing for work
You will need a set of tools and accessories:
- a set of socket heads with a wrench and a ratchet;
- syringe for removing engine oil;
- figured and flat screwdrivers;
- special tool for recessing valves;
- a series of special probes;
- tweezers;
- long-nose pliers;
- adjusting washers.
The procedure is actually simple and can be done independently, without the participation of specialists. To save time or if the process seems too complicated, it is better to use the services of a car service. Such work does not cost that much: the standard figure does not exceed 800–1000 rubles, depending on the region.
Instructions for adjusting gaps
Before starting this operation, it is necessary to cool the engine. Afterwards, the bolts securing the cylinder head are unscrewed and the latter is dismantled. Further work looks like this.
- Remove the casing that covers the timing gear drive.
- Unscrew the spark plugs (this will make it easier to rotate the engine crankshaft).
- The surface under the head is cleared of oil using a syringe.
- If the camshaft has severe wear on the pusher cams, damaged and worn elements must be replaced.
- In place of the block head, a special device should be installed on the mounting studs, which will help to push the valves down.
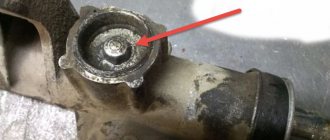
- The pistons are set at dead center. To do this, the crankshaft is turned with a knob until the mark on the rear timing cover coincides with the mark on the pulley.
- After the marks match, the crankshaft rotates a few more teeth, and the first piston will be installed at top dead center.
- Using a feeler gauge, the gaps are measured first on the first cam, and then on the third. To do this, take a probe whose size is no more than 0.35 mm. If the dipstick passes without resistance, you should select another washer.
- Through a special groove in the upper edge, the washer is picked up and removed. In order to see the groove you need to move the pusher a little.
- Using a special device, the valve is recessed downwards; in this case, you should hold the pusher with a flat-end screwdriver, inserting it not into the groove, thus preventing its arbitrary rotation.
- After fixing the pusher with tweezers, the washer is removed and another one of suitable thickness is installed in its place. On one side of each washer there is a special marking indicating the size. The washer change is completed, the screwdriver is removed, the valve is returned to its place, and the gap is measured using a feeler gauge.
Ideal valve adjustment on Kalina involves inserting the dipstick into the gaps with little force (within reason). After this, you need to turn the engine again by one revolution of the crankshaft pulley and carry out a control measurement of the gap. Thus, all clearances are checked and adjusted, with the obligatory rotation of the crankshaft before each measurement. After the operation, you need to fill the engine oil to the required level, you will also need to replace the Kalina valve cover gasket, and then secure the valve cover and timing drive with fasteners.
The operation, if you look at it, is simple. You must strictly follow the step-by-step instructions, and even a beginner can handle this procedure.
Correct adjustment is immediately noticeable: the gas distribution mechanism works smoothly, the engine does not make noise, which means the car’s “heart health” is in order. At least for the next 50–60,000 kilometers, thermal gaps will not have a negative impact and no additional work will be required. And they will certainly be the result of incorrect or untimely adjustment.
We recommend reading:
- The adsorber purge valve for our Kalina
- Buying brake discs for Kalina
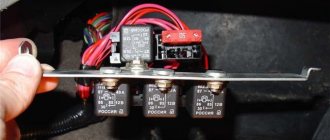
- Fuse box for Lada Kalina car
- Auto Lada Kalina hatchback: technical specifications
- Why do you need a spoiler for Kalina station wagon?
- Informative presentation of the Lada Kalina 2 car
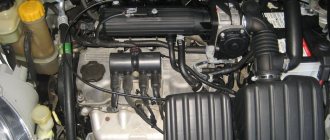
Engines "Lada Kalina"
Machines of this type are equipped with several types of engines. Each of them has its positive and negative sides. The first Lada Kalina produced by AvtoVAZ was equipped with an engine with eight valves. Its working volume was 1.6 liters. Then the car began to be produced with an engine with 16 valves, with a slightly smaller volume, only 1.4 liters. The most expensive model of the Kalina, which is a sports type, is equipped with an engine from the Priora, which has 16 valves and a volume of 1.6 liters. Three years ago, the brainchild of VAZ began to be equipped with a new engine. It, like the first engine, has 8 valves and a volume of 1.6 liters, but differs from its “brothers” in that it has a lighter piston system. As a result of this change, power increased and the engine began to behave more responsively. Today, this engine is mainly installed on the Grant, which replaced the Kalina Sedan. Perhaps in the future every Lada Kalina will be equipped with such an engine.
Adjusting valve clearances
Any engine installed on the Lada Kalina must be regulated. The difference in adjustment lies in the order in which the thermal gap is measured. All measurements are carried out only when the valves are completely closed. When adjusting, the engine crankshaft rotates in a clockwise direction. To adjust the Lada Kalina valves, special washers are used, located in the niches of the pushers. To obtain the required clearance, washers of the required thickness are selected.
Tools required for valve adjustment
To make the adjustment you need the following tool:
- Heads for unscrewing bolts;
- Collar;
- Ratchet;
- Syringe to remove oil;
- Screwdrivers;
- A special device used to recess the valves;
- Probes;
- Tweezers;
- Long nose pliers;
- Adjusting washers.
Valve adjustment "Lada Kalina", 8 valve
The entire technological adjustment diagram is shown in the pictures below. Work is performed on a cold unit. First, remove the valve cover. To do this, you need to unscrew and remove the mounting bolts.
Then the cover covering the timing belt is removed. The candles are turned out. In this case, the engine will turn over more easily. The head must be freed from oil. A syringe will make the job easier. The camshaft must have cams without wear. If damaged, it must be replaced. A device is screwed to the studs securing the valve cover, with which the valves are recessed. Use a wrench to turn the crankshaft until the pulley marks align with the belt cover. When the marks match, the shaft must be rotated by three additional teeth. The piston will find top dead center.
The gaps are checked, first on the first cam, then on the third. The size of the probe should vary in the range of 0.2 - 0.35 mm. If the probe passes freely, the washer needs to be replaced. You need to pick it up from the pushers and easily remove it through a special groove made in the upper edge. To find the groove you just need to turn the pusher. Using the device, you need to recess the valve. To prevent rotation of the pusher, hold it with a flat screwdriver, which must be inserted deep into the groove.
The lower position of the pusher is fixed. The washer is pulled out with tweezers. A new one of the required size is installed. It should be turned with its marking towards the pusher. Each washer is marked with its size. The retainer is then removed. Measuring the gaps is repeated again.
In the case of normal adjustment, the feeler gauge enters the gap with slight effort. Rotate the crankshaft again until the mark matches again. Rotation should be 90 degrees. After each rotation of the crankshaft, all remaining clearances are adjusted, adhering to a specific sequence. When the adjustment is complete, you need to fill in the oil, replace the gasket under the valve cover, and install the valve cover and belt.
In principle, the operation associated with adjusting the valves of the Lada Kalina is a fairly simple operation. If you follow the sequence described above, then even a novice car enthusiast can do this work with his own hands. If the work was done correctly and the exact regulation procedure was followed, then the gas distribution mechanism of the Lada Kalina will work perfectly. Correct adjustment allows you to travel more than 50,000 km without additional work.
Adjustment procedure
How to adjust the clutch on a Kalina 8 valve
The procedure for adjusting the valves on all modifications of the 8-valve vase is the same. There are differences only in injection Grant cars, Kalina 2 with a Grant engine. They have a lightweight piston group and metal-ceramic seats. In this regard, the gaps differ upward by 0.05 mm. Knowing the order and adjustment scheme, you can adjust the valves yourself. The downside is the lack of a set of washers for adjustment. It’s expensive to go to the market to buy them every time, and it’s also expensive to buy the entire range.
Here is a detailed diagram of valve adjustment for VAZ 2108, 2109, 2114, 2115
- First you need to cool the engine. You can use an additional cooling fan from any VAZ car. Place it on top so that the airflow is towards the internal combustion engine and turn on the 12 V power supply;
- When adjusting 8 valve engines (11186, 11113 oka, 1118, 1111) with a mechanical throttle assembly, unscrew the throttle cable from the intake manifold receiver;
- Disassemble the valve cover, timing belt side casing. Disconnect the large and small breather hose going to the throttle body pipe;
- Pump out the oil near the valve cups using a syringe or bulb. It is most convenient to use a regular medical syringe with a white silicone hose at the end;
- Install a device for adjustment - a rack for pressing the valve, also called a ruler;
- Set the first adjustment position. Turn the camshaft clockwise to the mark and tighten 2-3 teeth. For cars with a lightweight piston group (Granta, Kalina 2, Priora), turn strictly by the crankshaft. If you turn the camshaft, the timing belt may slip, and if this is not noticed and the engine is driven, the valves may bend;
- Adjust in the following sequence: 1 outlet and 3 inlet valves;
- Rotate the camshaft 90 degrees. Adjust 5 outlet and 2 inlet valves;
- Rotate 90 degrees. Adjust 8 exhaust and 6 inlet ports;
- We make the last turn by 90 degrees and adjust the 4th exhaust and 7th inlet valves;
- Reassemble in reverse order. We install a new gasket under the valve cover to prevent oil from leaking out.
- On carburetor engines, everything is done in a similar order. First you need to unscrew the filter housing and the suction cable. The frequency is the same as on the injector 30,000 km.
Checking the gaps is also required after repairing the cylinder head. Especially after replacing the guides. When replacing bushings, the seats are countersunk with a special tool and deliberately recessed into the head. Accordingly, you need to follow the sequence, set the optimal gaps and repeat after 1000 km.
Adjusting the 8kL engine for gas increases the mileage between adjustments. If the engine is not intended to operate on gas equipment, the seats and valves will quickly burn out, and in order to somehow extend the service life, the clearances should be made a little larger than standard. Usually they do +0.05 mm. If the gap is not set, that is, does not expand, then the saddle is sunk a decent distance into the head. In this case, you need to measure how much the gap needs to be increased, disassemble the cylinder head and file the end of the valve. The second option would be to replace the seat or the cylinder head itself.