- Handbrake VAZ 2114
- Adjusting the hand brake VAZ 2114
- How to tighten the handbrake on a VAZ 2114
- Useful video
- Conclusion
The handbrake is one of the most important elements in the safety system while driving. It is not only an element of the braking system, which is needed in order to effectively prevent a parked car from rolling, but also in order to avoid an accident. Some motorists are concerned about the question of how to tighten the handbrake on a VAZ 2114. In the article you can find a detailed answer to this question.
Handbrake VAZ 2114
Handbrake VAZ 2114
It is necessary to monitor the serviceability of not only this element, but also the entire brake system so that the handbrake can fully perform its functions. If this element fails, then problems will arise with the brake system. Some drivers are perplexed why the VAZ 2114 does not hold the handbrake? In order to find out the cause of the breakdown, you should study the structure of the hand brake.
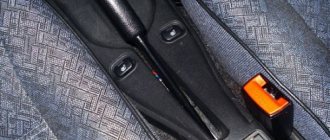
The hand brake of this car consists of many elements. The very first ones that you can notice are the lever and the locking button. The remaining elements of the handbrake are hidden from view.
Handbrake device for VAZ 2114
These include:
- protective case;
- control nut;
- traction for the handbrake;
- equalizer;
- nut for adjustment;
- cable.
The car also has a mechanism that is directly responsible for braking. It consists of brake pads that directly control the braking process. They should be changed constantly. The condition of another element of the system also needs to be monitored most carefully. We're talking about a drum.
When is it necessary to replace the handbrake cable?
VAZ 2114 parking brake cable - it is with its help that we interact with the rear wheel brakes (brake drums). Another name for the handbrake is the parking brake. Many people think that they can live well without it, they say, who even puts the handbrake on their feet these days? But don’t forget that the fourteenth is a manual transmission, with our downhill traffic jams the handbrake is very useful, and also, in the parking lot, the chance of the car being stolen is sharply reduced, plus you can take turns in the winter effectively! Anyone who has ever jacked up a car themselves knows about the need to put the handbrake on. If you come up with a hand brake for your car, it should work properly. But it doesn't always work.
Handbrake cable
Hint of replacement
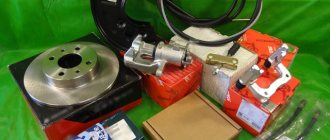
Elementary wear of a part - the handbrake cable may rust, break or become loose so that it cannot be tightened - this is the most common reason for replacement. The two rear wheels seem to hint that the parking brake is connected to the wheels in the form of two cables. Almost always one of the cables fails. This does not mean that one needs to be changed. Buy a set and change both. The price for a VAZ 2114 parking brake cable varies from 200 to 1000 rubles (depending on the manufacturer and place of purchase). Otherwise, the cable that turns out to be older will definitely fly in the near future, and you will simply pay double the price.
Symptoms of a cable failure are usually as follows:
- The handbrake does not hold the required traction
- brake drums get hot
- when pulling the handbrake, the cable may not respond to the action
- the cable sheath is worn out
It’s easy to check if something is wrong with the cable: put the car on the handbrake, get out of it and try to give it a good push – it will roll a little if the cable is dead.
How to remove the handbrake cable on the fourteenth?
Before changing the handbrake cable on a VAZ 2114, it must be removed. Fortunately, it is clearly visible and cannot be confused with anything. You need to work in a hole or on an overpass under the bottom of the car. It’s good if the car is clean, because all the nuts and fasteners need to be found and unscrewed (you can also spray them with WD for a smooth fastening movement); dirty ones will take longer to work with. Before replacing, move the handbrake all the way down.
- We start with the locknut and the adjusting nut, loosen them and remove them from the handbrake rod (now you can remove the washers and cable leveler, or you can do this after jacking up the car, before removing the wheels).
- Jack up the rear of the car, unscrew the wheel bolts and remove the wheels.
- To remove the brake drums, tap the locking pins to dislodge them from the shoes.
- Remove the brake pad.
- We disconnect the tip of the first and second cables from the equalizer (the clamps can be removed with simple pliers).
- Remove the cable loop from the hook of the shifted spacer lever of each wheel.
- We remove the cable sheath from the entire rear suspension, having first unscrewed the fastening bolt.
- Pull the cable out of the holes in the brake flaps.
Adjusting the handbrake tension
Replacing the handbrake cable of a VAZ 2114, the process is similar to removal, only in reverse order. We start by threading the new cables into the washers, attaching the loops (many people make special clamps at the end of the loop - bosses - so that the cable sits even more tightly in place), and assembling the entire wheel hub. They laid each cable along the suspension and secured it. In the end, you will need to tighten the handbrake in the cabin itself.
By the way, the parking brake is the cause of the unpleasant squeaking sound in the rear of the cabin. Replacing the VAZ 2114 parking brake cable is a good reason to get rid of it for one thing: you should come up with a rubber seal for attaching the cable to the body frames.
After replacing the old cable with a new one, we check how it works. Just put your fourteenth on the hill on the handbrake, if it moves, you need to adjust it:
- We loosen the lock nut of the tension device in the handbrake, and tighten the adjusting nut, then pull the cable with a lever.
- The lever should move 2-4 strokes (this is the working stroke of the handbrake), if it works, tighten the lock nut.
- We drive up the hill again, put the handbrake on, check how it holds.
Before frost, you should always remove and lubricate the handbrake cable; you will increase its service life, protecting it from the adverse effects of low temperatures. Thus, you will ensure stable operation of the entire brake system of the car. It is worth lubricating the axle itself, the tips and the equalizer rod.
One more point: the handbrake cable does not always need to be changed, excluding, of course, an obvious rupture or wear of the mechanism. Most often it just needs to be tightened. And your handbrake will be back to normal. Tightening also means that the cable gradually becomes unusable, and it will soon have to be replaced with a new one. Also, the brake pads may be acting up. Very often, especially after tightening, drivers sin on the handbrake cable, buy a new one, change it, but there is zero effect. Look at the pads, they also tend to run out.
Adjusting the hand brake VAZ 2114
A handbrake failure is not a rare event. This kind of malfunction occurs everywhere. In some cases, after tightening the handbrake, the handbrake still remains inoperative. What are the main reasons for this malfunction?
The structure of the parking brake is quite complex.
Most often the problem is:
- Worn out brakes.
- Rope rupture or complete deformation.
- Drum wear.
Parking brake cable
The fastest way to repair the handbrake is to contact a service center. If you have no desire to go there, then you can try an alternative option. It consists of tightening the handbrake yourself.
Tension
So, having understood the diagram, you can begin the procedure of tightening the handbrake cables.
Stretch
The tensioning procedure is as follows.
- Place the car on an overpass or pit. If you don’t have a garage and you have the opportunity or desire to carry out the procedure at a service station, use a jack. The rear of the car is raised on a jack. The most extreme option is a curb onto which the car is driven and all you have to do is crawl under it.
- Engage the gearbox in first gear and put the car on the handbrake by pulling the lever up.
- The ideal number of handbrake clicks is from 2 to 5. If there are fewer or more clicks, it is easier to take appropriate measures to tension the cable.
- If there are less than 2 clicks, then the cable will need to be lengthened. If there are more than five clicks, then the cables are shortened.
- Lengthening the cable means relaxing it. To do this, unscrew the locknut. When tightening the cable, the locknut must be tightened in reverse.
- Before you start looking for the required nut on the bottom of the car, release the handbrake lever all the way.
- Take a 13mm wrench under the car and head down.
- Find the handbrake cable equalizer. This is the same element from which the main handbrake cable is divided into two cables.
- In some cases, it is simply not possible to gain access to the equalizer, since the muffler holders made of rubber are in the way. In such a situation, it is better to remove them. This is not difficult to do, but working with the handbrake will be much easier.
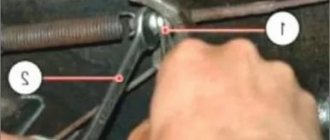
- Now there are two nuts in front of you. One is a simple nut and the other is a lock nut. Having two keys in your hands, fix the nut with the first one, and with the second one begin to unscrew or tighten the locking nut. Be careful that the nut does not start to turn.
- Taking into account the condition of the handbrake and the need to loosen or tighten the lever, turn the locknut in the appropriate direction. Remember what is the optimal number of clicks.
- Tighten or unscrew the locknut to obtain the required degree of tension.
Examination
But if you twisted the nuts there, this is not a guarantee that the handbrake now works perfectly. This needs to be clearly verified.
To do this, it is enough to go through a successive stage of verification activities.
| Stage | Explanation |
| Spin the wheels after tensioning is completed | The wheels are lifted one by one on a jack. When the handbrake lever is turned off, they should rotate freely without obstacles. By squeezing the brake, the wheels should lock. |
| Drive up a slight slope, stop and engage the handbrake | The fact that the wheels do not spin when suspended is good. But you need to make sure that the handbrake holds the car even when exposed to gravity. |
If the check shows that the handbrake still does not hold, even if the cable was tensioned exactly according to the instructions, the handbrake is probably simply worn out and the cable needs to be replaced.
Signs that replacement is needed
It is not uncommon for the VAZ 2114 handbrake cable to rust, as a result of which it breaks or weakens so much that no tightening can restore its previous functionality.
At the first sign of cable wear, you should consider replacing it. This problem may manifest itself as follows:
- The handbrake is not able to withstand the required traction;
- Drum brakes overheat;
- When you pull the parking brake lever, the cable does not respond to your actions;
- The cable sheath is seriously worn.
To check the operation of the handbrake, it is enough to perform one simple action. Place the car on a level surface, apply the handbrake, get out of the car and try to push it hard. If movement begins, the cable is dead and needs urgent replacement.
We recommend: Replacing the clutch cable of Lada 2109i (VAZ 2109i)
How to tighten the handbrake on a VAZ 2114
During operation, many elements of the brake system wear out. The cables suffer the most. They may be subject to deformation. They also stretch over time. What needs to be done and how to tighten the handbrake of a VAZ 2114?
To repair the handbrake, do the following:
- The car needs to be driven onto an overpass. As an alternative, a regular inspection hole is also suitable. A jack should be used for repairs.
- After this is done, you need to set the gear lever to 1st gear.
- When this is done, you need to release the handbrake.
- Now it's time to find the most important tool. We are talking about a key for 13. You will need 2 copies.
Keys for 13
- After this, you should go under the car and find the muffler. It will be easier to do this if you study the location of this unit in advance according to the instructions.
- The next step is to remove the muffler mounts as carefully as possible. When this is done, the manifold mounts must also be removed. If this is not done, then further repair steps will be much more difficult.
Handbrake linkage equalizer
- You need to find a cable equalizer. When this unit is found, you need to loosen the locknut using the first wrench. A second wrench will be needed to hold the nut. If this is not done, scrolling may occur.
- Now it’s time to adjust the lever travel. Tightening the nut reduces the stroke of the lever, and loosening the nut increases the stroke of the lever. A stroke of two to six clicks is considered normal.
Adjusting the parking brake
- After this is done, all that remains is to raise the rear of the car using a jack. You need to get the car in such a position that the wheels are hanging. After this, you can begin checking the brake pads. The wheels must be secured as securely as possible, otherwise an emergency situation may occur.
- At the last stage, you need to tighten the nut back. After this, you should check the handbrake for functionality.
Checking the hand brake
Important information. Some craftsmen are able to tighten the handbrake even without loosening the muffler. They use homemade keys as tools. It is not recommended to repeat this yourself, otherwise the most unpleasant consequences may occur for both the mechanic and the car.
Design
Many people mistakenly believe that the handbrake is a simple lever located near the gearbox, on the right hand of the driver. In fact, it is a whole system of elements that are connected to each other.
When the hand brake fails, in 90% of cases the culprit is a cable or a pair of cables that go to the rear brake pads from the equalizer.
To determine the reasons for the failure of the handbrake, it is necessary to understand the circuit diagram of the device and its components.
Handbrake diagram
The device includes a number of structural elements. Namely:
- Lever arm;
- Traction;
- Springs;
- Lever button;
- Main cable axis;
- Bolts;
- Washers;
- Drive unit;
- Equalizer;
- Case;
- Locknuts;
- Cotter pins;
- Right and left lever;
- Expansion left and right strip;
- Lock washer, etc.
Conclusion
A properly functioning braking system is the key to safe driving and the absence of any problems on the road. The life of not only the transport driver, but also all passengers depends on how efficiently it works.
The VAZ hand brake is the simplest mechanism. Its repair cannot cost a large amount, so you should not put off repairing the brake system until a later date. You don't even need sophisticated tools to carry out repairs. You can repair a VAZ 2114 with ordinary garage equipment.
If you take proper care of your car and its braking system, it will repay its owner with more than just longevity. In an emergency, a car can save lives if all its mechanisms are in good working order and functioning normally.
Dismantling and replacement
It is difficult to confuse the cable from the handbrake with anything else under the bottom of your VAZ 2114, which greatly simplifies the repair and replacement procedure.
Dismantling works
We provide detailed instructions for replacement, and additionally recommend watching the video.
- We advise you to get the car in order in terms of cleanliness in advance. This will make it easier for you to find all the nuts and fasteners.
- Additionally, treat the nuts with the almighty WD40. This will make it much easier for you to unscrew the sometimes sticking and rusting nuts.
- Place the handbrake lever all the way down.
- Start with the adjusting nut and locknut that you used recently to try to tighten a loose cable. In this situation, you should loosen the nuts and remove them from the handbrake rod.
- Remove the washers and cable equalizer. Although this can be done after you jack up the car. But be sure to do it before removing the wheels.
- Raise the rear of the car with a jack, unscrew the wheel bolts and remove them.
- Tap the brake drum locking pins. This will allow them to be removed from the brake pads.
- Remove the block.
- You now need to disconnect the ends of the two cables from the equalizer. The fasteners can be removed from their places with the simplest pliers, so don’t bother.
- The shifted spacer lever has hooks from which the cable loop can be removed.
- The cable sheath must be removed from the entire suspension of the rear of the car. To do this, the mounting bolts are first unscrewed.
- Pull the cable out of the holes through the brake flaps.
- We got rid of the old cable, so all that remains is to replace the old one with a new element. The procedure is performed exactly in reverse order.
- Thread the new cables through the washers and hook the loops. You can additionally make bosses - this is a special clamp that allows you to fix the cable even more tightly.
- Reassemble the entire disassembled wheel structure.
- Route the cable along the suspension through the sheath and secure the bolts.
- Pull the handbrake in the cabin.
- Check the correct tension and operation of the new hand brake, or rather the cable.
It is not uncommon for the parking brake to cause an unpleasant squeaking noise from the rear. By changing the cable, you can get rid of this problem at the same time. To do this, rubber seals are installed under the cable fasteners on the body frames.
Functionality check
After replacing the cable, check its operation.
- Place the car on a hill and turn on the handbrake. If the car starts to roll, the new cable needs adjustment.
- Loosen the parking brake lock nut in the handbrake, tighten the adjusting nut, and then pull the cable using the lever.
- The optimal lever stroke should include 2-4 strokes. If this happens, tighten the locknut and check it again.
- We drive up a hill and turn on the handbrake. Now the car should definitely stand still. Unless the cable turned out to be fake or an error was made during the assembly stage.
Disassembled handbrake
Before frost, it is recommended to lubricate the parking cable, which will significantly extend its service life. Under the influence of negative temperatures, the cable breaks down faster. The tips, axle and rod of the equalizer should be lubricated.
Tightening and replacing the handbrake cable is not a difficult task. Even if you don't have a lot of experience working on cars, you will be able to do this job.
But if you are not confident in your own abilities or simply do not have time to do such things on your own, contact a service station. A lift will cost about 500-700 rubles, but for a replacement they will ask for at least 1,500 rubles.
cableThe role of the car’s braking system in ensuring safety is unlikely to be disputed by anyone, but the importance of the “handbrake” is still underestimated by many. Some motorists are negligent about its technical condition, believing that in extreme cases they will be able to lock the car in the parking lot by engaging the gear. At the same time, they do not take into account that a tightened handbrake will also help in a critical situation on the road. Therefore, it is better to monitor its condition from the first days and make timely repairs to the system.
We recommend: Antifreeze or antifreeze, which is better to fill and what is the difference?
Pulling up the handbrake
It is likely that you just need to tighten the parking brake on the VAZ 2110 to fix the problem.
- Drive to the inspection hole, from where it is most convenient to make adjustments. Another option is a lift. You'll find something here. This way you can easily get to the necessary nodes.
- Make sure the brake lever is in its lowest position.
- Take two keys. You will loosen the lock nut first and tighten the adjusting nut second.
- Tighten the adjustment nut until the cable is properly tensioned.
- It is strongly recommended to hold the rod when tightening the adjustment nut with pliers.
- Now make sure that the lever makes full travel in 2-4 clicks, no more.
- If after checking everything turned out to be good and the working stroke is correct, tighten the equalizer locknut while holding the adjustment nut with a second wrench.
- Release the handbrake lever down and turn the rear wheels by hand. Rotation should occur evenly without any jamming.
- But if the adjustment did not allow the cable to be tensioned, then the element must be replaced.
How to tighten the handbrake
- We park the car on an overpass or inspection hole. (You can also place the rear of the car on a curb or use a jack).
- We put the car in 1st gear.
- We put the car on the handbrake and count the number of clicks. If there are less than 2 clicks, then you need to lengthen the drive, if there are more than 6, then reduce it accordingly.
- Lower the handbrake all the way.
- Take 2 keys to “13”.
- We climb under the car.
- We remove the rubber holders of the muffler and manifold for convenience.
- We find the cable equalizer (number 11 in the diagram).
- Use one key to unscrew the lock nut, and use the other to secure the nut from turning.
- We adjust the stroke of the lever: when screwing it in, the stroke decreases, when unscrewing it increases. (remember that the lever stroke should be from 2 to 6 clicks).
- We hang the rear wheels of the car on a jack and check the rotation of the wheels. The brake pads should not interfere with the rotation of the wheels, and when the handbrake is raised, the wheels should stop firmly.
- Tighten the nut with a counter nut.
You will have to tighten the handbrake quite often due to the design of the handbrake. You will also have to adjust the handbrake when replacing the cable, repairing the handbrake, replacing brake pads (How to replace rear brake pads?) and replacing the rear brake cylinder.
It should be noted that the parking brake must be held on an uphill slope of at least 23%.
Sources used:
- https://autovaz-2114.ru/brake-system/chto-delat-esli-ne-derzhit-ruchnik-na-vaz-2114/
- https://remontvazov.com/kak-podtyanut-ruchnik-na-vaz-2114
- https://vaz-2114.info/kak-podtyanut-ruchnik-na-vaz-2114/
- https://vaz-2114-lada.ru/2012/08/kak-podtyanut-ruchnojj-tormoz/
HOW TO ADJUST THE HANDBRAKE
Sometimes, after replacing the cable, it becomes necessary to adjust the brake. It's easy to check whether adjustments are needed. We put the car on the handbrake down the slope. If it moves, then it needs to be adjusted.
Incorrect operation of the handbrake is expressed not only in poor fixation of the car when using the parking brake. A creaking sound near the rear wheels also indicates that the cable tension needs to be loosened.
Adjusting the hand brake of the VAZ 2114 is quite simple:
- It is necessary to remove the muffler from its mountings
- Unscrew the parking brake lock nut
- Tighten or loosen the nut, depending on the situation (if it doesn’t hold, tighten it, if it creaks, then loosen it).
The lever travel should be in the range of two to four clicks until it is completely locked. After this procedure, you need to check the car again on a hill.
BRAKE SYSTEM DEVICE
Like any other mechanism in your car, the brake system consists of several elements that work together. The VAZ brake system is no exception. It is much simpler both in structure and functionality than in popular foreign cars, but it also deserves attention.
Its main elements are:
- Front wheel brake structures;
- Pipelines (both sides);
- Hydraulic drive main cylinder;
- Tank;
- An amplifier that has a vacuum structure;
- Braking mechanisms located on the rear wheels;
- Two pressure control levers;
- The hydraulic system also has a regulator that controls the pressure;
- Pedal;
- Hoses made of flexible material.
The system is designed so that if one of the circuits fails, the second will provide safe braking. This is done in order to make driving as safe as possible. The brake system of the VAZ 2115 works on the same principle.
The hand brake consists of:
- Lever with locking button;
- Cable in a protective sheath;
- Adjustment nuts;
- Equalizer;
- Locknuts;
- Protective cover.
The weak point of the handbrake is the cable . It requires constant attention. Its stretching or rupture can lead to disastrous consequences. It is also worth remembering that the pads are constantly worn out (especially with active use). It is important to pay attention to the brake force regulator of the VAZ 2113.
Diagram of the brake system of a front-wheel drive VAZ car (device)
These are the elements that make up the brake system of the VAZ 2114. Everything is quite simple, both in repair and in preventive maintenance. Any adjustments are also made without much effort. For example, you can adjust the handbrake in half an hour yourself, and adjusting the brake pressure regulator of the VAZ 2114 will not cause stupor even for a beginner. These are the key features of the domestic automobile industry - everything is easy and simple.
How many clicks should the handbrake lift?
The need to tighten the handbrake on a VAZ 2114 arises when the rear brake pads and cable stretch are worn out. If you actively use the mechanism, the cable will become deformed due to constant tension and loosening.
The ideal number of clicks when applying the handbrake is considered to be in the range from 2 to 5. Most often, their number exceeds the permissible value, which requires tightening the handbrake.
You can do the work yourself without special knowledge; just follow the instructions from the next paragraph and have all the necessary tools at hand.
Handbrake diagram (photo of handbrake)
Handbrake diagram
Hand brake device:
- Drive lever.
- Lever pawl pull.
- Traction spring.
- Lever button.
- Front cable axle.
- Bolt M6x14.
- Spring washer 6.
- Drive traction.
- Lock washer 6.
- Protective cover.
- Cable equalizer.
- Washer 8.
- Nut M8.
- M8 nut is low.
- Lever axis.
- Washer 10.
- Cotter pin 2x20.
- Lever right.
- Left lever.
- Right expansion bar.
- Left expansion bar.
- Nut M6.
- Lock washer 6.
- Cable clamp.
If the handbrake does not hold, then it needs to be tightened. The process of adjusting the handbrake is not very complicated, but it does require some equipment and suitable conditions.
So, before you learn how to adjust the handbrake, you should know the following: the working stroke of the parking brake should be 2-4 clicks, but the handbrake stroke of 8 clicks is not excluded - here you already need to adjust the parking brake stroke.
Malfunctions and their symptoms
Determining that a cable needs adjustment or replacement is quite simple. Signs of a faulty mechanism appear as follows:
- The handbrake is pressed effortlessly - the cable is loose, you need to tighten it.
- The mechanism does not respond to pressing the lever - the drive is torn or flew out, or the reason may be the wear of the rear pads.
- If the handbrake is stuck, the drive is damaged and needs to be replaced.
Read more: Oil pump VAZ 2106: device, check, adjustment, replacement, instructions with photos and videos
Having taken out the main element, you can visually determine its condition. Replacement is required in the following cases:
- Up to 2% are damaged or torn.
- The cable moves with difficulty even after applying lubricant.
- The drive tips have grooves.
