Home » VAZ repair
Reading time: min. Updated 08/04/2019
INSTALLATION KIT MADLEXXCARS VAZ 08-15 KIT (MLC VAZ 08-15 KIT) for cars of the Volga Automobile Plant (AvtoVAZ) ========================================= ======================== Designed for the installation of REAR DISC BRAKES (RDB) with a mechanical parking brake on vehicles with a DRUM BRAKE SYSTEM (RDB).
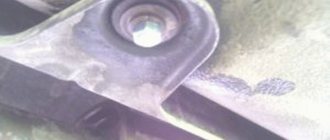
Brackets (MLC VAZ 08-15) are installed between the beam and the axle (rear axle) using high-strength fasteners.
As a result, WITHOUT SIGNIFICANT CHANGES IN THE DESIGN (replacing the beam or welding work...), the beam without brackets “WITHOUT EARS” is modified into a unit READY for the installation of new brake mechanisms (BRAKE CLIPS and CALIPERS).
When developing the MADLEXXCARS VAZ 08-15 KIT (MLC VAZ 08-15 KIT) for AvtoVAZ cars, we relied on the experience of other manufacturers of similar disc brake systems.
But unlike them, WE DID NOT USE exclusive and custom-made components, but selected AVAILABLE and COMMON factory parts for our system. From popular and frequently encountered car models (original spare parts and analogues, which are easy to find on sale anywhere.) So that by installing our HTD kit, car owners will not experience absolutely any difficulties in the future with the selection of consumables or repairs.
Calipers, brackets and pads are used from time-tested TRW REAR DISC BRAKE SYSTEMS. (installed on the rear axle of cars similar in weight and dimensions to AvtoVAZ models) Parking brake cables are used from the SPORT model Brake “non-ventilated” 4x98 mm brake discs are selected according to parameters from FIAT/ALFA/LANCIA Additional mounting holes are provided for installing dirt-protective shields from the front axle of VAZ: 2108/09/099/13/14/15
The result was a SIMPLE, CLEAR, COMMON and RELIABLE brake system (BS) for the rear axle with a mechanical parking brake at an adequate cost. __________________________________________________ Applicability:
For installation on VAZ cars with a rear torsion beam with a hub (4x98) without ABS (Rim R14 and more):
VAZ 2110/2111/2112 ___________________________________________________ The kit includes:
1) 2 MADLEXXCARS SPACERS (VAZ 08-15) 2) 8 HIGH-strength BOLTS for their installation, 3) WASHERS for the brake caliper 4) FASTENERS for installing the shields (6 screws, 6 nuts, 6 rivet nuts. ======= =========================================== WE DO DELIVERY TO OTHER REGIONS (By Post RUSSIA or transport companies) find out more about delivery on the madlexxcars website in the delivery section or contact us in any way convenient for you.
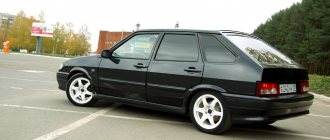
Domestic cars are reliable and quite durable, despite the fact that they are widely criticized. Low cost and availability of components are the key points when choosing a machine. But every driver tries to improve his iron horse, so for beauty and reliability they often install rear disc brakes on the VAZ-2114. Yes, it's beautiful - drums look poor on alloy wheels. And reliably - the effectiveness of the brakes increases several times in comparison with the standard equipment of the car.
Basic information
Since the release of the first car at the car plant in Tolyatti, and this was the Zhiguli-2101 model, popularly nicknamed the “penny”, almost to this day the brake system diagram of all cars has remained unchanged. Discs were placed in front, and drums in the back. This is logical, since the main load during braking falls on the front ones.
Of course, this scheme is much more effective than the GAZ-24, which has drums in a circle. Because it’s no secret that disc brake pads grip much better, and the distance to stop is correspondingly much shorter.
Necessary materials
If you decide to install the HTD yourself, then you will need the following materials:
- Directly disc brakes, machined under the hub by 0.6 cm. The diameter of the disk should be 24 cm. Please note that it is not necessary to grind the disk itself. If you want to leave it unchanged, then you need to groove the hub.
- Front calipers and hoses.
- Faceplates necessary for attaching calipers. You will have to tinker with this part, since it is quite unusual and requires separate manufacturing to the exact dimensions.
- High quality pads that fit true to size.
- 12 bolts M10 × 1.25 with groovers.
- 8 spacers. You can use timing belt tensioner roller washers for the VAZ-2108.
When you have acquired all the necessary materials, it’s time to proceed directly to the replacement. The procedure is performed in several stages.
Tuning VAZ-2114
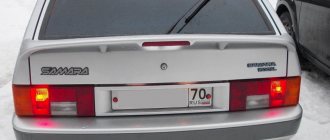
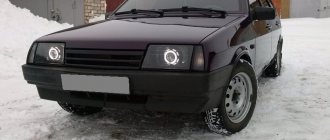
VAZ-2114 is a fairly recent model that replaced the famous nine. The base of the cars is the same, even such little things as taillights cost the same. But you can significantly improve the car only on your own.
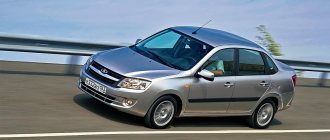
It is worth noting that the Lada Kalina is the first model on which disc brakes are installed on the rear axle from the factory. And it should also be mentioned that you make all changes to your car entirely at your own peril and risk. Intervention or modification of the design, steering, or braking system is punishable by removal of license plates and prohibition of operation of the vehicle. But if this doesn't scare you, you can continue reading.
What is needed for tuning
If you still decide to install rear disc brakes on the VAZ-2114, you need to know what elements are required for this:
- Brake discs. Ideally suited are those installed on the front wheels of the VAZ-2114 or similar models - 2108, 2109. Their diameter should be 240 mm. But you need to pay attention to the fact that you cannot do without a turner - the hub is slightly different in design. More specifically, it will have to be bored from a diameter of 58 mm to 60.
- Calipers, brake pads, hoses - also from the front brakes of the Samara-1 and Samara-2 generation models. Therefore, you can safely purchase the entire set of front brakes for the nine.
- Plates for fastening calipers. You can either make them yourself or purchase them at auto stores.
- 12 bolts M10X1.25, 30 mm long.
- Distance washers – 8 pieces. Ideally suited are those installed in the gas distribution mechanism drive of the 8-valve VAZ-2109 and 2114 models.
Well, that’s all, all the spare parts have been purchased, all the necessary tools are available. All that's left to do is carry out a complete modernization. It should be noted that fairly new VAZ-2114s (their price on the secondary market remains high) do not have rear brakes, but can be converted without much difficulty.
Replacement steps
The entire replacement process can be divided into several stages:
- Removing wheels;
- Removing the old brake pad;
- Frame disassembly;
- Cleaning the hub and checking it;
- Removing coating from new disks;
- Runout check;
- Installation of new brake system elements.
Now let's talk about this in more detail.
Removing the wheel
In fact, dismantling the wheel for subsequent replacement of the brake elements is not difficult.
But a certain sequence of actions will have to be followed.
- Place a jack under the car.
- Lift it up so that it doesn't tip over, but still allows you to easily remove the wheels.
- Unscrew the wheel fasteners.
- Remove the hubcaps and the wheels themselves.
As you can see, the procedure is really simple, but it requires attention and accuracy.
Removing the pads
- Try to move the piston as far as possible from the brake mechanism. But do not exceed the distance beyond that which will allow you to comfortably remove the brake pads.
- Take out the block.
- To make the job easier, you can disassemble the brake frame. To do this, unscrew the two bolts securing the block and disconnect the device.
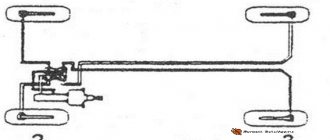
Disassembling the unit
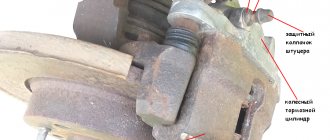
Before disassembling the entire brake system on the rear axle, the fluid must be drained. To do this, unscrew the bleeder fittings located on the calipers. Therefore, in the future you will have to pump it. The initial work looks like this:
- Loosen the cable and move the pads together. Unscrew the guide pins that secure the drum to the wheel hub. If you cannot remove the drum easily, generously coat the seat with WD-40 penetrating lubricant. It should always be at hand when carrying out such repairs. Even more - in advance (about half an hour) all threaded connections should be treated with this liquid.
- Remove the springs using a flathead screwdriver and remove the spacer bar. By disconnecting the handbrake cable, you can completely dismantle the old, now unnecessary, pads.
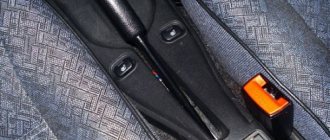
Please note that now you will not have a handbrake (unless you install a hydraulic one). Therefore, absolutely all components that in one way or another relate to the cable, including it, can be removed. Now we need to talk about installation.
Installation process
If any difficulties arise during dismantling, then it is worth looking into the VAZ 2114 service manual, there is a detailed description of the removal and installation of all mechanisms. And now to work:
- The cable tension must be loosened and the rear pads must be brought together. After this, you can use the 12th key to remove the guide pins. The seat must be thoroughly cleaned with a metal brush, and then the drum must be knocked down. It is not recommended to use a metal tool for these purposes, as it can damage the seat. The best solution would be a rubber hammer;
- The rear beam also needs to be sharpened
- To release the pads, you need to remove the springs - this can be done with a regular screwdriver. After these manipulations, you can remove the tension spring and spacer bar. Next, you should lower the handbrake lever, after which you can remove the brake pad. The standard elements are removed, you can begin installing the new mechanism;
Important point! Sometimes one pin hole in a mechanism is smaller than the other. It is not recommended to adjust this size yourself. The best solution would be to go to a workshop where the diameter can be quickly adjusted.
- The caliper can be located in front or behind the wheel axle. This should not affect the operation of the mechanism in any way, but usually owners of the VAZ 2114 prefer to install it on the rear axles, since symmetry will have a positive effect on braking. The next step is to join the faceplate and hub. You should check that the centering has been carried out thoroughly. If there are defects, the docking must be repeated;
- Grinding the corner of the beam
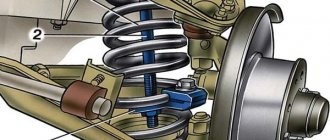
- The next step should be straightening the corners of the beam. Once this procedure is completed, the hub can be installed. Straightening can be done using a grinder. The main part of the work is completed, all that remains is to install the rear brackets on the faceplate, and then attach the brake disc to the mechanism. In order for the structure to be reliable, it is necessary to place spacer washers at the contact points. The connection between the brackets and the faceplate must be securely secured, and then proceed to sealing the mechanism. An important point is to check the pedal. Rear wheels with an improved mechanism will significantly reduce the braking distance, thereby increasing safety.
- Result of work
We recommend: Car floor mats, what types are there?
Installation of disc brakes
The location of the mechanism support can be either in front or behind the rear wheel axis. It will work in any case, but if you install it at the back, the efficiency becomes a little higher. Next, your task is to correctly connect the hub to the faceplate. Pay attention to defects, even the most minor ones. If there are deficiencies, carry out the joining work again.
How to carry out correct installation
- the caliper can be located either on the rear or on the front side of the axle, this moment does not affect the efficiency of the braking system in any way, in this case you can choose a location convenient for you;
- but it is better to choose installation on the rear of the axle, in this case you can achieve more complete symmetry and this will create all the conditions for a better stop;
- the faceplate is connected into a single solid mechanism with the hub;
- all holes must show the most accurate match possible;
- if displaced, the problem can be corrected by lightly tapping with a hammer;
- alignment must be carried out efficiently and in accordance with all established rules;
- in the process, it is necessary to correct the corners of the beam in order to prevent the support from resting on them; to do this, you can use a regular hammer or, in extreme cases, a grinder;
- Corner handling directly depends on how the rear brake discs are placed.
Positive qualities of rear disc brakes
Yes, the main advantage is increased security. The braking distance is reduced, and it does not depend on the weather. The operation of the node is stable, the weather does not affect it in any way. For example, when it rains, drum brakes become ineffective and the braking distance increases. This is not observed when using disk drives.
Overheating is not a problem for disk structures. For example, when braking at high speeds, the fluid in the system heats up due to high friction force. The drum and pads can heat up almost red hot – up to 600 degrees. As a result, the pedal fails and braking efficiency deteriorates significantly. You'll never feel that way with disc brakes. Their device is simple and reliable, so you don’t have to worry about safety.
Bleeding the brakes
After all the work has been carried out, it is necessary to perform bleeding - getting rid of air in the system. This is essential to improve operational efficiency. And once you’ve started upgrading, don’t forget to change all the components that have been serving for a long time. Replace hoses, front pads, VAZ-2114 vacuum brake booster, master cylinder. As for the fluid, it should be changed approximately every two years. Briefly, the pumping procedure looks like this:
- Pour liquid into the expansion tank.
- Bleed the right rear caliper.
- Check the fluid level and add if necessary.
- Bleed the left rear caliper.
- Repeat step 3.
- Bleed the right front caliper.
- Follow step 3.
- Bleed the front left caliper last.
Here's how to bleed the VAZ 2114 brakes correctly, the essence of the procedure is to go from the farthest to the nearest caliper (relative to the main brake cylinder).
Need a handbrake?
But some motorists cannot do without a handbrake. And the new VAZ-2114, the price of which at one time was close to 300 thousand, does not have a handbrake, and this is not very convenient. In cities, parking lots are simply impossible without it. And if an autostart system is installed, then you simply cannot do without a handbrake - it is not recommended to set it to speed.
What is needed to install this mechanism? First of all, this is the handbrake itself, but not a cable one, but with a hydraulic cylinder. As a rule, they are universal, and new Chinese mechanisms cost from 1,500 rubles and more. And the rear disc brakes on the VAZ 2114 will be equipped with a handbrake system.
The installation procedure is extremely simple - put it in place of the old one, fasten it with bolts, connect it to the hydraulic system, namely to the part that controls the calipers on the rear axle. That's all, from now on you will have a handbrake that will work perfectly in any conditions. Neither overheating, nor frost, nor torrential rain is scary. And even in cold weather you can use the handbrake.
What are the best brake discs for VAZ?
A car's brake system, which is in good condition, is the key to the safety of both the driver and passengers of the car. It goes without saying that it is necessary to maintain this system in good condition, without skimping or skimping on the quality of components and consumables. And brake pads, in particular, need to be changed promptly.
Today there are a lot of pads from different manufacturers. And an inexperienced car owner will have difficulty making a choice. And therefore it is worth giving examples and descriptions of the pads of some companies - in particular, about how their products behaved on the VAZ 2115. Based on this experience in operating various pads, everyone will be able to make their choice and equip their VAZ 2115 with exactly those pads that will function in accordance with the requirements of the car owner. But it’s worth making a reservation - we are talking about branded spare parts, and not about fakes, which are available in abundance on store shelves.
The most suitable products for the VAZ 2115 from Russia are TIIR from Yaroslavl, VATI from Volzhsk, EZATI from Yegoryevsk, and, finally, STS from Moscow. Of the imported ones for the VAZ 2115, Rona (Hungarian), German ATE and Bosch are good; Ferodo and Lukas from England, as well as Roulunds from Denmark, are suitable.
We will compare the pads according to those properties that ensure comfortable and safe driving - wear resistance, frictional qualities, and restoration of these qualities.
The conditions under which these pads were tested on a VAZ 2115 were as follows: 1. The friction coefficient of the pad-disc system with cold brakes, where the temperature did not exceed 50 degrees; 2. The same thing, but with hot brakes, up to 250 degrees; 3. With periodic braking up to 50 times, subject to a decrease in speed from 100 mph. up to 50 km/h. 4. Checking their functionality after they have cooled down to ambient temperature.
So: 1. TIIR pads. Their friction properties leave much to be desired. Especially with regular braking. 2. VATI pads. Cold braking is also not of particular quality, but still maintains the norm. But when they warm up they work well. Interesting, but after restoration they became even better. This fact is explained by defects in manufacturing, or more precisely, in their heat treatment. After heating during operation, the material was calcined and became what it should be. 3. EZATI pads. They are perfect in every way. It is not for nothing that a large number of counterfeits are disguised as this particular manufacturer. Therefore, when purchasing such pads you need to be extremely careful. 4. STS pads. The parameters are not inferior to foreign ones. They can be restored to almost the same parameters. 5. Rona pads. These Hungarian pads are simply exceptional in their quality. Their results are amazingly consistent. 6. ATE pads. They showed the highest results in terms of friction properties. When warmed up they work worse, but still acceptable. 7. Bosch pads. The work is beyond praise, but only in a cold state. That's where all the positives end. High price and poor quality of work at high temperatures. 8. Ferodo pads. Worse than some domestic ones. 9. Lukas pads. Everything would be fine if it weren’t for their balance sheet for the VAZ 2115 – at the lowest level. 10. Roulunds. True European quality.
So, which pads should you choose for your VAZ 2115? From Russian, of course, STS . The good price-quality ratio of the products makes them the most acceptable. EZATI is also quite a suitable option. But it’s better not to mess with TIIR.
If you take imported ones, then it’s better - ATE . This is true German quality. Roulunds from Denmark are also good It is these pads that will ensure the comfort and safety of driving a VAZ 2115 at the highest level.
This is interesting: Generator Ford Mondeo 3: which one is installed, replacement