Many inexperienced owners of the Lada Granta Liftback (Sedan) claim that the door sills from the Lada Kalina are compatible with the Granta. This is partly true, if you don’t measure it down to the millimeter.
In fact, after installing the plastic thresholds from Kalina, an overlap of a couple of centimeters is formed. The value is not critical, for many it is completely unnoticeable, but complete compatibility should not be asserted.
Review of prices for original thresholds and their analogues for the Lada Granta Liftback
| Article/index OEM | Price in rubles per unit |
| Original (Sedan, Liftback) | |
| Lada 99999219004200 | from 350 |
| Lada 999992190042/24 | —/— |
| Lada 999992190042/27 | —/— |
| Lada 999992190042/42 | —/— |
| Analogs | |
| Stainless steel9999921924 | from 1600 |
| Polished steel LAGR.31.3772 | from 2500 |
| NP.6002.3 (stainless) | from 1600 |
| LAGR.31.3773 (engraving, drawing) | from 2000 |
| NPLAGRA011 | from 1600 |
*prices are current as of 10/01/18.
Preparatory stage before installing thresholds on the Lada Granta Liftback
Required tools:
- Phillips head screwdriver;
- a set of linings, the type is chosen by the owner based on preferences;
- plastic pistons (at “6”) and cone-shaped screws with a flat head for screwing in in the amount of 16 pieces, 4 for each of the thresholds;
- stationery knife, side cutters;
- doorway seal, subject to damage (wear) of the previous one.
Sequence of actions when setting thresholds
- We place the car on a level platform, open the doors, and begin dismantling work.
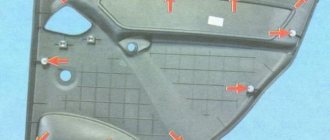
- We start with the driver's door, unscrew the four standard screws from the trim, and remove it.
- We insert polymer pistons into the holes, they fit perfectly.
- We apply the threshold and screw it with self-tapping screws.
When it comes to installing stainless steel trims and decorative inserts on the outer threshold, we use double-sided tape instead of screws. We pre-treat the surface, remove dust, dirt, and moisture.
Some service stations and tuning studios practice fitting metal onto self-tapping screws, but not every owner agrees to drilling a number of through holes in the car. By analogy, we complete the installation on the remaining sections of the thresholds.
Reviews
| № | Positive |
| 1. | Alexander , 32 years old: of course, there was a catastrophic lack of additional inserts in the standard configuration. After two years of using the car, the paint began to peel off. On the recommendation of friends, I installed overlays from Lada Kalina. They are a couple of centimeters longer, but the fastenings are the same. |
| 2. | Kirill , 32 years old: after buying a car from the showroom, I installed polymer door sills. Now the paint will not be damaged. |
| 3. | Mikhail , 41 years old: a garage friend bought stainless steel pads and installed them with double-sided tape. It looks beautiful. I did it by analogy. No complaints, I'm happy. |
| 4. | Vitaly , 35 years old: despite the negative comments about the thresholds from Kalina, I installed them for myself and they fit well. I sawed off two centimeters in length. |
| 5. | Vyacheslav , 44 years old: on the recommendation of his comrades, he glued the stainless steel overlays onto double-sided tape. My advice to motorists. |
| Negative | |
| 1. | Victor , 29 years old: dissatisfied with the quality of manufacturing of domestic plastic pads. There is no money to buy stainless steel. I heard that you can insert it from a second generation Opel Astra, albeit cut a little in length. I will try. |
| 2. | Vasily , 41 years old: despite the wide range of accessories, there is no good quality. Instead of wasting money, I installed rubber pads, having previously cut them according to the blank. |
| 3. | Ignat , 39 years old: when buying pads, I preferred stainless steel, I didn’t like plastic. Although I overpaid a little, I am confident in its practicality. |
Conclusion Despite a number of negative reviews, it is necessary to install door sill covers. As for the cost, we start from the size of the allocated budget for accessories. Obviously, we consider plastic as the best option. We also take into account the temperature conditions in which the machine will be operated.
FakeHeader
Comments 17
Were they not there at all? economy - pelvis
why even install them?
So that the carpet doesn't turn into shit. in this place.
I've been driving almost every day for two years, like new rapids
Mine are also like new, because I immediately wipe them off if someone gets them dirty. But plastic is easier to wipe than carpet.
my opinion, the view is not very good
I don't know, they are priced in the deluxe suite from the start. Looks normal. Certainly better than carpet that goes under the rubber band.
They are also in the top nine initially, which is why I don’t put them.
1. I removed the slats, but it was possible to make holes for self-tapping screws directly in them. With slats it is more convenient to stretch the carpet. 2. In the rear facings, I drilled a hole in each for side mounting.
I also removed the lower trim of the pillar, but didn’t touch the rubber
Well, I wouldn’t recommend unhooking it from the plastic slats, especially since it easily rises and bends with the carpet. I also don’t see the point in making holes - everything can be cut normally with a self-tapping screw. I simply inserted the clips into the threshold and screwed in the screw.
I was given self-tapping screws with a blunt tip. Oh, I'm tired of it. It’s easier to punch holes in advance with a thick awl
Well, yes, that's how they should be. It pushed normally.
Well, I wouldn’t recommend unhooking it from the plastic slats, especially since it easily rises and bends with the carpet. I also don’t see the point in making holes - everything can be cut normally with a self-tapping screw. I simply inserted the clips into the threshold and screwed in the screw.
I unhooked the carpet from the slats while I was connecting the sub. But nevertheless, the slats lie directly above the holes and I don’t quite understand how you can tighten the bolts without removing the slats. The self-tapping screws also had a blunt end, so I made holes in advance. And on the back door, you generally need to insert the last screw through 2 carpets. This is difficult to do with a blunt end. If you have a photo of how you did it, I'd be glad to see it.
Many inexperienced owners of the Lada Granta Liftback (Sedan) claim that the door sills from the Lada Kalina are compatible with the Granta. This is partly true, if you don’t measure it down to the millimeter.
In fact, after installing the plastic thresholds from Kalina, an overlap of a couple of centimeters is formed. The value is not critical, for many it is completely unnoticeable, but complete compatibility should not be asserted.
Video - LADA GRANTA and door sills
Let's consider such a question as setting thresholds on the Grant. By tradition, all work will be done with your own hands.
Remember that you can always improve the appearance of your car and you don’t have to turn to specialists for everything. Today we will talk about installing thresholds on the Lada Granta.
In rainy weather, this is a nuisance: you get into the car and the carpet turns into a dirty rag, and moisture also accumulates. The adverse effects of water should always be avoided. I went to the market and bought thresholds from Kalina.
Installing the thresholds was not a complicated undertaking, but some effort still had to be made. We begin work by removing the seal. This is how we get to the standard plastic thresholds, which are attached to the carpet with a stapler. We carefully tear off the thresholds and find a great place to install clips from Kalina.
We install internal thresholds on the Granta
Let's see how you can install internal thresholds on the Lada Granta. As usual, let's look at the modification using the example of a specific car enthusiast and car.
The author of the material says that he likes “Granta” itself, and it suits him quite well. The car cannot be compared with the VAZ classics, or even with many front-wheel drive models produced by the domestic auto industry.
This applies not only to the technical characteristics, but also to the appearance of the Grant. True, there is still something to work on, and the car gives tuning lovers many opportunities for this. But today we are not talking about external tuning, but about internal tuning - this is where the installation of internal thresholds can be attributed.
If it’s raining or slushy outside, getting into the Granta will inevitably stain the carpet. In addition, moisture also gets inside the cabin. The owner says that although he purchased the car recently, he has already completed anti-corrosion treatment of the body. However, moisture inside is still an undesirable phenomenon. Therefore, I went to the nearest car market and bought Kalina door sills there.
There was nothing complicated about their installation and the process did not take much time. True, in order for the final result to be pleasing, I had to tinker a little. First of all, remove the seal. When you remove it, under the carpet you will find plastic thresholds that are nailed to the material with a stapler. The brackets need to be bent and the thresholds carefully torn off.
When the owner removed the standard “Grant” thresholds, he saw a place where the “Kalinov” clips fit perfectly. What do clips have to do with it? They will allow you to secure the new internal thresholds with self-tapping screws. In principle, one could do as the manufacturer did and reattach the elements to the carpet with a stapler. But then the whole point of revision is lost.
In general, the clips came in handy here. In total, 8 of them were needed for the rear sills - 4 clips for each door. When I installed them, I took a regular utility knife and applied notches for self-tapping screws to each clip.
By the way, I also bought standard self-tapping screws from Kalina - they are black and go well with the thresholds. And they fit perfectly into the clips. When I installed the thresholds, I “planted” them on the screws and that’s it – the modification was completed.
A total of 18 clips and the same number of screws were used. What was the benefit of installing new thresholds? The carpet is no longer so dirty, and moisture no longer penetrates into the interior. In addition, if necessary, the elements can be easily dismantled and then reinstalled.
Vazikov.ru » Lada Granta
Source: https://vazikov.ru/lada-granta/stavim-na-grantu-vnutrennie-porogi.html
What options are there for Granta threshold covers?
Door sills for the Lada Granta can be roughly classified according to the following criteria:
- plastic products;
- steel options with increased strength;
- designer products.
Standard thresholds for Granta made of plastic attract an army of buyers with its affordable cost. If you use them with care, they can “live” for more than one year.
Thresholds on Grant, made of stainless steel, although they are characterized by a slightly higher cost, can “last” an order of magnitude longer. Their main drawback is the appearance of a small number of scratches after a long period of use.
Designer door sill covers will also delight you with their practicality and, in addition, they are endowed with a unique appearance. In most situations, these privately produced products carry a message or logo on their surface.
If the steel surface of an element has additional elements, they are coated with a special composition that prevents scratches. The price of these accessories for Lada Granta is very high, and the installation process is more labor-intensive.
Types of internal linings
Internal and external linings are classified according to the material of manufacture and installation method. Fairings are installed in one of the following ways:
- for auto glue;
- double sided tape;
- bolted connection;
- on self-tapping screws.
Bolts and screws are used to install parts made of plastic, more than 3 mm thick, fiberglass, or metal. This method is reliable and durable, but also has its drawbacks. If the base is rotten, screwing in the bolts can cause a break in the base threshold or distortion of the supporting structure. Before installing decorative overlays, the threshold and bottom are inspected and repaired.
Installation with double-sided tape or auto glue ensures a tight connection between the panel and the base. But due to the fact that the inner fairing must cover the threshold and press down the carpet, it is inconvenient to glue massive overlays; it is better to use self-tapping screws, and install only the upper strips and protective strips with glue.
Thresholds for Granta Sport are of the following types:
- Plastic made of hard ABS plastic, tailored to the specific configuration of the car. If the overlay protrudes in size, the part can be easily aligned by cutting off the extra centimeters with metal scissors.
- Metal, made of stainless steel with primary or additional chrome plating. The decorative element can withstand loads of up to 350 kg and has a long service life.
- Made from fiberglass. The protection has a service life the same as steel elements, but due to its low weight it does not create additional load on the body.
- Illuminated fairings. A very convenient option if children often travel in the car. An additional light built into the rear sill allows kids to get in and out of the car comfortably.
You can choose trims both in the online store and in a special service; the internal fairings on the Lada Granta have catalog numbers, which make it easy to select the required part.
Catalog numbers for interior linings for Lada Granta sedan/station wagon:
- Front left -1118-5109077;
- Rear left - 1118-5109079;
- Front right - 1118-5109076;
- Front left - 1118-5109077.
Manufacturers also offer fasteners in the kit if the parts are mounted with screws. If the fairing kit does not include screws and bushings, the fasteners have their own catalog numbers, which will allow drivers not to make a mistake when choosing:
- Fastening screws, 16 pcs. - 1118-8212786;
- Bushings, 16 pcs. - 1118-8212778.
How to install standard accessories in Grant?
For long-term service of the element, its high-quality installation must be ensured. First, purchase linings that match the modification of your Lada Granta. You can alternatively use accessories designed for Kalina, which have identical dimensions.
It is not forbidden to look at modern products, but they must meet regulated requirements in terms of their own aspects.
Installation of overlays is carried out according to the following algorithm:
- We dismantle the protective rubber seal located above the threshold of the LADA Granta.
- Next, remove the plastic insert that acts as a protective cover.
- Please note that there is no rust. If corrosion begins to appear, we treat the area with a special protective compound.
- We integrate the clamps into the holes provided by the factory and return the rubber seal to its original position, and also correct the carpeting.
- The new element is applied in accordance with the correct location. Plastic accessories require mounting holes, which the owner must make with his own hands.
- We fix the cover using self-tapping screws.
Sometimes the internal protection plate may be missing, and the clips may already “sit” in their seats. It is recommended here that before purchasing the linings, you examine all the elements located under the rubber seal in the LADA Granta car.
If “original” clips are not available, then we purchase them along with accessories.
Recommendations
Comments 11
Well done. A couple of questions: are there already holes in the thresholds or did you drill them? And the second question: are the linings factory or anonymous craftsmen?
the holes are standard, in the front where the fender even the standard clip for the self-tapping screw was on top, the rest had to be installed new ones, the trims from the officials cost 600 rubles, but at the car market they were 400, I got them there, I don’t know whether they were standard or not, but the clips for the screws at the car market were 50 They cost rubles apiece, and the dealer had 10 rubles, so first I drove through everything, looked at the price tags, and then bought them.
Well done. A couple of questions: are there already holes in the thresholds or did you drill them? And the second question: are the linings factory or anonymous craftsmen?
I had these installed at the factory.
I went into the salon, some have them, some don’t. .
It depends on the configuration. I installed them myself the other day, but it took me an hour.
yes, that’s understandable, I had a pre-luxury set with casting for 15... there’s nothing in it except Conder, but the steering rack was already at 3 turns, when I changed it after 110,000, I had to pay 8600 for it and 2000 for the work
Well, I don’t know if they are needed, somehow they don’t fit
I'm tired of vacuuming up sand after passengers. .it will be cleaner
Every motorist has had to deal with an unpleasant situation - significant contamination of the interior. The penetration of dust and dirt compounds onto decorative carpet upholstery is not so dangerous, because cleaning can be done using a regular car vacuum cleaner. But, nevertheless, now there are special sill covers, as well as internal linings that will help make your task easier.
What to do if moisture penetrates into the interior and provokes the occurrence of corrosion spots? To do this, there is an excellent and relatively inexpensive option for solving this problem - using door sills. Self-installation of linings directly on the Lada Granta sills takes no more than an hour and a half.
Read also: Is it possible to lubricate a sewing machine with wd 40


