Description of the hydraulic compensator device and its principle of operation
Hydraulic compensators are designed to automatically regulate the thermal gap between the valves and the engine camshaft. The hydraulic attachment is provided by oil, which enters the expansion joints under pressure, and a complex and incredibly precise set of springs provides the necessary clearance.
Hydraulic compensators, which have been installed on Chevrolet Niva in recent years, give them a tangible advantage:
- there is no need to periodically adjust the valves;
- now the timing belt works more clearly and correctly;
- The noise when the engine is running has decreased significantly; it begins to knock less;
- The service life of timing parts has increased significantly.
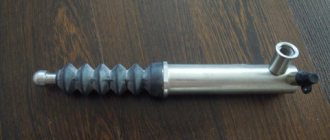
Main details of the unit:
- Plunger pair.
- Frame.
- Plunger bushing.
- Plunger spring.
- Plunger ball valve.
The operating principle of the unit is relatively simple and consists of three main functions:
- There remains a small gap between the camshaft cam and the compensator, which is filled with oil. The plunger spring pushes the plunger out of the sleeve, the oil fills the gap under pressure, reaches the desired level, and the ball valve shuts off the oil supply. After these actions, the gap disappears.
- By turning, the cam moves the compensator down. Due to the accumulated oil, the plunger pair becomes rigid and presses on the valve, opening it.
- As the plunger moves down, it loses some oil and its pressure drops. As the cam moves further, the cycle repeats.
Types of hydraulic compensators
At the beginning of the production of Chevrolet Niva cars, old-style compensators were installed, and in the fall of 2008, a modified, new version of this part began to be installed.
Hydraulic compensators Niva Chevrolet old model
Until 2005, General Motors supplied its own expansion joints, which were of impeccable quality. But then the domestic “hydriki” came along, and the problems began. The quality of the supplied parts left much to be desired; the metal from which the parts were made was raw and did not have a long service life.
New Generation
The end of 2008 was marked by the appearance of a new generation of hydraulic compensators among Chevrolet Niva assemblers. At first, about two years, there were no problems, the parts were of good quality, the metal was hardened and wear-resistant. And then the same story began as with the old ones - the glasses became “half-baked” and could not serve their owners for a long time.
Depending on the design of the timing mechanism (gas distribution mechanism), several types of hydraulic compensators are distinguished:
- hydraulic pushers;
- roller hydraulic pushers;
- hydraulic supports;
- hydraulic supports, which are installed in rocker arms or levers.
How to identify a faulty hydraulic compensator
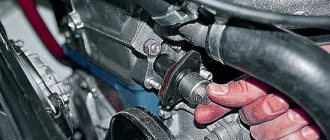
To determine a knocking compensator, you need to use a screwdriver, which is used as a lever, to press on those “hydraulics” that are at TDC (top dead center). If the hydraulic compensator fails under pressure from a screwdriver, it means it is not adjusted. If you want to make sure of this, quickly press with a screwdriver and you will hear a characteristic sound.
Typical faults
Problems with hydraulic compensators arise for two reasons. It is not difficult to identify them - this is either a mechanical breakdown of the unit itself, its destruction, or a breakdown of the oil supply system to the compensator.
In the first case, a common cause is wear of the plunger pair. This is an inevitable process that depends only on the operating time of the unit and the quality of the metal from which it is made. Factory defects cannot be ruled out; this is extremely rare, but it does happen. Replacing this part costs the same as replacing a regular consumable.
In the second case, the oil level in the engine matters; it can be too low or too high. The oil filter may be dirty and dirt may have entered the channels. Untimely oil change is another reason for unstable operation of the unit.
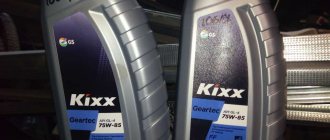
Do not forget about the correct selection of oil - use oils of the same type and preferably from the same manufacturer. The consequences of failure to comply with these rules can be disastrous; saving on oil can cost you money to repair the engine.
How to check hydraulic compensators for functionality, repair them or replace them
Checking the performance of hydraulic compensators
To check the hydraulic compensators, you need to remove the valve cover and check the elasticity of the hydraulic compensator with your hands.
The hydraulic compensators are checked by penetrating under the valve covers and turning the crankshaft by the central nut. Due to the drive of the gas distribution mechanism, the camshaft begins to rotate.
At those moments when the cams of the pushers are directed in the opposite direction from the hydraulic compensator, an alternate check for elasticity and the presence of free play begins. This can be done either by hand or with a special tool.
If the hydraulic compensator is soft or loose, then it is necessary to begin repairing it.
After removing the hydraulic compensator, it is necessary to wash it in clean gasoline, diesel fuel or kerosene, or in a special washing liquid that breaks down carbon deposits and fats. It is necessary to lower the part there, rinse and wipe.
You need to find a hole and use a metal object suitable for its diameter to press it to open it. During this, the hydraulic compensator should be lowered into the liquid so that it penetrates inside.
It is necessary to repeat these steps several times.
Disassembling and cleaning hydraulic compensators
After cleaning the hydraulic compensators, they must be lubricated with oil before installation.
Through the same hole you need to get rid of the flushing fluid and excess air, while simultaneously clamping the hydraulic compensator itself. After this it should press freely.
After washing the hydraulic compensator, you can put it back in place if there are no visible defects. It must be lightly oiled before installation. Next, the part is installed in the reverse order of removal.
After this, you need to start the car and assess the situation. If the knocking continues, then repairing the hydraulic compensators will no longer help, you need to replace them.
Also, if after removing the hydraulic compensator it is discovered that there is damage on it, then the part must also be replaced with a new one. To replace hydraulic compensators, you should purchase a suitable part from the store and install it in place of the old one.
Of course, many car enthusiasts are interested in the question of how much it costs to replace hydraulic compensators. It is impossible to answer this question unequivocally. The final amount depends on the number of standard hours spent on this procedure. Also, do not forget that the cost of parts for different cars varies.
Causes of knocking hydraulic compensators
The knocking sound of Chevrolet Niva hydraulic compensators can be easily detected by ear; it knocks at a frequency half the engine speed. It can knock both on a cold engine and on a hot one, and the reasons for this are different.
Reasons for knocking when cold:
- Thick oil. As the engine warms up, the oil heats up, becomes thinner, and the knocking noise goes away.
- Dirt. A bad filter or old oil can cause dirt to get into the channels and holes and clog them.
- Worn or broken plunger. The cause may be natural wear or abrasive contaminants that have entered the oil.
"Hot":
- Plunger jamming. Scuffing on the plunger pair increases its wear significantly and blocks it.
- Oil with incorrect viscosity. When changing the oil seasonally on their own, sometimes owners make mistakes and fill in oil with the wrong viscosity. If it is too liquid, it quickly flows out through those. gaps.
- Increased oil level in the engine. If this is due to coolant getting into the oil, it will foam in contact with the crankshaft.
All these reasons can be eliminated yourself if you carefully monitor your car.
Installation of adjusting bolts.
The installation work is carried out in exactly the same way as in the previous case. The only difference will be manual valve adjustment. To do this, you need a thick probe or indicator.
To take a measurement, you must first align the marks on the camshaft and measure the clearance of valves 8 and 6, then rotate the shaft 180 degrees, and then begin adjusting valves 7 and 4. Then adjust 3 and 1, 2 and 5.
The gap on the valves should be 0.15 millimeters. Only measured on a cold engine. If this value is greater, then valve knocking will appear over time. If you install it less, they may soon burn out.
On older internal combustion engines, the problem of increasing changes in thermal clearances, increasing due to wear in the valve mechanism, was solved with the help of adjustments. This work was performed by a specially trained person. Valve adjustments were required every 10,000 km or due to wear. The specialists disassembled the engine and manually adjusted the valves - it must be said that this was a rather labor-intensive procedure that required special skills and qualifications from the master. Also, for this task, a specialized tool was needed - a set of probes.
Is it worth replacing hydraulic lifters with bolts on a Chevrolet Niva
What is more practical, a bolt or a hydraulic compensator - this question worries many Chevrolet Niva owners. First you need to find out why some drivers decide to make such a replacement? The answer is simple - the introduction of compensators gave hope to once and for all solve the issue with thermal gaps. In fact, the poor quality of hydraulic compensators only worsened the situation - more money was spent, but the problem was not solved.
For this reason, some Niva-Chevrolet owners “return to basics,” i.e., they switch back to bolts. One can argue a lot about the effectiveness of such a transition, but often on the forums of owners of such cars one can read the following reviews:
“...I changed the hydraulics back to bolts, the result: the consumption dropped, the idle speed was stable, the traction started from the bottom, the clutch became noticeably lighter. I’m happy with the decision, the replacement justified itself.”
Checking the functionality of the hydraulic compensator
As long as the hydraulic compensator works well, the car owner will not hear any unnecessary sounds from the power unit. Its appearance may indicate a malfunction of the hydraulic compensators.
Large gaps can cause a decrease in engine power, increased fuel consumption and premature valve wear.
Before considering the issue of diagnosing hydraulic compensators, you need to understand the reasons for the formation of defects in it, namely:
1) Determine the oil level in the crankcase of the power plant: it can be either high or low. In both cases, the oil may be saturated with air, which means that the oil inside the hydraulic compensator will be compressed, or rather not the oil, but the air contained in it.
2) Natural wear of hydraulic compensator elements. Moving components are constantly being rubbed, which can lead to a leak in the system.
3) From time to time, the surface of the mechanism becomes dirty. Particles of dirt and metal get inside. Due to the high precision components of the hydraulic compensator, even very small contamination can cause poor operation of the mechanism.
While the engine is running, a characteristic sound will occur from the faulty hydraulic compensator. It also happens that car owners may confuse this sound with the sound coming from poorly functioning valves.
To determine a faulty hydraulic compensator, a phonendoscope is used, its receiving element is applied to the places where the hydraulic compensators are located. By comparing sounds, you can understand where the defective mechanism is located.
In this place you can hear a characteristic strong knock.
You can make a tool with which you can check the condition of the hydraulic compensator yourself; the basis of this tool should be a metal rod. In the middle of this rod we make a special handle, either wooden or plastic.
At one end of the rod we place a resonator, which can be made by taking an aluminum beer can. We apply the second end of the rod to the location of the hydraulic compensator, and the resonator to the ear.
You will hear all changes in the incorrect operation of the mechanism by a characteristic strong knock.
After you have discovered a defect in the hydraulic compensator, it needs to be dismantled. And only after that make a verdict. If it can be disassembled, then we disassemble it and determine the level of wear of the internal parts.
After you have carried out the maintenance, and the hydraulic compensator can be easily squeezed with your fingers, this means that it cannot be restored. And if this engine part cannot be disassembled, then you need to purchase a new one.
If you are not confident in your abilities, you should seek help from specialists at a car service center.
Read news about the new Niva
- Rearranging wheels on a car: diagram, recommendations
- Off-road wheels for Niva: review, photos -
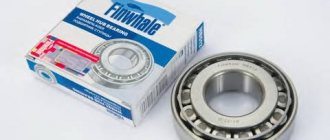
- Chevrolet Niva hubs: front bearing, advantages of non-adjustable Iveko
- Renault DUSTER (Renault Duster) | Vehicle overview
- Luaz on low pressure tires
- Repair kit for CV joint cardan VAZ 2121, 2123 Niva, Chevrolet Niva Hammer and Sickle in Moscow |
- Fuel consumption on a Chevrolet Niva per 100 km: indicators "
- Buy auto parts 2121 transfer case cushion axle for foreign cars in the online store AUTOPITER
When it is necessary and when it is not necessary to change hydraulic compensators and replacement features
Ideally, during normal operation of the hydraulic compensator there should be no extraneous sounds. But sometimes you hear sounds from under the hood that make you want to replace timing parts. But hydraulic valves on engines with high mileage must be replaced - they have a high percentage of wear and tear and there is no point in repairing them. In other cases, you can get by with less radical actions.
Attention. Sometimes you shouldn’t immediately disassemble the engine and try to find out the cause of the breakdown. Often an oil change is enough for the problem to go away, and money and nerves are saved.
Among the features of replacing hydraulic compensators on a Chevrolet Niva, it is worth highlighting the following:
- if you notice an extraneous knock from under the valve cover, do not rush to immediately disassemble the timing belt and change components; first change the oil and filter;
- use oil from the same manufacturer;
- there is no need to tighten the parts too much, this may lead to breakage;
- When installing new parts, do not forget to rinse them thoroughly in gasoline.
This is interesting: Step-by-step instructions for replacing the cylinder head gasket in a Niva Chevrolet
Features of replacing the timing chain in a Chevrolet Niva with your own hands
Do-it-yourself Chevrolet Niva valve adjustment
Hydraulic compensators Niva and Niva Chevrolet old and new models
The Chevrolet Niva SUV is equipped with two types of engines – Opel’s 1.8-liter Z18XE and the 1.7-liter VAZ-2123. If the Opel engine does not cause car owners virtually any problems, then various problems occur with the VAZ power unit.
Niva Chevrolet hydraulic compensators often cause trouble for car owners - valves knock, the engine begins to work intermittently.
Niva hydraulic compensators, a bit of theory
What exactly is a hydraulic compensator and why is it needed in the engine? The valves have a thermal gap. You can “choose” it in two ways. The first way is mechanical adjustment. Either with washers, as on the “eight”, or bolts, as on the “classic”. The second way is to install a hydraulic compensator between the camshaft cam and the valve. Oil is supplied to the hydraulic chamber under pressure, and thereby the valve clearance is selected. But there is one thing, BUT.
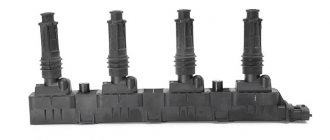
For high-quality operation of hydraulic compensators, a certain oil pressure is required. According to German documentation, at least 1.5 kg at idle. On our classic engine, normal pressure at idle is 1.2-1.5 kg. But we hung a hydraulic chain tensioner and eight hydraulic compensators on our oil pump. The system is working at its limit. Let me remind you that the design of the pump remains from a penny and has a performance designed for a 1.2 liter engine. Shown in the photo.
1 – old-style hydraulic support, 2 – new-style hydraulic support, 3 – new-style hydraulic support cup.
Old-style Niva hydraulic compensators
The first Chevrolet Niva rolled off the assembly line in September 2002. Until 2004-05, General Motors supplied its own hydraulic compensators (I never found the manufacturer). Cars from these years are still driven with only an oil change. But after this time, the “domestic spill” hydraulics began to appear, and problems immediately began. To this day, there are no high-quality replacements, only surgical removal and installation of a “death to old-style hydraulics” kit. Let me remind you that with old-style hydraulics you can only use old-style rockers . Details are described in a separate article.
New sample hydraulics
A separate chapter will be devoted to the new type of hydraulic compensators, as such, now only about the differences and general issues. Apply from October-November 2008. The picture is exactly the same as with the old-style hydraulics. The first couple of years, high-quality wetsuits and good hot cups. Then, hydraulic compensators of unknown origin and disgustingly processed “half-baked” glasses.
There is a category of nivovods and shnivovods who firmly believe that under their hood there is not a Fiat engine from the 60s of the last century, but something new and modern. Therefore, it is necessary to put exclusively what the designers intended. For them, in December 2013, I ordered the first trial batch of original hydraulic guides from Germany. Don't be surprised, it's from Germany.
Because our designers did not bother themselves with “brain activity”, but simply adapted hydraulics from BMW.
Installation
Several times they sent me links from forums about the fact that they installed German hydraulic compensators, but it became little better than it was. The issue is not with the INA hydraulic compensators, but with the cups.
If you look at how the hydraulic compensators are installed in the cylinder head, you will see that the vector of application of force by the camshaft cam goes vertically, and the hydraulic valves and cups are at an angle to the vertical. Cups are traditionally made from shit of poor “half-baked” material, so after some time (50-70 thousand km.
) an elliptical groove begins to appear, along which the oil pressure supplied to the hydraulic unit begins to disappear. Therefore, if you want to update the system and install German hydraulic compensators, install new glasses.
What it is?
This element is a piston, with the help of which the thermal clearances are automatically adjusted. The operating principle of this device is quite simple. The bottom of the piston interacts with the camshaft cam.
A ball valve is installed in the piston, with the help of which the valve opens and oil flow begins. As the piston is filled with oil, pressure will be applied to the existing plunger, causing the piston to move all the way to the cam. As a result, the most optimal gap is automatically installed. When the cam acts on the piston, some of the oil escapes through the valve.
Step-by-step procedure for replacing hydraulic compensators
If it is not possible to eliminate the knocking of hydraulic compensators using all the above methods, then it is necessary to replace it, and how to do this correctly, read below in our article.
- Place the car on a level surface, turn on the handbrake and neutral gear.
- Next, open the hood and first remove the air duct.
- Then we free the valve cover from all kinds of pipes by unscrewing the clamps from them.
- Remove the eight bolts from the valve cover.
Removed the valve cover.
When removing the bolt, keep the sprocket and chain motionless.
The order in which the bolts are removed does not matter.
We install the previously fixed chain.
At this point, the work on replacing hydraulic compensators can be considered completed.
Tips for replacing hydraulic compensators
If you hear valve knocking, do not rush to replace the hydraulic compensators; try changing the engine oil first.
- Fill in high quality oil with a viscosity of 10W40 5w30 or in winter . Please note that if the same oil is constantly poured and changed on time, i.e. every 7-10 thousand kilometers, then the fact of clogging of hydraulic compensators is significantly reduced.
- If you have dismantled the hydraulic compensators, try washing them in gasoline after disassembling them. After cleaning, check their functionality by pressing the plunger with your finger, and if it is working, it will return to its original position.
Niva hydraulic compensators: what they are and how they work
The hydraulic compensator in the engine is a device that allows you to “select” the thermal clearance of the valves automatically, that is, without additional interventions. For example, mechanical adjustments performed with washers or bolts must be carried out regularly, since the gap “goes away” over time, deviating from the recommended values.
In turn, the hydraulic compensator (HC), located between the camshaft cam and the valve, “selects” the gap automatically. The hydraulic compensator itself is a plunger; engine oil is supplied to the chamber, thereby maintaining an optimal thermal clearance.
At the same time, for normal operation of the main engine, it is important that the oil is supplied under a certain pressure (at least 1.5 kg at idle). Normally, the Niva engine has a pressure of 1.3-1.5 kg, while the oil pump is loaded (the motor is a chain, has a hydraulic chain tensioner, as well as 8 hydraulic compensators)
It turns out that the lubrication system is quite overloaded, while the oil pump remains almost the same as on the old “classic” VAZ. Perhaps it was for this reason that the manufacturer replaced the old-style hydraulic compensators with new ones.
Hydraulic compensator 21214, a little theory
Let us take the following as an axiom - all mechanical parts wear out. Let's try to figure out why these hydraulic compensators on BMW engines last up to 150-200 thousand, but on this engine the real mileage is about 70 thousand. Further, the engine already resembles a machine gun firing blank cartridges. I already said in the first chapter that the hydraulic compensator is a hydraulic cylinder, and they obey the laws of hydraulics. So, the eternal Russian question: who is to blame for such a short period of normal work?
Hydraulic compensator 21214, specifics
In 2013, I ordered a batch of hydraulic compensators in Germany from the trendsetter in this area, the German brand INA. I won’t talk for a long time about their quality; they are a supplier of “German troika” conveyors. The first thing I did, like a true young man, was to take the hydraulic valve out of the “factory engine,” put it next to the “German” and pick up a micrometer. The first difference was purely visual. This is clearly visible in the photo. This is the ball shape and the height of the compression skirt. But that was only the beginning. Everything is like in a Russian fairy tale. The further you go, the worse it gets. The diameter of the factory miracle is 0.03 mm less. That is, there is simply no need to talk about maintaining the working pressure in the cup-hydric pair. Any hydraulic engineer, or just a mechanical engineer, will tell you that this is an unacceptable gap for hot oil. Result: inability to compress the valve spring and incomplete opening of the valve.
diameter of hydraulics
Installation of hydraulic compensators on a VAZ 21214
To work you will need:
— Clean motor oil
— Tweezers (can be replaced with a slotted screwdriver)
Before installing the HA, they must be disassembled and thoroughly washed in gasoline. Dry and put back together. After that:
- We check the hydraulic supports. To check, you need to press your thumb on the assembled hydraulic support; it should squeeze and move apart freely (without jamming)
- The next step is to install the oil supply ramp and screw in the dry hydraulic mounts by hand
- Using a torque wrench, tighten the hydraulic mounts (22 N per m). Again we check that when pressed it is pressed all the way, and then returns to its original position. If it sticks:
a) swap the hydraulic support with the neighboring one
b) reduce the moment to 18 n per m
c) replace with a new one
!All hydraulic clamps must be tightened to the same torque
4. Next, you need to fill each hydraulic mount with oil. To do this: take out the plunger and put it in a clean place, use tweezers to take out the piston with the ball and also put it aside; We fill the engine oil into a syringe and fill it into the hydraulic support housing to the brim, after which we lubricate the piston and insert the piston into the housing, pressing the valve ball with an awl. Fill the plunger with oil and insert it into the body.
All steps have been completed and the hydraulic mounts have been installed, then you need to get the engine into working condition. After that you can safely start!
Design of hydraulic compensators
Let's look at the design and principle of operation of a hydraulic compensator using the example of a hydraulic pusher installed in the cylinder head. The remaining types of hydraulic compensators, although different in design, work on the same principle. The hydraulic pusher is a housing, inside of which a movable plunger pair with a ball valve is installed. The body is movable relative to the guide seat made in the cylinder head. If the hydraulic valve is mounted in valve drive levers (in rockers or rocker arms), its moving part is only a plunger, the protruding part of which is made in the form of a ball joint or support shoe.
The main part of the main body is a plunger pair. The gap between the sleeve and the plunger is only 5-8 microns, which ensures a high tightness of the connection, while maintaining the mobility of the parts. There is a hole at the bottom of the plunger for oil to enter, which is closed by a spring-loaded check ball valve. A fairly stiff return spring is installed between the sleeve and the plunger.