Fastening diagrams
Lada Granta door cards are attached according to the standard pattern. The casing is plastic, fastenings are plastic latches and standard bolts. Place the fasteners around the perimeter of the insert. In this case, there will be 9 screws on the front door of the Grant, and the rear trim contains 10. To remove all bolted connections, use a screwdriver.
Proceed carefully, otherwise you risk breaking the bolted connections.
Instructions
To tune Grants of standard or luxury modifications, you must first disconnect the negative terminal from the battery. If the stern doors are not equipped with electric drives, then this step is skipped. Purchase new clips in advance, since when removing the trim and the trim itself, the old ones are often damaged.
Then you need:
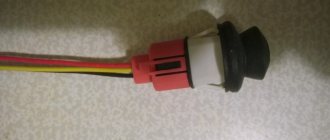
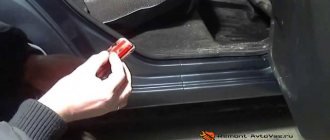
- Remove the decorative panel plug - to remove it without damage, it is recommended to use a flat profile screwdriver. You need to work until you hear a click, and act carefully to prevent the fastener from breaking off.
- Use a Phillips screwdriver to tighten the fixing screw, and do the same with the bolt that goes inside the plastic socket.
- Disassemble the plugs from the handle - remove them to gain access to a pair of screws, unscrew them, put them in a prepared box or other container.
- To complete the disassembly of the casing, unscrew the last pair of bolt clamps installed at the bottom of the Grant door.
Front doors
How to remove the front door trim on a Grant in stages:
- Disconnect the negative terminal, prepare a Phillips screwdriver and a set of spare clips.
- Unscrew the locking part of the lock.
- Pry off the screw muffler.
- Remove the screw and the lock release button.
- Remove the screw from inside the armrest niches.
- Remove the pair of screws at the bottom of the upholstery fastener using a similar tool.
- To dismantle the entire car trim - in Grant they do this, starting from the front corner of the door from the bottom, inserting a screwdriver between the metal and the trim material. To remove the upholstery without damage, you need to carefully overcome the resistance of the pistons.
- Remove the screws from the armrest niche and lower upholstery fastenings.
- Continue removing the trim, moving from the corner in different directions, and move the lock rod outward.
- Remove the block with wires from the electric window, remove the upholstery.
Reasons for removing trim from Lada Granta doors
We list the most common situations in which it is impossible to do without removing the casing:
- one or more window regulators have failed;
- there is a need to replace window glass on one or more doors;
- the car owner decided to improve the sound insulation of the car doors and glue the internal door cavities with a special sound-absorbing material;
- the locking mechanism of the door lock or its cylinder has failed (which happens much more often);
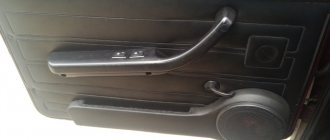
- The window lifter handle has broken (this applies to cars not equipped with electric windows).
Location of fasteners
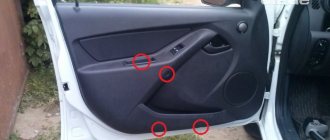
The door trim on the Lada Granta is a plastic structure that is attached to the edges of the metal door using bolts and plastic latches located around the perimeter. Below is a diagram of the location of fasteners on the front doors of the Grant.
Layout of fasteners on the front door trim of Lada Granta
The rear door trim of the Lada Granta differs from the front door trim only in the shape and number of screws: there are only 9 of them, while on the front doors there are 10.
Layout of mounting holes on the rear door trim of the Lada Granta
Instructions for removing the trim from the front and rear doors of Lada Granta
Before we get started, let's collect everything we need.
Tools and materials
- flat blade screwdriver;
- Phillips screwdriver;
- a plastic spatula for removing the trim (it can be purchased at any VAZ specialized store);
- set of plastic door latches.
The process of properly removing trim from the front door of a Granta
- The hood of the car is opened and the negative terminal is removed from the battery.
- The trim on the front door handle is carefully pryed off with a plastic spatula and removed. This allows access to the top fastening screws of the casing.
The trim on the Granta front door handle can be removed manually
- The upper screws are covered with plugs, which are pryed off with a flat screwdriver and removed. Then use a Phillips screwdriver to unscrew the screws themselves.
The screws from under the door handle of the Lada Granta are unscrewed with a Phillips screwdriver
- There are two more self-tapping screws in the upper recess of the casing. They are unscrewed with the same Phillips screwdriver.
Two self-tapping screws from the upper recess of the Grant door are unscrewed with a Phillips screwdriver
- Next, use a Phillips screwdriver to unscrew a pair of screws located on the lower edge of the front door.
The lower part of the door trim of the Lada Granta is held on by two screws
- After this, the lock button is turned away. This is done manually. It should be remembered that the thread on this button is left-handed, that is, the part is unscrewed clockwise.
The lock button on the Grant is unscrewed manually
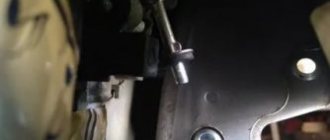
- If your vehicle is not equipped with an electrically adjustable rearview mirror, there will be a hinge arm seal on the front door. It is removed manually.
Door seals hinge arms Grants are removed manually
- Now the trim from below is pryed off with a plastic spatula and moved away from the door to a distance of 10 cm.
Granta's front door trim gently moves back towards itself
- This opens access to the power supply wires for the power windows (provided that the car is equipped with them).
Access to power supply wires for Lada Granta windows is now available
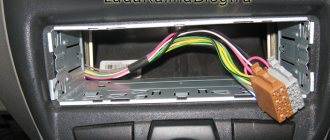
- The wires are manually disconnected from the connectors of the control unit located at the bottom of the door.
Window lifters of Lada Grants are disconnected from the control unit - The casing, freed from fasteners and wires, is removed.
Rules for rear doors Grants
- The car hood is opened and the negative terminal is removed from the battery.
- If the car is equipped with manual window lifts, then the rear window lifter handle lock is pryed from behind with a flat-head screwdriver and carefully pulled out.
The door latch on the Granta handle is pryed off with a screwdriver - After this, the latch moves slightly to the left.
The protrusion on which it is held disengages and the window lifter handle is removed. The Granta window lifter handle moves to the left and is removed - Now you can manually remove the window handle socket.
The Lada Granta window lifter handle socket is removed manually - The locking button is manually unscrewed.
The rear door lock button of the Lada Granta is unscrewed manually - Now the trim on the door handle is pryed from below with a plastic spatula and removed.
The Granta rear door handle trim is pryed off with a spatula and removed - Underneath there are two mounting screws, which can be unscrewed with a Phillips screwdriver.
The fastening screws from under the cover on the Grant handle are unscrewed with a Phillips screwdriver - Next, use a Phillips screwdriver to unscrew the screw on the lower edge of the rear door, after which the trim from below is pryed up and removed.
The rear door trim of the Lada Granta is pryed from below with a spatula and removed manually
How to remove door trim from LADA Granta - video
Important points
- It is necessary to remember that there are also plastic latches under the fastening screws of the casing. And after unscrewing all the screws, you will have to overcome the resistance of these latches, literally tearing the trim off the door. It will not be possible to pry these clips with any tool - they are too far away. So it is not uncommon for situations when, after removing the casing, half of the clips are broken. There is only one way out: have a set of spare door latches on hand;
- on cars with electric windows, control units are located only in the front doors. Therefore, when removing the rear door trims, you will not have to disconnect all kinds of wires from the connectors;
- The locking button has a left-hand thread only on the earliest Granta models, released in 2011. On later machines, the threads became right-handed.
So, removing the door trim from Granta is not a difficult task. Even a novice car enthusiast can do it. And an experienced car owner needs no more than 10 minutes to deal with one door.
The picture is spoiled only by the internal plastic latches, the breakage of which, it seems, has never been possible for anyone. But this is an “innate” design flaw that you have to come to terms with.
- Benjamin
Source: https://vazweb.ru/desyatka/salon/kak-snyat-obshivku-zadnih-i-perednih-dverey-avtomobilya-lada-granta.html
Rear doors
Let's look at how to disassemble the rear door of a Lada Grant, since this work has its own characteristics. Actions:
- Disconnect the terminal with the minus sign and prepare replacement clips.
- Unscrew the lock button.
- Press out the socket on the window handle using a flat-head screwdriver.
- Remove the handle with the locking mechanism, having first pulled it out, remove the plug from the handle.
- Remove a pair of mounting screws with a Phillips screwdriver and remove the handle.
- Remove the door plugs of the Grants, begin to remove the trim one by one from the front from the bottom, inserting a screwdriver between it and the metal sheets. The upholstery must be moved away from the door panel towards the sides of the corners, overcoming the 10-piston resistance.
Reviews
| № | Positive |
| 1. | Vitaly: I don’t know about others, but I didn’t have any problems with the upholstery. The plastic fits tightly to the metal, does not creak or rattle. After purchasing the car, I immediately removed the noise from the showroom. |
| 2. | Mikhail: I’ve already removed the card myself several times, laid out the wiring, no complaints. The fit is tight, the first time I broke one pin, I installed a new one. No complaints. |
| 3. | Ignat: I recommend changing the upholstery on the Lada Granta Liftback yourself. There is nothing complicated, just ten minutes of time and you're done. |
| 4. | Sergey: I heard that owners complain about the card knocking on the Lada Granta, I can’t confirm it. Since noise reduction is not provided from the factory, I installed it myself. |
| 5. | Semyon: despite the budget class of the car, the workmanship and assembly quality is good. There is no personal garage, the car is parked in the cold all year round, the panel is not deformed in the sun. |
| 6. | Vasily: two months ago I was in an accident and was hit in the side. I did some minor cosmetic work, didn’t change the trim, the stock one fits snugly, doesn’t play or squeak. |
| 7. | Gennady: I’m happy with the upholstery, no comments. I wish the manufacturer to make the clips stronger, since they are flimsy and practically disposable. |
| Negative | |
| 1. | Maxim: I can’t evaluate the quality positively, because after two months of using the machine, the cards began to knock. I visited a car service center and had the seals glued. I don’t know for how long, but is this quality? |
| 2. | Ivan: the car isn’t even six months old, but I’ve already removed the cards twice and sealed the joints. You can hear knocking and vibrations on the paving stones. Additionally, I pasted over the noise reduction. I can't recommend the quality. |
| 3. | Victor: the upholstery started knocking after a year. Possible deformation from cold, direct sunlight or manufacturing defects. |
Conclusion Despite isolated negative reviews regarding the upholstery of the Lada Granta Liftback, the design of the door card is generally of high quality. The joints fit tightly to the metal body. Most likely, third-party sounds are caused by a violation of the operating conditions of the technical device. For example, direct rays of the sun, negative temperatures.