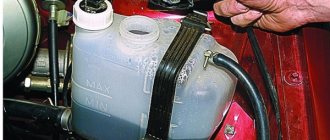
Inflates the coolant reservoir of the VAZ 2114
The cooling system reservoir swells and tears along the seams. Replacing the tank cap and the tank itself did not give any results. Could the cause of the tank swelling be due to a leaky cylinder head connection and the cylinder head itself? That is, does the cylinder head gasket itself allow gas pressure to pass into the coolant cavity?
- Strong steam from exhaust 2110 – 5 answers
- The oil sensor came on after replacing the cylinder head in 2110 - 3 answers
- The stove on the VAZ 2110 does not work - 3 answers
- Where can oil leak from above the manifold on a VAZ 2110? – 2 answers
- The cylinder head gasket has smaller coolant holes - 2 answers
Check with a gas analyzer whether there are gases in the expansion tank.
If the engine is not overheated, then the cylinder head gasket lasts until the engine itself is overhauled (that is, it is approximately 150-250 t.km.).
For gases in the cooling system. If the expansion tank plug is working properly, then it should relieve pressure, that's why it has a valve there in the plug. Bloating occurs due to a faulty valve in the tank plug.
... The problem was that the cylinder head gasket had become unusable and began to leak gas pressure from the working chambers of the cylinders into the cooling system of the internal combustion engine. The boost was so powerful that it unraveled the antifreeze tank along the seam - the plug did not have time to bleed it out.
To check, I removed this plug from the expansion tank and tied a balloon to the neck with threads. I started the engine and the balloon began to inflate... May 1 is now far away, opening a company for inflating balloons will not be profitable, so I bought a cylinder head gasket and replaced the old one myself. It was slightly reconstructed, loose...
After replacing the expansion tank (I left the old plug) there are no comments on the operation of these components.
The coolant in the system of a VAZ-2114 car can not only properly perform its tasks, preventing the engine from overheating and heating the interior, but also create numerous problems. This is her nature.
Why the coolant temperature light may be on: opinions of car owners
1. The reasons may be different.
“When the temperature warning light starts flashing while the car is moving, you need to look at what level the coolant is. It is possible that the level is not high enough or the coolant has reached too high temperatures. It happens that the level remains within normal values and then it may make sense to check the operation of the fan fuse. If everything is in order there, then it’s better to go to the nearest workshop, trying to adhere to a low speed limit.”
2. The result is obvious.
“I was very concerned that the coolant temperature light was constantly on. In this case, there is no level sensor in the car. Following the advice posted on the forums, I removed the dashboard and soldered the connector and everything that was in doubt. As a result, the temperature light stopped blinking.”
3. I spent a lot of energy.
“I’ll share one story with you... I observed the coolant light blinking chaotically. It happened to burn at idle, and in motion, and at speed, and without. At times it stopped blinking.
As a result, the following actions were taken:
- The fuses have been checked and replaced.
- Checked belt tension.
- Checked coolant level.
- Due to the low level of antifreeze, a flushing and purging was done and the coolant was replaced.
- Replaced instrument panel
- Checked for leaks from the stove.
- Thermostat checked.
A lot of effort and time was spent on finding out the reason, but in the end everything turned out to be simpler - the cause of the light bulb turning out to be the wiring...”
4. Just tightened the nut.
“Not long ago I noticed that the coolant temperature light was on and blinking. At times the temperature sensor did not work. It turned out that the mass securing nut, which is located at the bottom of the engine, had become loose. When the motor was turned on, one end of the mass came into contact with the engine for forced passage of liquid, and the second generally clung to something incomprehensible. After I tightened the nut, the light bulb began to work as it should.”
What is this?
Or rather, what he looks like. The expansion tank is a container made of plastic. Liquid is poured inside it, which takes part in cooling the motor.
In addition to the hoses that are connected into a circuit, the tank design also includes a float sensor. With its help, information about the temperature of this liquid is transmitted to the car’s instrument panel inside the cabin.
This unit is located under the hood, on the driver's side. You can easily find it right behind the glass counter. Such placement cannot be called practical, since there is metal on all sides of the tank. Therefore, the metal does not allow the plastic to expand properly if the reservoir cap does not work properly.
The result is the same - the container bursts. This problem is especially relevant in the summer, when the car heats up not only from the engine, but also from active sunlight.
Repair or replace the tank?
Some drivers, having noticed that the expansion tank 2114 is leaking, try to repair the crack with glue or epoxy resin.
It should be noted right away that doing this is absolutely not worth it. After all, such repairs, as a rule, are short-lived, and with active use, even the most reliable adhesive seam can leak.
In addition, as already mentioned, the appearance of cracks in the tank is a sign of aging of the plastic caused by depolymerization - the volatilization of a number of fractions from the material that give it plasticity.
Thus, a plastic container that has already cracked can always crack again. That is why replacing the expansion tank of a VAZ 2114 is the most preferable option rather than repairing it.
As for the cover, it is also not repairable, and in case of malfunction it should be replaced with a similar one. At the same time, it is highly advisable to purchase the “native” cover for the 2114, and not its various analogues, the quality (and functionality) of which may be much worse.
If you could not find a cover for the 14th model, then instead you can purchase and install a cover for 2199, since they are completely interchangeable.
Buying Tips
Since the expansion tank for the VAZ 2114 is inexpensive, you should not save on its purchase. It is better to install a new original spare part . If you can’t find it, then you should give preference to parts from well-known manufacturers with a positive reputation. These include Togliatti, Master-M.
to inspect the spare part before purchasing . Even a new part may have defects. The tank must be made of high-strength plastic and have a certificate. It is better to make purchases in specialized stores. There is a higher probability of purchasing high-quality spare parts.
If you still want to save money, then you should consider used options. When choosing such a spare part, special attention must be paid to its condition . It is not recommended to take the tank from a car dismantling point.
To avoid such unpleasant consequences when purchasing online, you should adhere to the following recommendations:
- Choose a proven and reliable organization.
- Do not send money to the seller until you have received and inspected the part.
- Require the provision of a warranty certificate (if we are talking about ordering a new spare part).
- Give preference to those sellers who offer free shipping.
Recommendations for selection
For VAZ 2110-12 models, you can find 2 types of expansion tanks on sale:
- old model with two necks: the coolant level sensor is screwed into the first, and the second is closed with a plug with a release valve;
On old-style products, a second neck was made for installing an antifreeze level sensor
The new sample container does not have a level sensor
If your car has a sensor in an expansion tank, then you need to select an old-style product. Accordingly, versions without a sensor will require a new reservoir design.
For VAZ 2114-15 models, tanks of the same shape are offered with 3 fittings: two of them are located at one end, and the third is located at the opposite end. Products for the VAZ 2110 and 2114 are not interchangeable with each other, although if you really want to, attaching a part from another model is quite possible. Another thing is that there is no need for this - both varieties are available for free sale and practically do not differ in price.
The reservoir for models 2114-15 has a wider shape and a versatile arrangement of fittings
When purchasing an expansion tank for any series of cars of the “tenth” family, pay attention to the following points:
- the plastic of a quality product should be light and half transparent;
- cracks in the corners or near the fittings are unacceptable;
- the plastic should not be “oaky” or have dark impurities visible to the naked eye;
- look on the body for an imprint of the manufacturer's trademark and catalog number (21083–1311014 for VAZ 2114).
For all modifications “ten”, “fourteen” and “fifteen” a small tuning is available - installation of an expansion tank from the cooling system of a Lada Priora car. Why and how this is implemented will be discussed below.
The reservoir of the Priora cooling system has a rectangular shape and 3 fittings on the front wall
Video: how to distinguish an original spare part
Causes of failure of VAZ 2110-2115 tanks
The service life of this element is not limited by regulations. This means that the container should be changed as needed, and this occurs quite often. The most common reason for replacement is damage to the integrity of the plastic case during operation . The tank simply bursts and here's why:
- Clogged or damaged lid valve. The steam coming from the radiators increases the pressure inside the tank because it cannot escape through the plug. As a result, the wall of the container is destroyed.
Damage to the plastic wall occurs due to excess pressure in the cooling system - In VAZ 2110-12 cars, the side walls of the vessel are closely adjacent to the body elements - the glass and the partition. As the antifreeze temperature and pressure in the system increase, the plastic has nowhere to swell, causing the body to burst along the seam at the end (usually in the lower corner).
- In the event of a breakdown of the gasket between the cylinder head and the engine block, the cooling system is subjected to a series of water hammers created by the movement of the pistons. The plastic case also often bursts from such an impact.
- The reason may be the expansion tank itself, made from low-quality raw materials or in violation of plastic molding technology.
On low-quality products, cracks may appear 3-6 months after the start of use.
To avoid destruction of the expansion tank, it is recommended to check the functionality of the plug valve before each long trip. Practice shows that problems with the tank most often arise on the road, when it is hot outside, that is, in the summer. A sign of a malfunction is a sharp increase in coolant temperature and a puddle under the engine compartment on the driver’s side.
Experienced drivers advise replacing the standard tank cap with the cap from previous VAZ 2109-099 models. They are much more reliable in operation and fit the thread. Just keep one thing in mind: in some car configurations the plug is equipped with an antifreeze level sensor. After such a replacement, you will not be able to control it, although this will not affect the performance of the cooling circuit.
Coolant tank replacement process
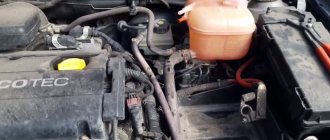
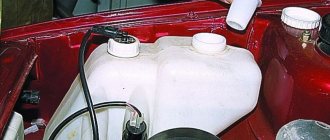
General view of the expansion tank
The expansion tank not only serves as an indicator of the amount of coolant in the system, but also when the “coolant” boils, it will come out through it. Usually the latter reason is the reason for depressurization in the system and the appearance of cracks.
In order to make the replacement you will need certain tools. So, what is needed to complete the process:
- Keys for 7 and 10.
- Screwdriver.
- Pliers.
- New tank.
- Sandpaper.
Now that everything you need has been collected, you can proceed directly to the process itself. So, let's consider the sequence of actions aimed at replacing the expansion tank:
- The first step is to remove “casting” defects that will interfere with the normal installation of the pipes. After treatment, the surface should become smooth and the hoses should be easy to put on.
Cleaned cavity of the expansion tank under the pipe
Unscrew the valve and remove it from the tank
Removing the expansion tank
We connect the pipe for exhausting evaporative gases
We check the coolant pipe for leaks and integrity
We connect the pipe and install the expansion tank in place
Choice
21083-1311014 – original catalog number of the expansion tank for the VAZ-2114 family of cars. The part is produced at the factory and has no analogues, but some car enthusiasts come up with modifications to this unit or tuning.
The average cost is 400-500 rubles.
Replacing the expansion tank of a VAZ 2110 with a tank from Priora
The story is this: in the distant past, when I first bought the car, there was an old-style expansion tank from a VAZ 2110 with a second neck for a sensor, actually this sensor flowed like normal, replacing the sensor helped for a maximum of a month, put it on sealant, through cellophane - nothing it didn’t help, in the end, having listened to a lot of “good advice” (at that time I didn’t google about the car, I just found out from friends) I replaced the old-style tank with a new-style tank - without a sensor, everything would be fine, but after driving for a long time I was convinced that this is not a panacea, Now it was squeezing out through the lid, and not because of a defect in the lid or the integrity of the neck, but due to the unsuccessful design of the tank - a stream of antifreeze from the steam pipes mercilessly hit directly into the neck, from where it solemnly spread across the lid and through the tank from the outside.
After surfing the Internet and reading that this bothers all users of new-style tanks, it was decided to do the same as many others, namely, replace the new-style tank with a tank from Priora, due to the design features (place of the steam exhaust hose inlets, partitions inside the tank) like this he had no illness. Next, we visited all the stores in the area, the average cost of a barrel is 380-450 rubles, but in one place, from the depths of the warehouses, a prepack for 280 rubles appeared, no different from the others, from the Skif company. It is important to note that there are two types of prepacks - for cars with condom (2 nipples) and without condom (3 nipples) this is exactly what we needed, with 3 nipples.
I’ll immediately note that I read a lot of articles about the difficulty of pushing something that cannot be pushed into its rightful place, someone cut the factory noise and vibration insulation on the engine shield, someone removed the entire frill, but I took the path of least resistance and, with pinpoint precision, strongly lifting frill stuck the tank in, covered the previously peeling seat with a piece of rubber from the camera (so that it would seem to flow past and the tank would sit tighter, pushed the noise and vibration insulation back, screwed all the pipes into place and filled in antifreeze, I’ll drive for a week, evaluate whether the change really helped or not and the antifreeze will continue to be poured into the car.
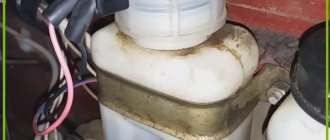
Here is the old tank number ten, you can clearly see in the photo that the tank is empty and covered in blood-red stains, especially in the area of the lid.
the process of pushing the expansion barrel from the Priora, everything got in the way: the frill, the brake pipes, the VUT and the wiper drive motor, but still, with a little resistance, it fell into its rightful place.
the tank is assembled and filled, the rubber on the sides is the same chamber for sealing if all the noise is cut off along the tank in the near future.
Purchase of components
There are some helpful tips to follow when purchasing new parts to replace your expansion tank.
- Buy the original. The original tanks are ideal for the “fourteenth” AvtoVAZ model. Therefore, various analogues are inappropriate here. The level of quality and efficiency of the original is much higher.
- If a cover is required, then use the analogue from model 2199. They are fully compatible even with threads. Plus, the practice of VAZ 2114 owners shows that the “nine” cover works better than the original one.
COOLING SYSTEM VAZ 2114
Once upon a time, back in Soviet times, water was poured into a car radiator as coolant. But it was very inconvenient - in cold weather it had to be drained regularly so as not to defrost the system, and in the morning before the trip I had to run around with buckets of hot water. In addition, the cooling jacket in the cylinder block and in the cylinder head suffered from corrosion. Nowadays, water is practically no longer used; antifreeze or antifreeze is poured into the cooling system (CO).
The volume of VAZ 2114 coolant in CO is about 8 liters (7.8 liters according to factory conditions). A car that has rolled off the assembly line can be filled with any coolant; the manufacturer does not adhere to any specific rules in this matter.
But if the fluid runs out or the time has come to replace it, then topping up or replacing is necessary. And here you need to know what is poured into the system, and whether it is possible to mix antifreeze with antifreeze.
ANTIFREEZE
The name "antifreeze" contains Greek and English roots. The Greek “anti” means “against”, the English “freeze” translates to “freeze”. Therefore, the coolant located in the cooling system must not only prevent overheating of the internal combustion engine, but also not freeze in frosty weather. The basis of antifreeze is ethylene glycol, and the freezing point of the coolant depends on how much water is added to the chemical composition. The fluid components do not cause corrosion of engine parts.
The composition can be of almost any color; ethylene glycol itself is colorless. The composition is painted so that it can be seen in case of leakage, and so that it is not drunk by mistake; the antifreeze itself is poisonous. In addition, the old coolant changes color, which means it is time to replace it.
Antifreeze
Antifreeze is a type of antifreeze, only at one time it was specially developed for VAZ cars. It is blue in color and can be concentrated, diluted 60% with water (grade A-40M), diluted 35% (A-65M). The concentrate is not used in its pure form; it is diluted at your discretion, depending on the freezing temperature that is oriented towards in the region where the car is located. Antifreeze has a more aggressive environment, but this does not mean that it is of low quality.
MYTHS ABOUT ANTIFREEZE AND ANTIFREEZE
- Antifreeze is worse than antifreeze. This is not true. Both coolants are made from the same base (ethylene glycol). But their density is different, and different instruments (hydrometers) are used to measure this parameter.
- The color of a liquid is an indicator of quality, and its composition depends on the color. In fact, the composition of the coolant is basically similar for all, and does not depend in any way on the color. Antifreeze is mainly tinted green and red.
Cooling system elements
The process of draining coolant from the radiator
In order to understand how and why it is necessary to drain the coolant, you need to have a little understanding of the design of the car and the cooling elements. Also, you need to know how the coolant circulates in the engine and have an idea of the places where it can be drained.
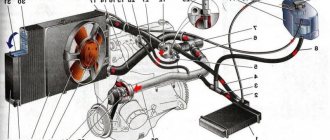
So, let's look at the complete diagram of the engine cooling system and how the coolant circulates:
Cooling system diagram
1 – element in the form of a plug for the expansion tank; 2 – expansion tank; 3 – hose for draining liquid from the pipe; 4 – hose passing between the radiator and the expansion tank; 5 – hose leading from the radiator; 6 – tank to the left of the radiator; 7 – aluminum tube; 8 – plug systems; 9 – tank to the right of the radiator; 10 – drain plug; 11 – middle of the radiator; 12 – casing for electric fan; 13 – plastic wings of the electric fan; 14 – electric motor; 15 – toothed pump pulley; 16 – pump impeller; 17 – camshaft drive belt; 18 – engine block; 19 – pump pipe; 20 – radiator hose with supply function; 21 – heater radiator hose with drain function; 22 – hose supplying coolant to the throttle pipe; 23 – exhaust pipe; 24 – hose for refilling; 25 – heater radiator hose with supply function; 26 – thermostat; 27 – coolant temperature sensor; 28 – coolant level indicator sensor.
Coolant drain options
There are two options for draining coolant from the system. They depend on what operations the motorist intends to perform with the car. So, let's look at both options separately.
Draining without removing the engine
This method is often used to replace coolant in the system, as well as to change cooling elements. The procedure is quite simple. Let's look at how to properly drain the liquid from the cooling system completely:
- We find the cooling system plug on the cylinder block.
Location of the coolant drain plug on the cylinder block
Remove the expansion tank cap
Unscrew the plug on the radiator to drain the coolant
Installation of faucet
Drain faucet
For the convenience of subsequent draining and repair work, you can install a faucet. Moreover, you have already unscrewed the standard plug.
Draining with engine removal
- Unscrew the plug on the expansion tank.
- We unscrew the plugs from the cylinder block and radiator.
- Next, when the liquid has flowed out, you need to unscrew the pipes leading to the radiator.
- Of course, some liquid remains in the system and must be drained completely. This can be done in two ways: by blowing it out with a compressor or by disassembling the engine.
This “slurry” has already served its term
- Development of a full resource of use. It is recommended to carry out once every 90-100 thousand km. This is due to the fact that the coolant, due to a constant temperature difference, which is its operating temperature, loses its technical and physicochemical properties. After such a mileage, it can no longer effectively provide cooling of the engine and its elements, which can lead not only to failure of the thermostat and pump (most often these are the spare parts that suffer), but also to boiling of the engine, which can have unpleasant and material consequences .
- During engine overhaul. When the engine is dismantled for major repairs, the coolant will need to be completely drained.
- Replacing the radiator will also require draining the coolant completely from the system, but it is done according to a simplified option (the second one, which is indicated above).
- Replacement of other individual elements that will require draining the coolant from the system.

