Attention! We hang and remove the rear wheel. Remove the rear brake pads (see Replacing the rear brake pads).
Using a 17mm spanner, unscrew the four nuts on the bolts securing the axle shaft to the beam flange.
Use a slotted screwdriver to bend the locking plates of the axle shaft mounting bolts...
...and remove the bolts.
We fix the wheel with the reverse side on the axle shaft by tightening three nuts several turns.
Holding the wheel, we move it with a jerk...
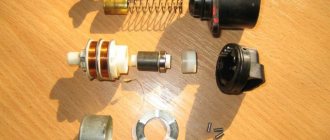
...and remove the axle shaft assembly with the bearing mounting plate, bearing and locking ring.
We take out the rubber sealing ring of the beam flange.
We insert two bolts into the holes of the brake shield and the rear axle beam so that the shield does not hang on the brake pipe.
We pry off the oil seal using sliding pliers...
Using a tool head of a suitable size with an extension (or a piece of pipe), we press in a new oil seal.
If the axle shaft is deformed, its splines are worn out, or the bearing is worn out, we replace the axle shaft with a new one complete with bearing and locking ring (it is not recommended to replace the bearing or locking ring yourself).
Install the axle shaft in reverse order.
Check the oil level in the rear axle and add if necessary.
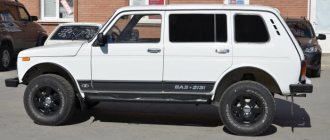
When it is necessary to replace the rear axle axle seal of a Niva Chevrolet, the owner does not have to immediately contact a service station. This operation refers to work that does not require high qualifications and special equipment, and if desired, it can be done with your own hands. This also applies to motorists driving regular Nivas - VAZ 21214 and 21213.
Removing the axle shaft and replacing the oil seal
Attention! We hang and remove the rear wheel. Remove the rear brake pads (see Replacing the rear brake pads).
Using a 17mm spanner, unscrew the four nuts on the bolts securing the axle shaft to the beam flange.
Use a slotted screwdriver to bend the locking plates of the axle shaft mounting bolts...
...and remove the bolts.
We fix the wheel with the reverse side on the axle shaft by tightening three nuts several turns.
Holding the wheel, we move it with a jerk...
...and remove the axle shaft assembly with the bearing mounting plate, bearing and locking ring.
We take out the rubber sealing ring of the beam flange.
We insert two bolts into the holes of the brake shield and the rear axle beam so that the shield does not hang on the brake pipe.
We pry off the oil seal using sliding pliers...
Using a tool head of a suitable size with an extension (or a piece of pipe), we press in a new oil seal.
If the axle shaft is deformed, its splines are worn out, or the bearing is worn out, we replace the axle shaft with a new one complete with bearing and locking ring (it is not recommended to replace the bearing or locking ring yourself).
Install the axle shaft in reverse order.
Check the oil level in the rear axle and add if necessary.
Checking the technical condition and repairing the axle shaft
After dismantling the axle shaft, you need to check its condition and the condition of the parts included in the axle shaft kit. You need to make sure that:
— the ball bearing is not worn out or damaged; if the axial clearance in it exceeds 0.7 mm, replace the bearing;
— the locking ring and bearing have not been displaced relative to the original fit; if the inner ring of the bearing rotates relative to the seat of the axle shaft, replace the locking ring;
— the bearing mounting plate and the oil deflector are not damaged;
— the axle shaft is not deformed and the seating surfaces are not damaged; The runout of the axle shaft, measured at the centers on the journal under the oil seal, should not exceed 0.08 mm.
Before installing into the centers, thoroughly clean the centering holes on the axle shaft from dirt and rust.
If wear or damage to parts installed on the axle shaft is detected, replace them with new ones, following the rules below and using special tools. Eliminate slight bending of the axle shaft by straightening.
After straightening the axle shaft, the runout of the flange hub, measured at the centers, should not exceed 0.05 mm.
If the runout of the flange end is more than specified, but not more than 0.08 mm, then it is allowed to groove it to eliminate the end runout. Reducing the thickness of the flange due to its groove is allowed by no more than 0.2 mm.
Removing the locking ring
Removing and installing the axle bearing lock ring must only be done using a hydraulic press.
First, bend outward the holders of the bolts securing the plate with the oil deflector and the brake shield, and remove the bolts.
Use the half rings of tool 67.7823.9529 to surround the bearing and install the half shaft vertically so that the half rings rest on the thrust ring.
Place the axle shaft under the press (Fig. 13) and apply gradually increasing force to the splined end of the axle shaft until the bearing lock ring is removed.
Do not reuse the axle bearing lock ring, but replace it with a new one.
Check whether the seating surface of the axle shaft has any marks or damage; if necessary, replace the axle shaft with a new one.
Replacing the axle shaft seal of the rear axle Niva 21213
Removing the axle shaft and replacing the oil seal
We hang and remove the rear wheel. Remove the rear brake pads (see Replacing the rear brake pads).
Using a 17mm spanner, unscrew the four nuts on the bolts securing the axle shaft to the beam flange.
Use a slotted screwdriver to bend the locking plates of the axle shaft mounting bolts...
...and remove the bolts.
We fix the wheel with the reverse side on the axle shaft by tightening three nuts several turns.
Holding the wheel, we move it with a jerk...
...and remove the axle shaft assembly with the bearing mounting plate, bearing and locking ring.
We take out the rubber sealing ring of the beam flange.
We insert two bolts into the holes of the brake shield and the rear axle beam so that the shield does not hang on the brake pipe.
We pry off the oil seal using sliding pliers...
Using a tool head of a suitable size with an extension (or a piece of pipe), we press in a new oil seal.
If the axle shaft is deformed, its splines are worn out, or the bearing is worn out, we replace the axle shaft with a new one complete with bearing and locking ring (it is not recommended to replace the bearing or locking ring yourself). Install the axle shaft in reverse order. Check the oil level in the rear axle and add if necessary.
Axle shaft assembly
Place the axle shaft vertically, resting its flange on wheel 7 (Fig. 14) of tool 67.7823.9530.
Install the axle bearing oil deflector and the bearing mounting plate with a gasket on the axle shaft, pre-connected with two screws; Install the axle ball bearing.
Insert the new locking ring into special holder 3, place it in the oven and heat the ring to approximately 300° C so that at the time of pressing onto the axle shaft its temperature is 220 - 240° C.
Press the locking ring onto the axle shaft using mandrel 1 on a press with a force of no more than 58.8 kN (6000 kgf) so that the inner ring of the bearing is clamped between the locking ring and the shoulder of the axle shaft.
After pressing, make sure that the ring does not move under an axial load of 19.6 kN (2000 kgf).
For this purpose, install the axle shaft assembly on a special device (Fig. 15), and clamp the locking ring in a special vice.
Place the indicator leg 1 with a division value of 0.01 mm to the axle shaft flange.
After setting the indicator arrow to “0”, apply the indicated axial load, using a torque wrench to create a tightening torque of 78.5 - 83.3 Nm (8 - 8.5 kgf m) on the device screw.
The screw rests through the ball against the end of the axle shaft. In this case, even the smallest gap should not appear between the lock ring and the inner ring of the bearing.
After removing the load and unscrewing the screw of the device, the indicator arrow should return to the zero position; this proves that no movement has occurred between the lock ring and the axle shaft.
If the indicator needle does not return to the zero position, it means that the locking ring has moved and the axle shaft assembly must be replaced with a new one.
After checking the press-fit of the locking ring, install the bolts securing the plate and oil deflector 6 (Fig. 14) and fix them by bending them inward, the bolt holders.
17.3. Removing the axle shaft and replacing the oil seal
We hang and remove the rear wheel. Remove the rear brake pads (see Replacing the rear brake pads).
Using a 17mm spanner, unscrew the four nuts on the bolts securing the axle shaft to the beam flange.
Use a slotted screwdriver to bend the locking plates of the axle shaft mounting bolts...
...and remove the bolts.
We fix the wheel with the reverse side on the axle shaft by tightening three nuts several turns.
Holding the wheel, we move it with a jerk...
...and remove the axle shaft assembly with the bearing mounting plate, bearing and locking ring.
We take out the rubber sealing ring of the beam flange.
We insert two bolts into the holes of the brake shield and the rear axle beam so that the shield does not hang on the brake pipe.
We pry off the oil seal using sliding pliers...
Using a tool head of a suitable size with an extension (or a piece of pipe), we press in a new oil seal.
If the axle shaft is deformed, its splines are worn out, or the bearing is worn out, we replace the axle shaft with a new one complete with bearing and locking ring (it is not recommended to replace the bearing or locking ring yourself). Install the axle shaft in reverse order. Check the oil level in the rear axle and add if necessary.
Replacing the axle shaft seal of the rear axle Niva 21214
Attention! We hang and remove the rear wheel. Remove the rear brake pads (see Replacing the rear brake pads).
Using a 17mm spanner, unscrew the four nuts on the bolts securing the axle shaft to the beam flange.
Use a slotted screwdriver to bend the locking plates of the axle shaft mounting bolts...
...and remove the bolts.
We fix the wheel with the reverse side on the axle shaft by tightening three nuts several turns.
Holding the wheel, we move it with a jerk...
...and remove the axle shaft assembly with the bearing mounting plate, bearing and locking ring.
We take out the rubber sealing ring of the beam flange.
We insert two bolts into the holes of the brake shield and the rear axle beam so that the shield does not hang on the brake pipe.
We pry off the oil seal using sliding pliers...
Using a tool head of a suitable size with an extension (or a piece of pipe), we press in a new oil seal.
If the axle shaft is deformed, its splines are worn out, or the bearing is worn out, we replace the axle shaft with a new one complete with bearing and locking ring (it is not recommended to replace the bearing or locking ring yourself).
Install the axle shaft in reverse order.
Check the oil level in the rear axle and add if necessary.
Reg.: 02/04/2009 Messages: 225 From: planet Norilsk. Age: 38 Car: 21213 95
Reg.: 04/30/2010 Threads / Messages: 3 / 1802 From: Moscow, TiNAO Age: 31 Car: MMC Pajero Sport 05
Reg.: 07/25/2009 Messages: 15 From: Yakutia Age: 35 Car: VAZ 21214 2008, VAZ 21101 2006
Reg.: 06/27/2007 Messages: 1765 From: Moscow Age: 51 Car: 21213, 1999
Name: Alexey Reg.: 03/05/2005 Threads / Messages: 62 / 4065 From: Moscow, Northern Administrative Okrug Age: 39 Car: Shniva 2021 70 tkm
Sever18
Wash the semi-axial bearing as a preventative measure (you need to remove one of the cheeks) and fill it with new grease. At least lithol. Anybody will be better than it was.
There is no need to buy any additional rings, etc.
Reg.: 06/03/2011 Messages: 68 From: Omsk Age: 62 Car: 2131 2001
Reg.: 06/17/2011 Messages: 95 From: Ukraine, Alchevsk Age: 34 Car: VAZ 2121 1982
But I also decided to change the bearings on the axle shafts and the seals. I bought 2121 for the Niva. I brought it to the garage and started putting the oil seal on the axle shaft, but it reached halfway and that’s it. Next comes the thickening of the axle shaft. The store said that the axle shafts on the VAZ 2101 and 2121 are the same. It turns out I have a VAZ 21213 rear axle? I think the bearing will fit. The numbers match 62208r
Added after 8 minutes 26 seconds:
Also in the store the seller said that the seals are installed on the VAZ 21213, I don’t remember anymore, I think it’s from the VAZ 2110
Name: Nikolay Reg.: 11/12/2008 Threads / Messages: 4 / 1073 From: Ruza.Moscow region. Age: 49 Car: VAZ21214. 2001, MP 7.0
Reg.: 02/27/2011 Messages: 1474 From: Biysk Age: 43 Car: VAZ-2131 1.8 carb 2002 (Was: 2121 84 2121 93 21213 01 2123 2007)
Maintenance of the axle shaft 21213. The bearings on the axle shafts 2121.21213, 2123, 21214 are the same. Only the seals are different: On 2121, the oil seals are 2101. On all other axle shafts, the drive seals are 2108-2110. Locking bushings for 2121 are their own. All the others have their own 21213. etc. The only difference is the presence or absence of ABC on the car. If there is ABC, then the bushing is appropriate. Bottom left 2121. Right 2123 under ABC, top - 2123-21213 (without ABC):
Reg.: 11/07/2010 Messages: 30 From: Bratsk Age: 37 Car: VAZ-21213 '96
Reg.: 12/02/2010 Posts: 37 From: Maloyaroslavets Age: 59 Car: VAZ 21213 1999
I'll write down how I removed the axle shaft. Maybe it will be useful to someone. We begin removing the axle shaft as in the manual, and end by screwing the wheel on with the reverse side. It was not possible to “pull” the axle shaft with manual effort. My weight is too low. Next, I proceeded as follows: 1. Attach a chain (about 2.5 m long) to the holes of the disk (symmetrically). It turned out to be a loop that I was going to hit (emphasis on the “U”) with a sledgehammer. 2. I placed a log at the end of the loop, on which I placed a chain, and placed a heavy piece of iron (a counterweight from a washing machine) into the resulting loop so that the loop would not fall off the log. 3. I was about to take a sledgehammer, but the log fell, and when I picked it up and lightly hit the loop with a piece of iron to tighten the chain, a miracle happened: the AXLE MOVED. No problem further.
Added after 1 minute 24 seconds:
In point No. 1, the emphasis is on the first “U”, otherwise not everyone will understand.
As I wrote in the previous post: I noticed oil leaks on the brake drum shield (on the right). The next day everything was covered in oil.
I bought seals for a VAZ 2108 drive, universal (left/right corteco. I was looking for corteco. In different stores, both for Shnivy and for VAZ 2110. They are everywhere - they are not there, take BRT. Having written everything down on a piece of paper, I went shopping with a photo.
In one of them it dawned on me - what if I look for chisels on the drive? And so they ended up in the autopasker.
Just in case, I decided to buy a bearing. There was only ANDY CAR.
When to change the seal
Replacing the axle seal is not tied to a specific mileage, but is done in connection with the following defects:
- Transmission oil leakage from the rear axle of a Chevrolet Niva. It is characterized by the appearance of oil stains on the brake casing and the “stocking” on the side where the axle shaft seal has lost its seal.
- In case of accidental damage to the seal when replacing the axle bearing. Happens when a part is pulled out of its socket.
A distinction should be made between transmission oil leakage from the axle seal on either side of the rear beam and from the gearbox shank where the driveshaft is secured. In the second case, greasy stains and dirt cover the rear axle gear housing, located in the middle.
- outer diameter - 57 mm;
- width - 9 mm;
- The diameter of the hole along the protruding rubber (or silicone) edge is 35 mm.
Basic parameters of factory parts for repair
Main technical indicators of the unit: diameter and length of the axle, number and length of the spline belt, type of bearings and sealing seals. These indicators are determined by the design features of the system and the calculated traction forces under comparable operating conditions at the time of design and production.
Often, under the influence of large loads, deformation of the axle shafts occurs, premature wear and jamming of the support ball bearings occurs, deformation and fatigue wear of the sealing seals, followed by leakage of transmission oil from the axle.
Factories producing spare parts for the domestic automotive industry are constantly striving to improve manufactured vehicle components and assemblies. They regularly offer consumers a newer, more reliable, more modern product.
Let's consider the technical parameters of the drive elements of the rear axle of an SUV.
Half shaft
Main characteristics:
- Catalog number: 21230-2403069-00, 21230240306900, 2123-2403069.
- Length: 760 mm.
- Diameter for oil seal: 35 mm
- Weight: 8.4 kg.
- Manufacturer: AvtoVAZ
- Average market prices: 6900 rubles.
Existing analogues:
- axle shaft, standard size for VAZ 2121 Chevrolet Niva, average price 3,400 rubles;
- Russian, the average price is 3900 rubles.
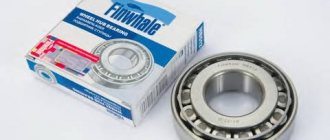
Rolling ball bearings
- Catalog number: 2121-2403080. Designation - GPZ - V76-180508AK2US9.
- Manufacturing index: 180508, 62208-2RS
- Manufacturer: AVTOVAZ
- Average market prices: 400 rubles;
- Inner diameter - 40 mm;
- Outer diameter - 80 mm;
- Width - 23 mm;
- Weight - 440g;
- Rated rotation speed - 5600 rpm.
Foreign bearing manufacturers - NSK, SKF, SNR. Average price from 600 rubles.
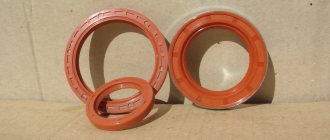
Oil seals
- Catalog number: 21100-2301034-00-0 - left and 21100-2301035-00-0 - right.
- Overall dimensions: 35x57x9 mm.
- Manufacturer: AVTOVAZ.
- Average market prices: 45-60 rubles.
Existing alternatives:
- CV joint drive oil seal 2110.08 “RT” universal, manufacturer RUZINOTEHNIKA;
- axle drive seal VAZ-2110-2112, 2123 right/left (35x57x9), manufacturer General Motors.
It is also worth noting the German manufacturer Corteco. This company produces a wide range of oil seals for the VAZ-2123.
Ready-made repair kits
On the spare parts market you can also purchase a ready-made repair kit for servicing the rear axle shafts of the VAZ-2123.
The repair kit for the rear axle shaft of the VAZ 2123 Chevy Niva from ESPRA consists of bearing 2121-2403080, sealing oil seal 2110-2301034 and locking ring 2123-2403084. The average price of such a set is 690 - 890 rubles.
Interesting! Some Niva owners prefer to purchase ready-made kits from one manufacturer, considering this to be a kind of guarantee of the compatibility of the parts being replaced.
Preparation and disassembly
To independently remove a leaking rear axle oil seal on a Niva Chevrolet, you will need the following tools:
- standard set of wrenches;
- slotted screwdriver and wheel wrench;
- jack;
- hammer;
- wooden stand;
- cloth gloves.
Never neglect gloves when repairing a car: they will protect your hands from damage due to accidental impacts. The height of the wooden stand should be enough to support the rear axle with the wheel removed and the shock absorber unscrewed, otherwise oil will leak from it.
Before removing the old seal, you will have to disassemble the rear hub assembly and remove the axle shaft. Disassembly is carried out in the following sequence:
- Place the car on a level surface and secure it with wheel chocks. Make sure the handbrake is turned off.
- Loosen the wheel nuts, jack up the car and remove the wheel.
- Clean the rear axle flange that protrudes beyond the brake drum from rust. Additionally, you can treat this area with WD-40 lubricant.
- Unscrew the 2 bolts securing the drum with a 12 mm wrench, then gently tap with a hammer to move it out of place.
- The drum is removed in 2 ways: by squeezing it out with the same bolts, screwed into other holes, or by knocking it with a hammer through a piece of wood. The methods can be combined, just be careful not to damage the edge of the drum with the blows.
- After dismantling, clean the seat on the axle shaft again to make the drum easier to remove.
The next step is unscrewing and removing the axle shaft. In the VAZ 2131 Niva Chevrolet, 4 bolts securing it are held on the other side by a bracket holding the shock absorber.
After unscrewing the bolts, the shock absorber will no longer hold the rear axle, and the spring will push it down, causing oil to flow.
To avoid this, you need to first adjust the stand by jacking the car higher. The rear axle “stocking” must rest with a slope in the other direction so that the oil does not leak out.
The 4 bolts holding the rear axle shaft are unscrewed with a 17 mm wrench. Pay attention to the growers: they should not get lost in the brake mechanism. If you ignore the loss of the groover and install a new one, then the old one will subsequently get between the block and the drum while driving and the wheel will jam.
After unscrewing the bolts, with a sharp movement, remove the axle shaft with the bearing from the cage. If this fails, attach the wheel to the studs with 3 nuts and try to pull it. The last option is to use a special inertial puller for removal. There is also a popular method: tie the axle shaft with a rope to an iron garage door and hit it with a hammer to knock it out of the cage. But for this you need to carefully park the car closer to the gate.
Replacing the rear axle gearbox seal of a Chevrolet Niva - Video
It is important to remember that the left and right oil seals are designed for different directions of rotation, so when purchasing, you should carefully check the package.
Quick removal of the rear axle and replacement of the bearing Niva 21214
But sometimes you have to shoot him down. Conclusion The rear axle on this model is quite weak.
Sometimes, it may be necessary to replace the rear axle axle oil seal on a Chevrolet Niva. Such work may be required...
This will save you from having to disassemble the unit again due to leakage of the old part. The rear wheels must be secured with supports. Useful tips Many drivers combine oil seal replacement and transmission oil change.
Check the oil level in the axle housing and top it up if necessary. Such a defect can only be corrected in a workshop on a special stand.
The direction can be determined by the marked arrow.
If installed incorrectly, there may be increased oil leakage outward due to the location of the oil scraper notches. To replace the oil seal, it is not necessary to dismantle the front axle.
Niva repair (part No. 3, replacement of the shank oil seal)
When replacing oil seals yourself, it is not recommended to use a lift; it is better to carry out the work on an inspection pit or overpass. The rear wheels must be secured with supports. The gearbox and transfer case levers must be adjusted to the neutral position. The only special tool you will need is a puller for the axle shaft, but if you don’t have one, you can do without it. Before carrying out work, ensure that the machine is as motionless as possible.
To do this, wheel chocks are installed under the front wheels. The work is carried out in the following order: The car is raised on a jack.
Supports are placed under the thresholds in case of problems with the jack; ordinary blocks or several wheels folded in a stack will do; Before removing the brake drum, make sure the wheel is completely released. In this case, the handbrake lever must be lowered, the wheel rotates freely; The decorative cap is removed.
When to change the seal
To do this, disconnect it by prying up the fasteners with a screwdriver; The gap between the flange and the drum is moistened with penetrating lubricant liquid wrench, WD; The brake drum is secured with two screws, they must be unscrewed. But sometimes you have to shoot him down. To do this, it is necessary to strike the rim of the drum with a hammer from the back side.
Just do this through a block, otherwise you can damage the drum; The screws holding the axle shaft and the drum casing are unscrewed; The bridge rises slightly; The shock absorber bracket should be removed from the axle bearing plate; The axle shaft is removed; for this you will need a special puller. If it is not there, then you can do without it. To do this, put the wheel on the axle shaft. The next step is unscrewing and removing the axle shaft.
In the VAZ Niva Chevrolet car, 4 bolts securing it are held on the other side by a bracket holding the shock absorber. After unscrewing the bolts, the shock absorber will no longer hold the rear axle, and the spring will push it down, causing oil to flow.
To avoid this, you need to first adjust the stand by jacking the car higher. Since in a regular Niva VAZ the shock absorber is attached to the spring cup, and not to the rear hub, there is no need to unscrew it. A stand is also not needed here; a jack is enough to lift it. Pay attention to the groovers: If you ignore the loss of the groover and install a new one, the old one will subsequently get between the block and the drum while driving and the wheel will jam.
After unscrewing the bolts, with a sharp movement, remove the axle shaft with the bearing from the cage. If this fails, attach the wheel to the studs with 3 nuts and try to pull it. The last option is to use a special inertial puller for removal.
Remove the drive gear flange. Remove the drive gear oil seal from the gearbox housing neck using a screwdriver. Lubricate the working surfaces of the new oil seal with Litol grease, and the outer surface with a thin layer of sealant. Place the oil seal in place and with light blows of a hammer through a mandrel, press it into the gearbox housing to a depth of 1.7-2.0 mm from the end of the gearbox housing neck.
Installing a New Seal
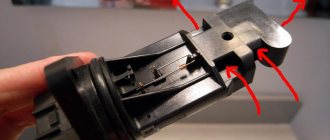
After removing the axle shaft, the metal shield where the brake pads are attached will remain hanging on the copper pipe with the fluid, so it should be fixed by inserting the 2 upper bolts back into the holes. Then follow the instructions:
- Remove the thick rubber gasket from the rear axle flange.
- Pull out the old oil seal by prying it with a screwdriver or pliers. Clean the seat and wipe with a rag.
- Lightly lubricate the new seal with transmission oil and insert it into the socket of the Niva rear axle as evenly as possible.
- Using a round pipe adapter, press the oil seal into the socket with light blows of a hammer. You can use an old seal as an additional attachment.
At the end of the procedure, you must thoroughly wipe all parts free of oil - the brake cylinder, pads, drum and metal shield. Before reassembling, it would be a good idea to check the axle bearing for wear and grease. Wear is indicated by difficulty turning, binding, or slight noise. If you discover a malfunction, take the axle shaft to the nearest car service center; you will not be able to replace the bearing without special equipment.
To check the grease inside the bearing, you need to pry the plastic covering the rollers with an awl and remove it. Then add thick Litol-type lubricant inside and put the plastic in place, and then begin assembly.
At the end, it is important to check the oil level in the rear axle gearbox of the Chevrolet Niva. The test is carried out on a fully assembled car, standing on a level area. The filler plug is unscrewed from the gearbox housing, after which the oil level is determined visually or using a thin wooden stick. If there is a shortage, you need to insert a hose of a suitable diameter into the filler neck with a watering can at the end, where the lubricant is poured. It is more convenient to top up with an assistant: you control the level, and the assistant gradually adds oil.
Rear axle bearing and oil seal
Reg.: 04/30/2010 Threads / Messages: 3 / 1803 From: Moscow, TiNAO Age: 30 Car: MMC Pajero Sport 05
Reg.: 06.27.2007 Messages: 1765 From: Moscow Age: 50 Car: 21213, 1999
Name: Alexey Reg.: 03/05/2005 Threads / Messages: 42 / 3713 From: Moscow, Northern Administrative Okrug Age: 38 Car: Shniva 2021 50 tkm
Sever18
Wash the semi-axial bearing as a preventative measure (you need to remove one of the cheeks) and fill it with new grease. At least lithol. Anybody will be better than it was.
There is no need to buy any additional rings, etc.
But I also decided to change the bearings on the axle shafts and the seals. I bought 2121 for the Niva. I brought it to the garage and started putting the oil seal on the axle shaft, but it reached halfway and that’s it. Next comes the thickening of the axle shaft. The store said that the axle shafts on the VAZ 2101 and 2121 are the same. It turns out I have a VAZ 21213 rear axle? I think the bearing will fit. The numbers match 62208r
Added after 8 minutes 26 seconds:
Name: Nikolay Reg.: 11/12/2008 Threads / Messages: 2 / 909 From: Ruza.Moscow region. Age: 48 Car: VAZ21214. 2001, MP 7.0
I'll write down how I removed the axle shaft. Maybe it will be useful to someone. We begin removing the axle shaft as in the manual, and end by screwing the wheel on with the reverse side. It was not possible to “pull” the axle shaft with manual effort. My weight is too low. Next, I proceeded as follows: 1. Attach a chain (about 2.5 m long) to the holes of the disk (symmetrically). It turned out to be a loop that I was going to hit (emphasis on the “U”) with a sledgehammer. 2. I placed a log at the end of the loop, on which I placed a chain, and placed a heavy piece of iron (a counterweight from a washing machine) into the resulting loop so that the loop would not fall off the log. 3. I was about to take a sledgehammer, but the log fell, and when I picked it up and lightly hit the loop with a piece of iron to tighten the chain, a miracle happened: the AXLE MOVED. No problem further.
Added after 1 minute 24 seconds:
In point No. 1, the emphasis is on the first “U”, otherwise not everyone will understand.
Reg.: 07/06/2010 Messages: 203 From: samara Age: 34 Car: 2121.1989 - was. 21214m.2015
Replacing the rear axle oil seal Niva 2121
Reg.: 02/04/2009 Messages: 225 From: planet Norilsk.
Age: 38 Car: 21213 95 Reg.: 04/30/2010 Threads / Messages: 3 / 1802 From: Moscow, TiNAO Age: 31 Car: MMC Pajero Sport 05
Reg.: 07/25/2009 Messages: 15 From: Yakutia Age: 35 Car: VAZ 21214 2008, VAZ 21101 2006
Reg.: 06/27/2007 Messages: 1765 From: Moscow Age: 51 Car: 21213, 1999
Name: Alexey Reg.: 03/05/2005 Threads / Messages: 62 / 4065 From: Moscow, Northern Administrative Okrug Age: 39 Car: Shniva 2021 70 tkm
Sever18
Wash the semi-axial bearing as a preventative measure (you need to remove one of the cheeks) and fill it with new grease. At least lithol. Anybody will be better than it was.
There is no need to buy any additional rings, etc.
Reg.: 06/03/2011 Messages: 68 From: Omsk Age: 62 Car: 2131 2001
Reg.: 06/17/2011 Messages: 95 From: Ukraine, Alchevsk Age: 34 Car: VAZ 2121 1982
But I also decided to change the bearings on the axle shafts and the seals. I bought 2121 for the Niva. I brought it to the garage and started putting the oil seal on the axle shaft, but it reached halfway and that’s it. Next comes the thickening of the axle shaft. The store said that the axle shafts on the VAZ 2101 and 2121 are the same. It turns out I have a VAZ 21213 rear axle? I think the bearing will fit. The numbers match 62208r
Added after 8 minutes 26 seconds:
Also in the store the seller said that the seals are installed on the VAZ 21213, I don’t remember anymore, I think it’s from the VAZ 2110
Name: Nikolay Reg.: 11/12/2008 Threads / Messages: 4 / 1073 From: Ruza.Moscow region. Age: 49 Car: VAZ21214. 2001, MP 7.0
Reg.: 02/27/2011 Messages: 1474 From: Biysk Age: 43 Car: VAZ-2131 1.8 carb 2002 (Was: 2121 84 2121 93 21213 01 2123 2007)
Maintenance of the axle shaft 21213. The bearings on the axle shafts 2121.21213, 2123, 21214 are the same. Only the seals are different: On 2121, the oil seals are 2101. On all other axle shafts, the drive seals are 2108-2110. Locking bushings for 2121 are their own. All the others have their own 21213. etc. The only difference is the presence or absence of ABC on the car. If there is ABC, then the bushing is appropriate. Bottom left 2121. Right 2123 under ABC, top - 2123-21213 (without ABC):
Reg.: 11/07/2010 Messages: 30 From: Bratsk Age: 37 Car: VAZ-21213 '96
Reg.: 12/02/2010 Posts: 37 From: Maloyaroslavets Age: 59 Car: VAZ 21213 1999
I'll write down how I removed the axle shaft. Maybe it will be useful to someone. We begin removing the axle shaft as in the manual, and end by screwing the wheel on with the reverse side. It was not possible to “pull” the axle shaft with manual effort. My weight is too low. Next, I proceeded as follows: 1. Attach a chain (about 2.5 m long) to the holes of the disk (symmetrically). It turned out to be a loop that I was going to hit (emphasis on the “U”) with a sledgehammer. 2. I placed a log at the end of the loop, on which I placed a chain, and placed a heavy piece of iron (a counterweight from a washing machine) into the resulting loop so that the loop would not fall off the log. 3. I was about to take a sledgehammer, but the log fell, and when I picked it up and lightly hit the loop with a piece of iron to tighten the chain, a miracle happened: the AXLE MOVED. No problem further.
Added after 1 minute 24 seconds:
In point No. 1, the emphasis is on the first “U”, otherwise not everyone will understand.